
It will shock you, but I really enjoy making trees. I know, I know who could have known? No wonder then that I dedicate yet another post to our green (or gnarly) friends.
I already covered birch trees, hazel bushes, oaks and yews, but this time the question is which features make a home-made model tree stand out and more naturalistic than the store-bought ones? What techniques can you use to add this last bit of realism to your trees?
I will address these questions with regard to bark texture, foliage, trunk and crown shape, scenic basing and critters. This is also an excellent occasion to show off my latest tree commission plus some trees I made for my own collection. We will look at oaks, apple trees, plane trees, olive trees and umbrella pines.
Rose tinted glasses? – Nah, dude
Do you want to see the first oak tree I made? I am sure you sitting on the edge of you seat, so behold this exemplar of craftsmanship *irony mode off*.

Well, looking at it this early work is not exactly naturalistic, but we can learn from my mistakes. So why does it not work?
- The crown of the tree is too densely flocked and looks more like a Minecraft tree than what we can observe in nature.
- The branches are actually increasing in diameter the farer out they reach. While this is not impossible, it is not the norm with oak trees.
- The bark texture is not very realistic, at least not for an oak tree. I used sand and PVA to texture it. Accordingly it does not resemble any oak bark I ever saw. That said this could work for a specific tree species, so context is important.
- The base is boring and does not feature different shades, textures and specks of colour.
Keeping these shortcomings in mind, we can now move on to some techniques and ideas to improve the look of the tree.
Gnarly and hard – the secrets of bark
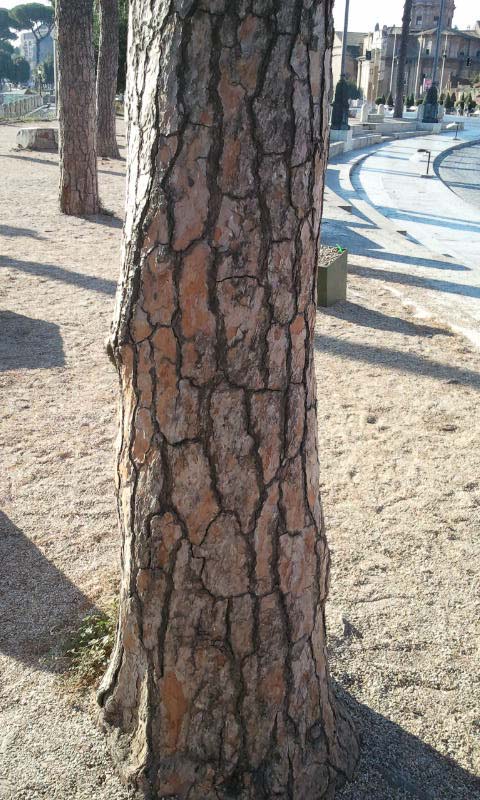
The pleasures of gnarly bark are many, but in most cases it is one of the features that simply differentiates trees. Accordingly, to improve the look of our trees, we need to keep in mind that we are depicting a specific species and avoid generic trees. For instance the bark of an oak will be quite different in comparison to the bark of an apple tree.

It thus pays off to really think about what kind of tree you would like to depict and to model the bark accordingly. Carving the bark in a layer of wood filler as explained in my oak tutorial can be a very time-consuming affair, yet the results a very naturalistic.
Oven-bake bark
If you need a large number of trees, a slightly simpler method may be in order. You can simply cover the wire armature with oven-bake polymer clay. Preferably in a colour like grey-brown or beige, depending on the species of your tree. You can now directly carve a simplified bark pattern into the clay with a needle tool. Downward strokes in the soft clay work very well. Do not bother to remove any small bits clinging to the clay. These can be easily brushed off using a copper brush after the clay has been baked.
Reference pictures and versisimilitude
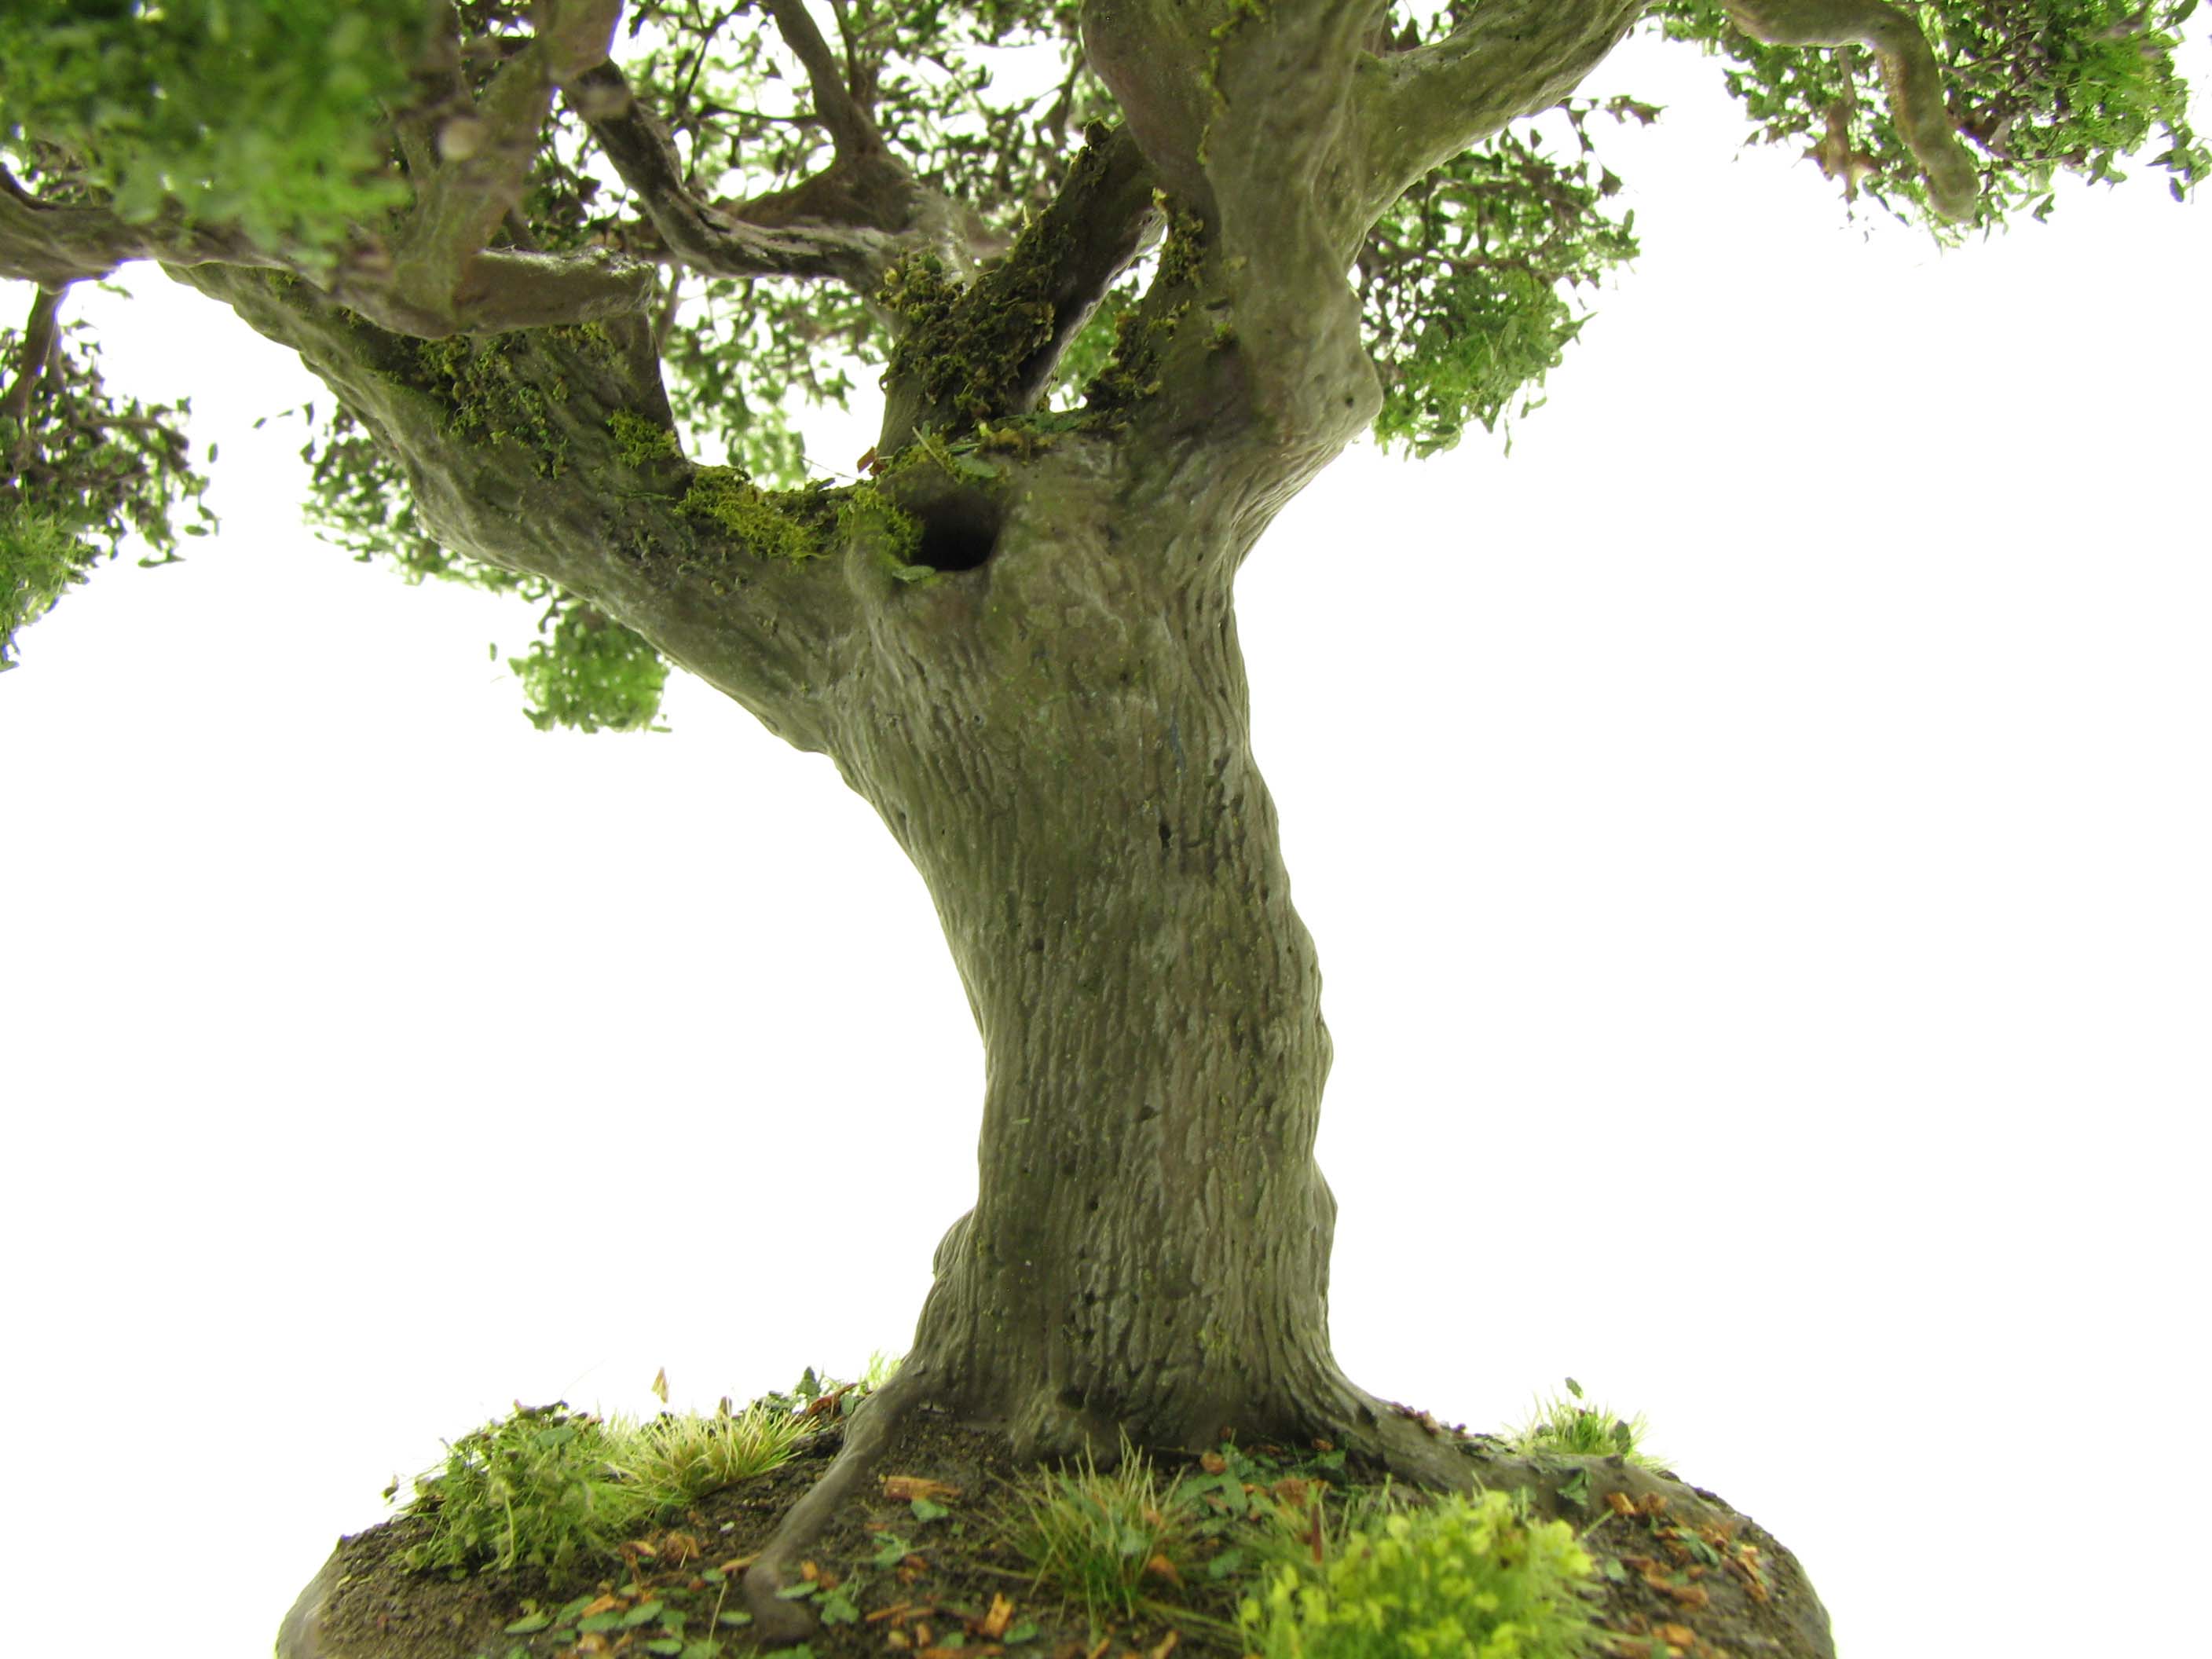
No matter which method you use, the coloration of the bark is very important for a pleasing result. I would always use a reference picture when painting the bark. There are few trees that feature a truly brown bark. In most cases a grey-brown or red-brown with hints of green and off-white moss dominate. In most cases the colours are subdued and very stark contrasts should be avoided. Naturally this is not true for all trees. Birch bark features stark contrasts and the crevasses in the bark of umbrella pines often feature a very dark brown in contrast to the in general lighter brown of the rest of the bark.
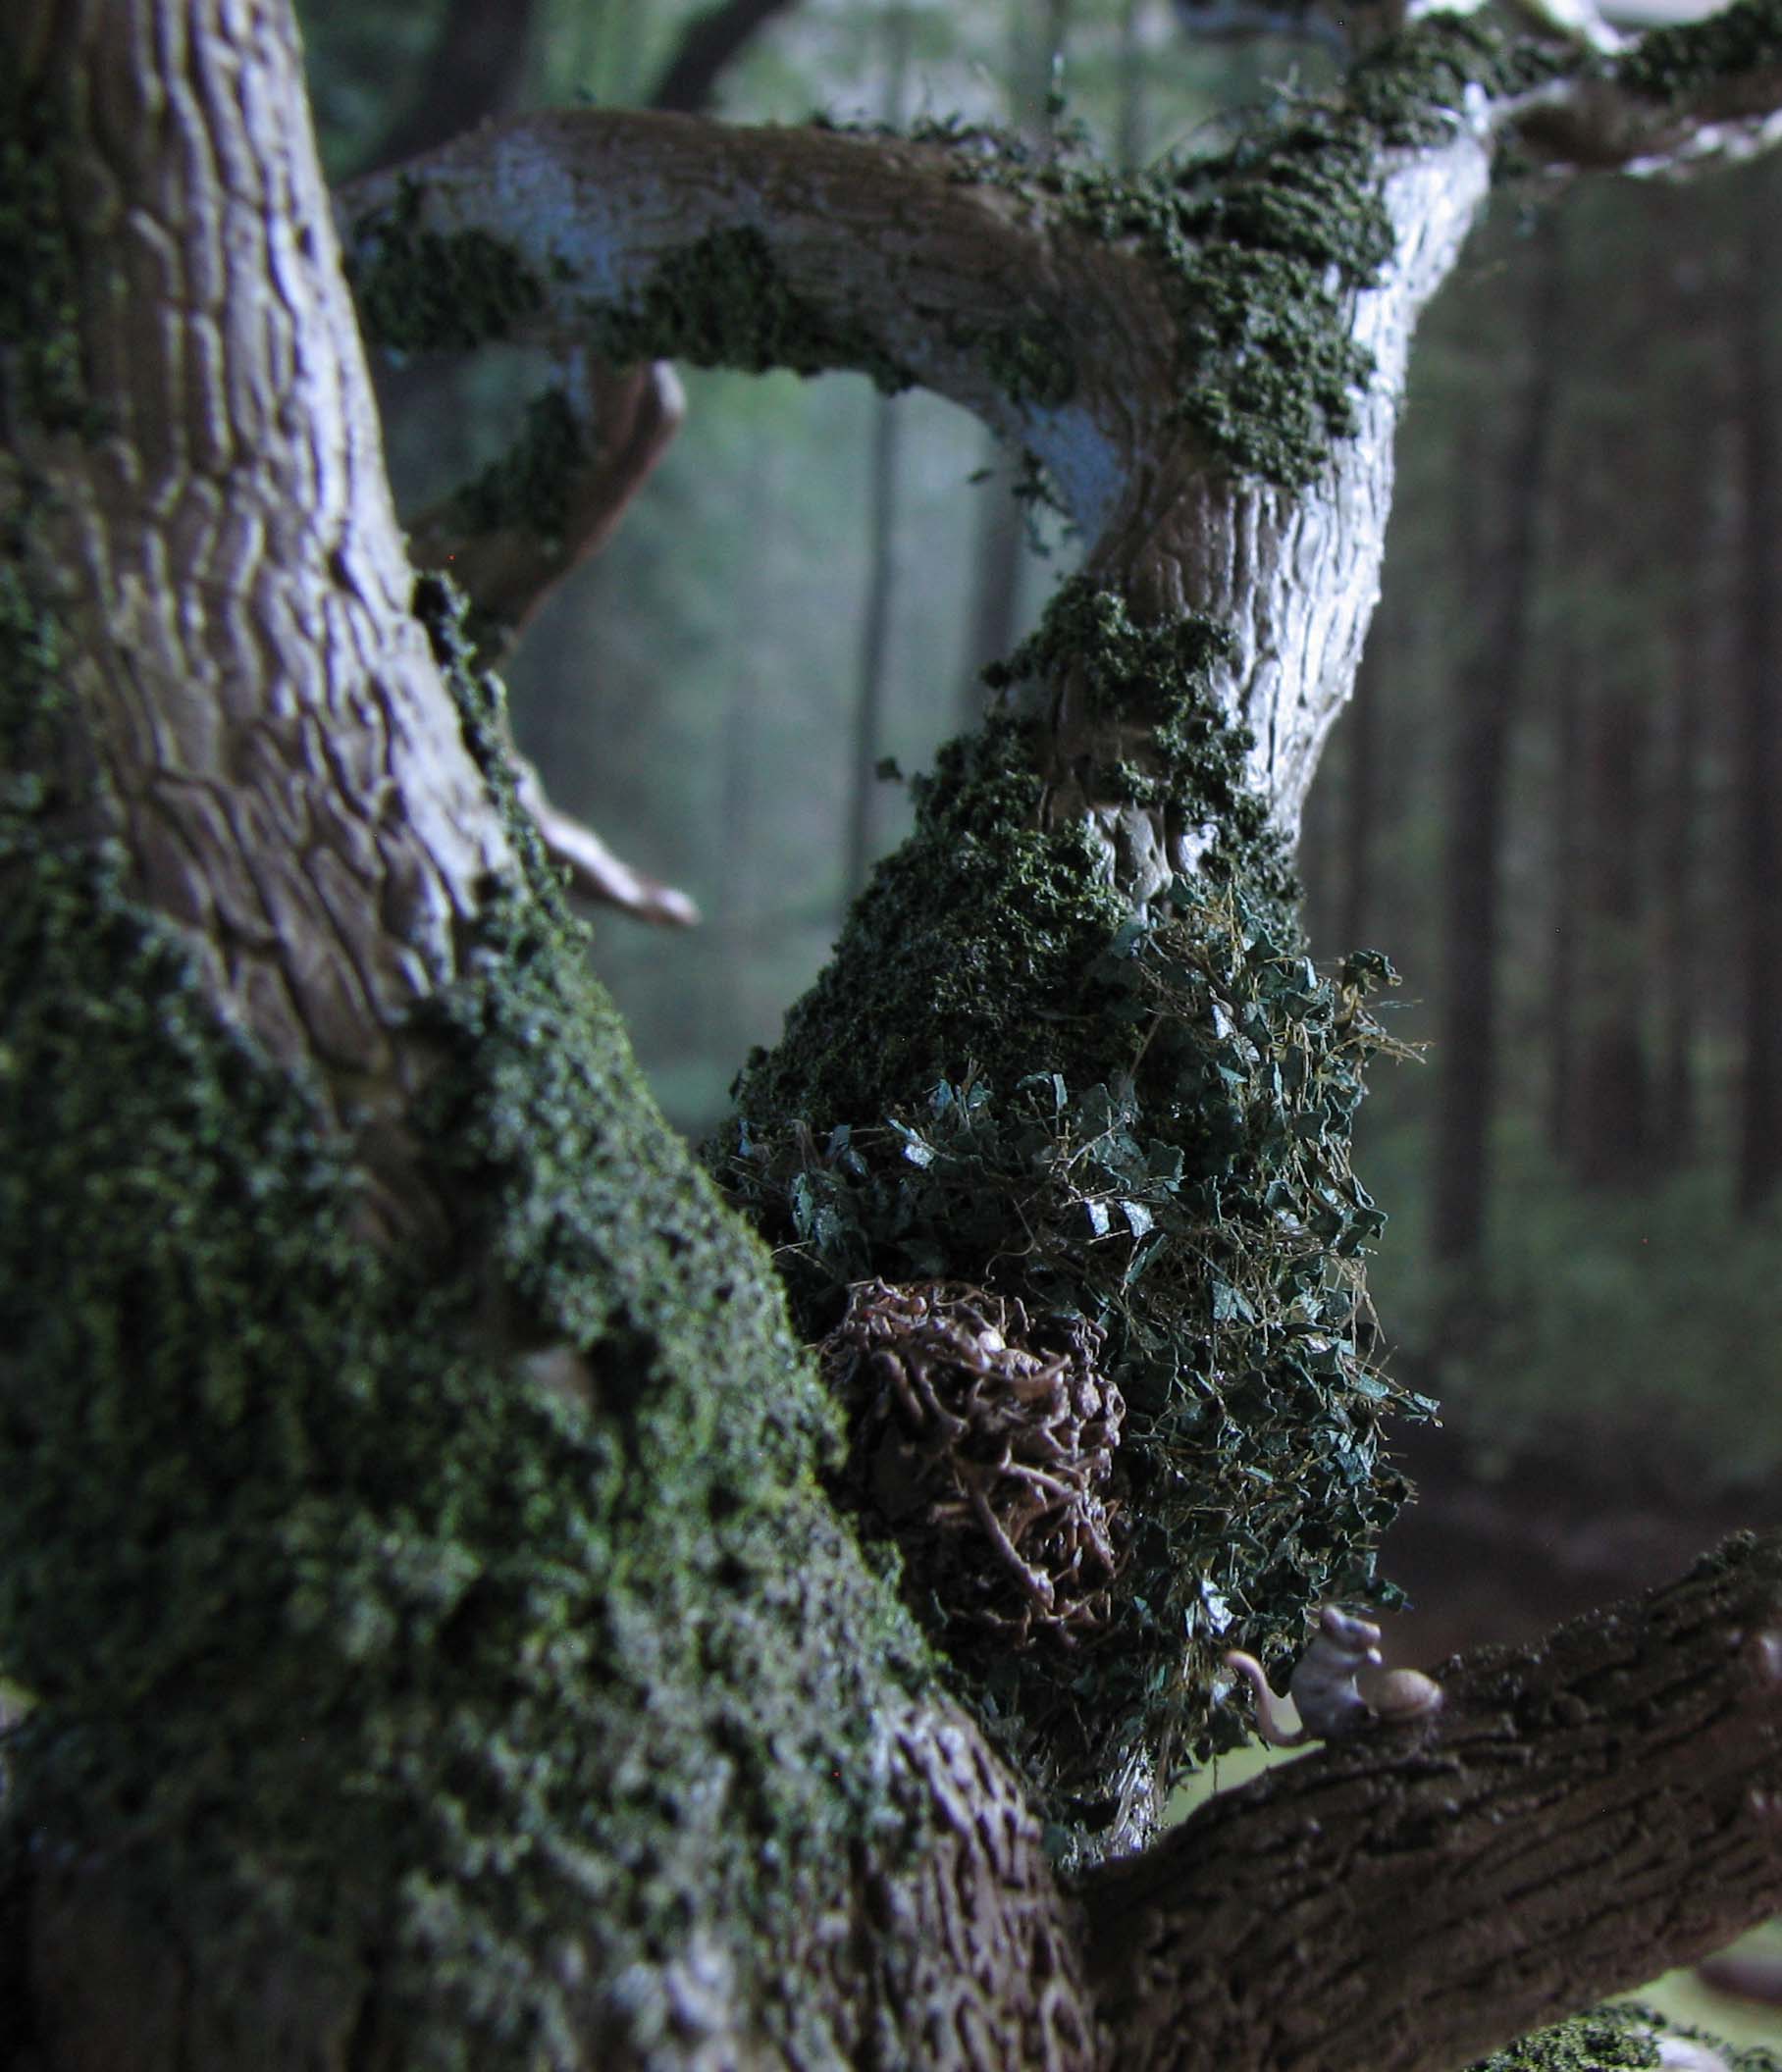
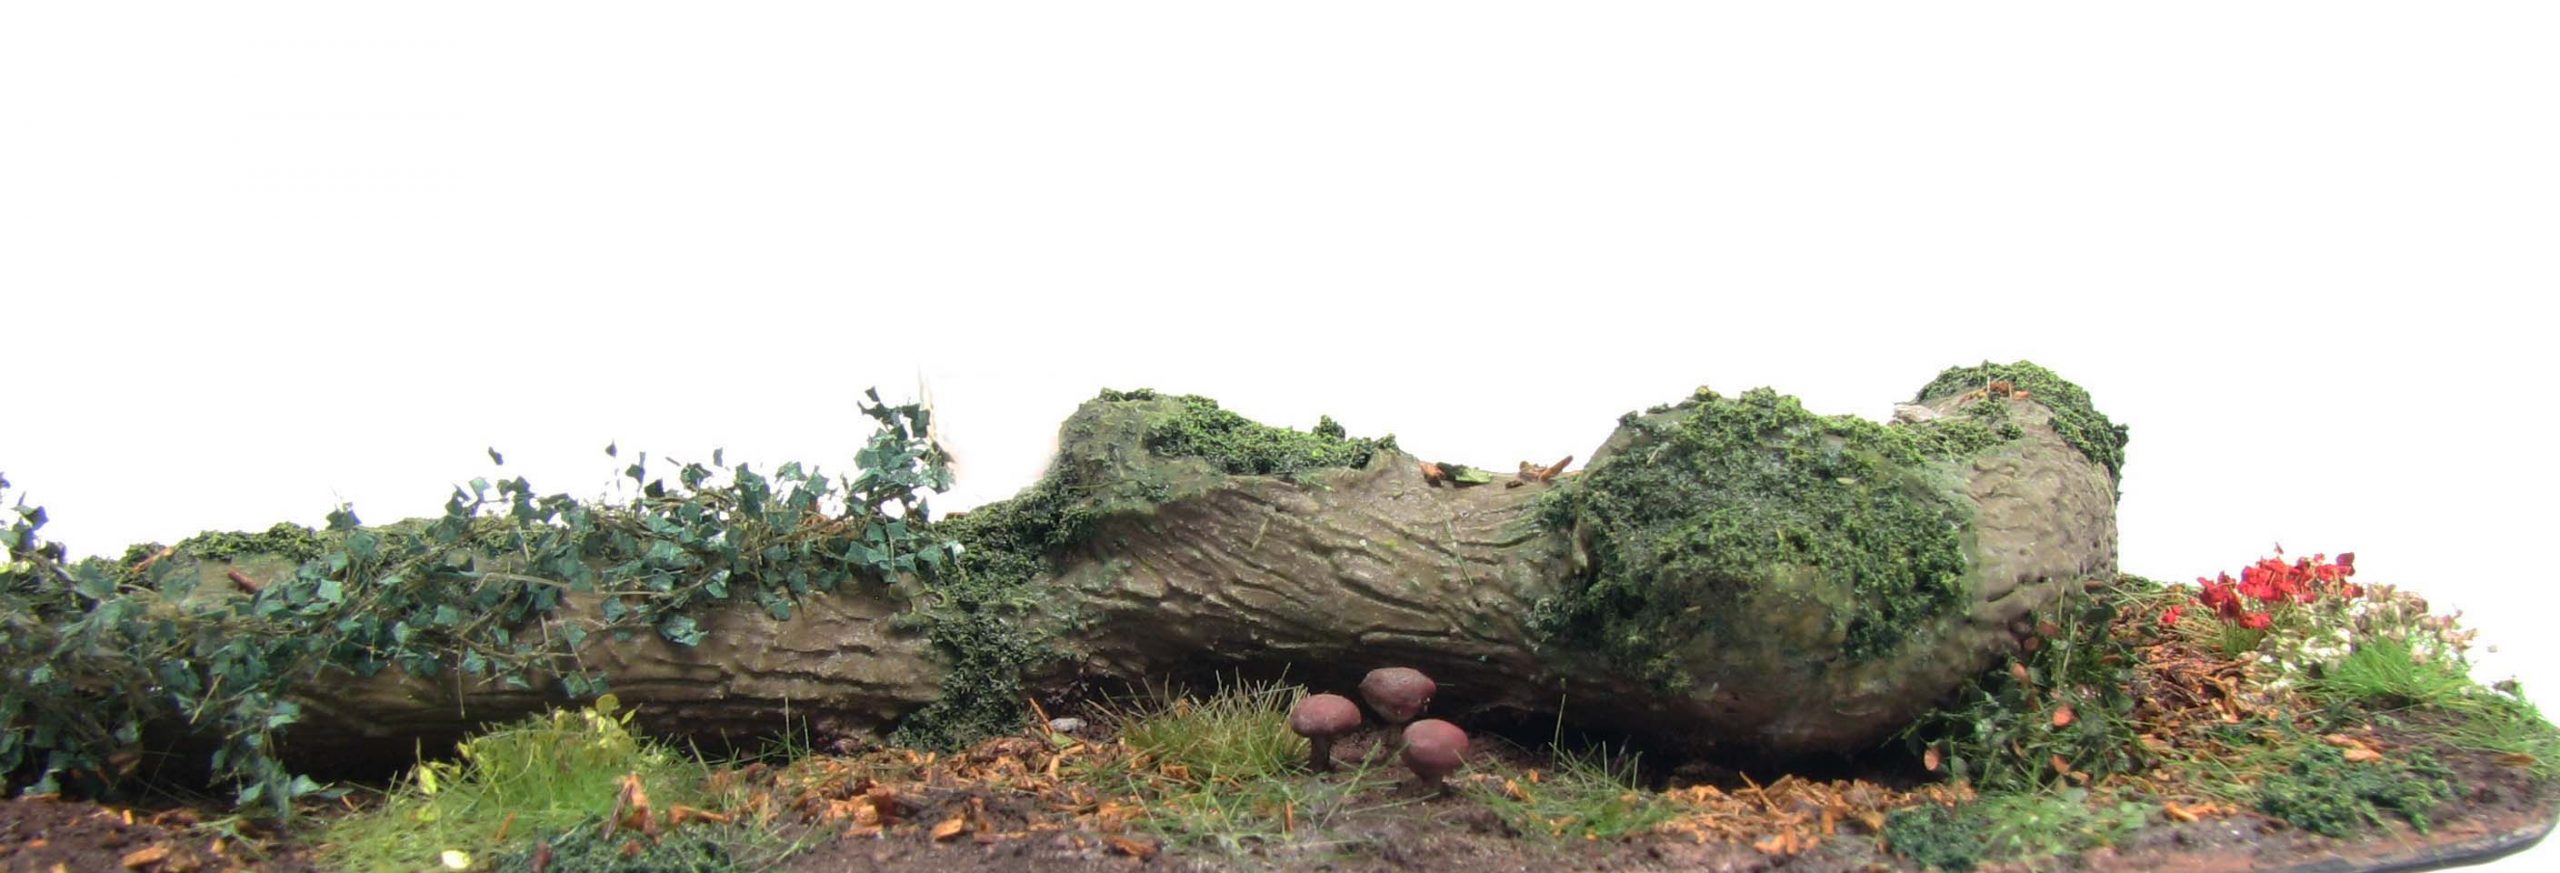
An interesting touch to any bark are symbiotic or parasitic plants growing on it. A common example is ivy.


To summarise:
- It really pays off to actually model the bark of your trees. No matter if you carve it or sculpt it, the results will be vastly superior to a sand and PVA mixture.
- Use reference pictures to get an idea of coloration and texture of the specific bark you would like to represent.
- Add moss or generic growth to the bark to add that extra bit of realism.
The canopy – a matter of taste
With the bark being as naturalistic as your time allows, it is now important to choose a matching technique to depict the canopy. In my tutorials I clearly propagate the use of MiniNatur foliage. I still stand by this choice as I was not able to find a suitable replacement. My own attempts at making a similar foliage net were disappointing.
That said, there is no reason why you cannot use clump foliage. I would only suggest to use filter wool as a base material and then to sprinkle on the finest turf you can get. Large clumps of foam will unfortunately look like large clumps of foam and destroy the illusion somewhat.
Density of foliage
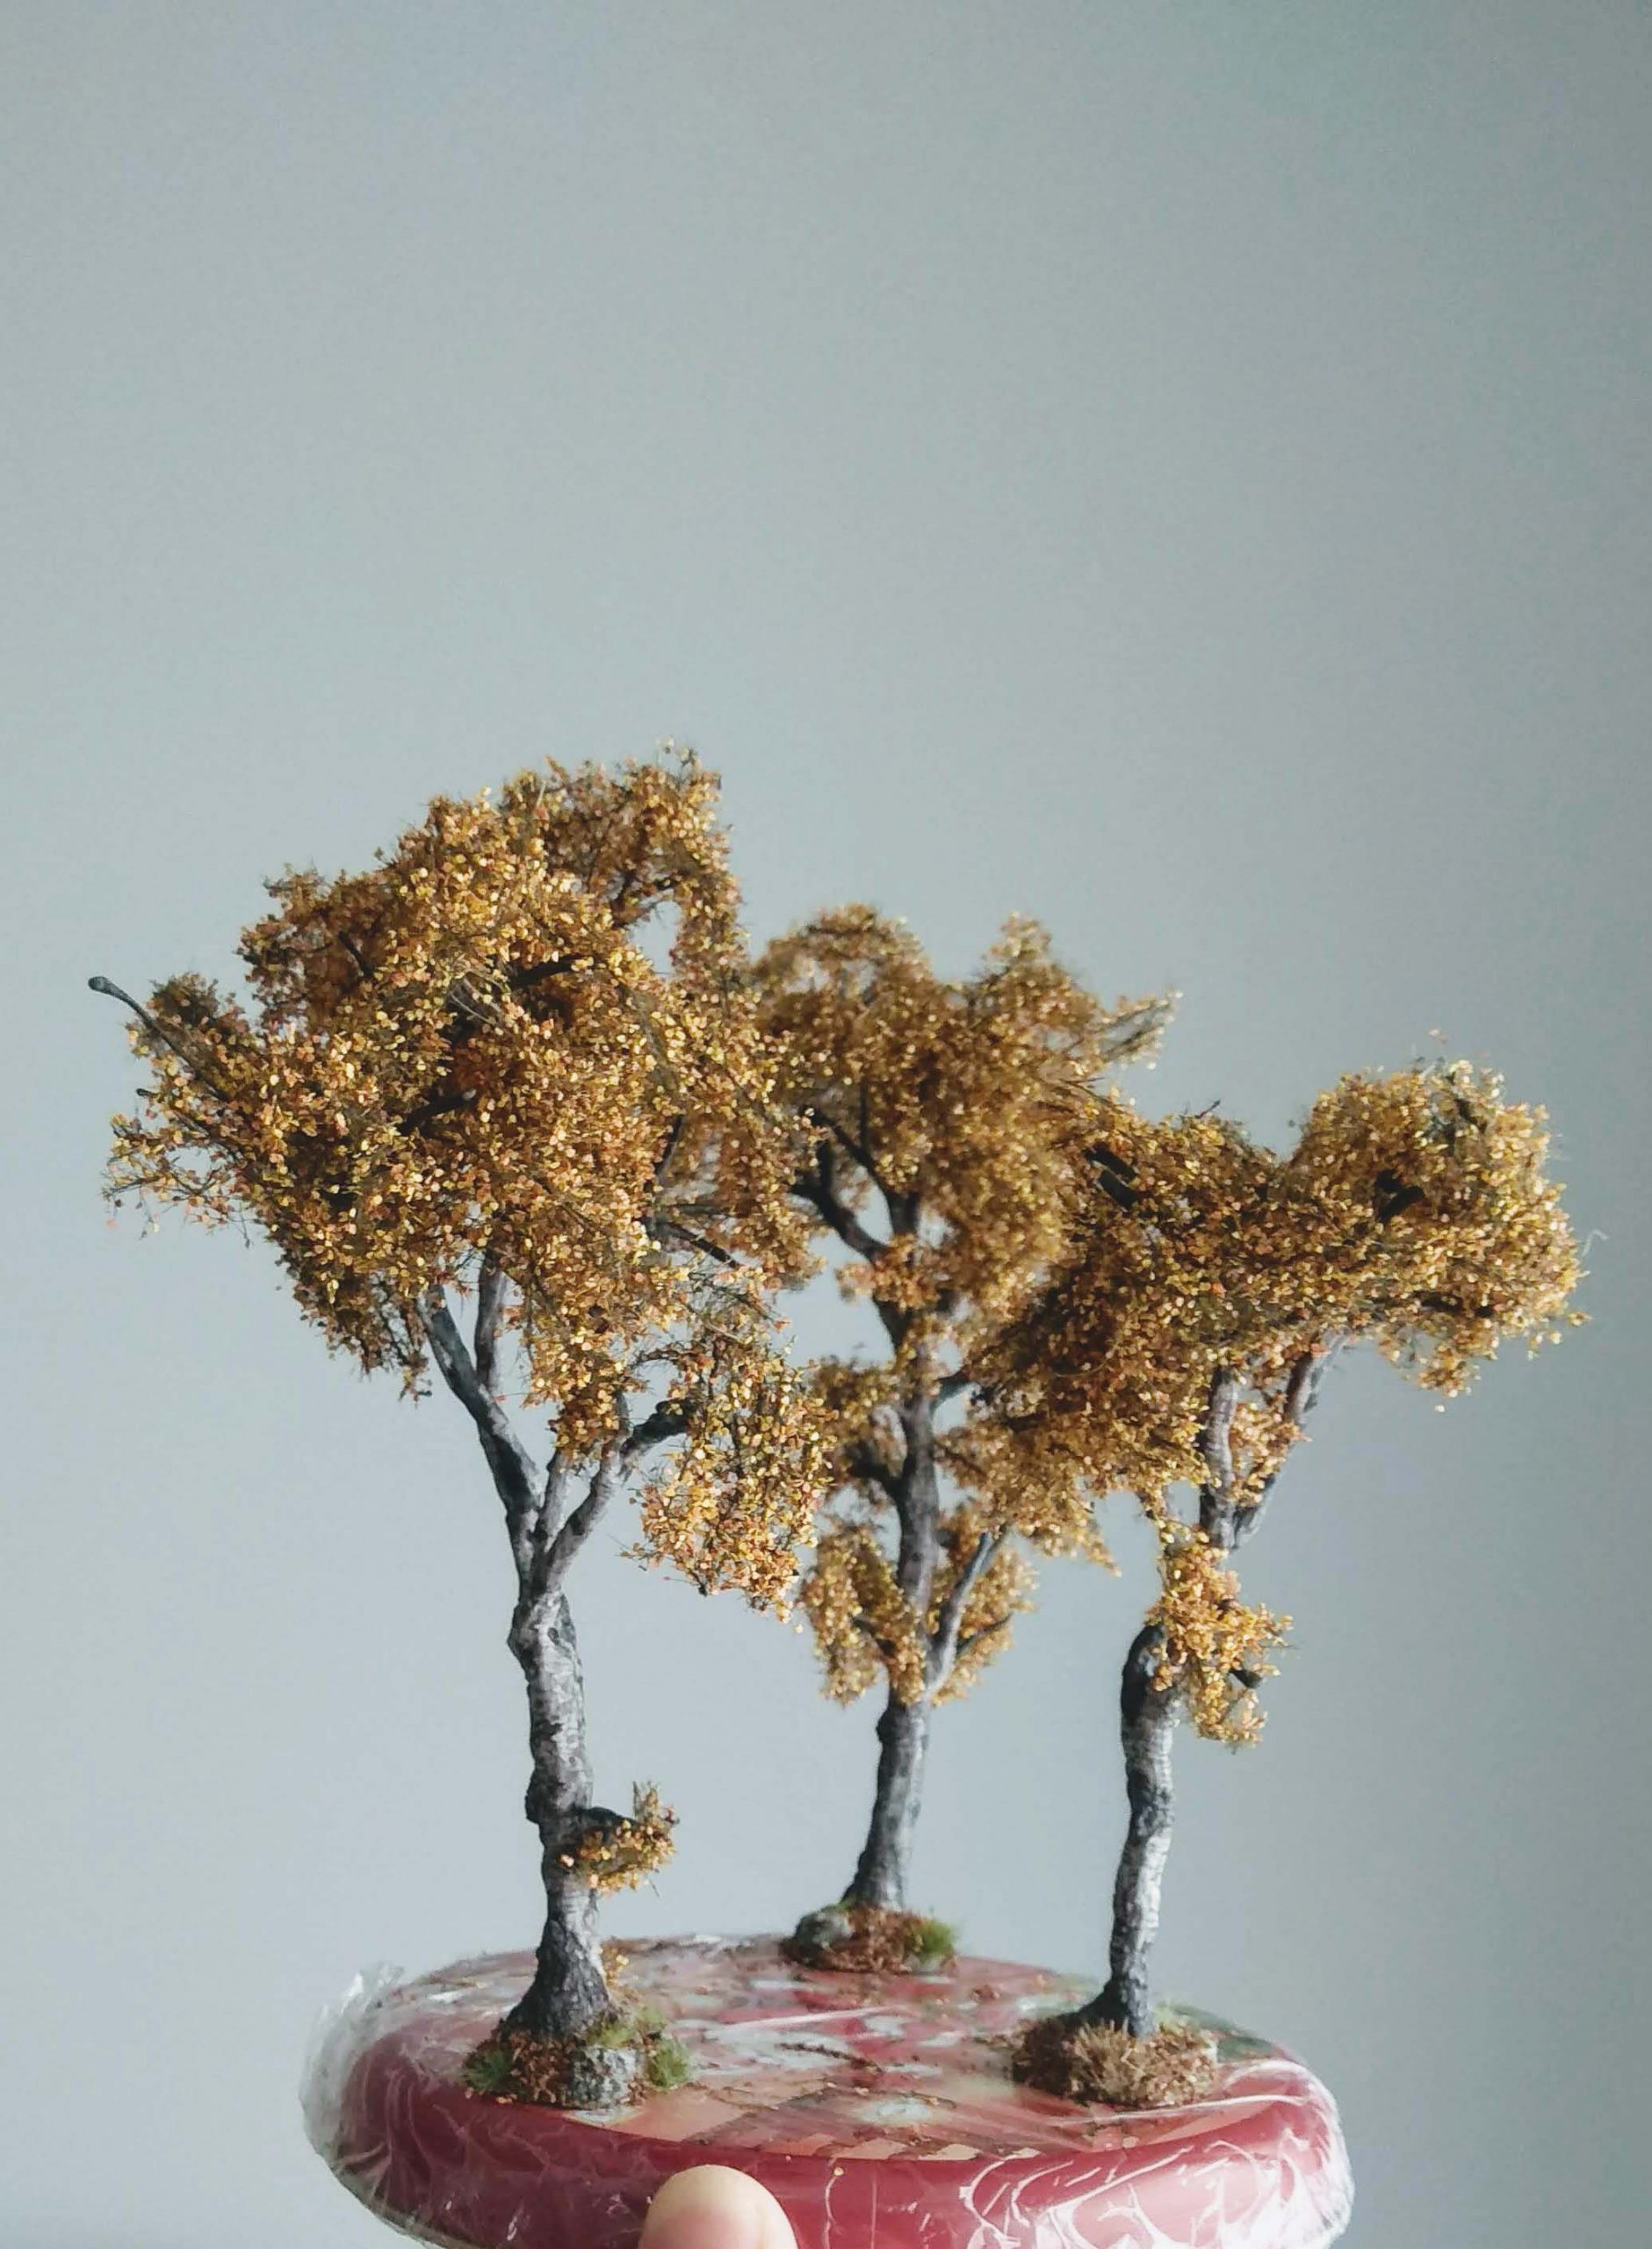
Another important factor is the density of the foliage. I prefer a less dense, airy look. Not only does this save material, it also looks more realistic and shows off ramifications better. Once again, this will also depend on the tree species. Some trees have very dense crowns, while others only feature sparse foliage. Naturally, if you go for autumnal trees there will be overall less foliage.
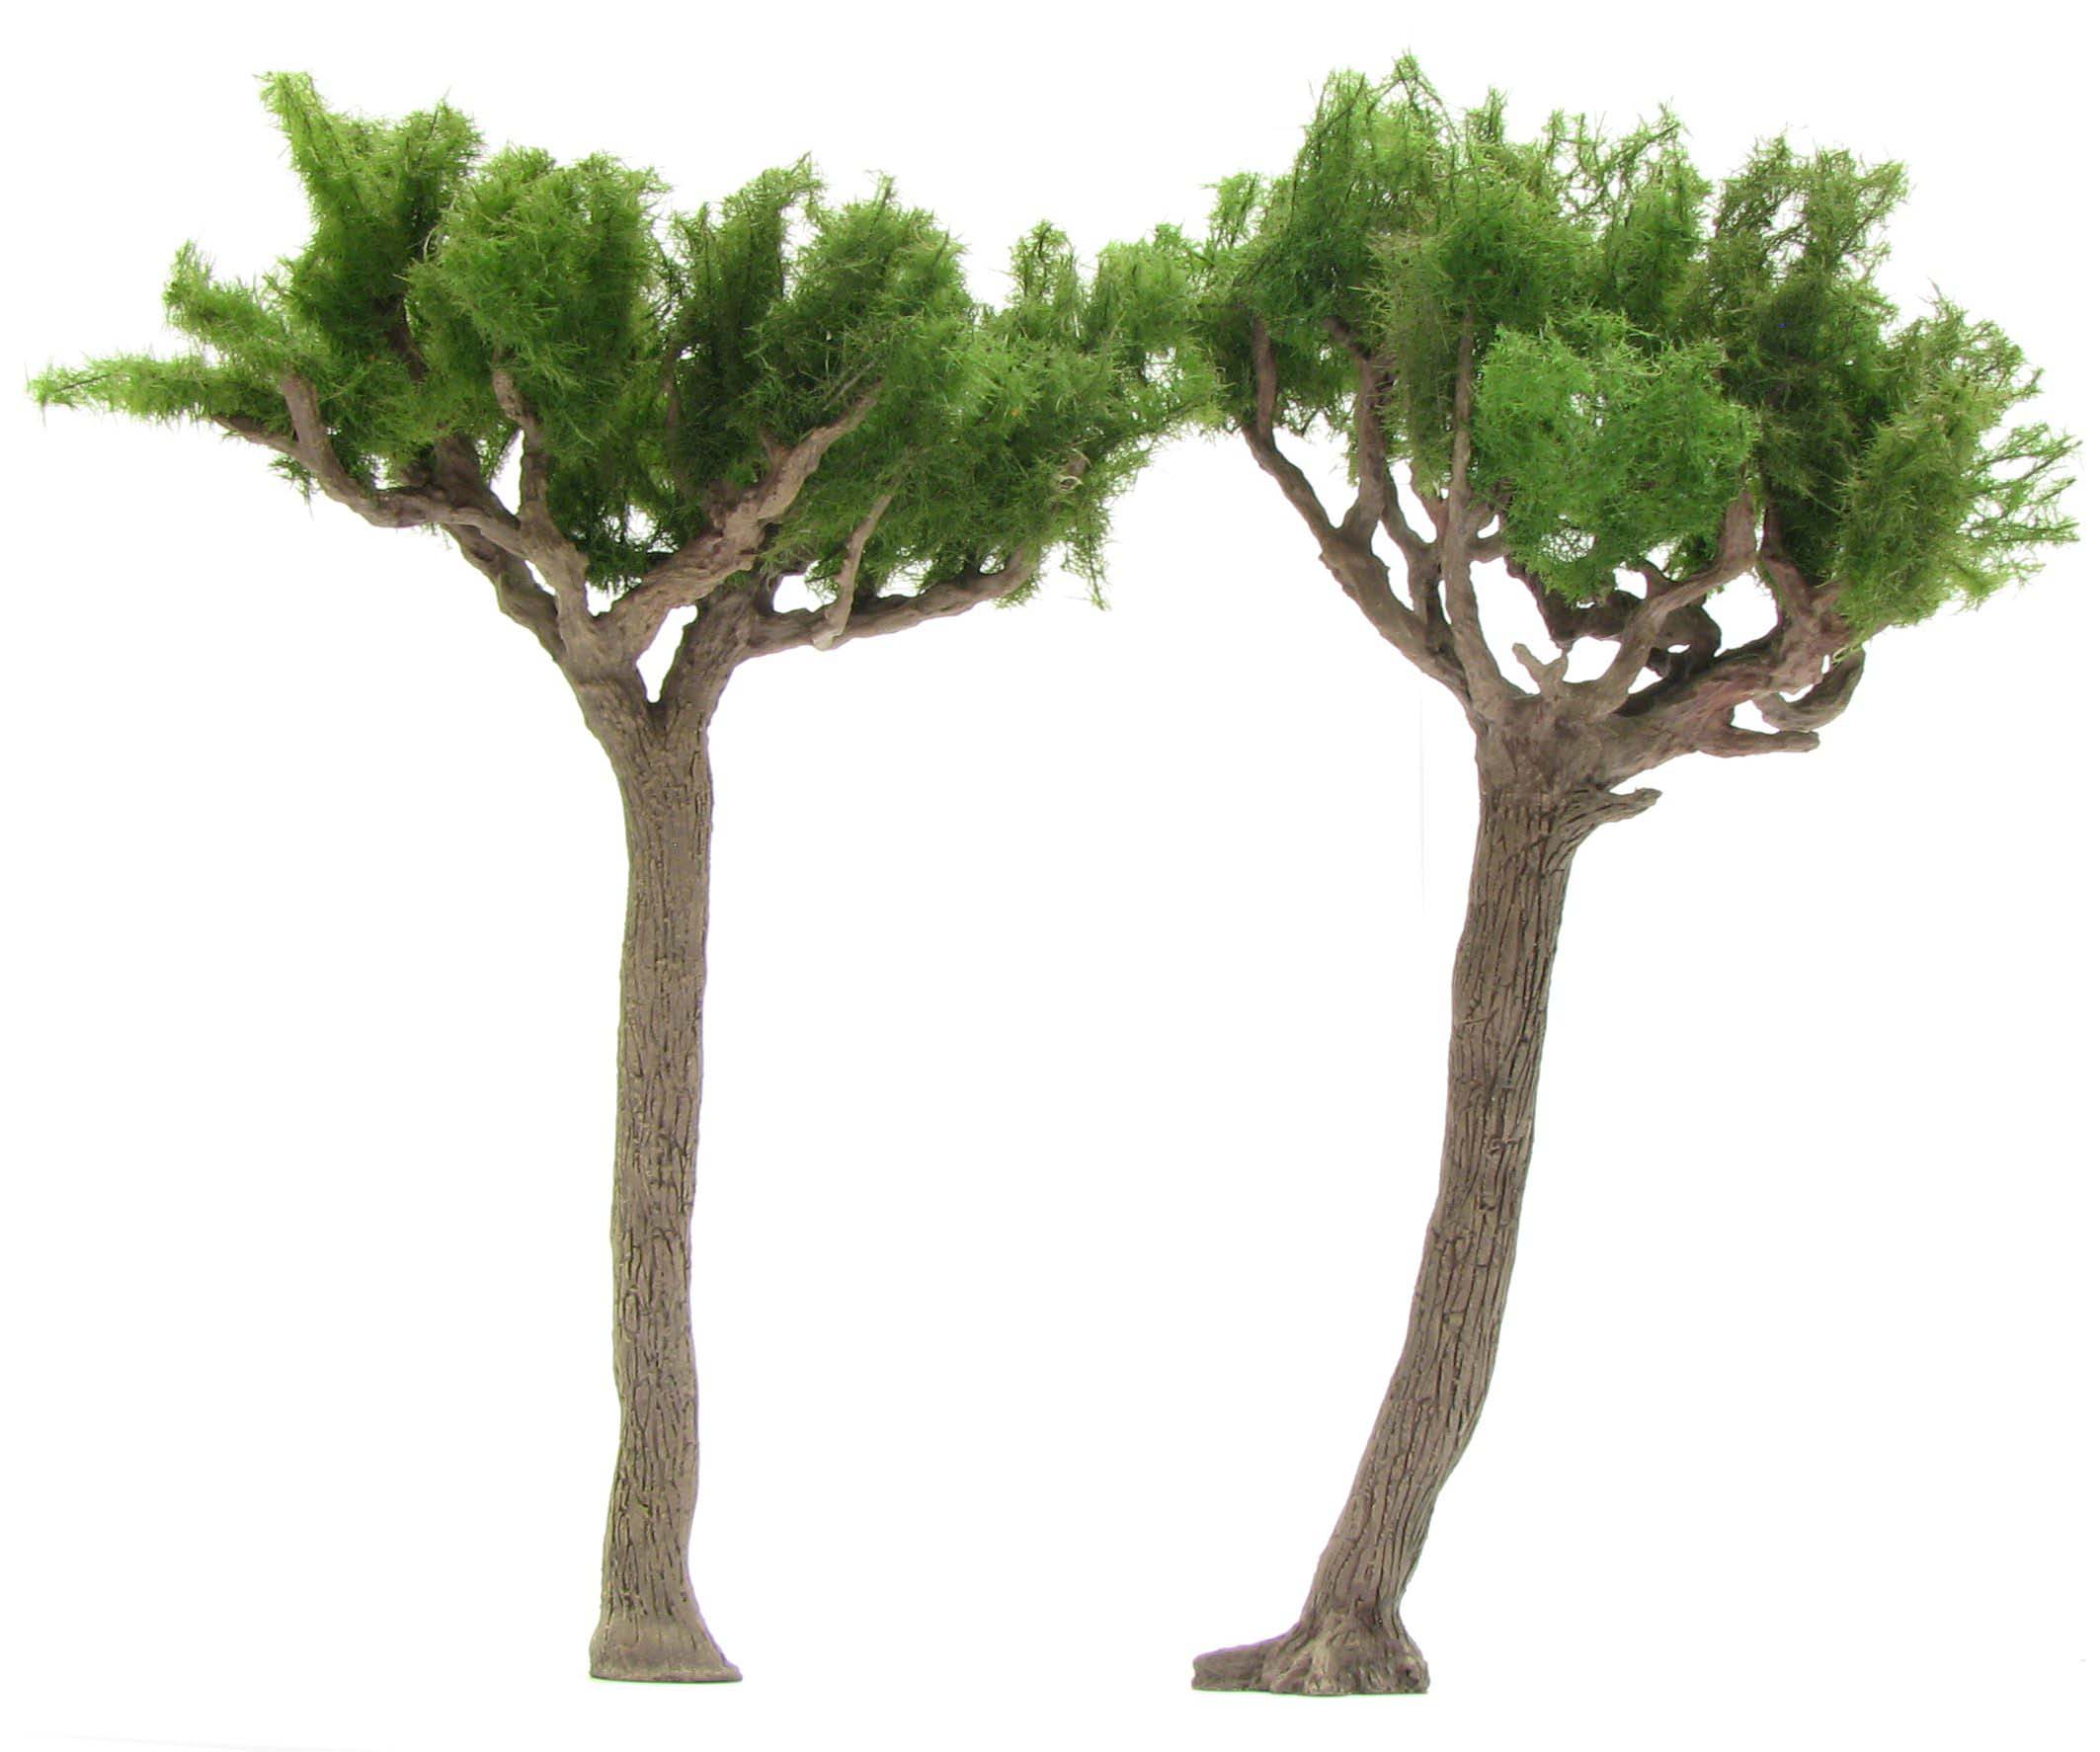
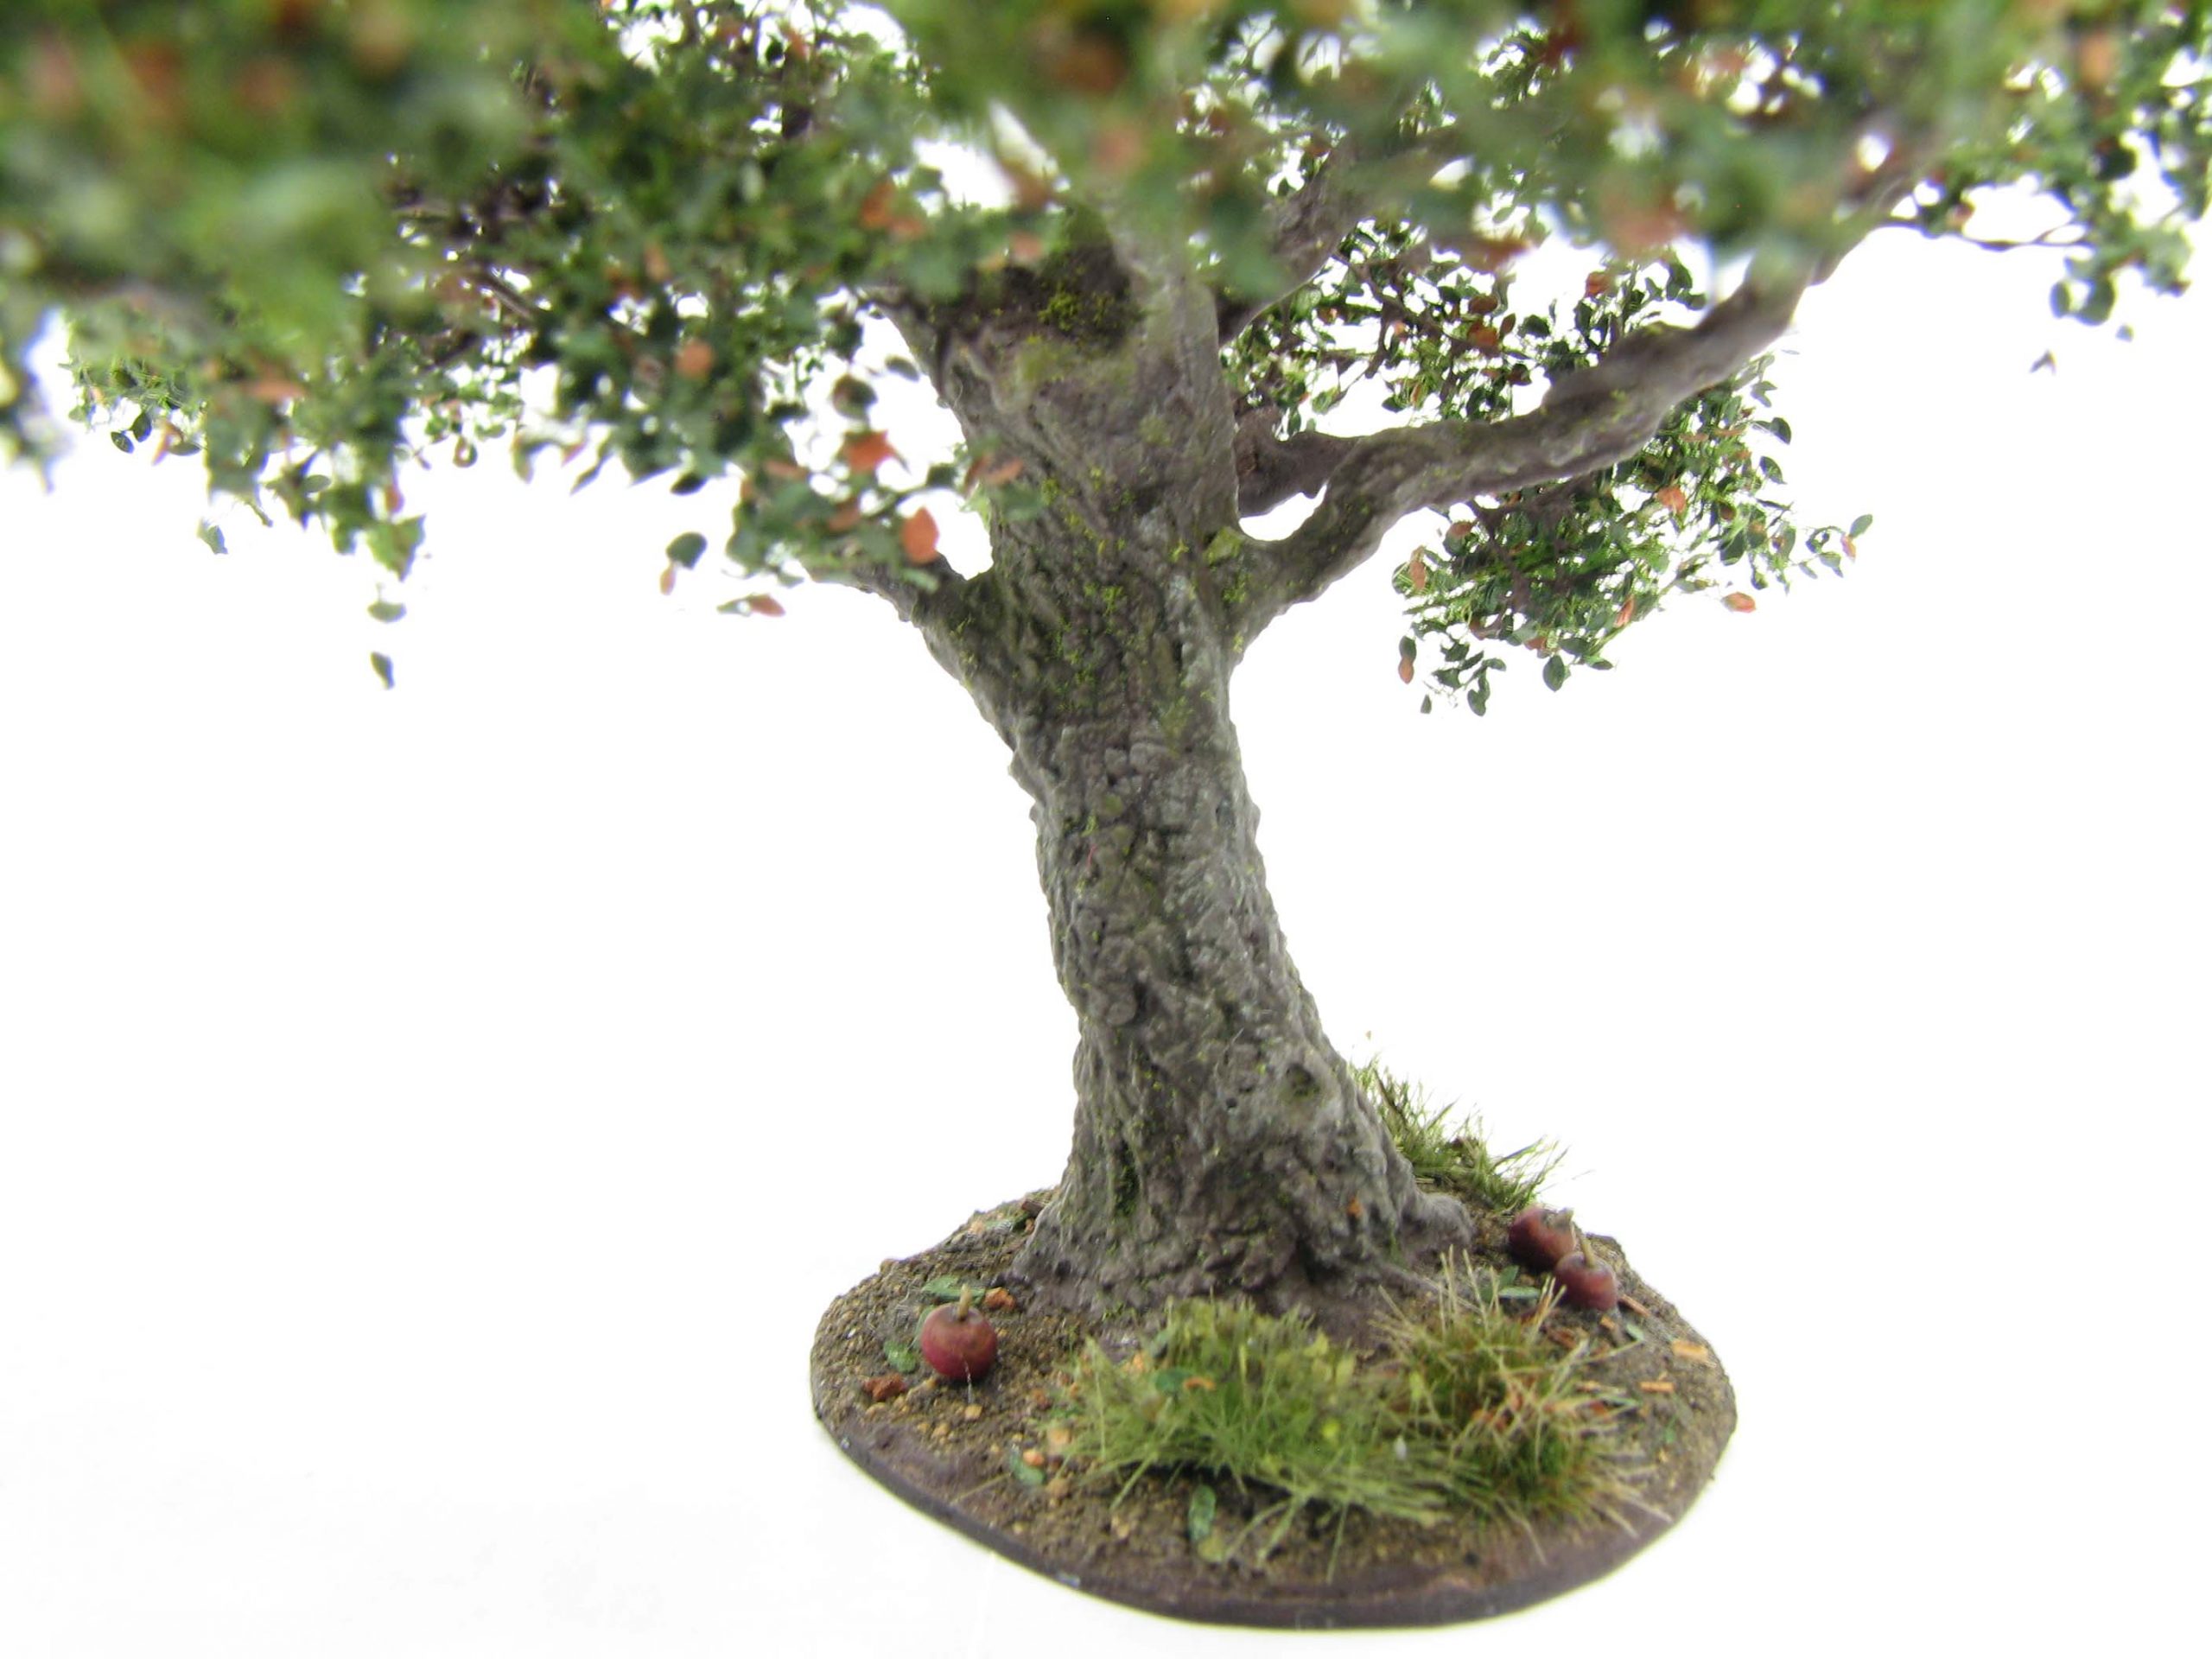
Crown Shape
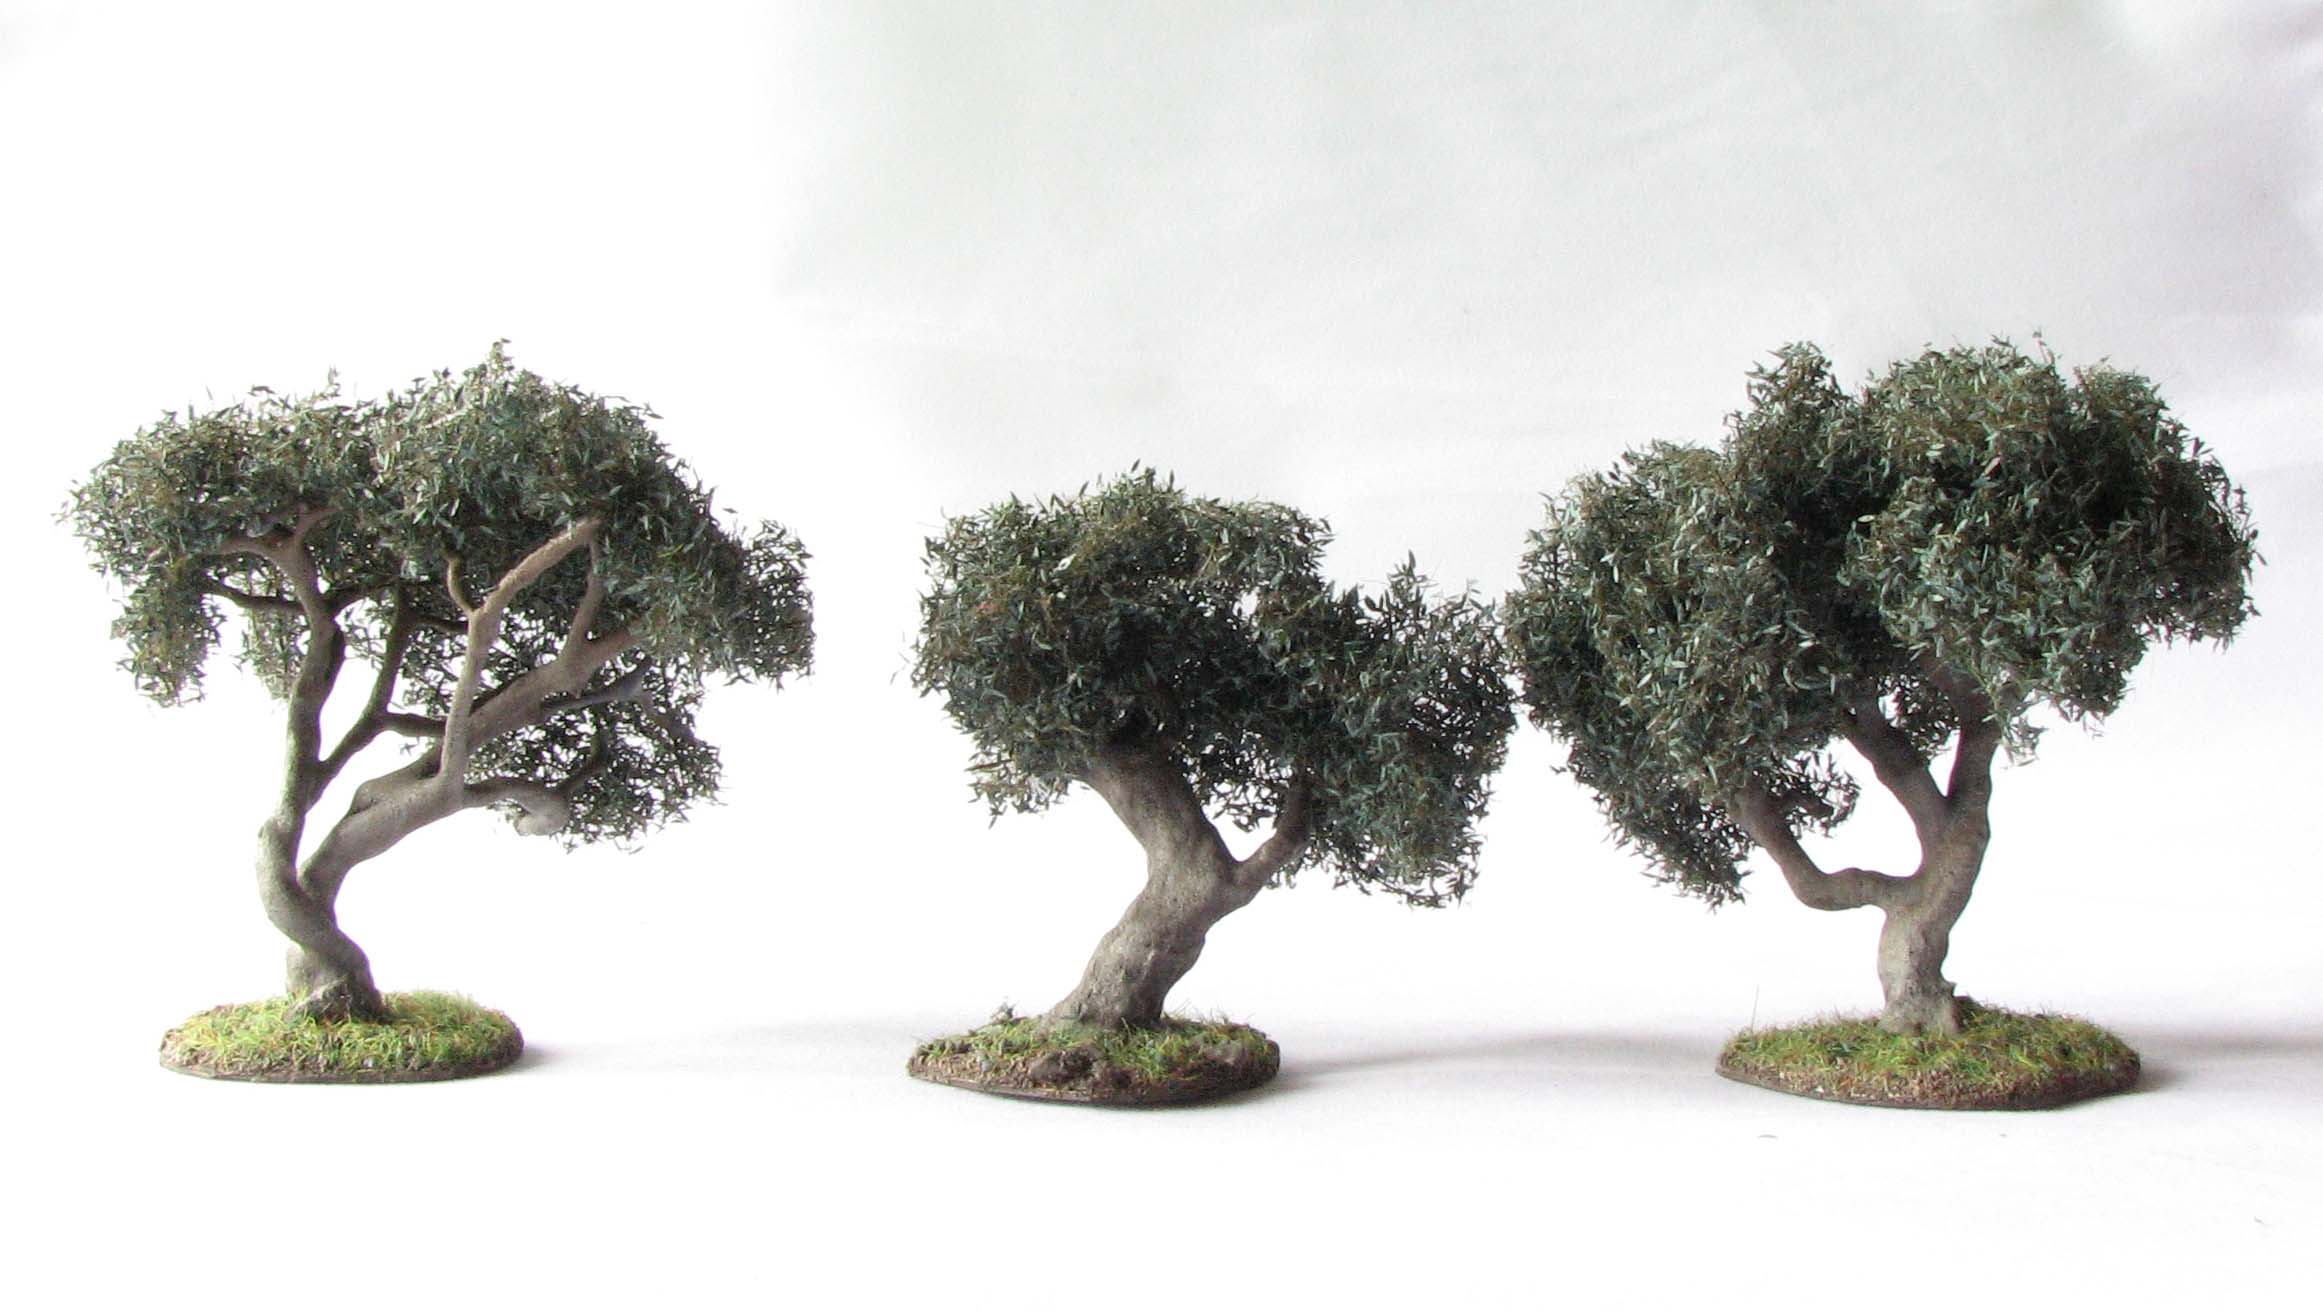
The shape of the crown is also an important consideration. Within a species of tree the crown shape can be quite distinct. Natural variation of growth, the effect of location, exposure to wind and the elements and many other factors will influence the growth of any tree and thus the shape of its crown. The four oak trees below, all with different crown and trunk shapes, illustrate how you can achieve variety within a tree species.
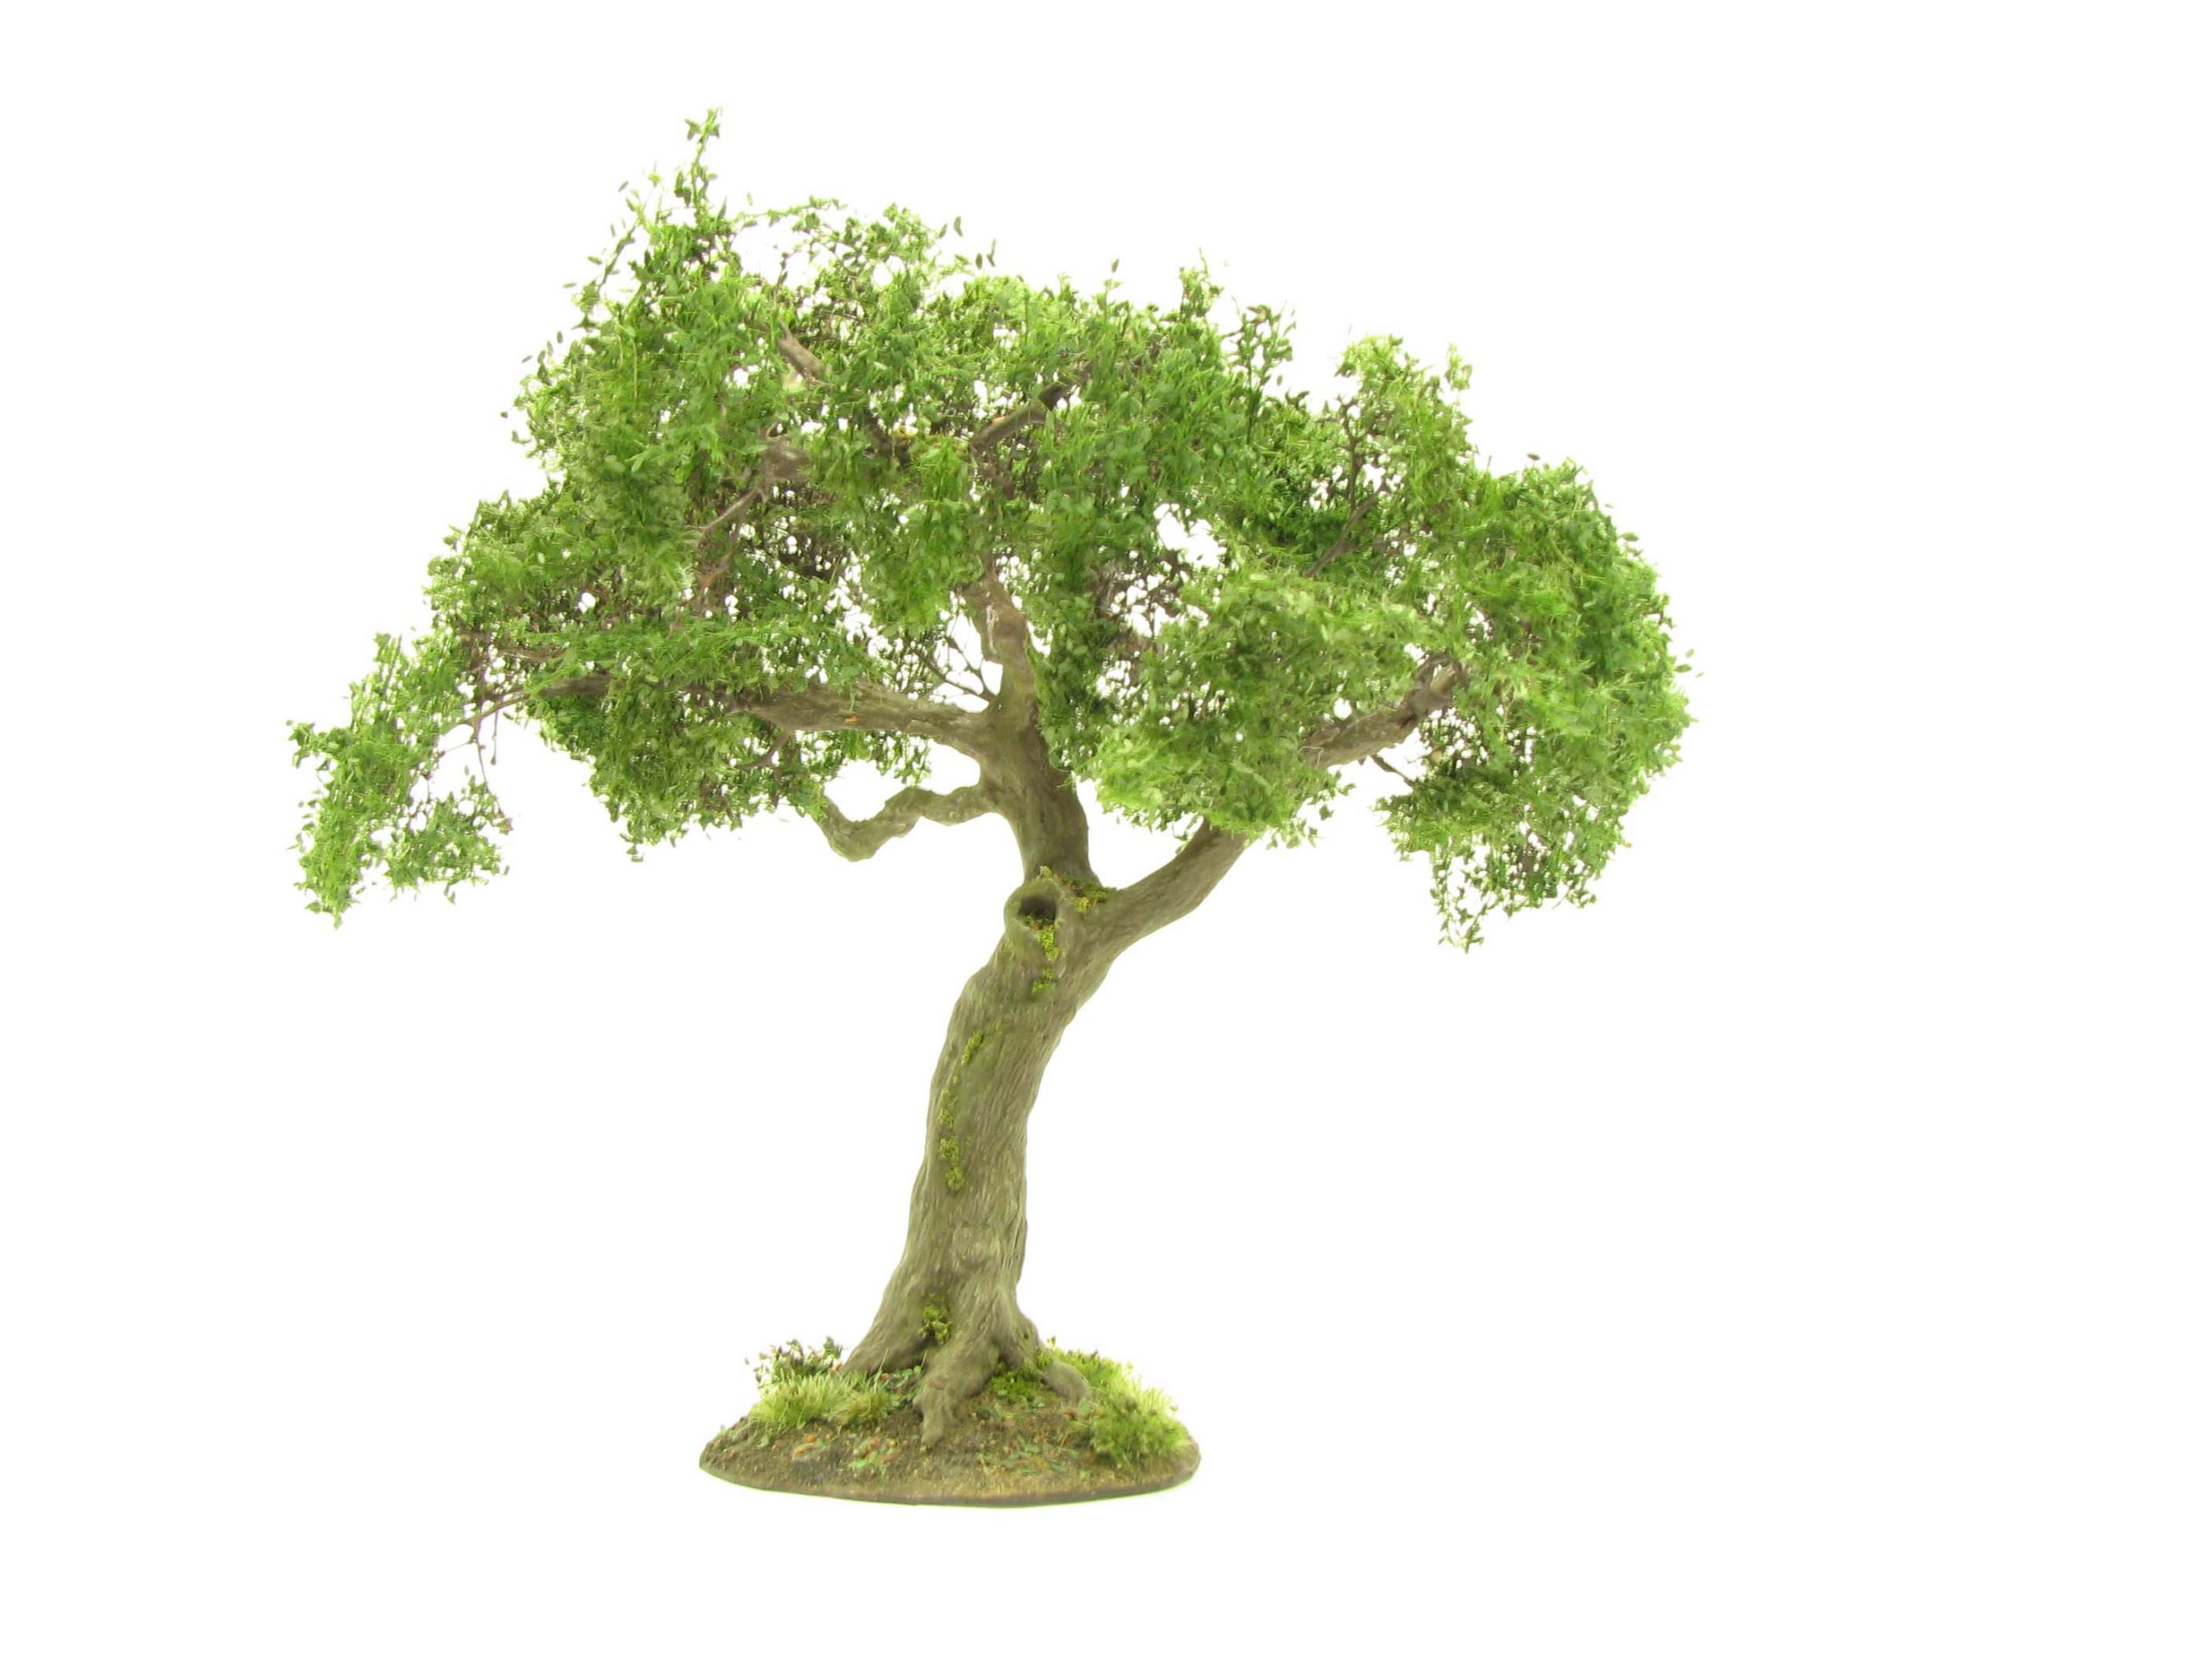

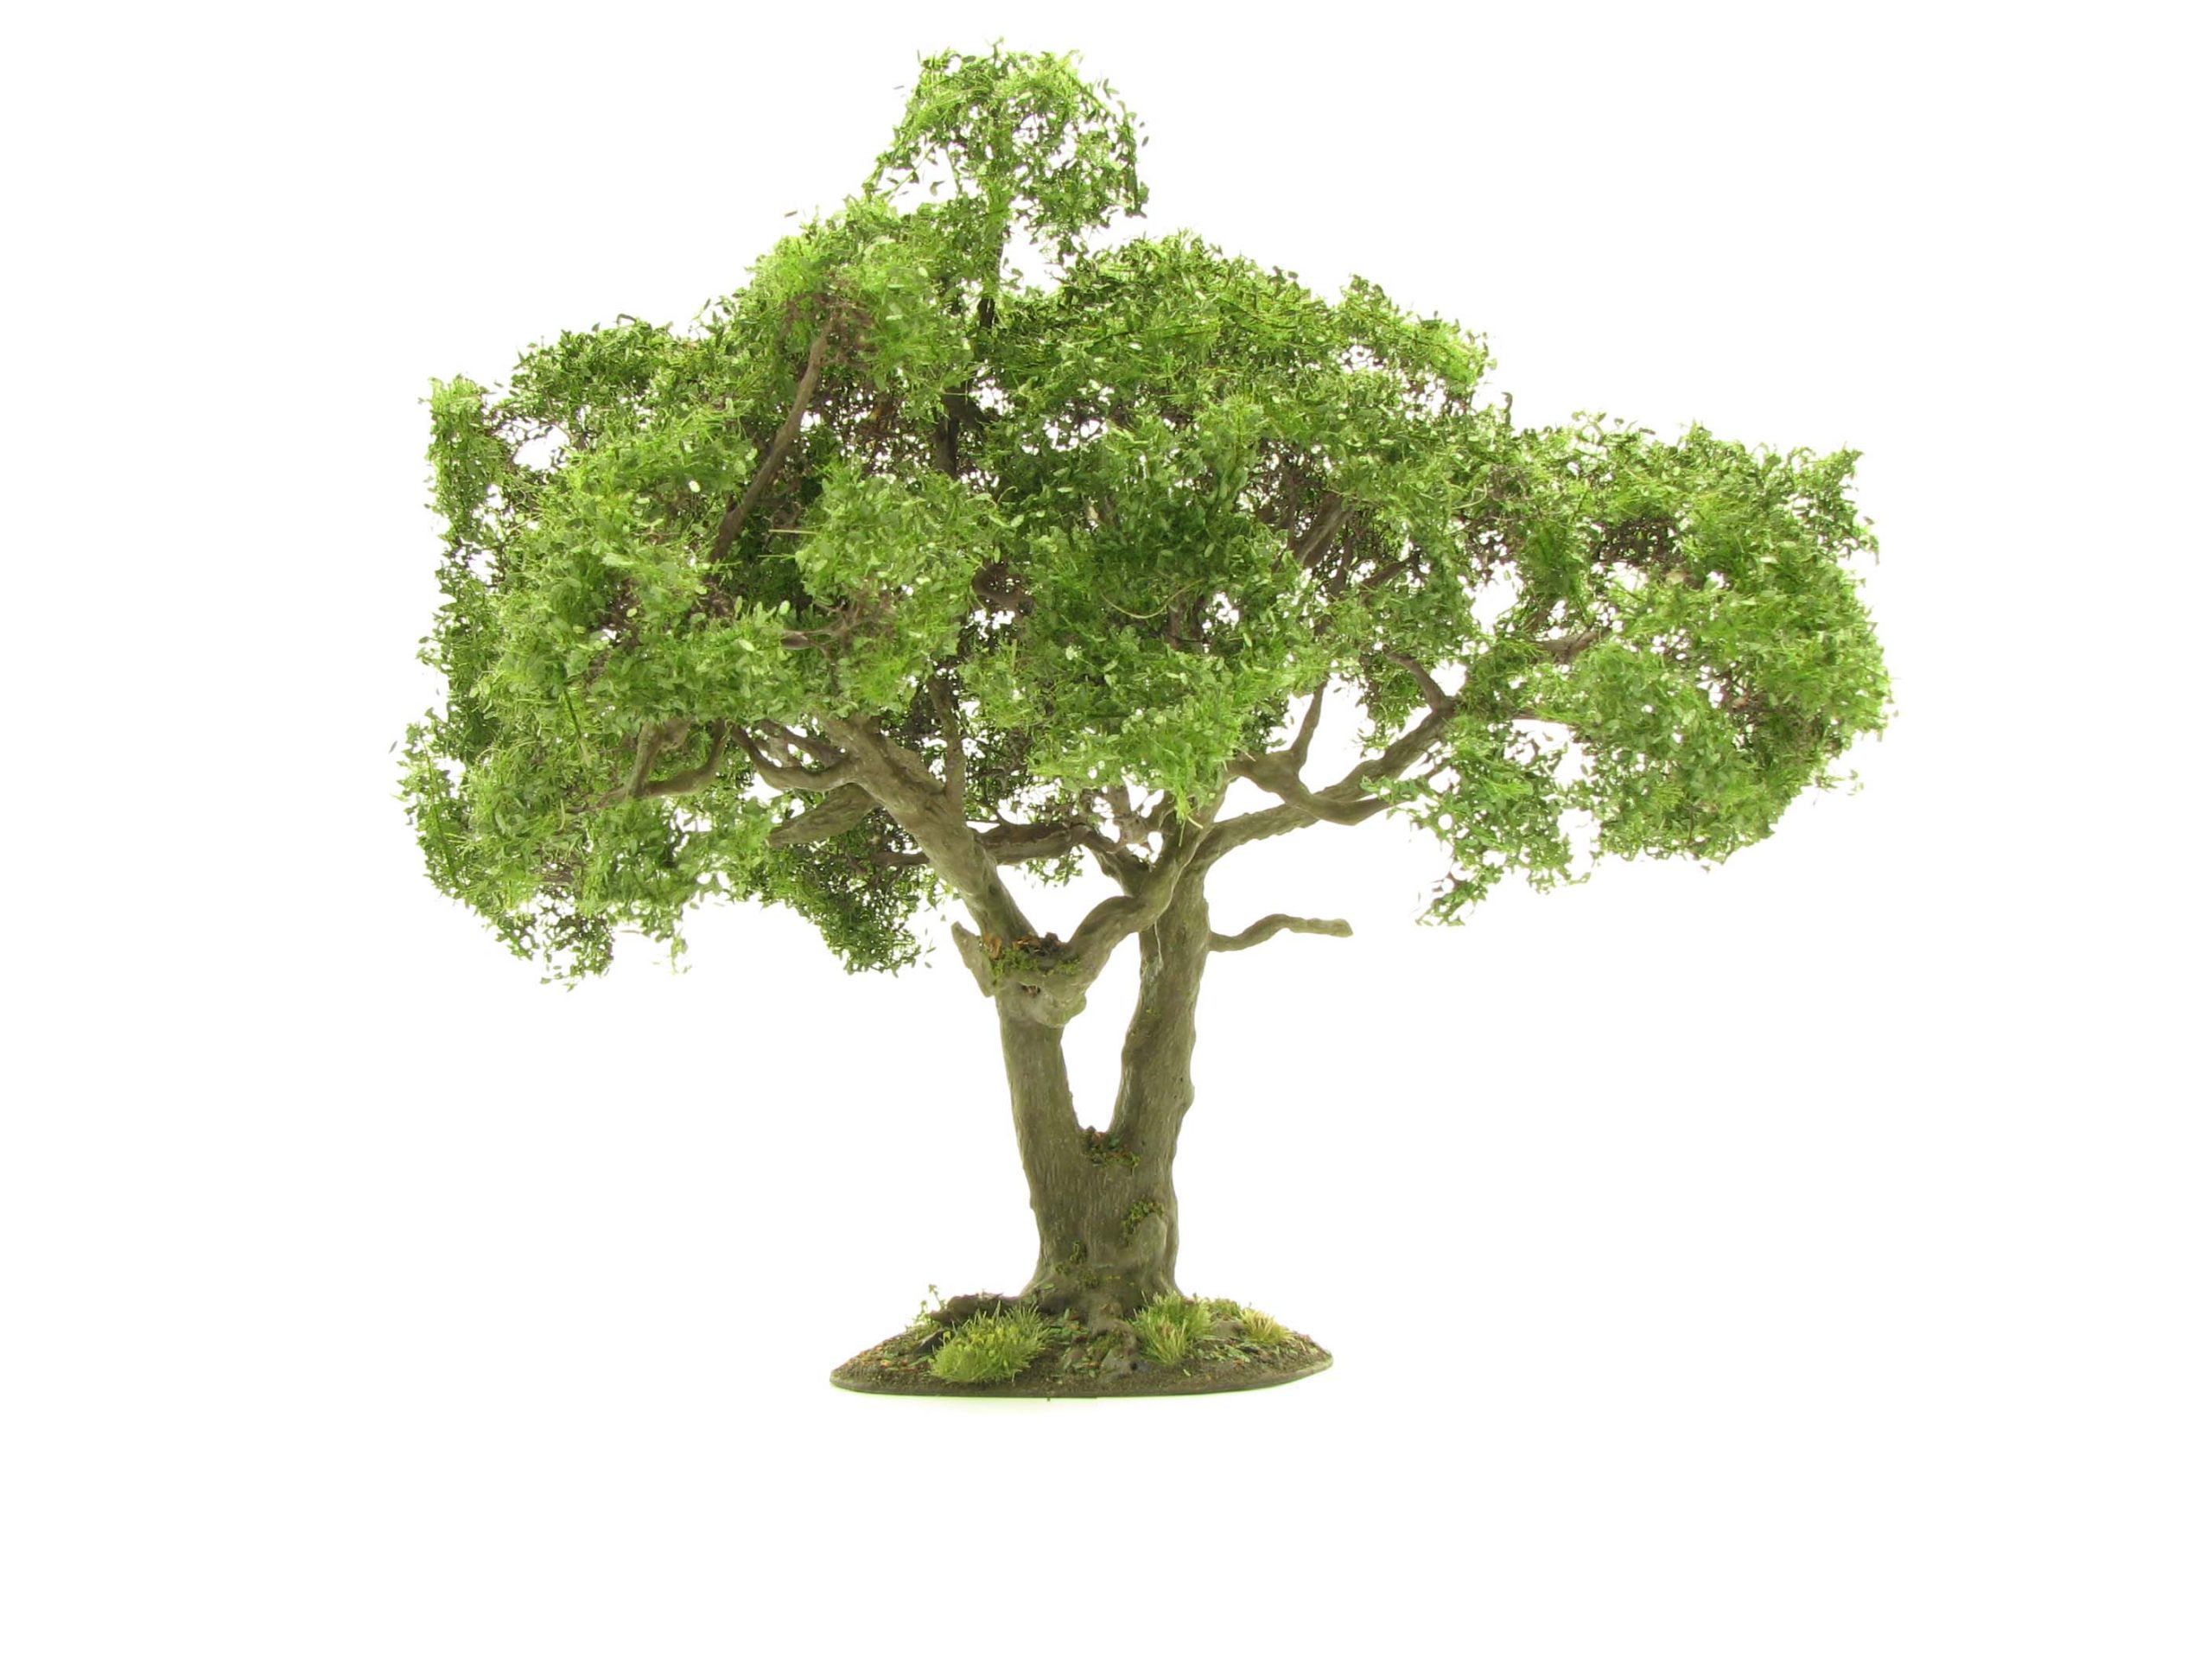
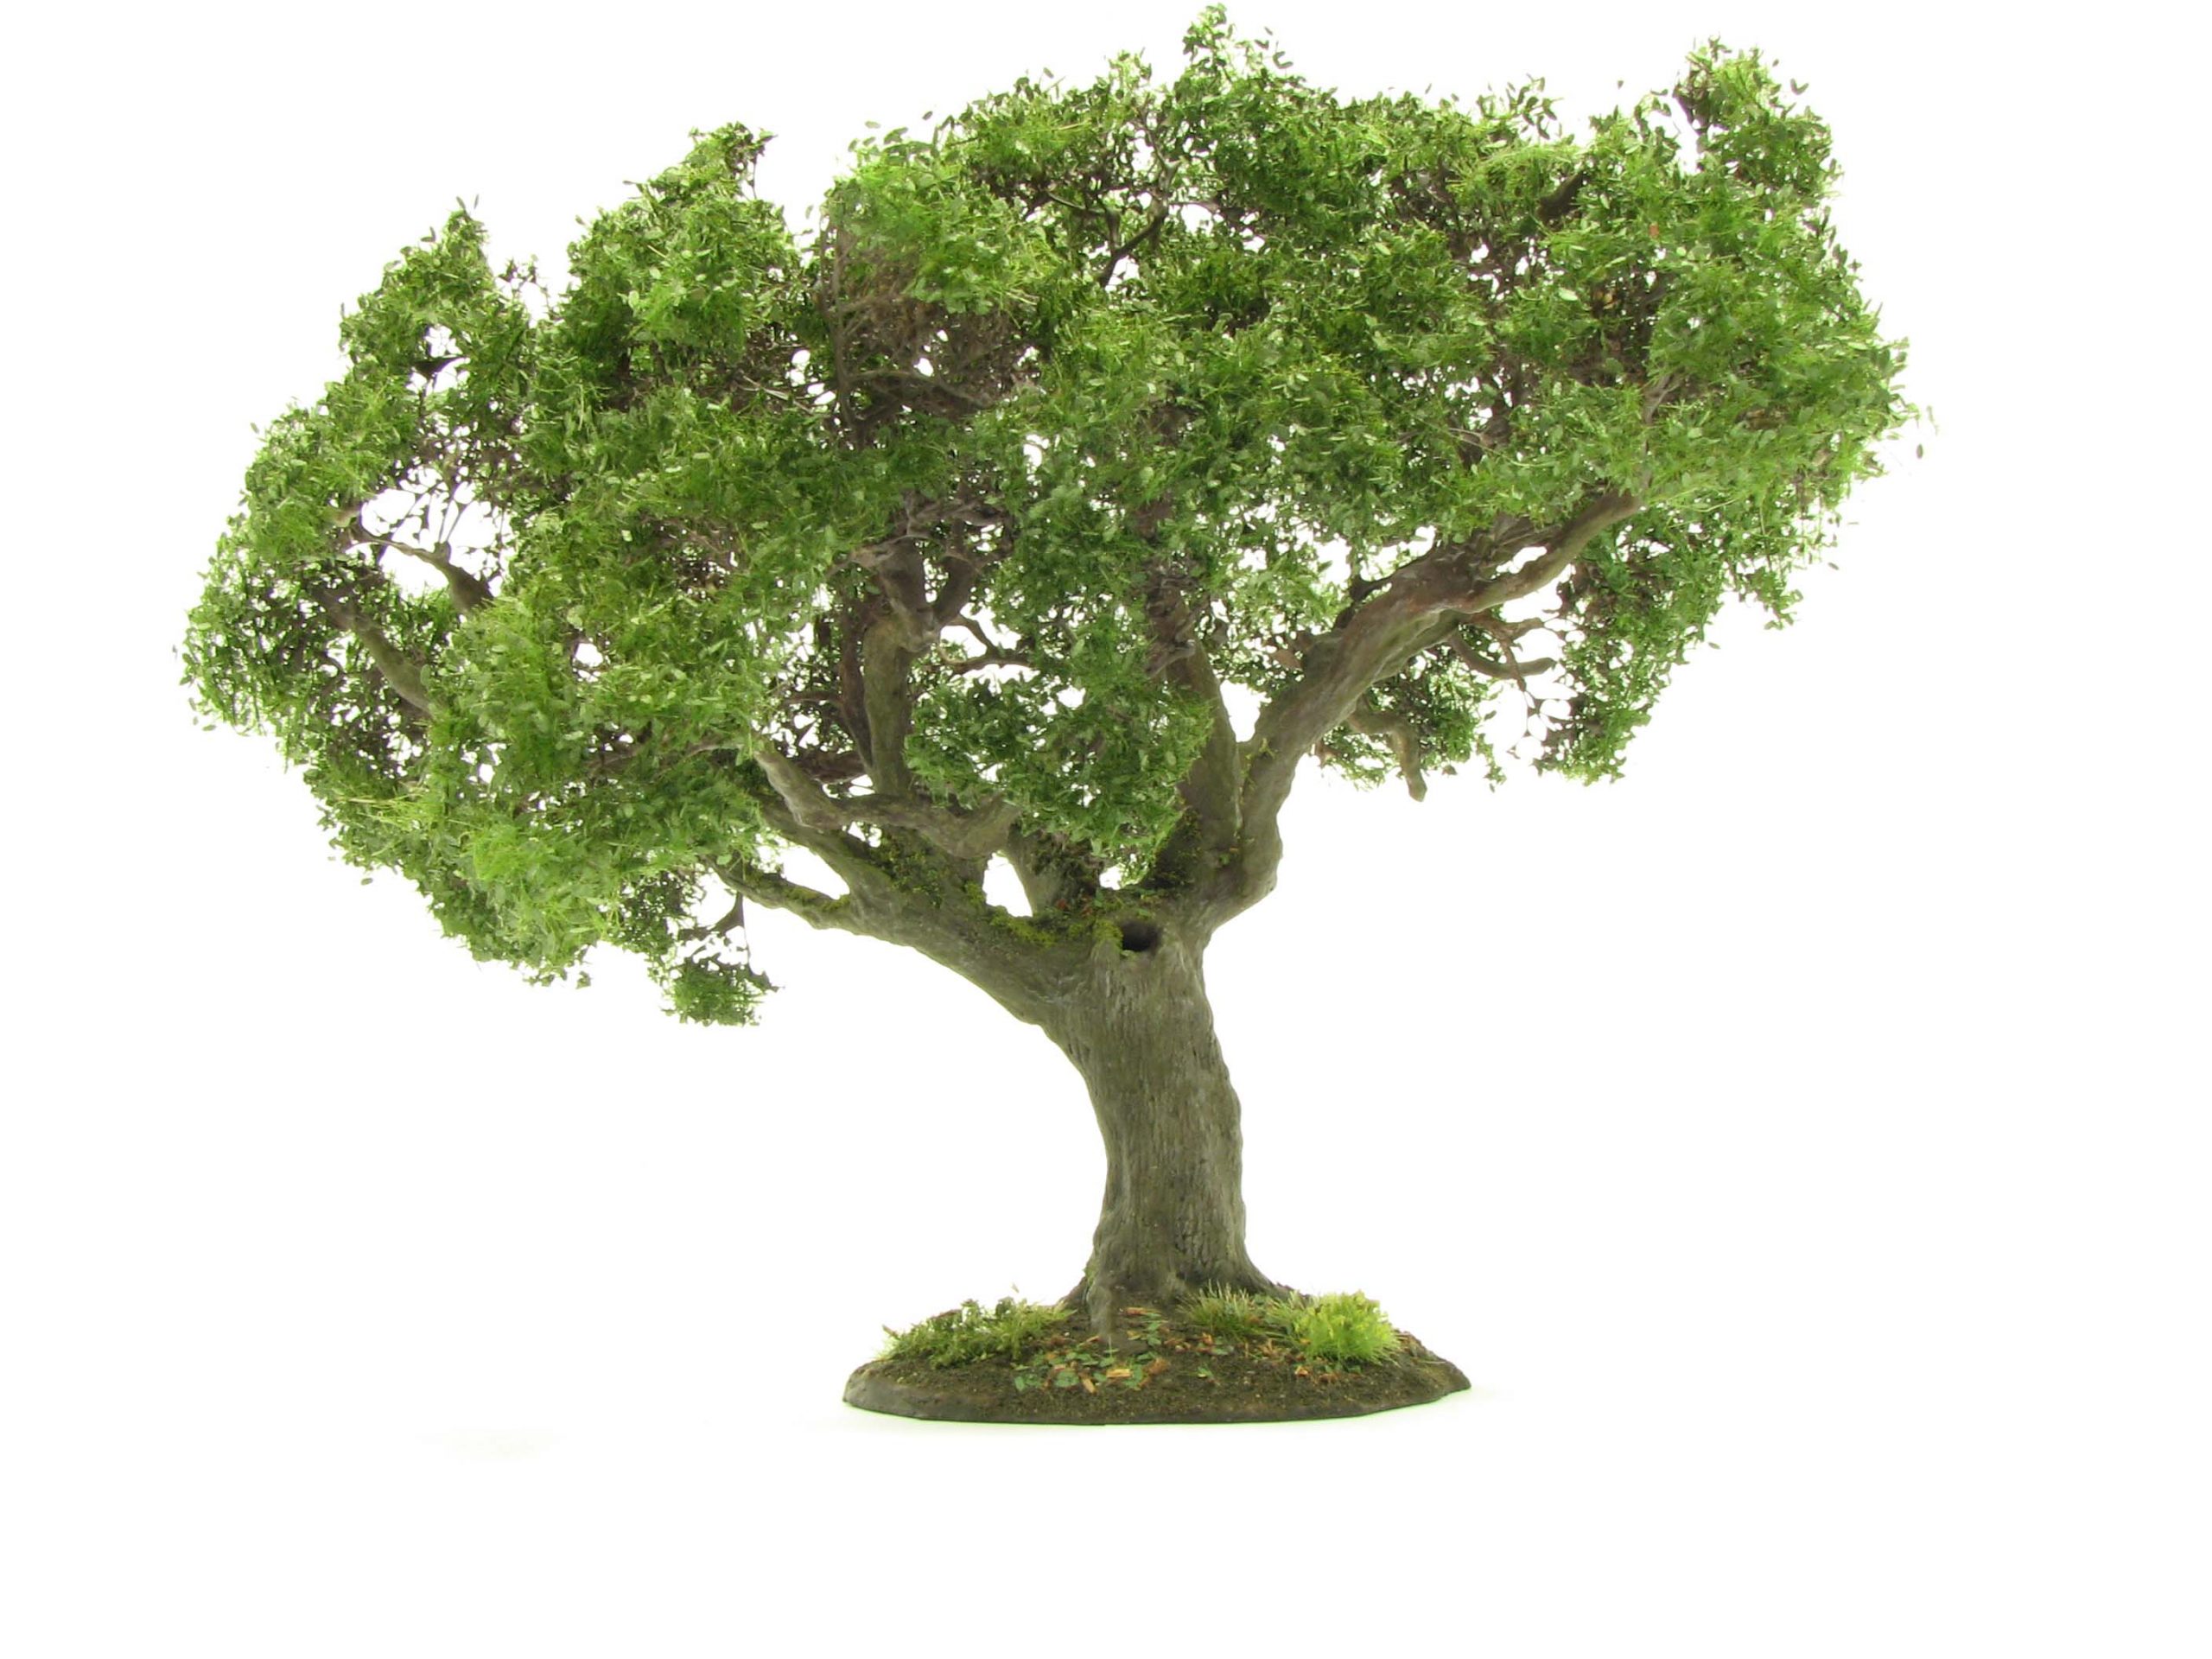
Diversity in crown shape and trunk growth adds realism to your trees. Bought trees often feature very similar shapes, with forking, gnarly or wind-swept trees being hard to find. If you make an effort to create your own trees, I recommend to really go crazy and come up with all kinds of different shapes. It pays again off to work with reference pictures, after all you want your oaks to be still recognisable.
To summarise:
- For realistic results use MiniNatur foliage nets or filter wool with very fine turf. Avoid large chunks of clump foliage.
- Avoid extremely dense crowns, rather try to achieve an airy look that shows of branches and detailing.
- Vary both the shape of the tree crown and of the tree trunk.
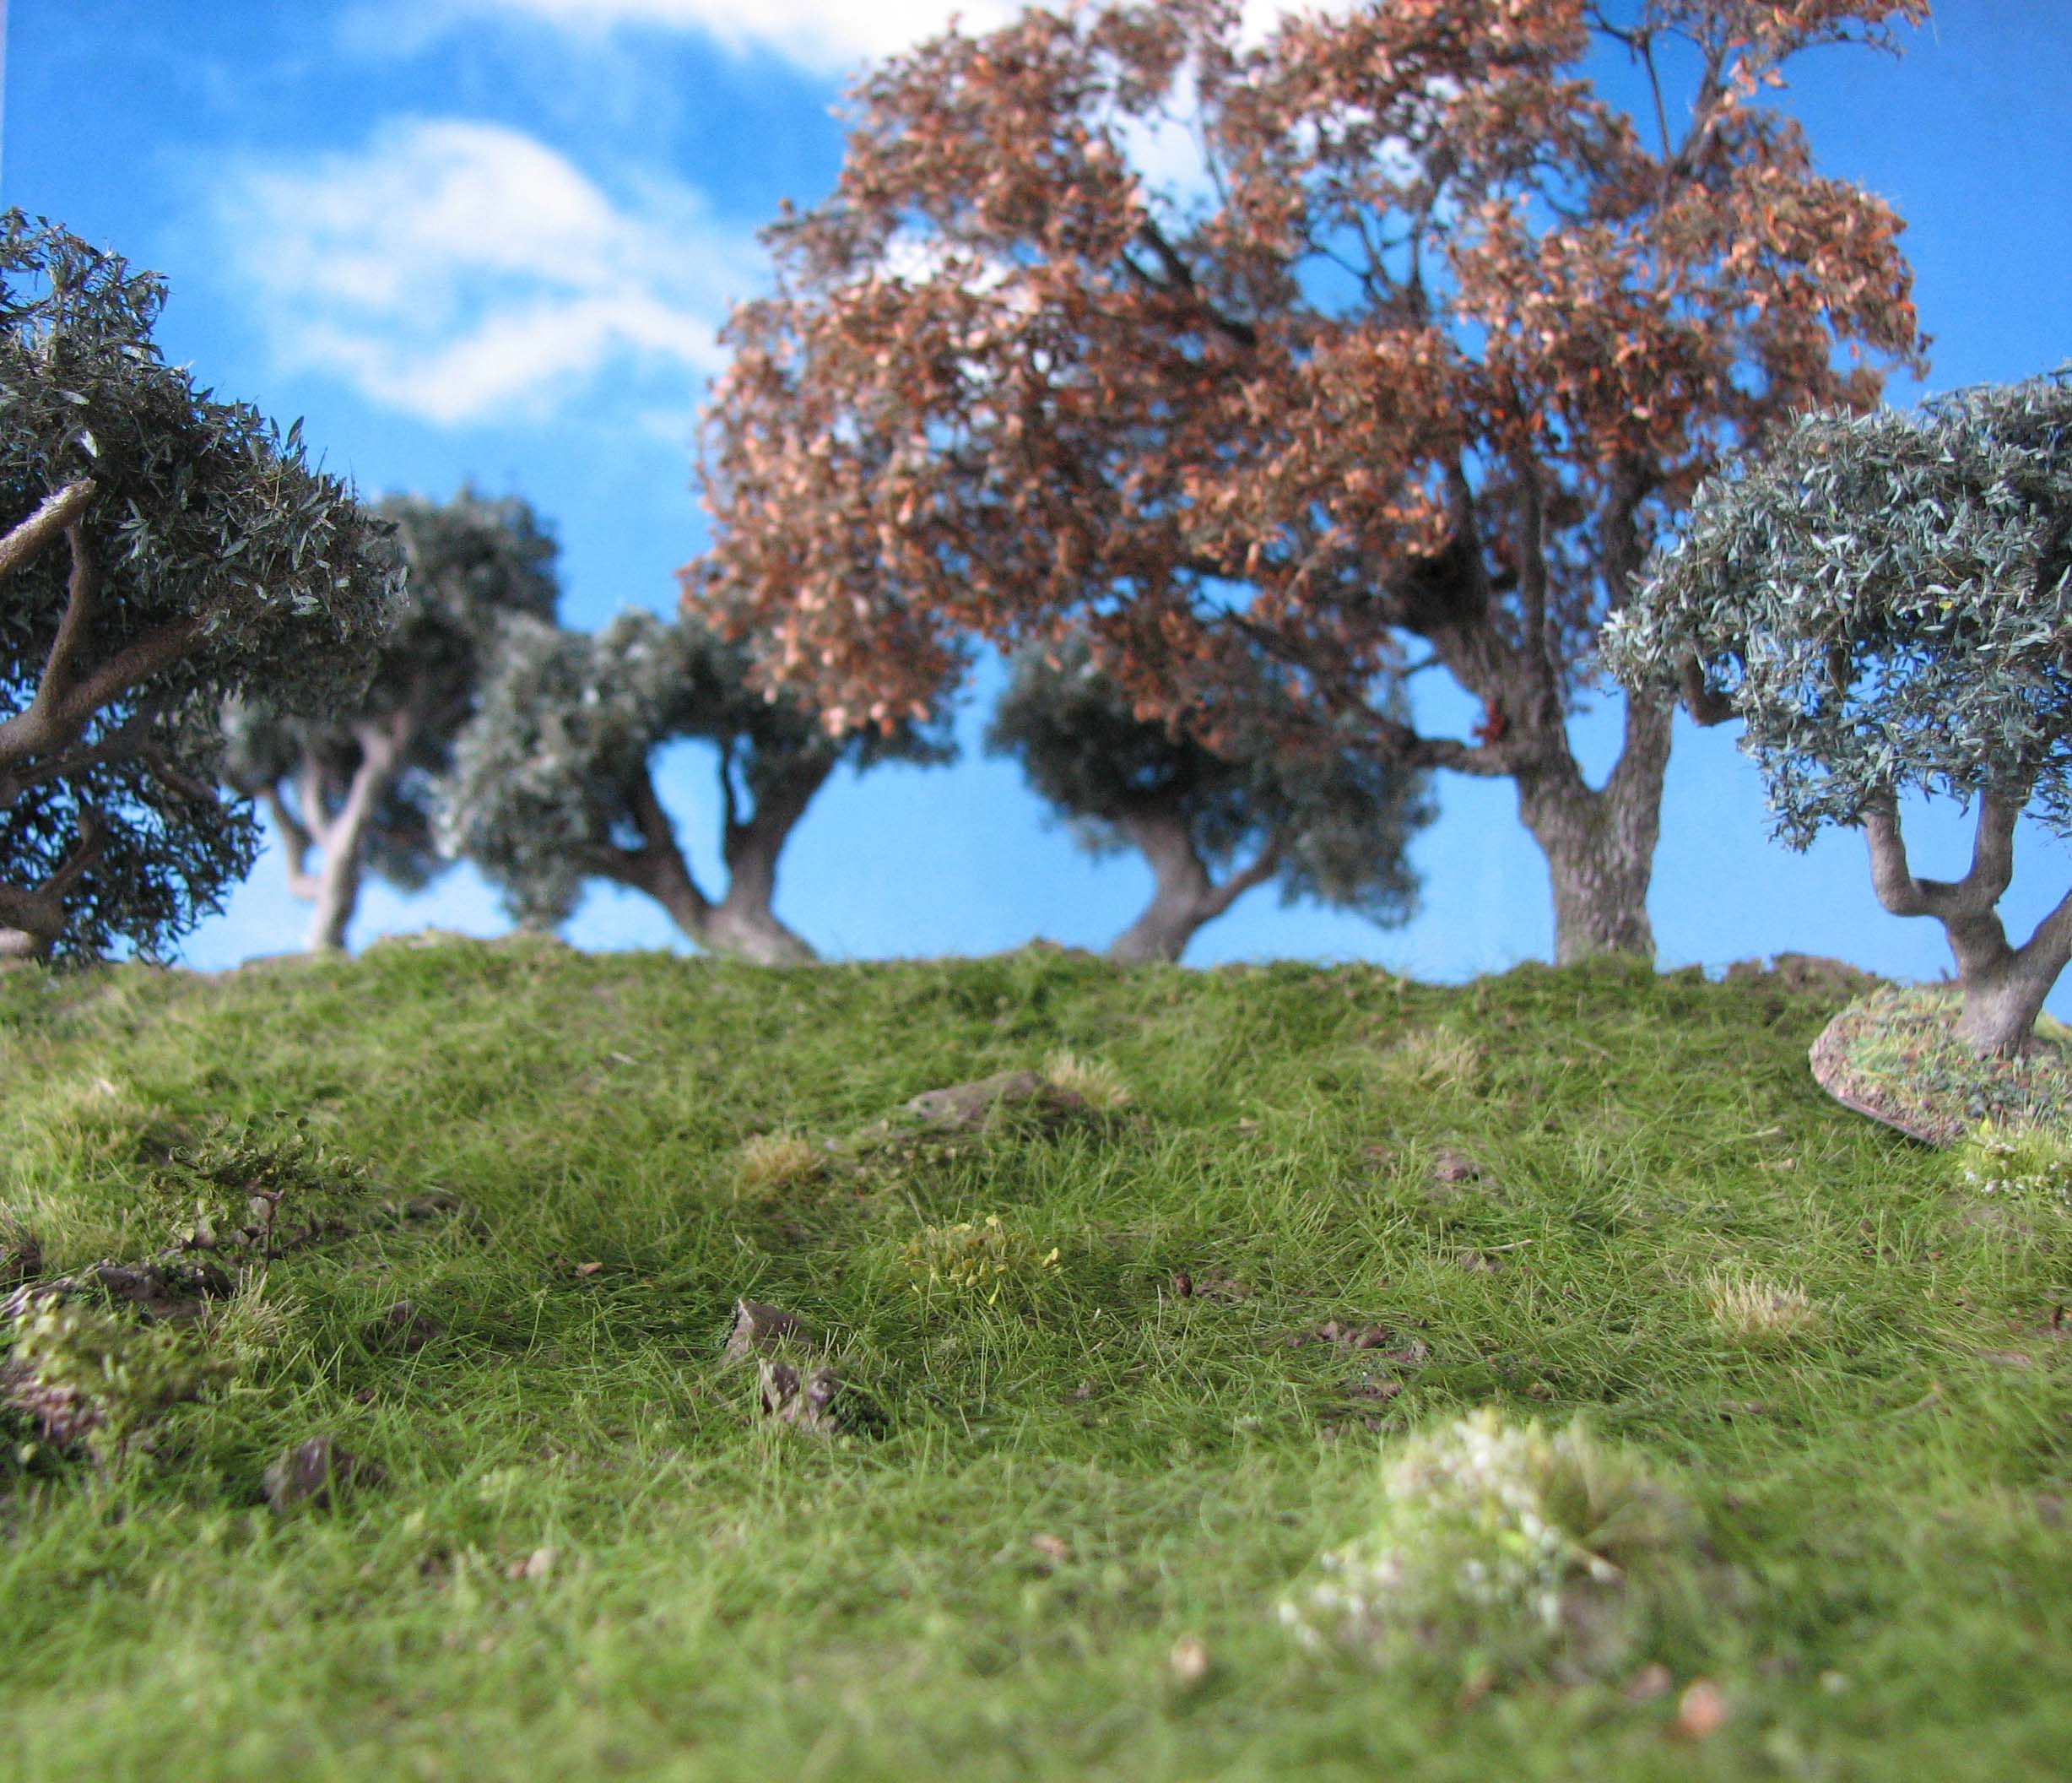
Scenic basing
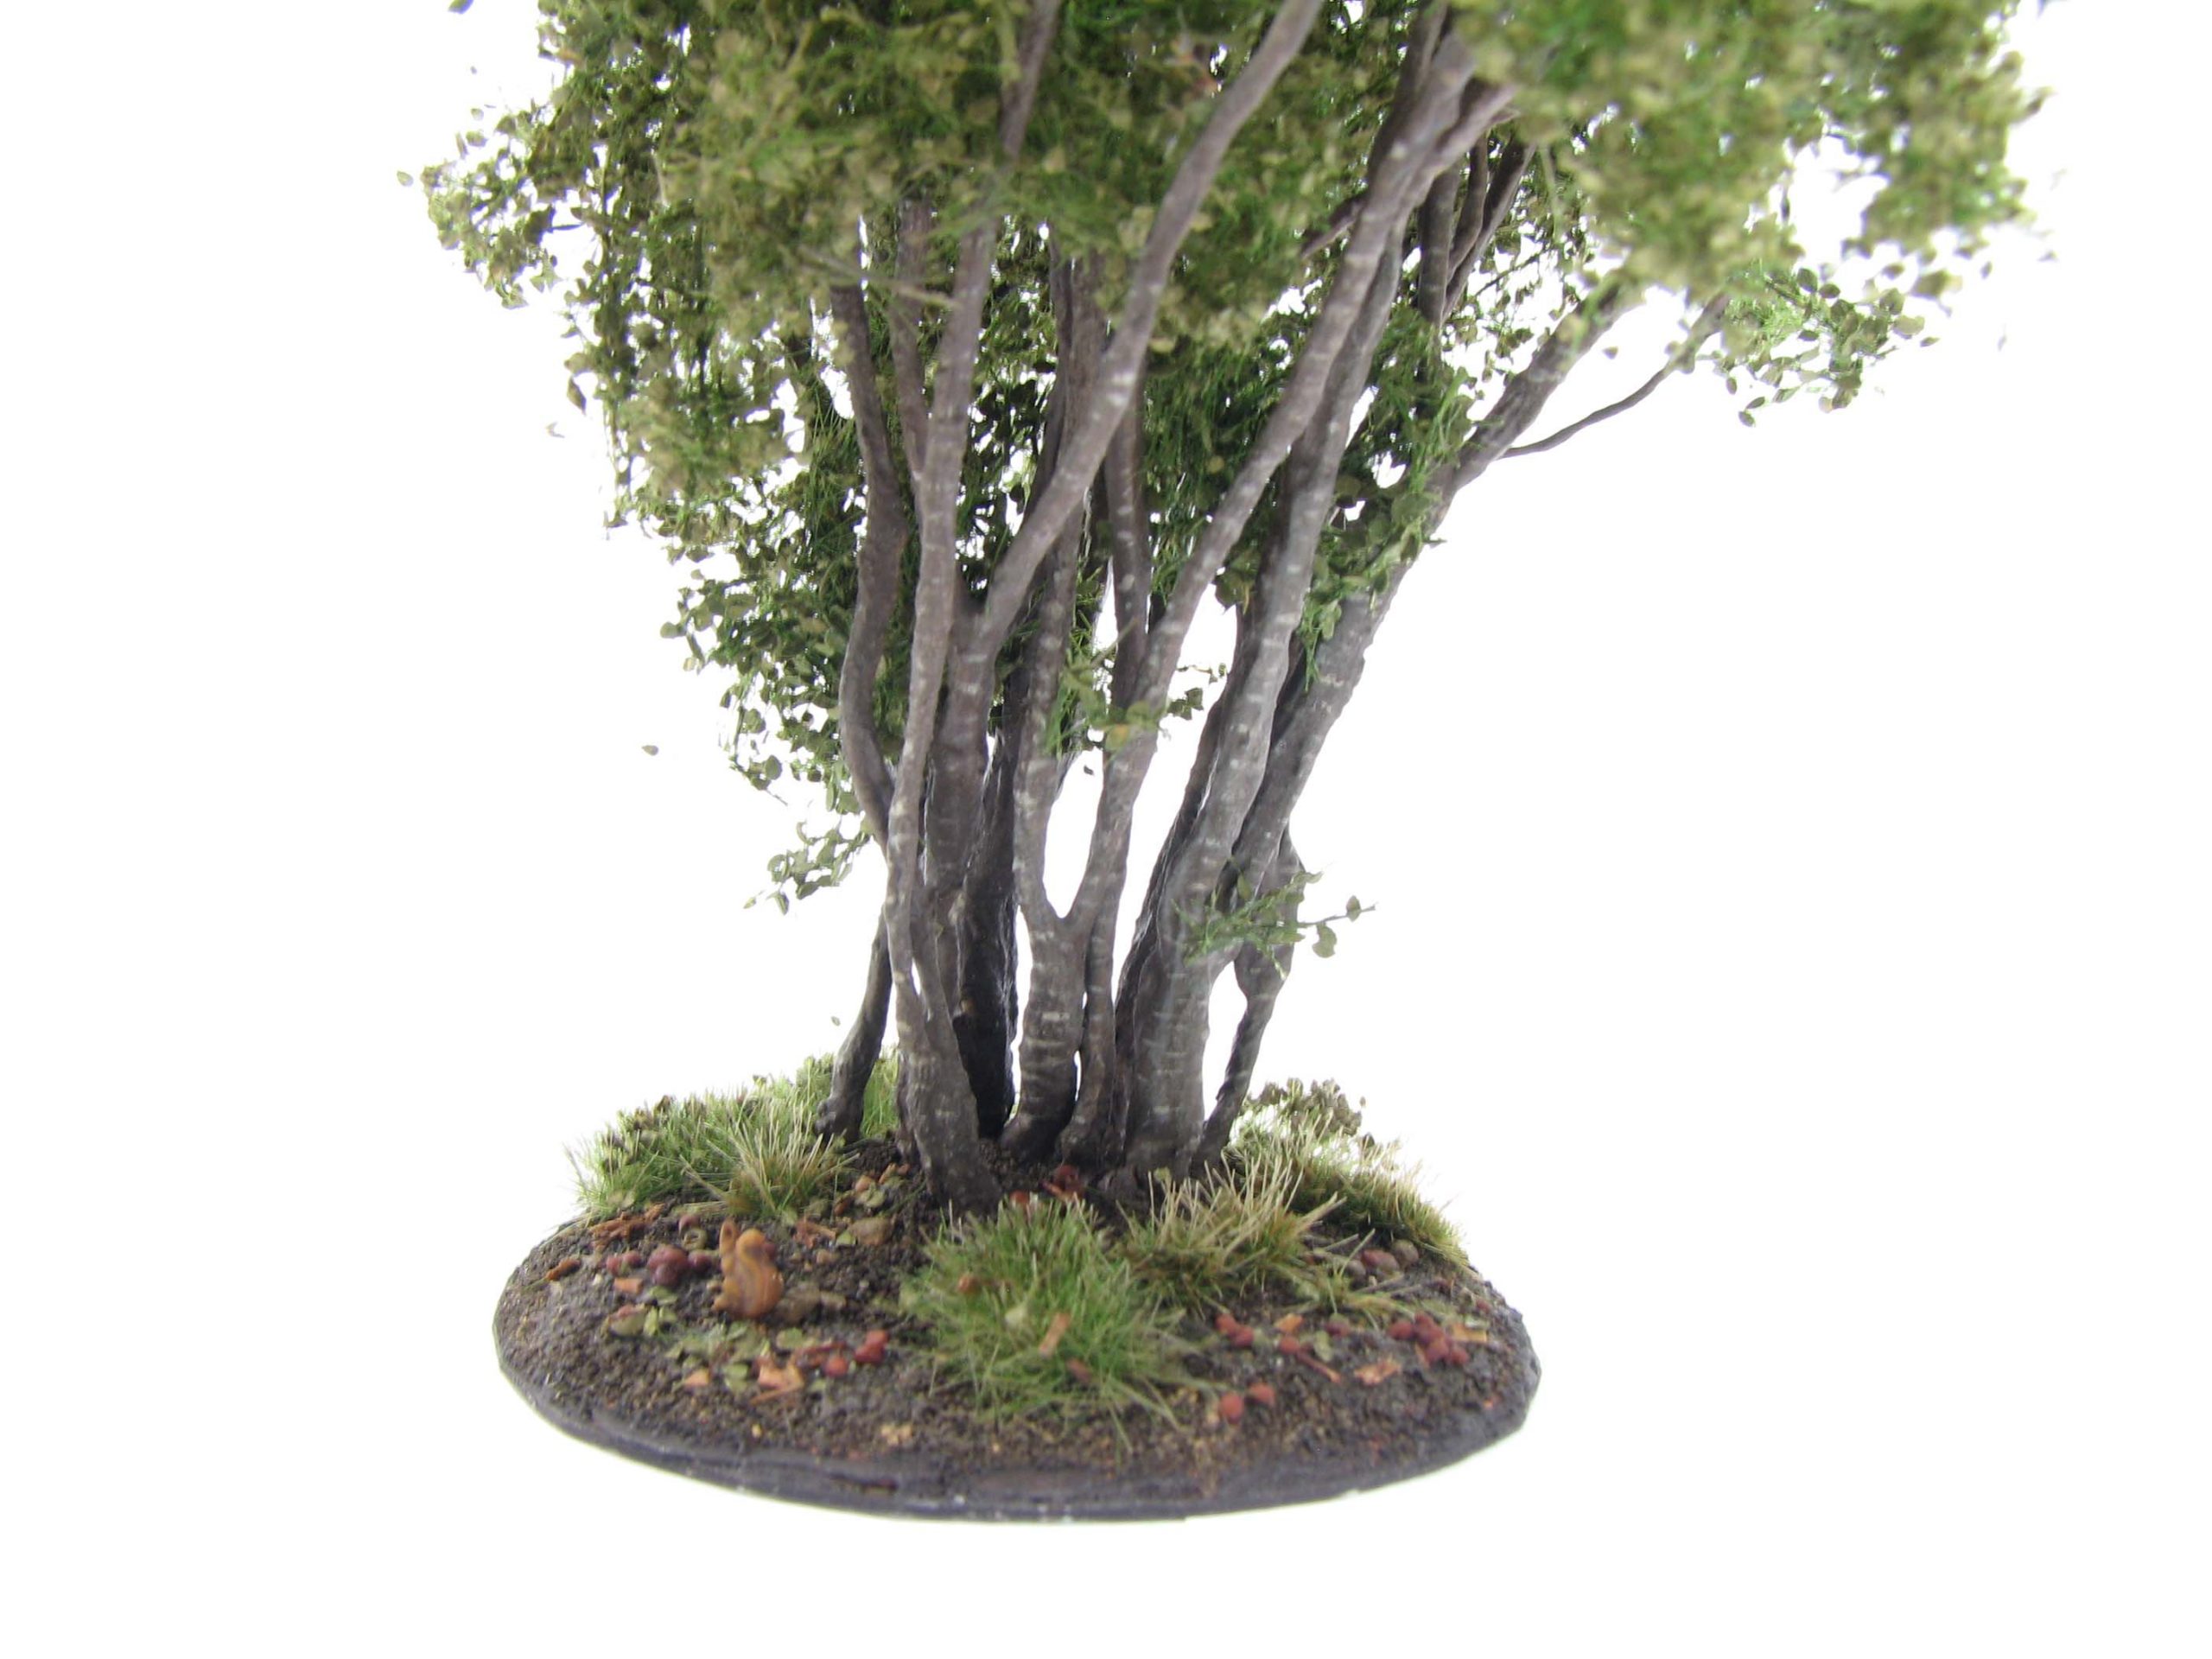
With all this talk about bark texture and crown shape it is easy to forget an important element of free-standing trees: the base. Investing some time here can really enhance a tree model. You can add a variety of bushes, fallen leaves, critters or fruit. The goal is to combine textures and colours to round off the model.
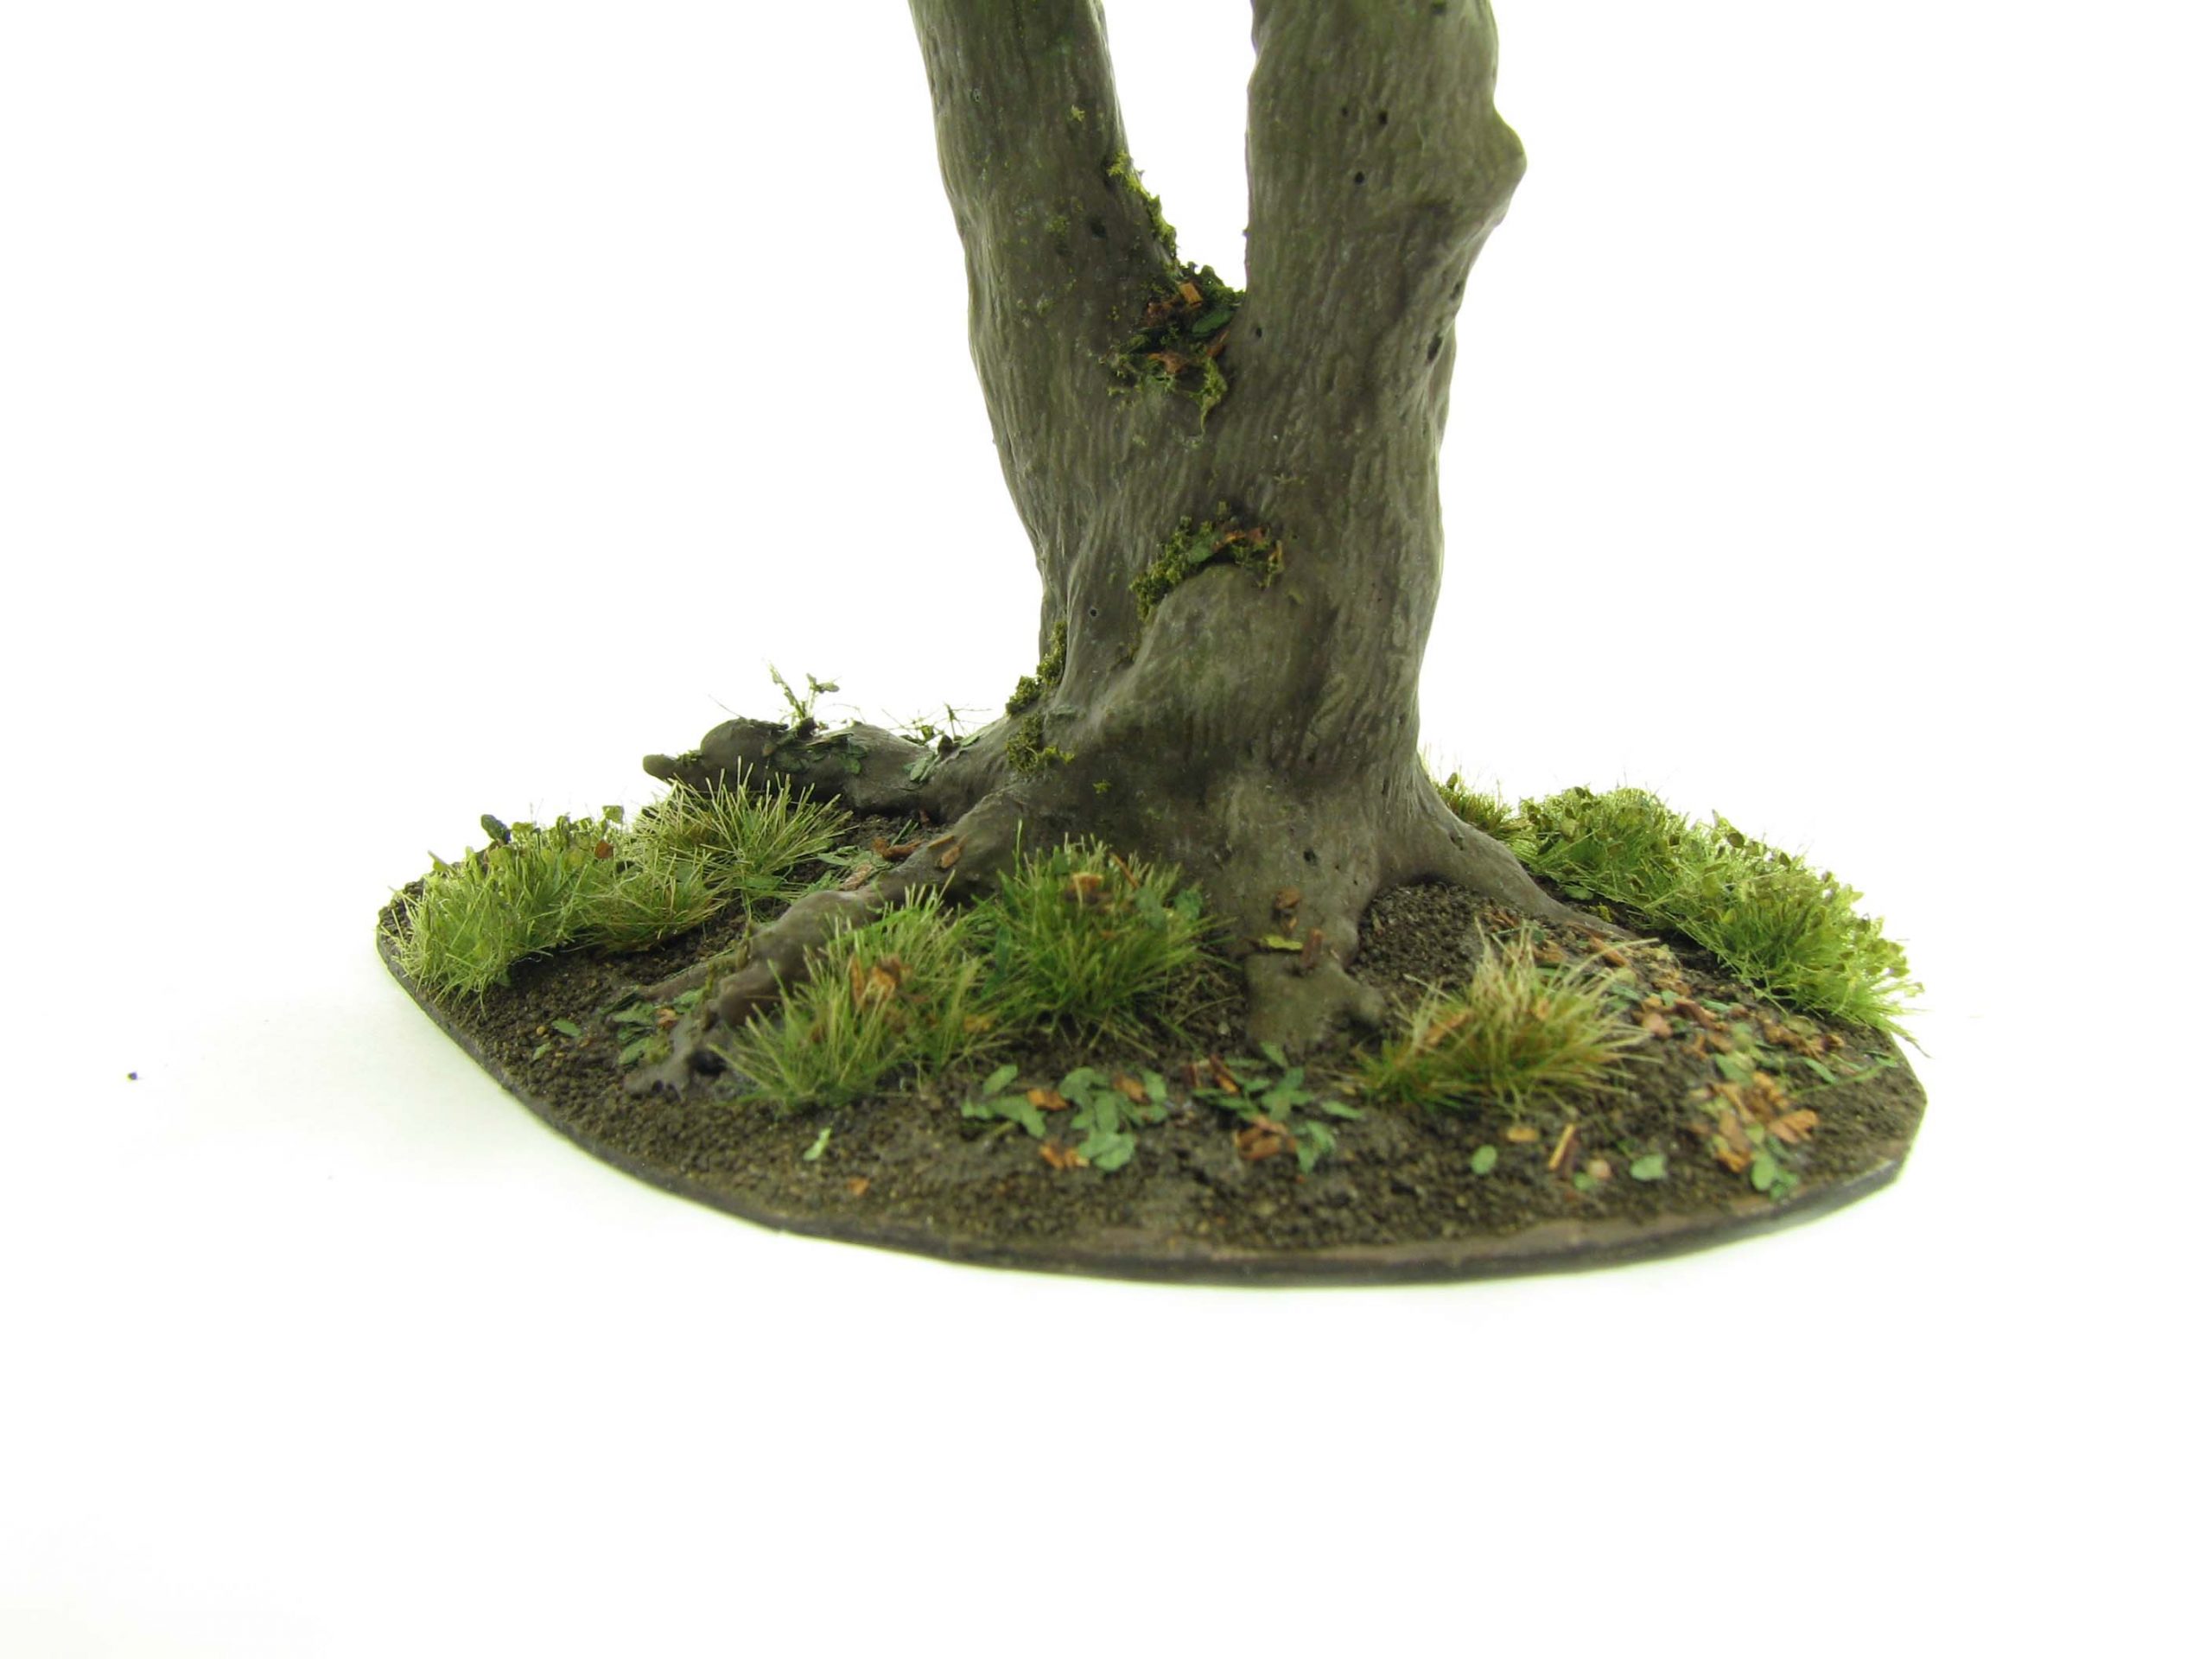
To summarise:
- Use a variety of products to maximise visual interest.
- Use visual hints on the base to emphasise the tree species: e. g. leaves, fruit or critters.
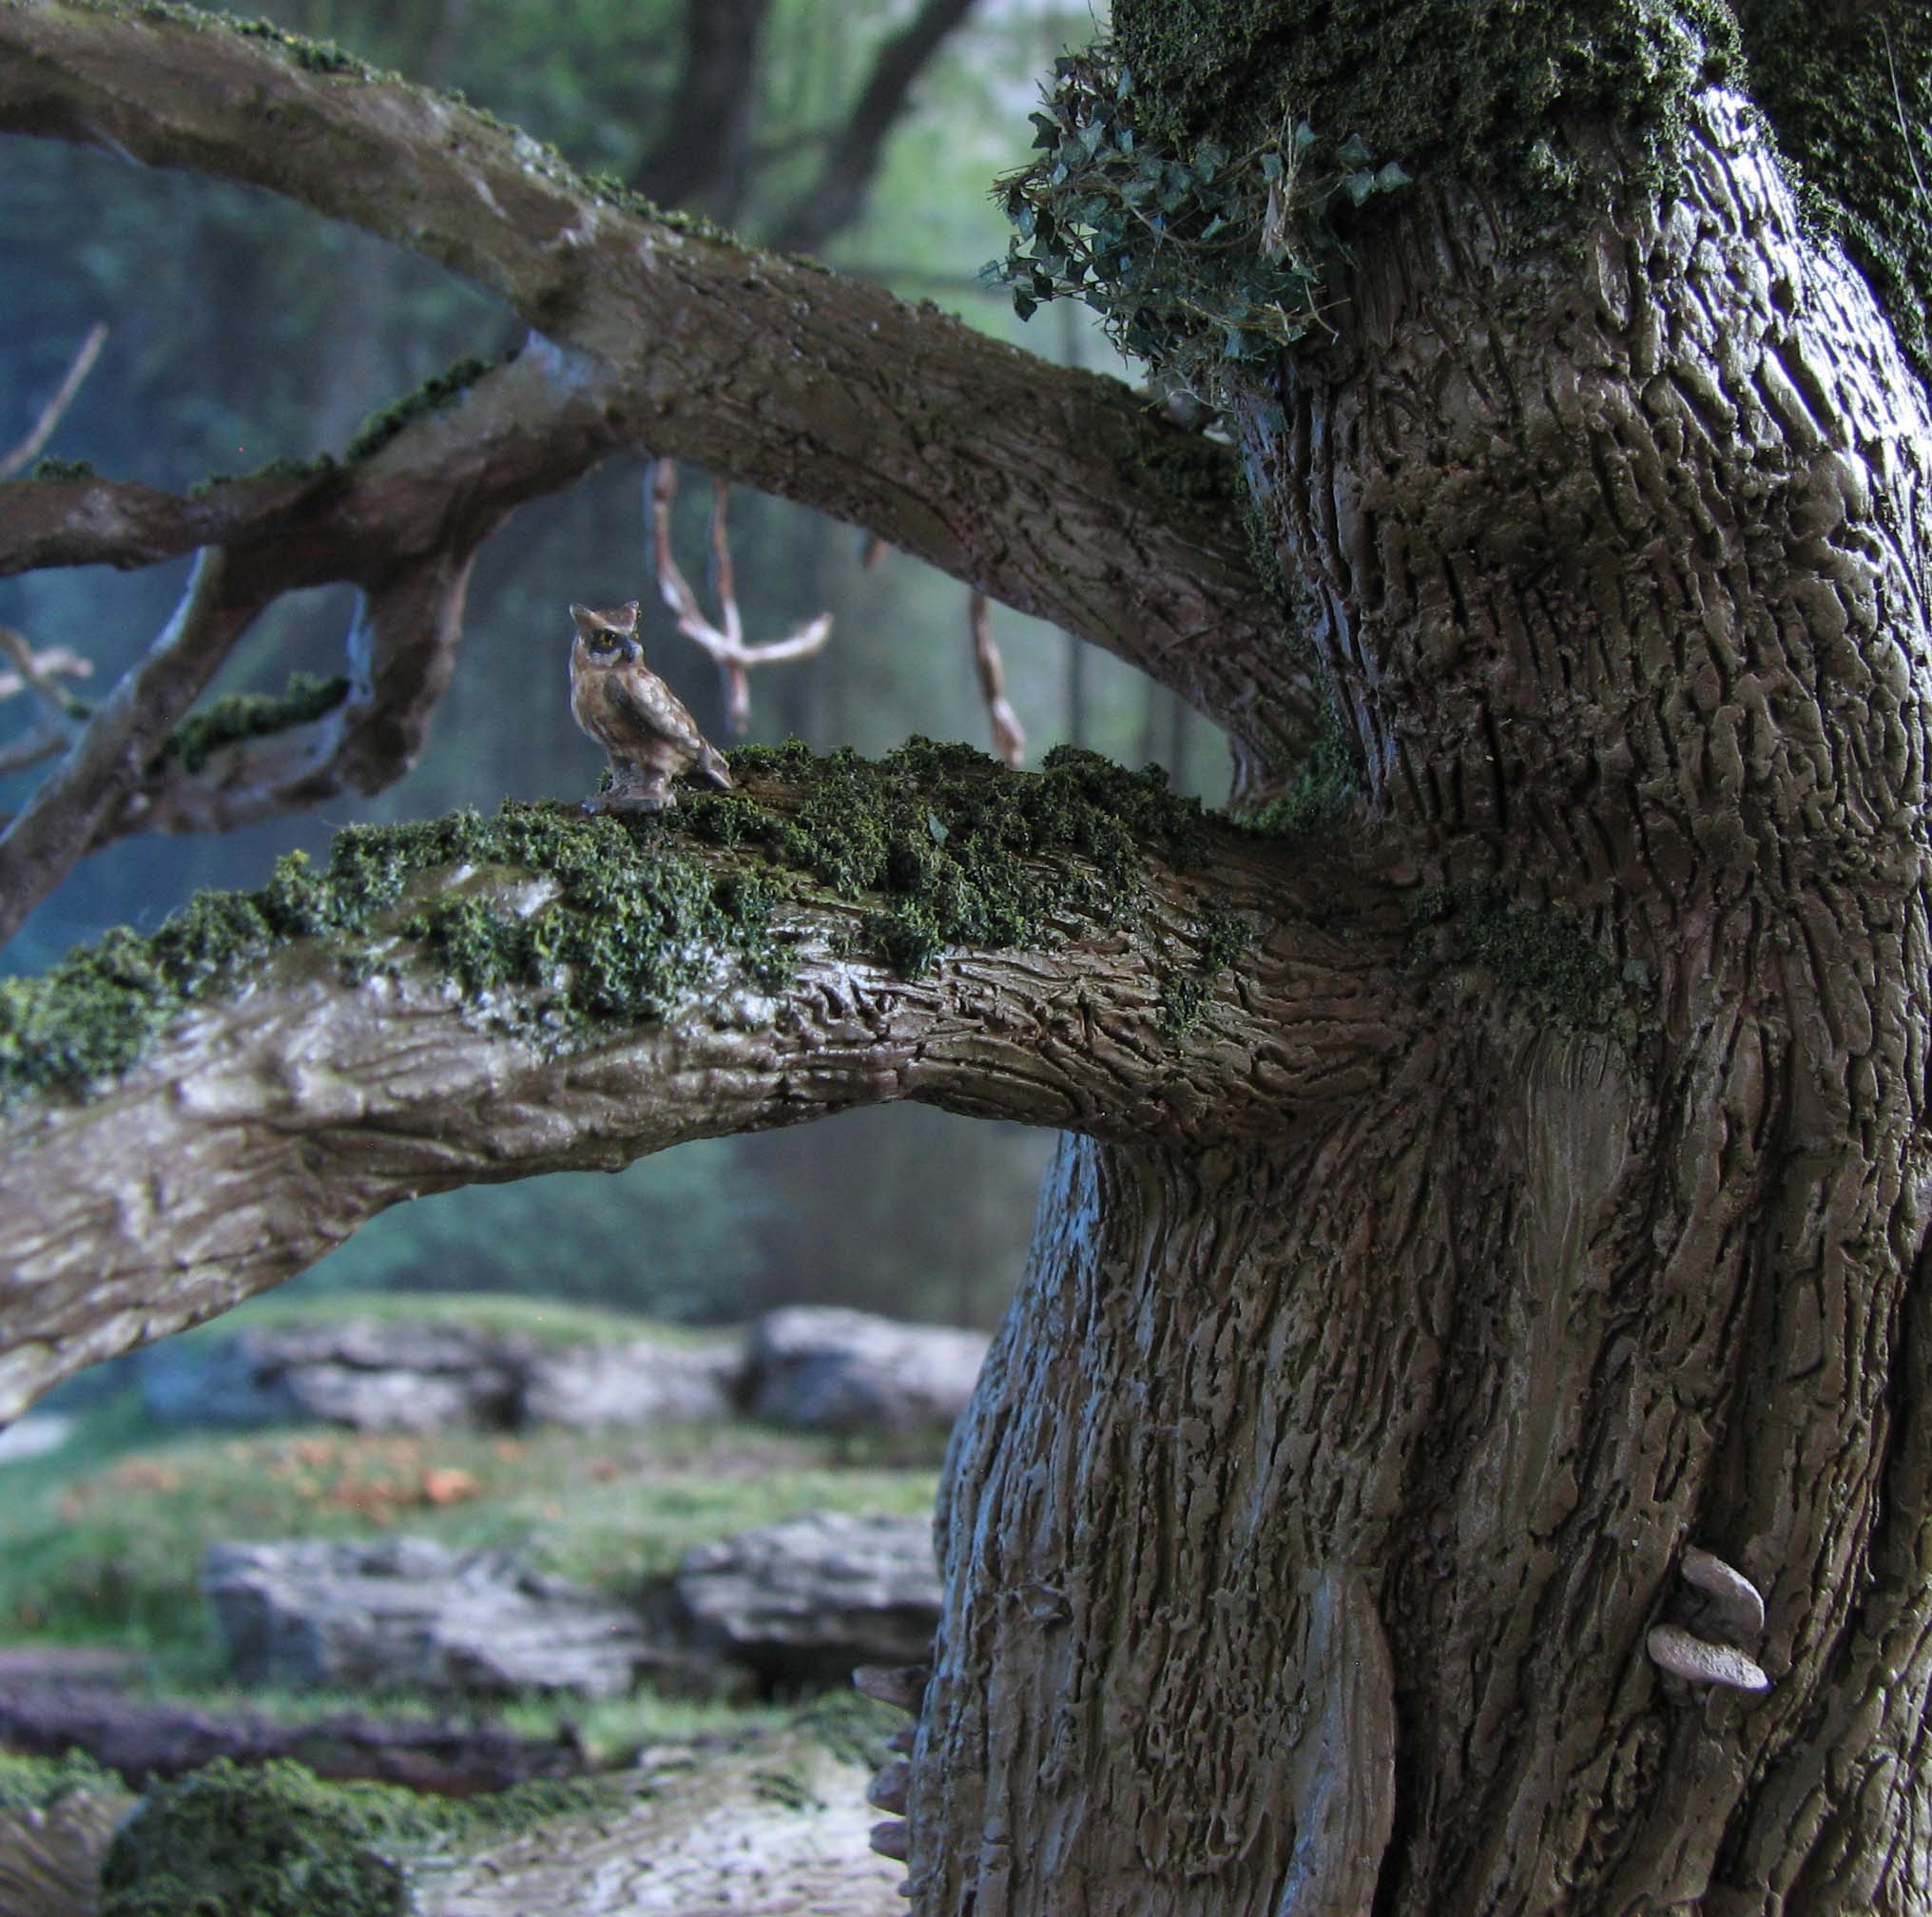
Critters – run for your life!
Critters can be a real problem, especially if you get a spine projectile directly into the face. Gladly our critters are of a much more benign variety: birds, lizards, squirrels, and so on.
Often our model landscapes lack ‘life’. Adding a bird’s nest with eggs, a lizard on a rock or a squirrel coming out of its drey can add the last bit of realism and really finish off a model.
To summarise:
- Adding critters complements any model tree and adds ‘life’ to the gaming table.
- If your trees often feature such details beholders will spend more time looking at your creation making it even more rewarding to make your own trees.
I hope these suggestions were of use to you and give you some ideas how to add that extra bit of realism to your trees. If you have suggestions or questions please comment below.
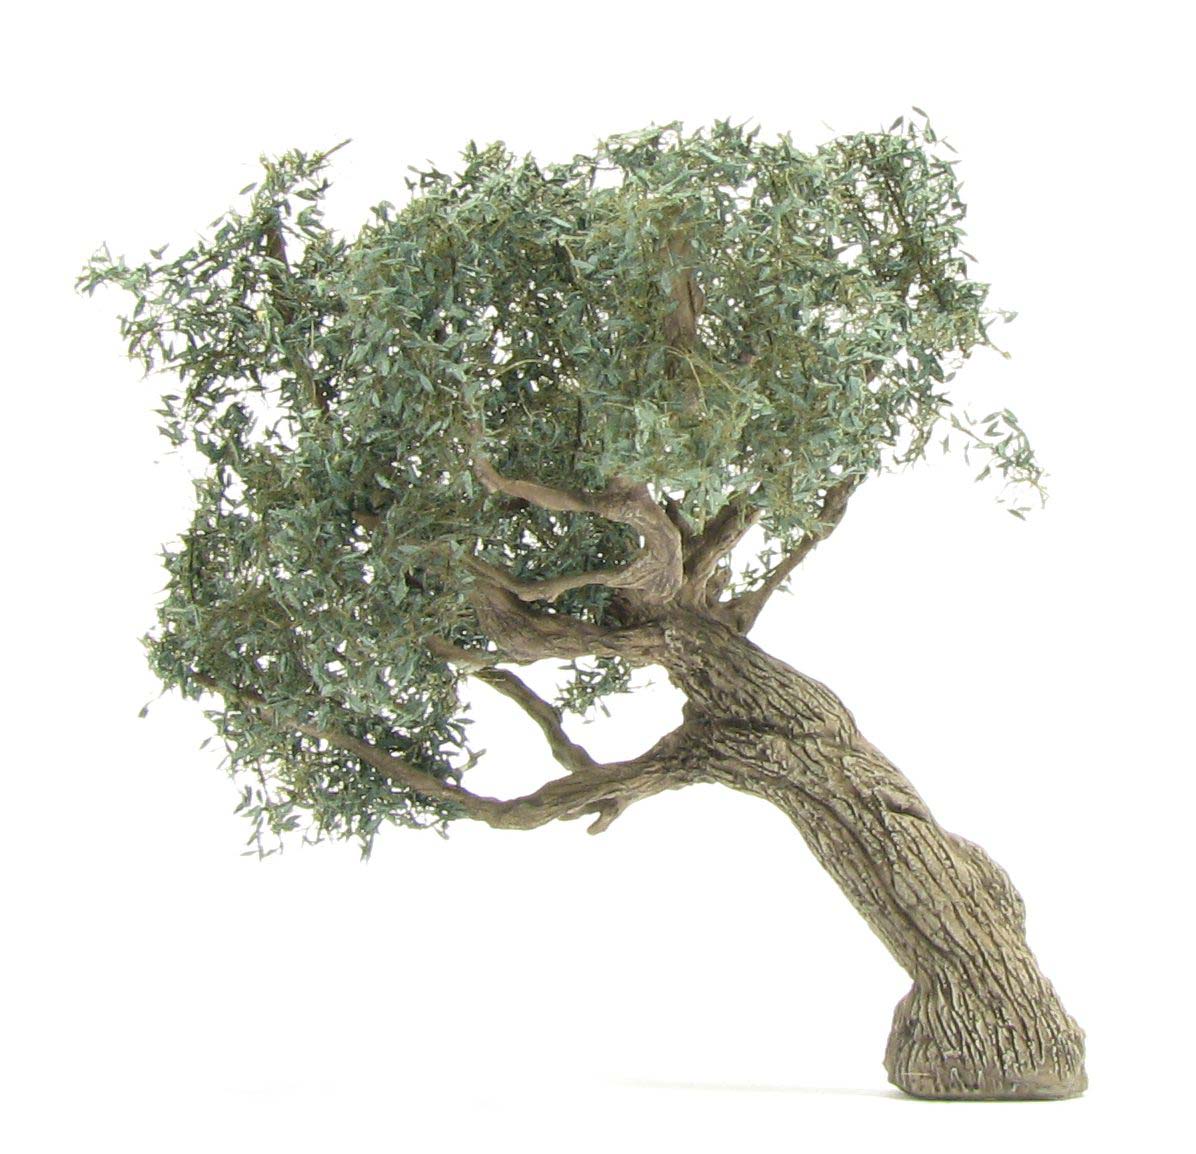
Hi, I bought the MiniNatur Olive Foliage nets but had some trouble applying it. What do you use for branches/shaping the canopy? Do you just use the netting or do you also use something else to put the netting on? Specifically talking about the olive trees.
Fantastic work btw.
Hi Merijn. Thank you for commenting.
If you have trouble shaping the MiniNatur foliage nets you could always add more branches to support them. So either use more wire initially to get more branches to work with or bulk it out with some seafoam / seamoss.
However, what I do for gaming pieces is usually to cut the nets in small triangles and then I tease them apart. I apply some super glue to the branches and drape the nets over them. You get quite some coverage that way and an airy look. Do this a few more time until you are happy.
To lock it all in place I recommend to spray some thinned down PVA over the canopy or use some spray varnish. Idea is to keep the tiny leaves in place while they are handled.
I hope that helps, but feel free to ask if something wasn’t clear.
Cheers
Chris
Superb- critters are definately an essential. I put Xmas tree snowmen on my Bulge forests⛄️
Keep up the good work
Mike
Thank you Mike for commenting. The snowmen idea is great. Might be something for Frostgrave, too. There is an excellent supplier for 28mm in France. Unfortunately they don’t ship internationally at the moment due to Covid. Might br an option later this year.
http://www.minisocles-store.fr/28-animaux
Hi, are you selling these trees?
Hiho, not currently. The time per tree and expectations of customers what a tree should go for did not match up. I thus only make trees for my own projects.
I came here looking for tips on adding bark to some Age or Sigmar Sylvaneth dryads and so on. A refreshingly long winded and considered post! Looking forward to digging a bit more into your blog now!
I see now that I never replied to your comment. Sorry for that, the blog was in suspended hibernation for a while. Glad to read you enjoyed the article. I hole you found some more interesting things to read. I really have to reorganise the blog a tad.
Fantastic advice. Your trees are beautiful little slices of nature in the table top.
Thank you, much obliged. I sometimes enjoy making them more than painting miniatures. Currently I work on some birch trees, quite different to my usual oaks, but visually interesting.
Reblogged this on War Across the Ages, and other dark horrors and commented:
Great advice on building better trees.
[…] Job done. Nothing wrong with that, but with posts by Dagger and Brush on building trees with realistic bark colours resonating in the back of my head, I decided to paint these ones so that they looked a little more […]
I’m with Azazel, I’d never manage to achieve anything quite like this, but I am enjoying reading the tutorials and marvelling at the results. It’s like watching a nature documentary!
Hi Subedai. Glad to read this. I think it is really all about how much time you have at your disposal and what your focus is. I do not get much stuff done in terms of miniature painting, but focus more on terrain pieces. I could see that for one tree you can paint two or three minis. I think in one point I will have all the trees I need and focus more on the painting side.
I always love reading your arboreal-themed posts. While I think I’d do an ok job at best, and not having the time to ever really try my hand at making some of my own, it’s always both entertaining and eye opening to read the thoughts and see the work of someone with such extensive knowledge and skill to match.
Thank you Azazel, much obliged (and flattered). I am glad the aboral themed posts are an entertaining read, even though they may not end up in a project.
Your work is most inspiring indeed. Talking of which, since thinking of Sharp Practice in 10mm scale, I’ve run into realism problem. Have you ever thought how big trees should actually be in various scales? A terrain maker’s challenge. How to build realistic terrain of French Indian war wilderness?
Thank you for commenting Tichy. I think this is a problem that affects any scale, really.
I had to limit the height of the oak trees, not only to keep the material costs reasonable, but also to make them look right both with miniatures and ground scale in mind.
I would say that with 10mm you could try to model the trees in scale, but in the end it will be important if it looks right to you. I think model railroaders normally reduce the scale of trees to make them look in scale with the sourrounding terrain, which normally is scaled down (e. g. mountain ranges, dimensions of houses etc.). I think this is a good strategy for our gaming tables, too.
Maybe fashion some wire armatures and see how they look like with the 10mm miniatures and the sourrounding terrain. If they tower over everything they will likely look out of scale, even though they might be perfectly in scale.
Given you may need to depict some wilderness areas I would suggest to use trees that can be mounted using magnets, as described in my earlier tutorial. This way you can always take them away or rearrange them should units move through heavily forested areas.
Very natural looking trees both in shape and textures. Your colors look great also. Thanks for sharing and they get better every time. I have learned a lot of technique reading your tutorials.
Thank you for your comment Daniel. Glad the tutorials are of use to you. It is true that I am always keen to improve on my designs and techniques, only catch is that I am often very critical of my older creations.
I’m really impressed by the techniques, thought, and effort you put in to breathe life into the trees. I’ll have to try some out with my next set of trees I work on.
You are welcome Brian. I am very interested in your take on trees.
Btw, did you make it ok through the earthquake I heard about? Hope all is well!
Thank you for your concern Mark. Yes, all is well. Auckland was not really affected by the quake and seldomly is (instead it is built on non-active volcanoes, but not a fault line). I am sad that once again a quake led to casualties, but also glad that this one did not have such devastating effects as the Christchurch quake years ago.
Wow, I’m in awe of your work. Truly beautiful!
Glad you like the oaks and other assorted trees Mark. I hope the tips might prove useful for your own work.