
Last time we looked at a simple method to make realistic wargaming trees using just seamoss, a bit of wood filler and foliage nets, but there are more advanced techniques that will yield even more realistic results suitable for the gaming table and a diorama alike. Naturally this comes at a price: the time involvement is much higher. The entire process will take you a good three evenings (including overnight drying times).
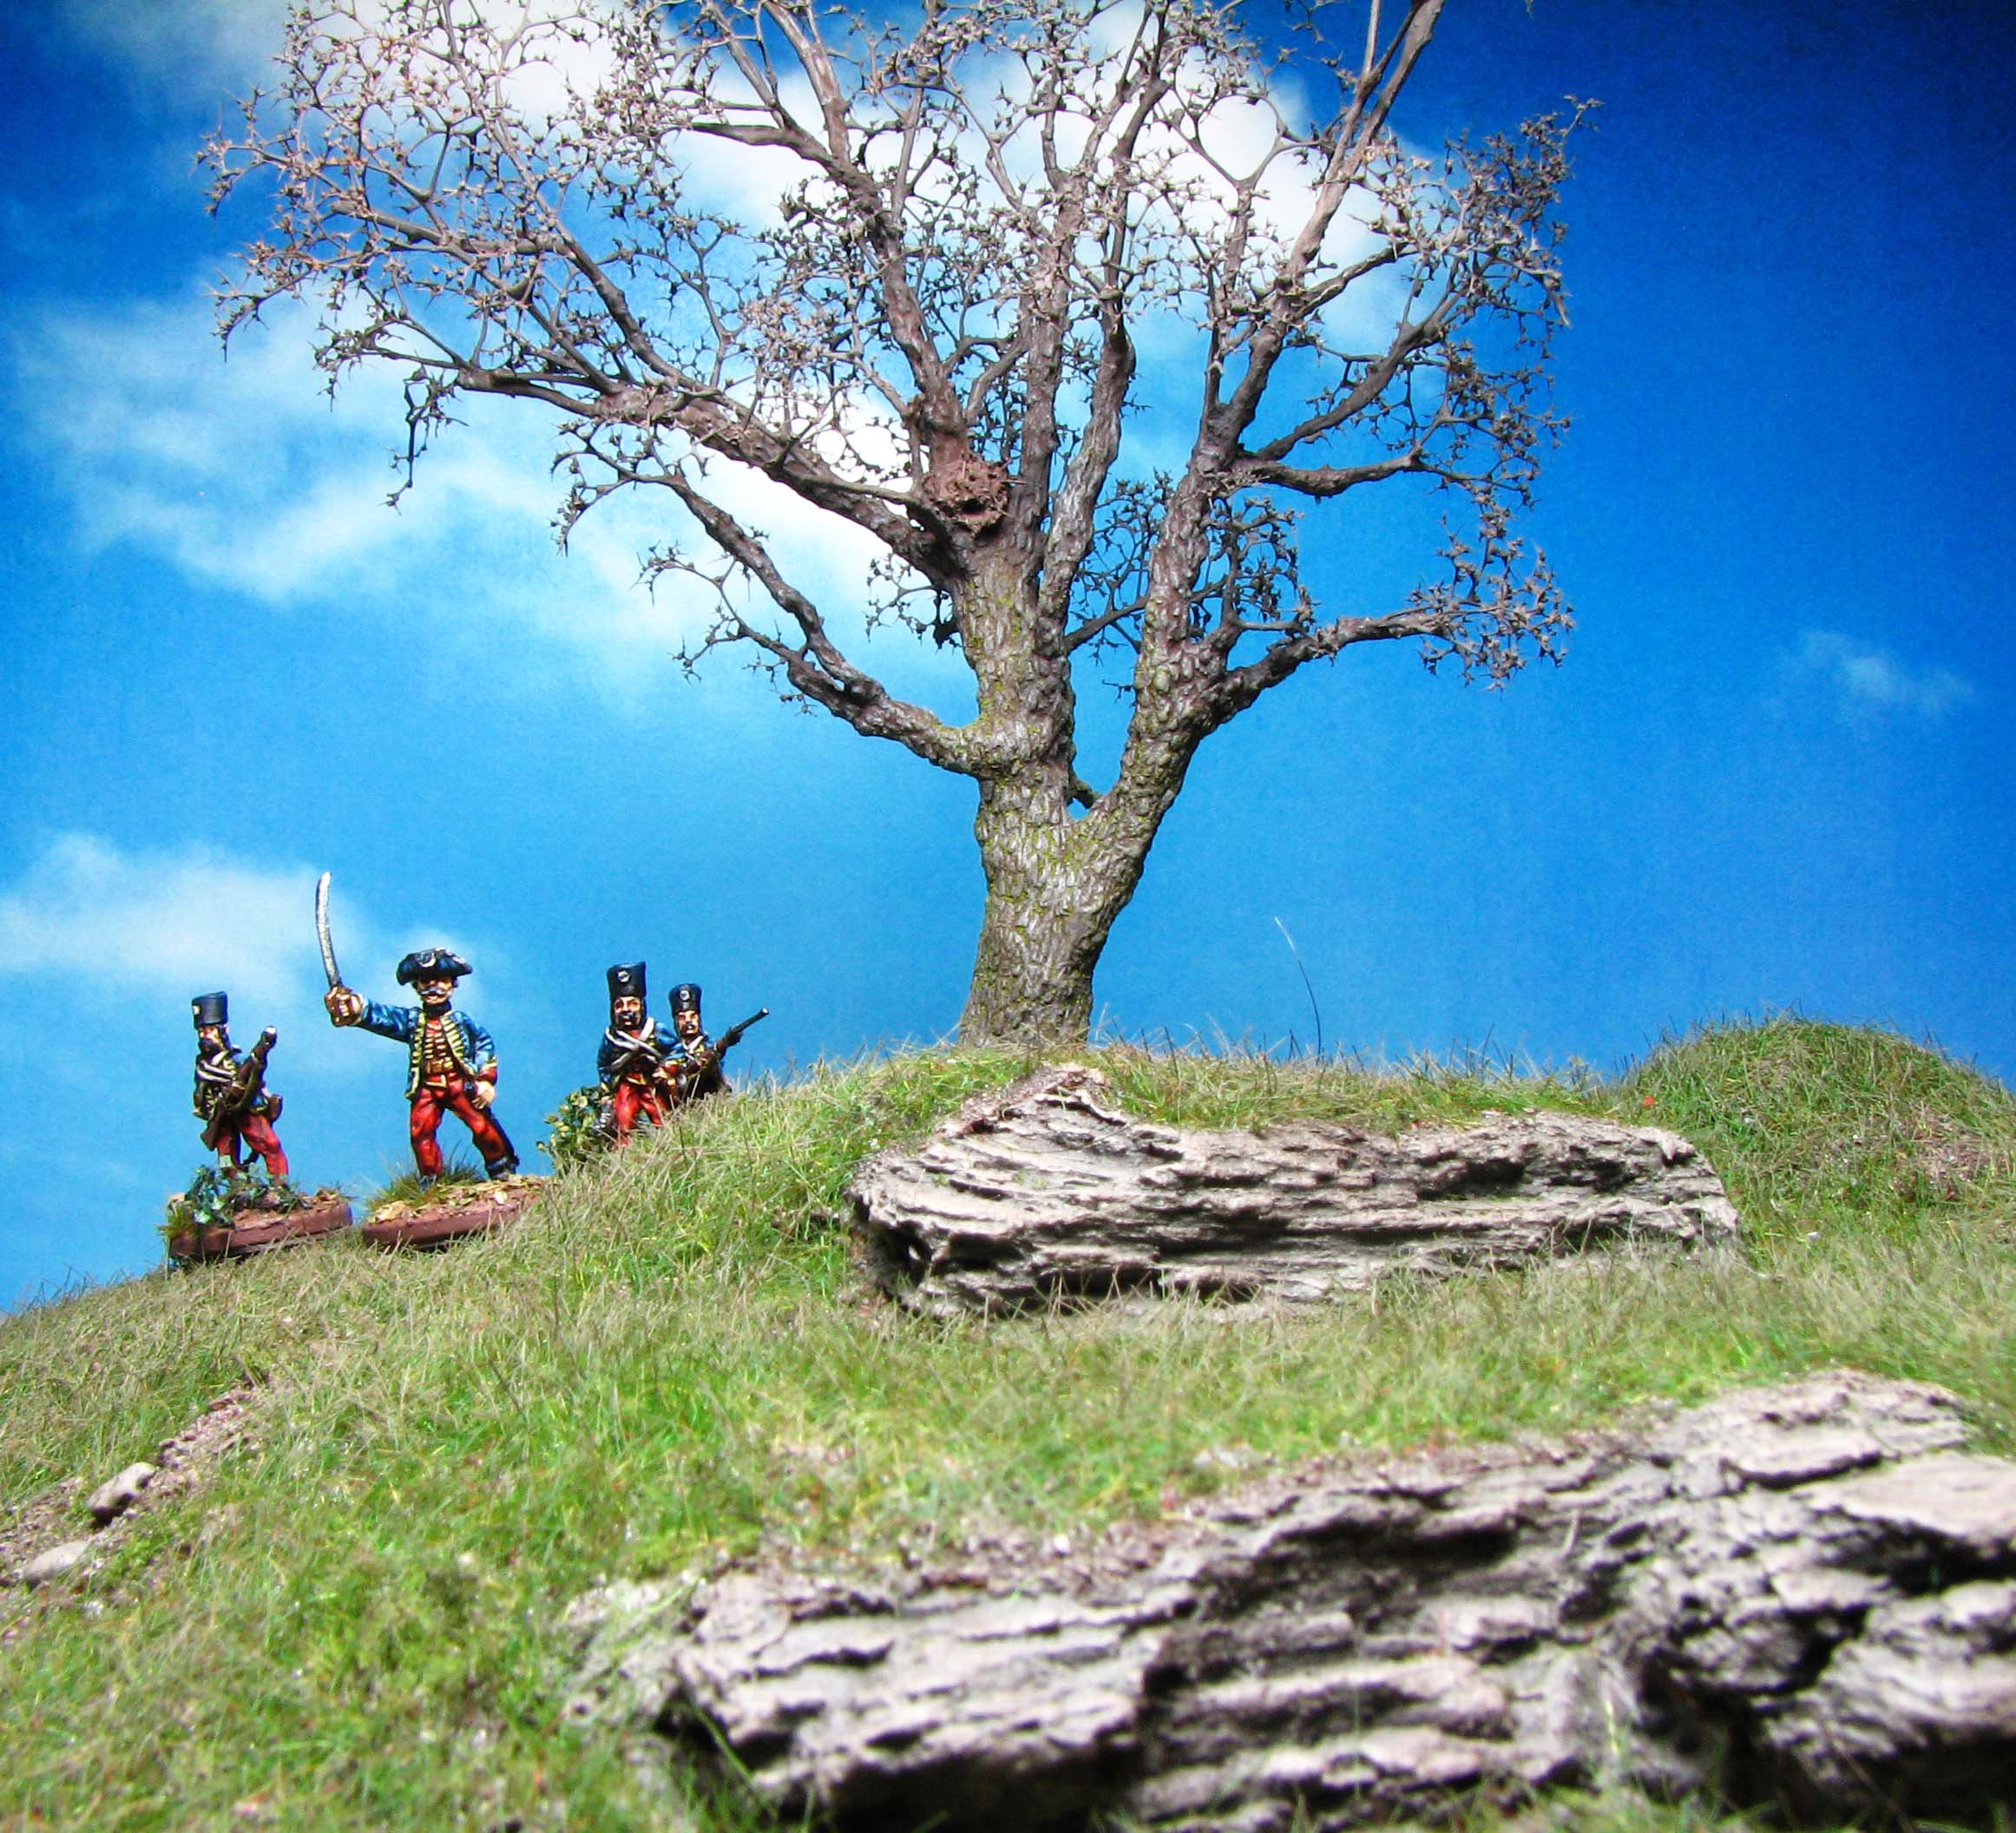
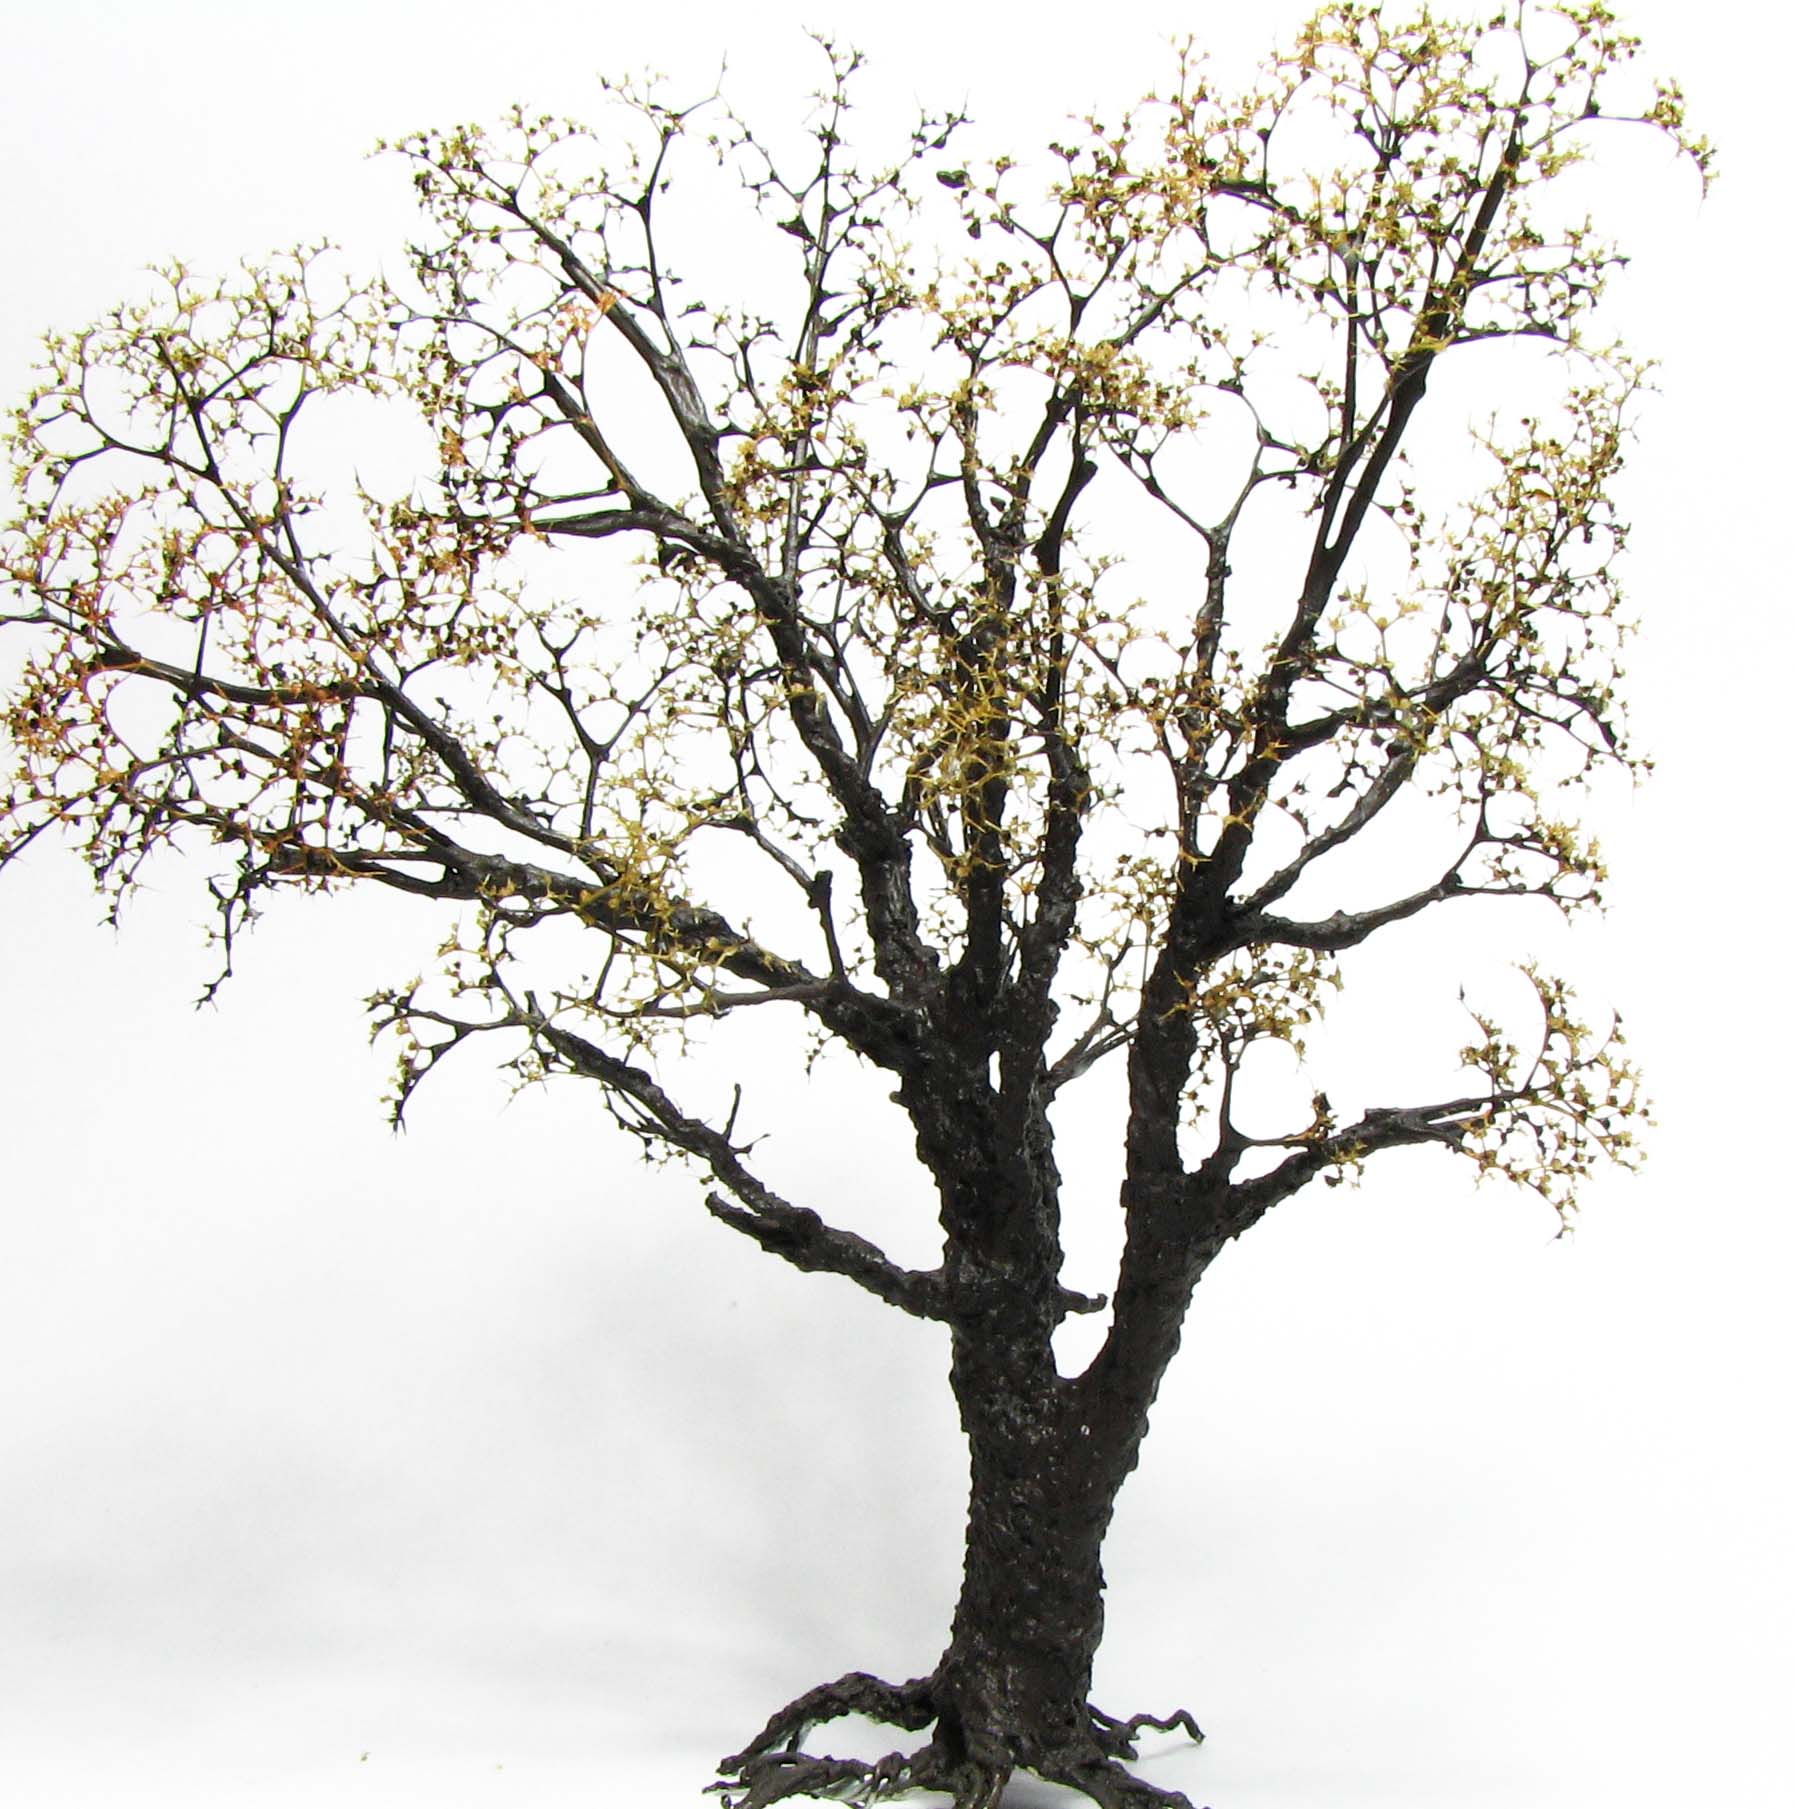
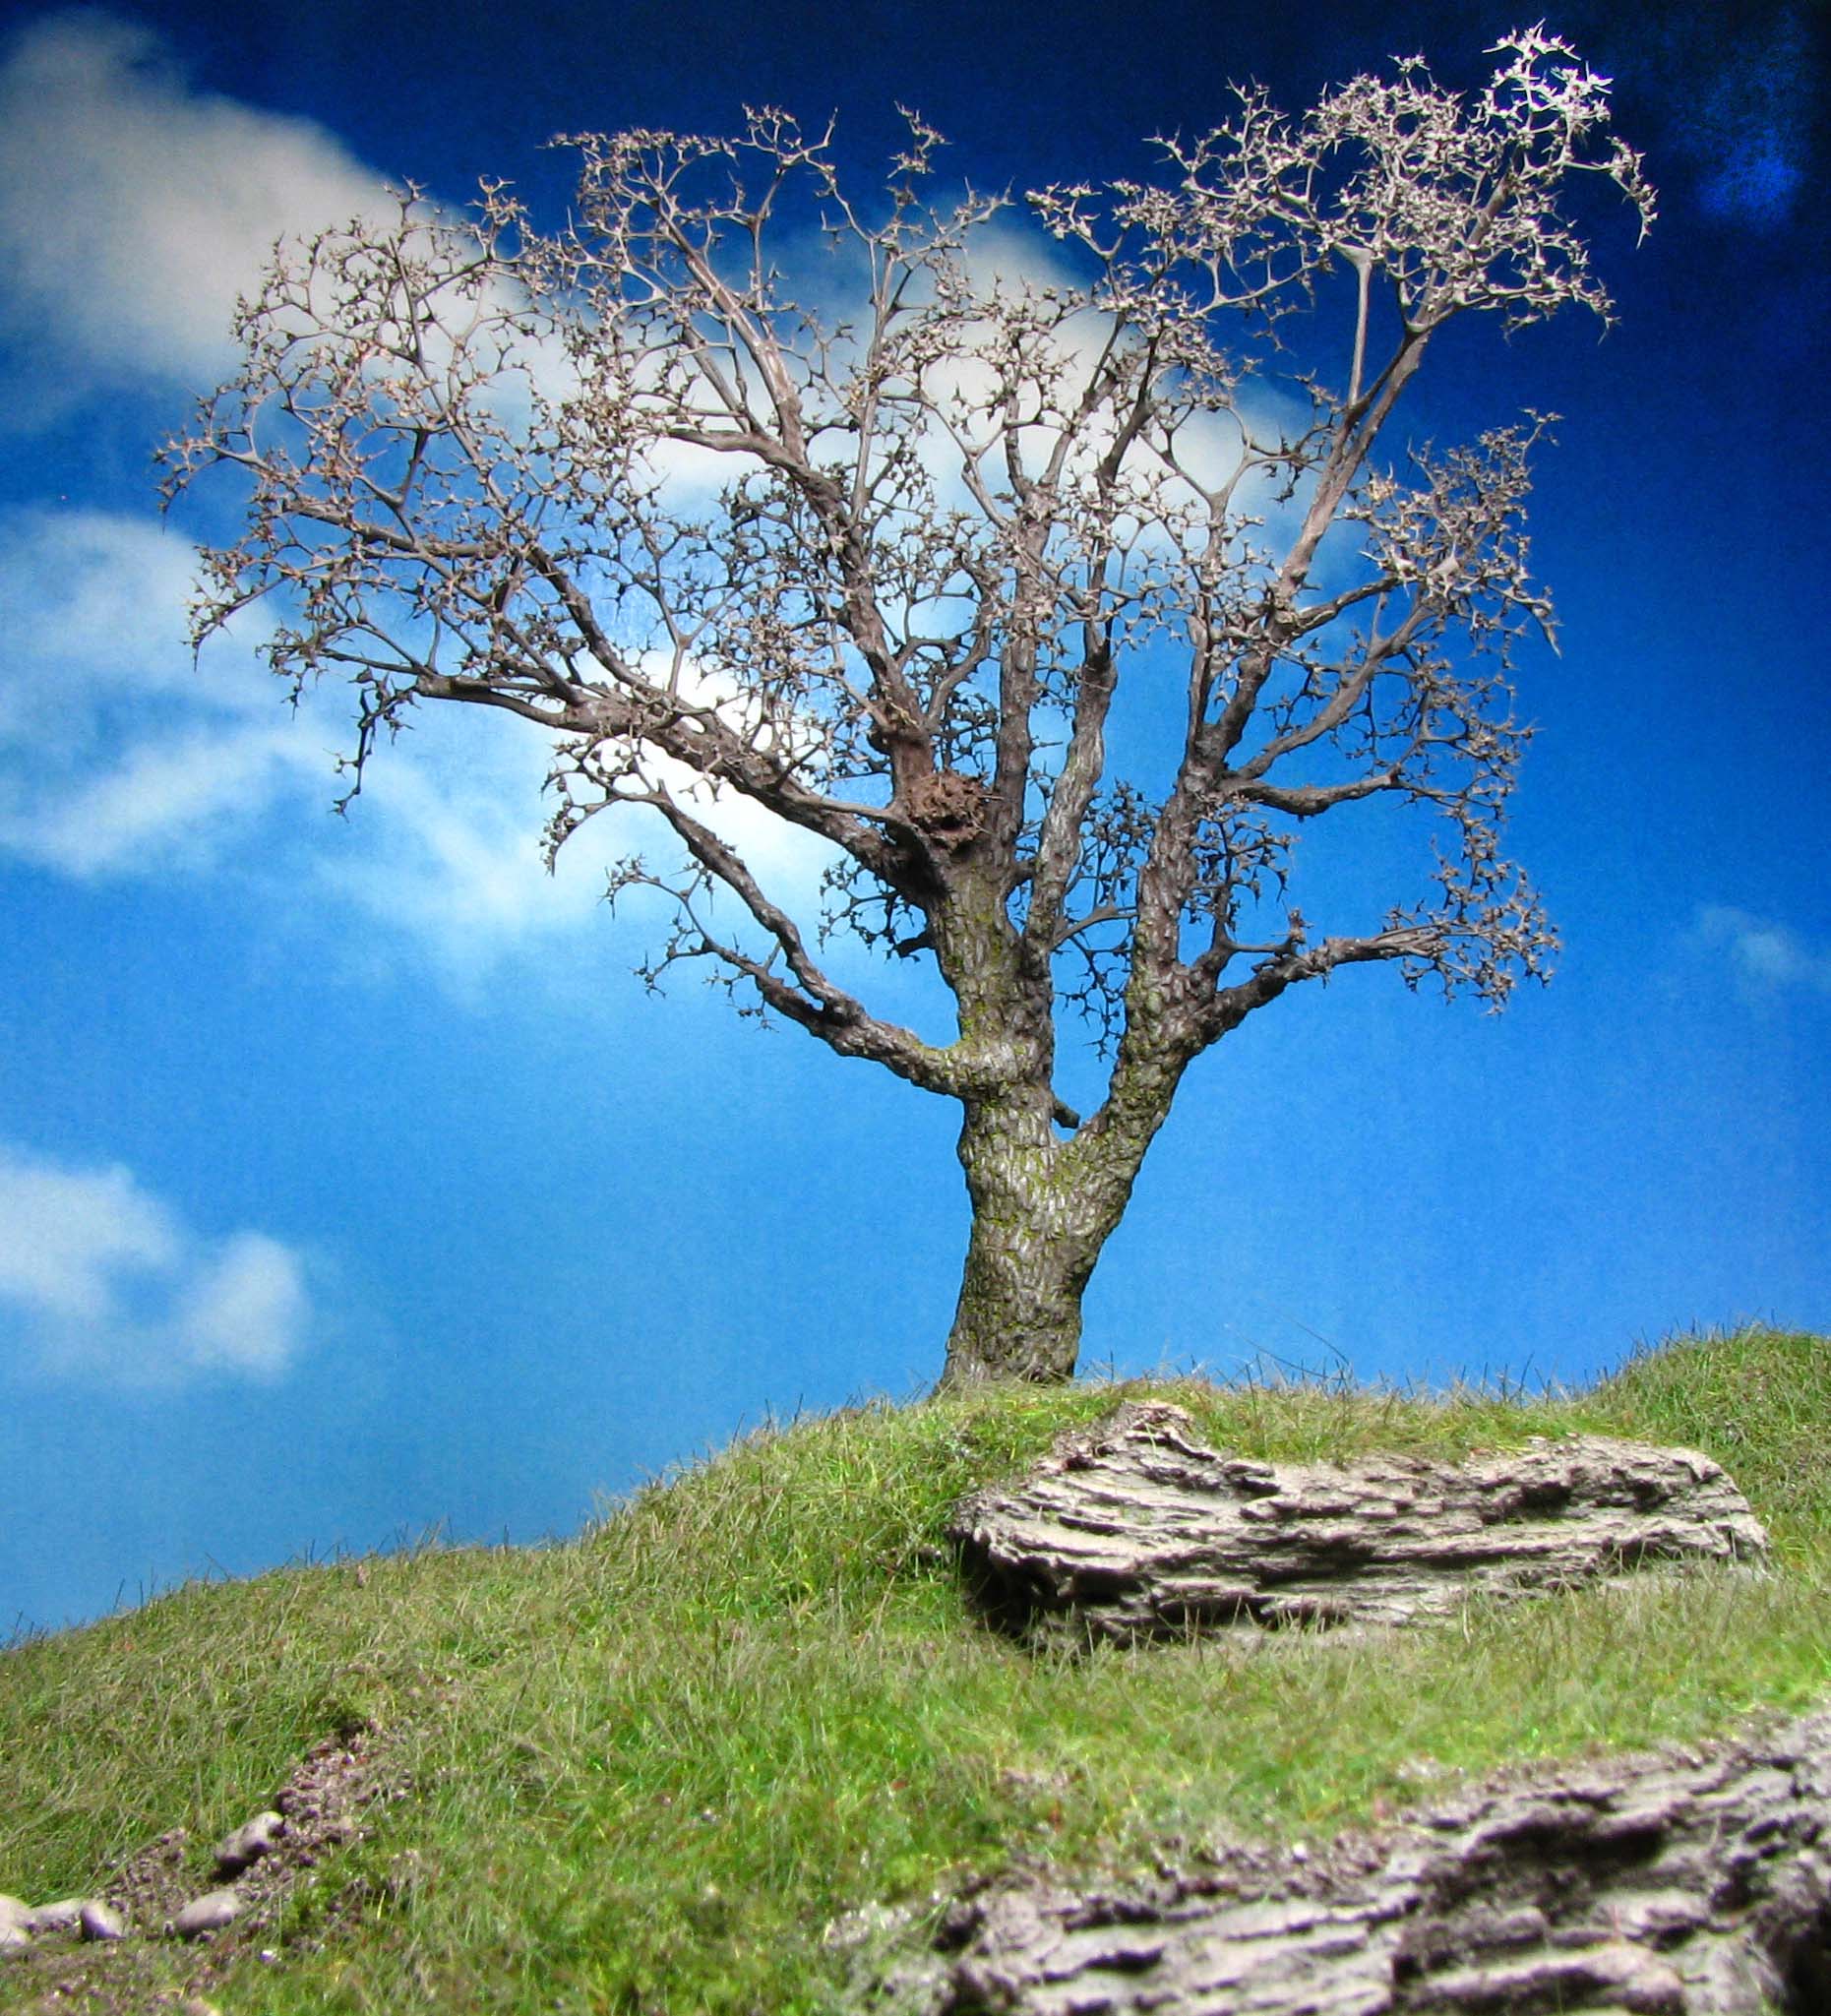
This time the tree of choice is an old oak tree. We expand on the idea of utilising seamoss in first making a tree armature out of wire to have a sturdy set of main branches. Then we attach seamoss to depict the finer branches closer to the top of the crown. Finally, we will add the distinctive bark texture. This way we achieve a tree suitable for a winter themed gaming table or diorama. Due to its wire skeleton the tree holds up well to the trials and tribulations of the gaming table, too. Naturally, the fine seamoss tops are prone to breakage if handled roughly. If you add some foliage nets this protects the seamoss and will make the tree more resilient. Foliage and further details will be added in part two of this tutorial.
Facts about oak trees
Oaks are large deciduous trees that can grow to an impressive size, with a stem circumference of up to 12 metres. For our oak tree we will, however, go for some more modest dimensions, to make it compatible with both 28mm and 15mm and to not use up too much foliage. The genus quercus includes a variety of different species, but we will model the archetypical oak tree quercus robur, also called English oak or German oak.
The short-stalked leaves have characteristic lobes, while the fruit is commonly refered to as acorns. To get the leaves look right we will need to employ MiniNatur foliage nets. To save money and also show off the intricate branches the late autumn foliage, applied sparingly, is a good choice.

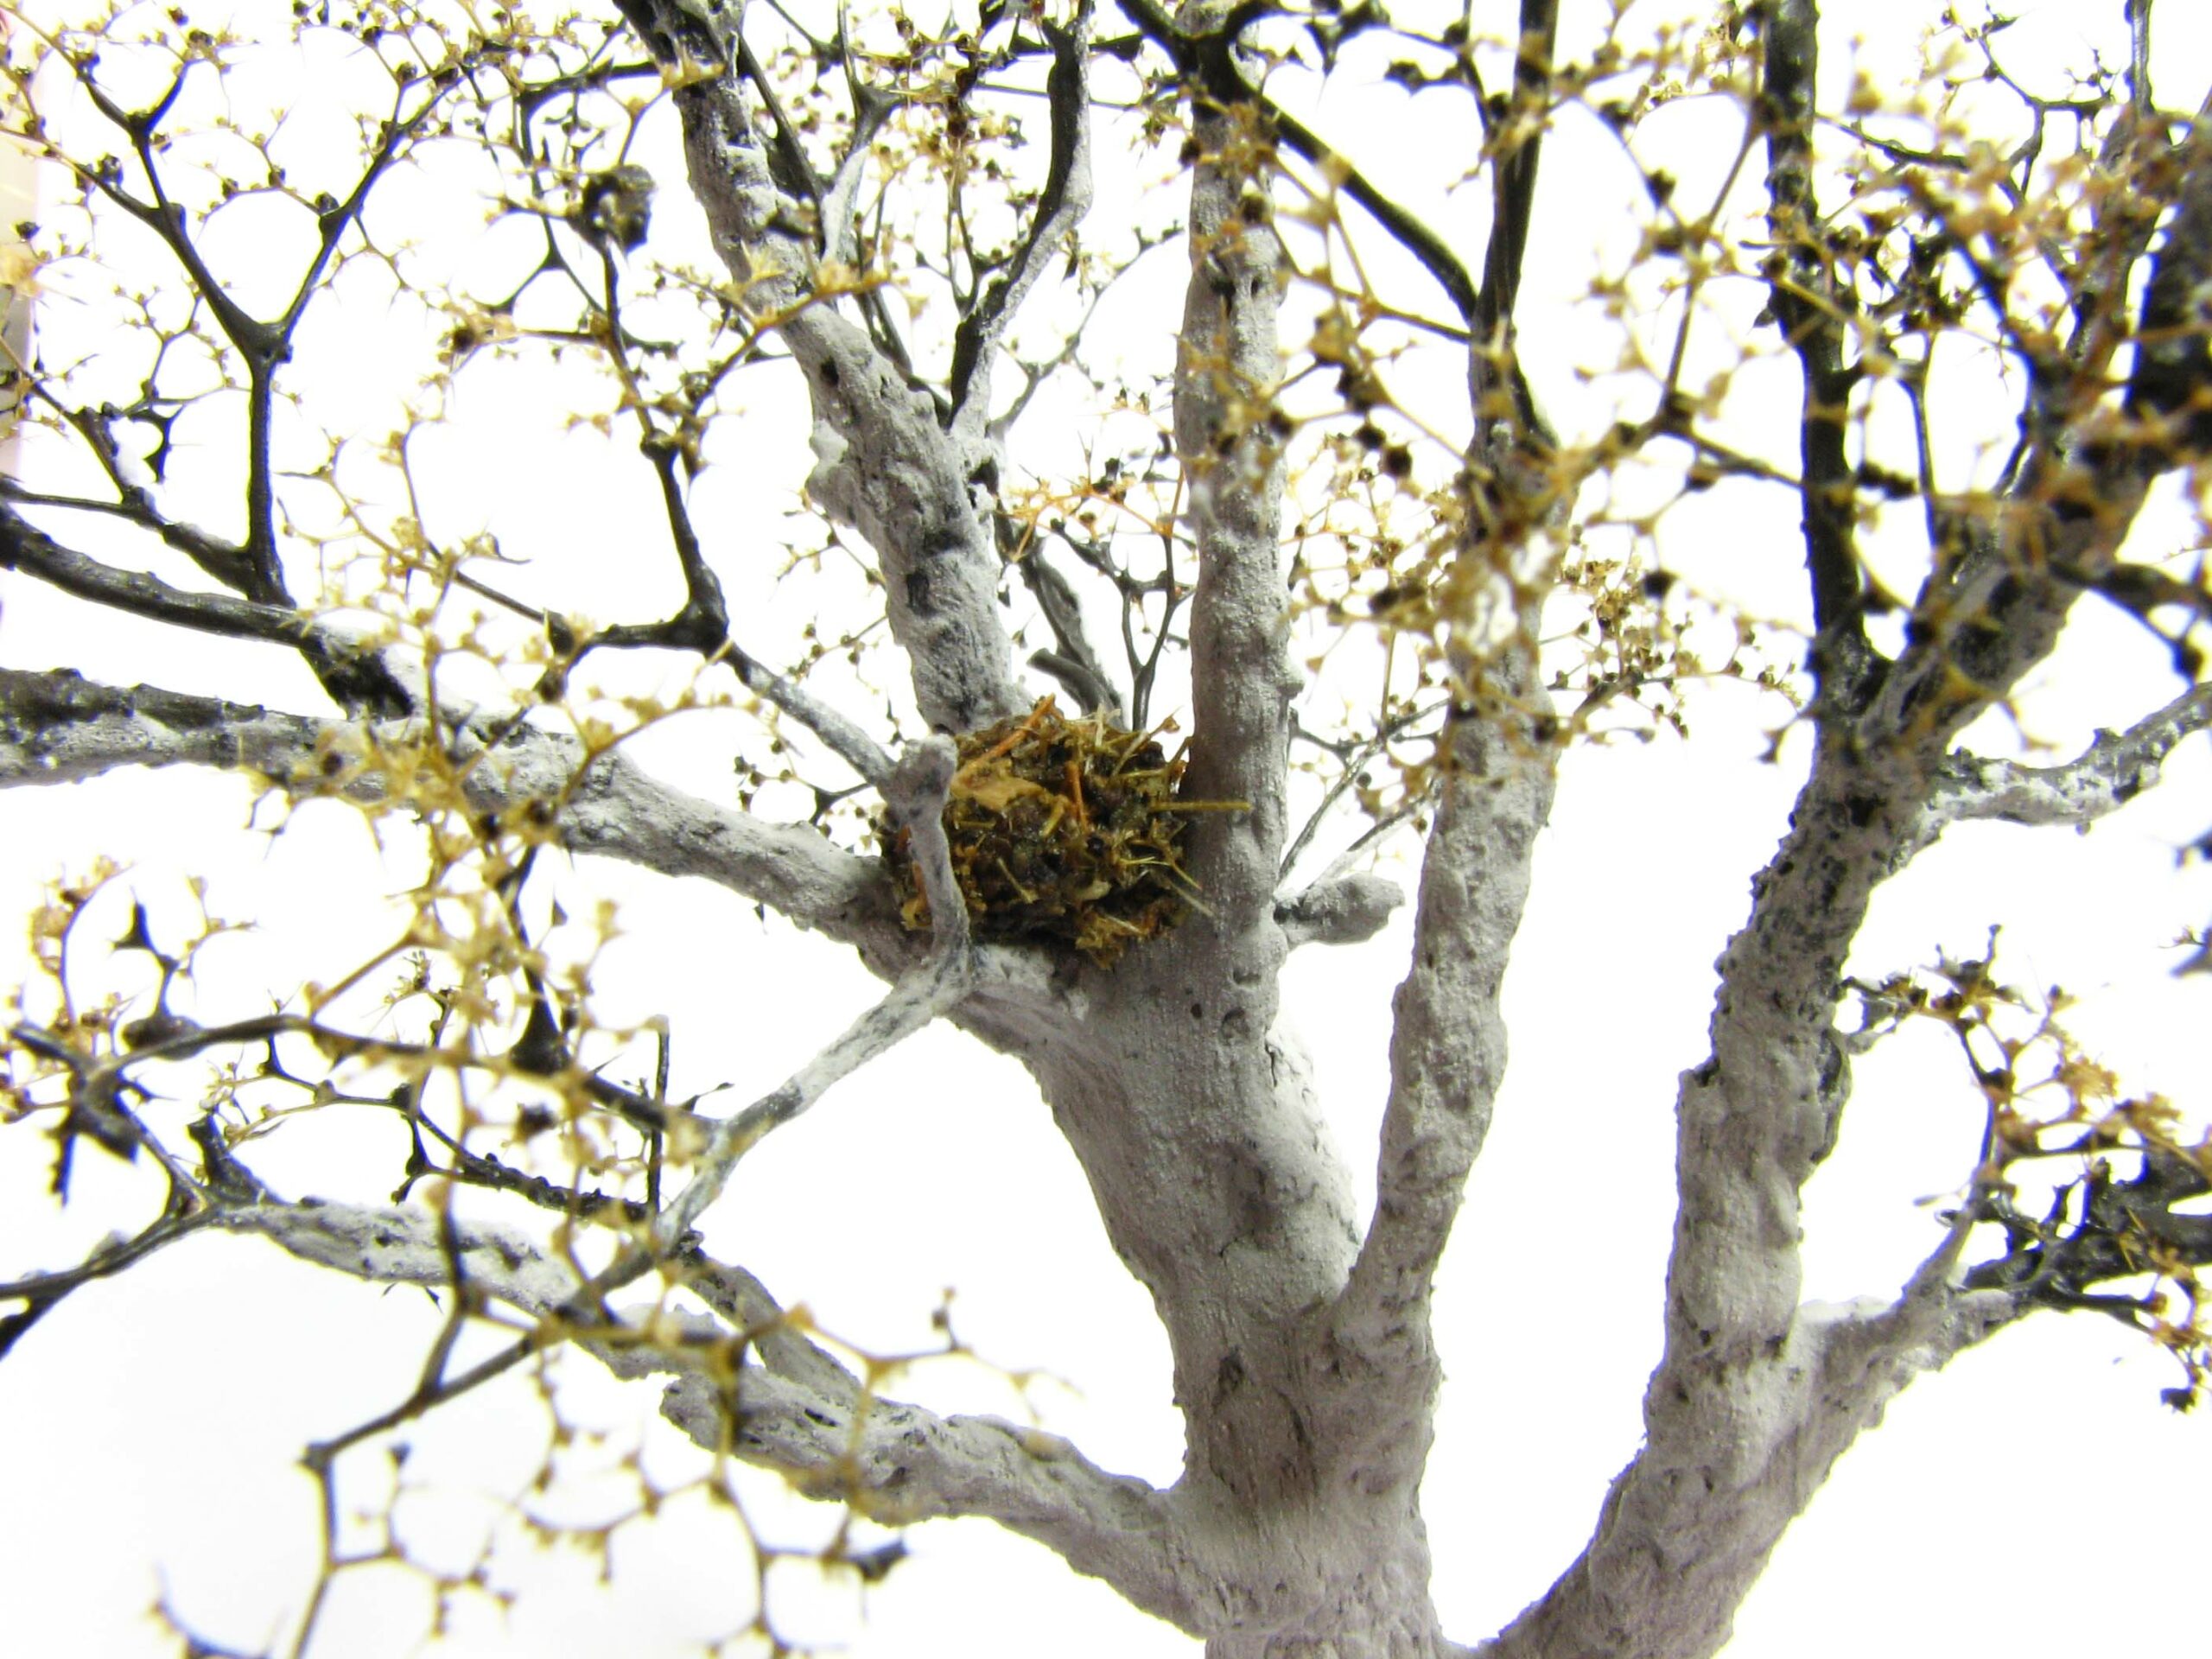
The acorns provide a good food source for all kinds of woodland critters, so I decided to add a squirrel drey further up the crown. Squirrels are active all year round, so no matter if the tree is barren or features foliage, we can have a couple sitting on the branches. A drey is normally constructed out of twigs, moss and leaves on a suitable branch and has a diameter of about 30cm. The entry is located on its bottom.

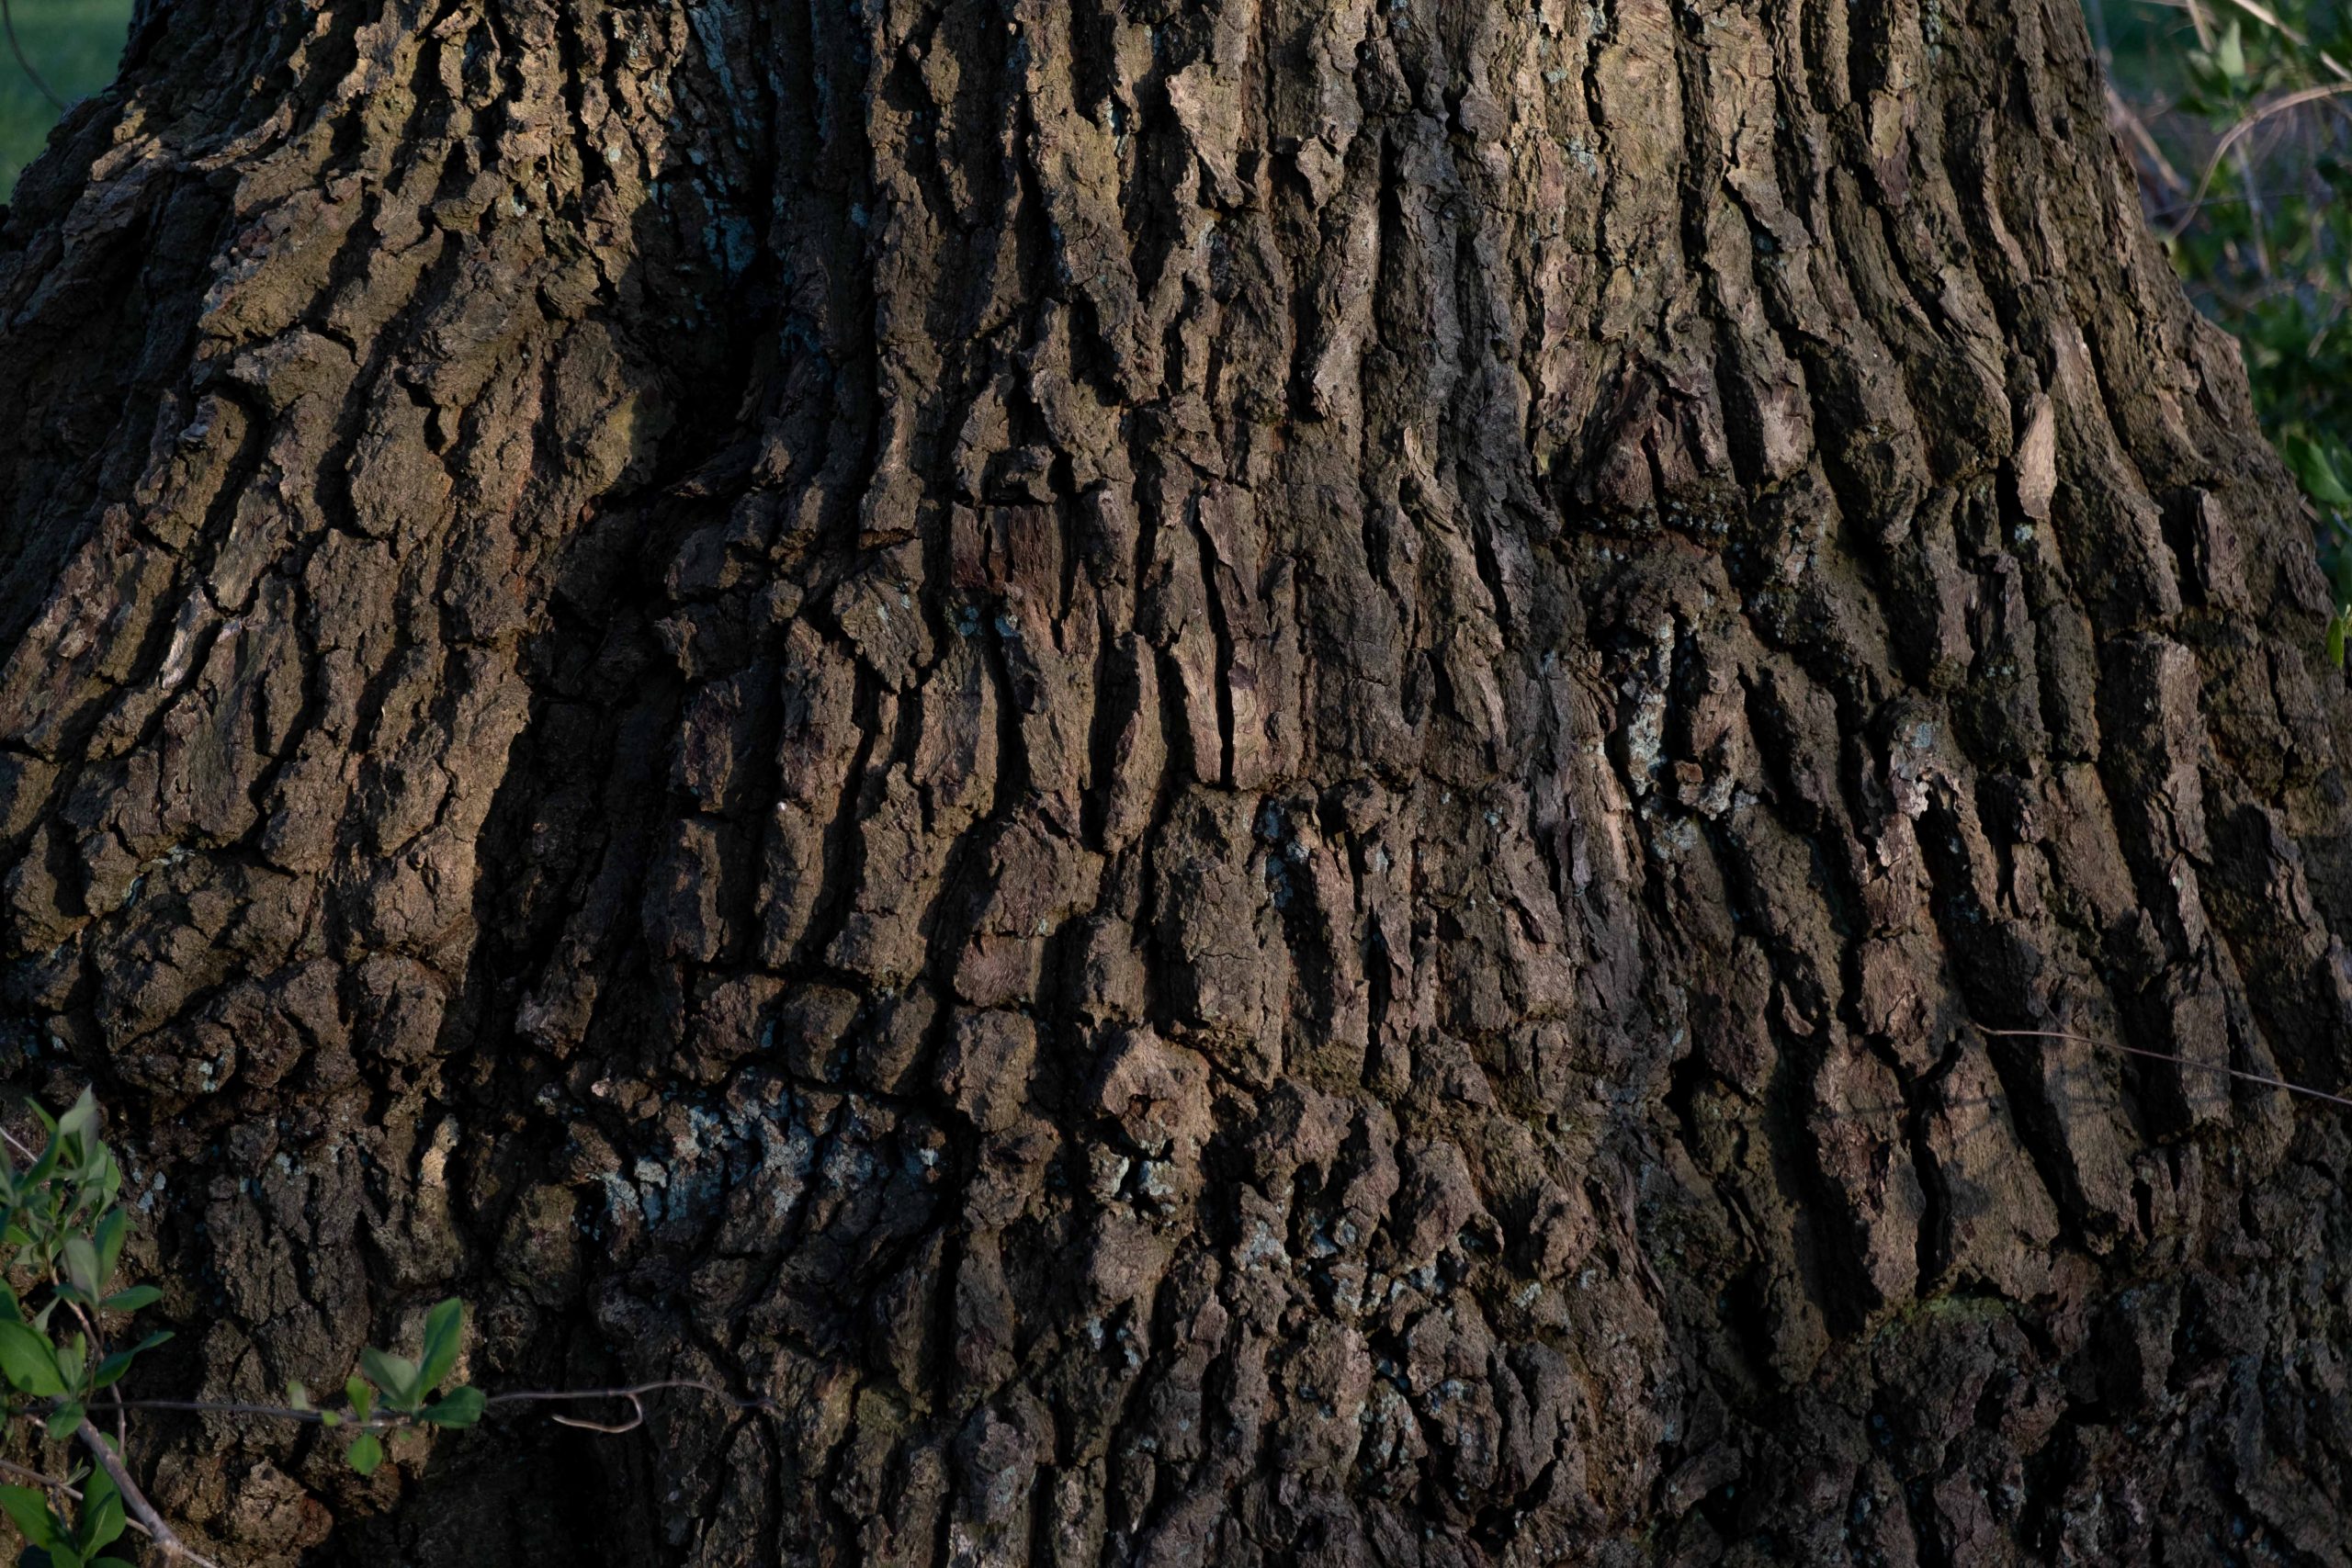
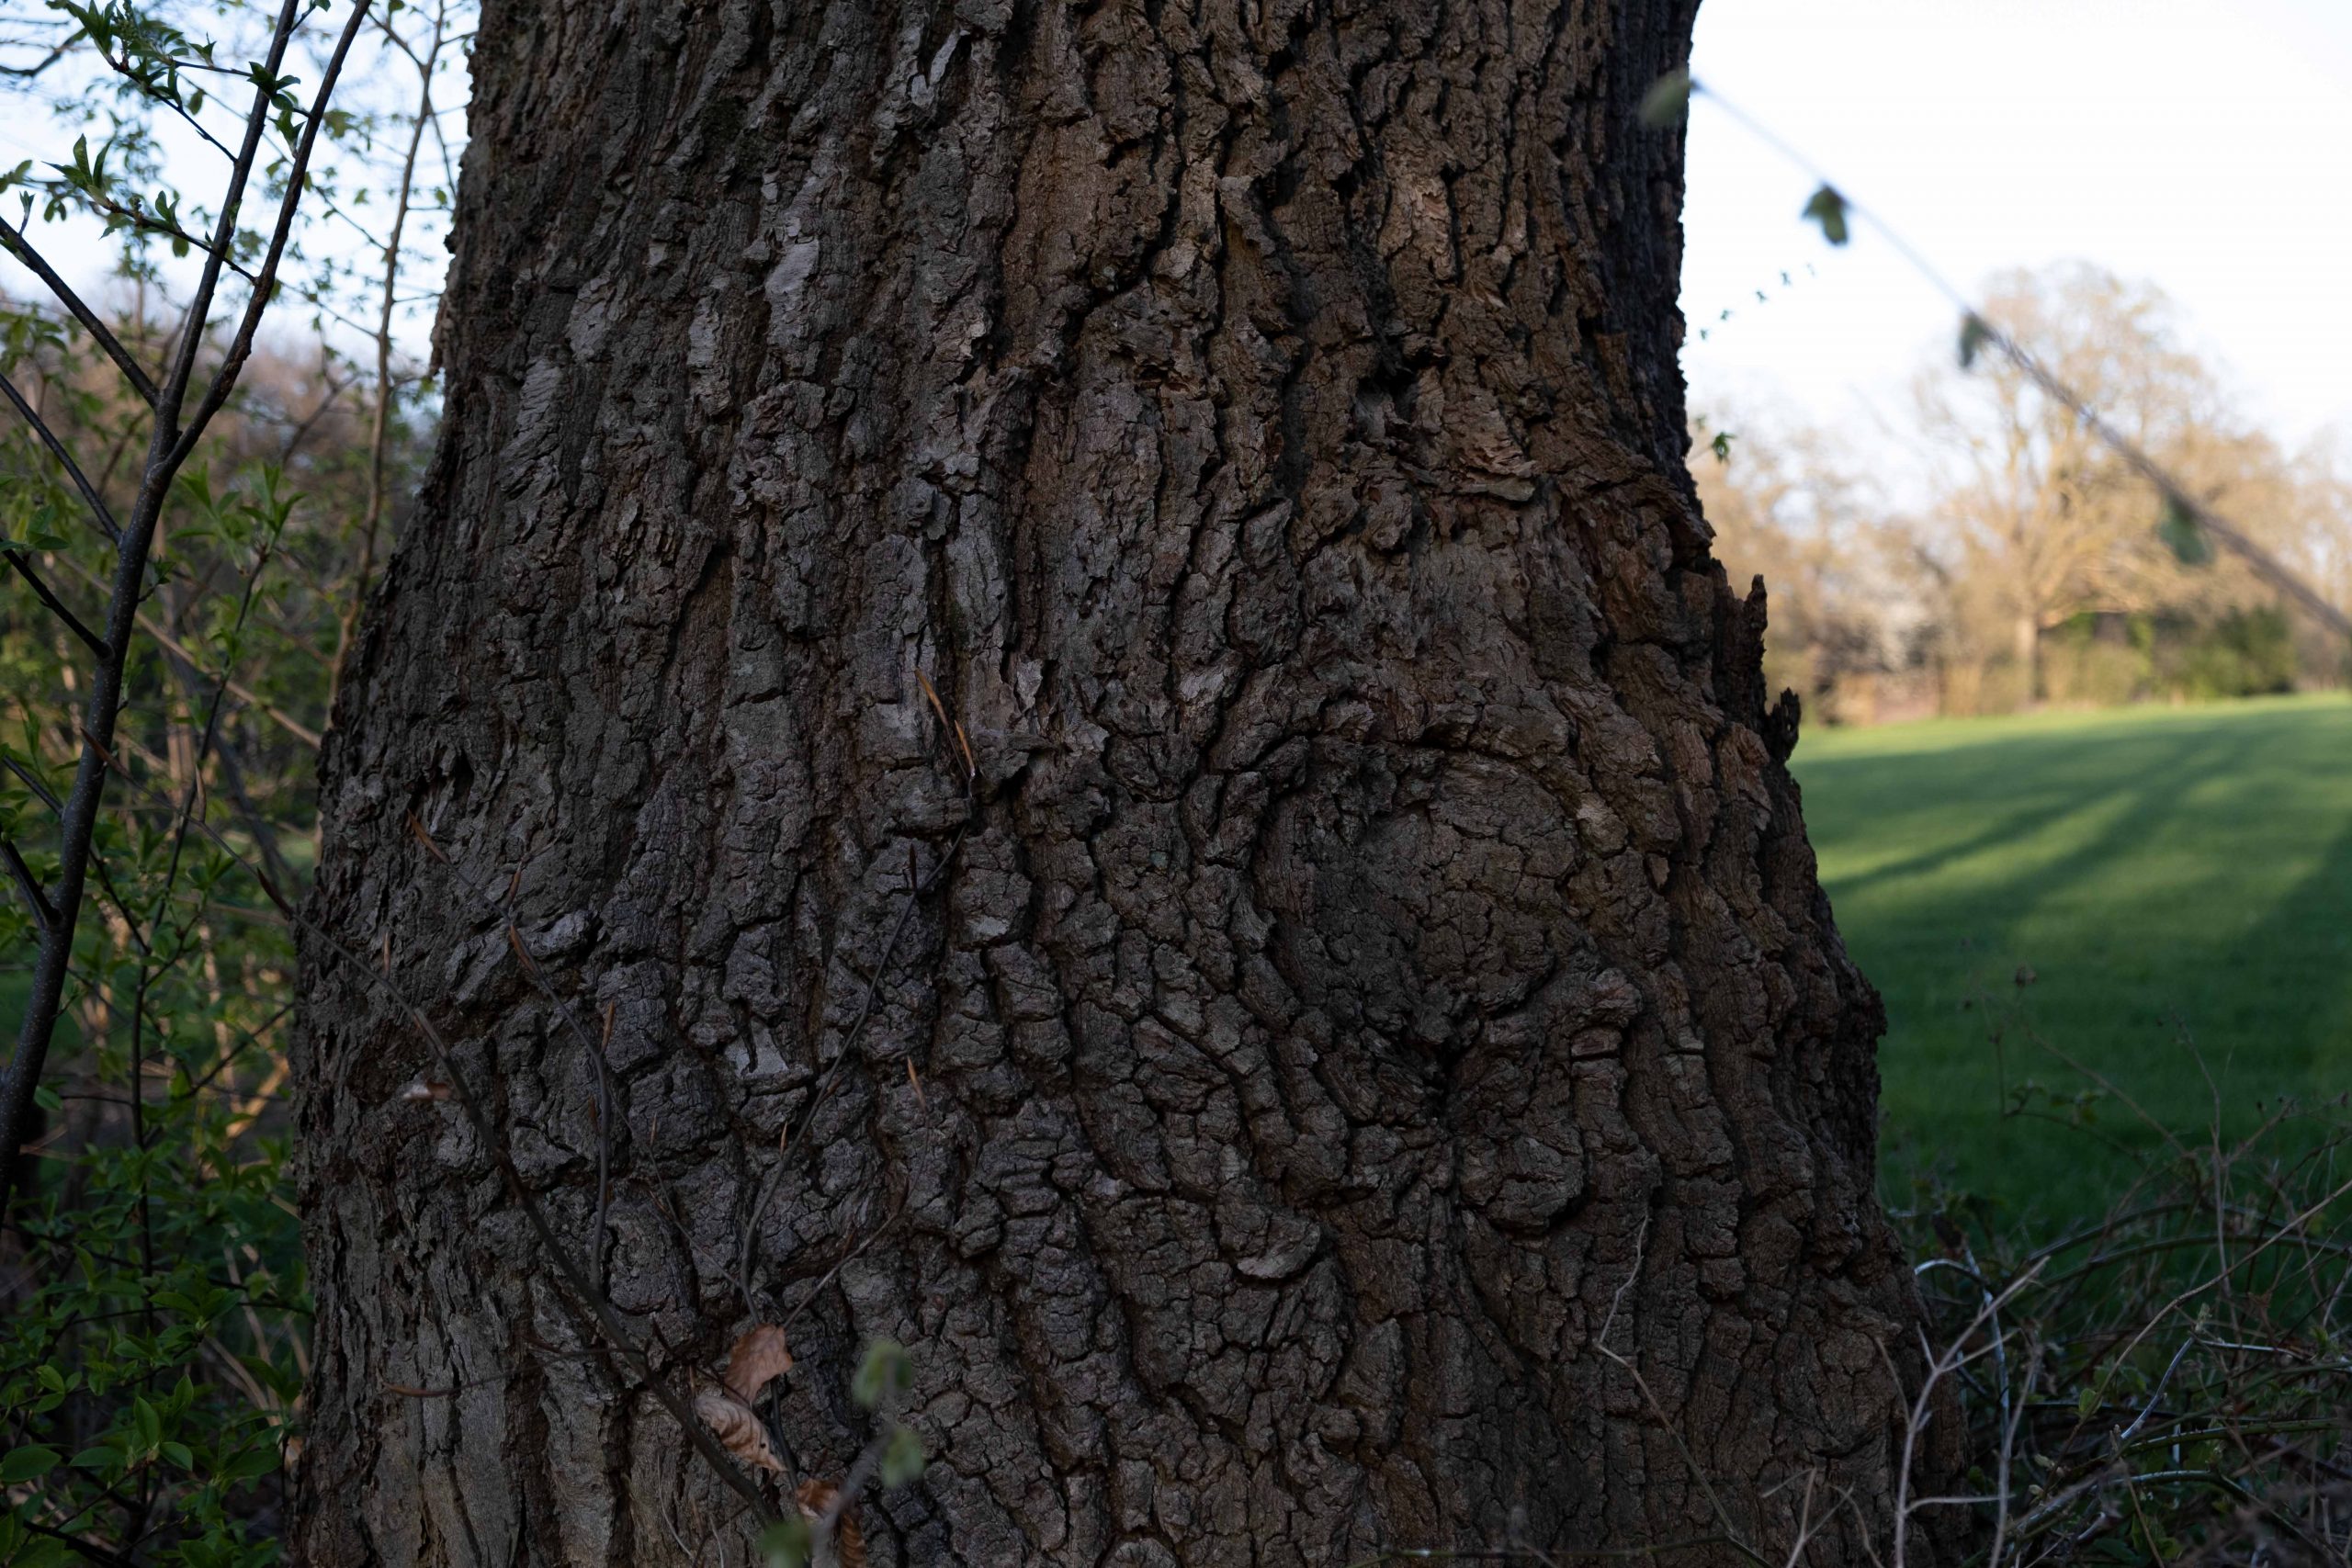
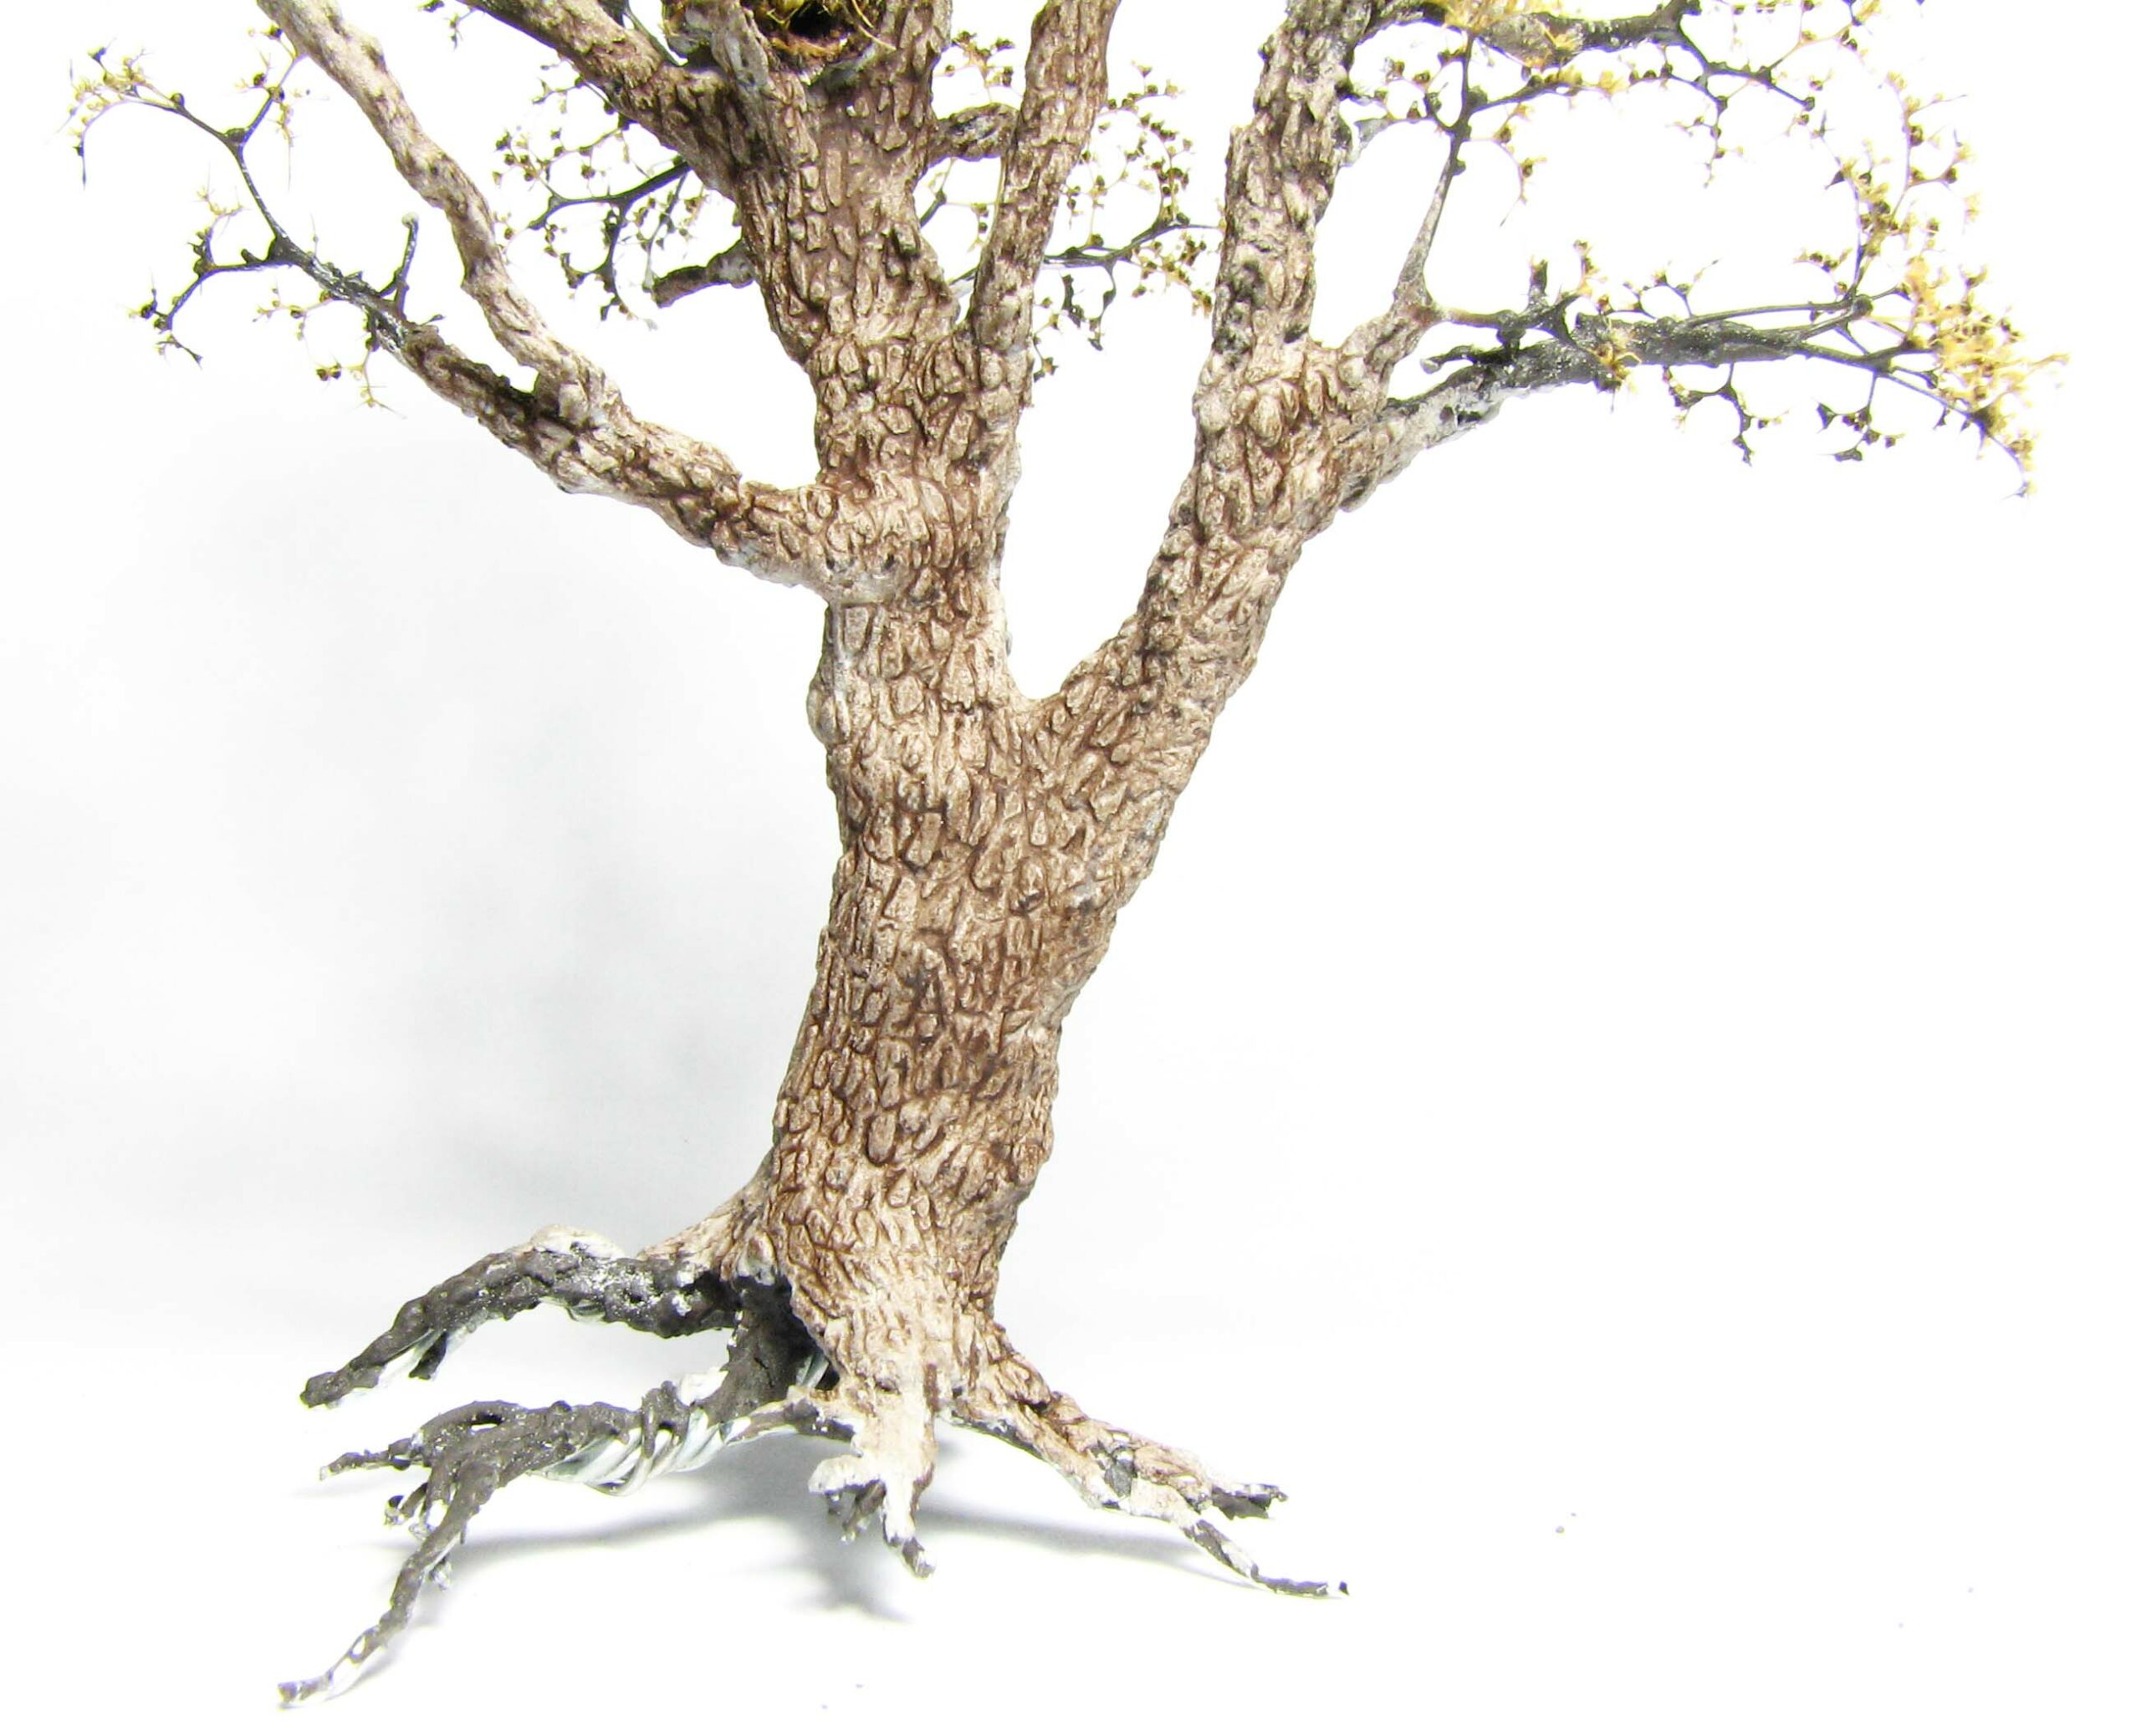
Oak trees are long-lived and have wide-spreading crowns of rugged branches. Young trees have a smooth, green-grey bark, while older trees develop a thick, brown-grey bark with deep vertical furrows. Given we model an old oak tree we have to sculpt the distinctive bark texture, as wood filler alone or comparable pastes will not yield the desired effect. Finally, the bark can also be lightly covered by moss, which adds a nice contrasting colour to the grey-brown bark. Here we need to use some very finely ground foam clusters, green pigment or a green enamel wash.
What you need for the oak tree
Tools
- A selection of broad brushes.
- A pair of small scissors to shape the twigs.
- A heavy duty wire cutter.
- Garden gloves to protect your skin from the rather sharp wire ends.
Materials
- About 20 pieces of thin wire, each about 20cm in length. We will twist them to get a tree armature. It is good to have different gauges at hand, to add some variety.
- A variety of sea moss twigs. The smaller, the better. We will use these to depict the finer branches further up in the crown.
- Super glue to attach the twigs to the wire armature. Get some fast setting stuff here.
- Wood glue to cover the seamoss twigs for added stability.
- Acrylic caulking paste. With some added paint we will use it for the first layer of “bark”. You can also add some black tea to add texture. Just cut a used tea bag open and let the contents dry. Also works well to depict dirt or dead leaves.
- Wood filler to create a realistic bark texture and to give the seamoss even more strength.
- Acrylic paints: Black, grey, brown and white to paint the bark.
- Very finely ground foam clusters in a medium green. These can be bought, but you can also make them yourself. You need some Pigment Fixer or PVA to fixate them.
Drey
- Acrylic gel matte.
- Dried basil.
- Finely cut seamoss and black tea.

Oak tree under construction
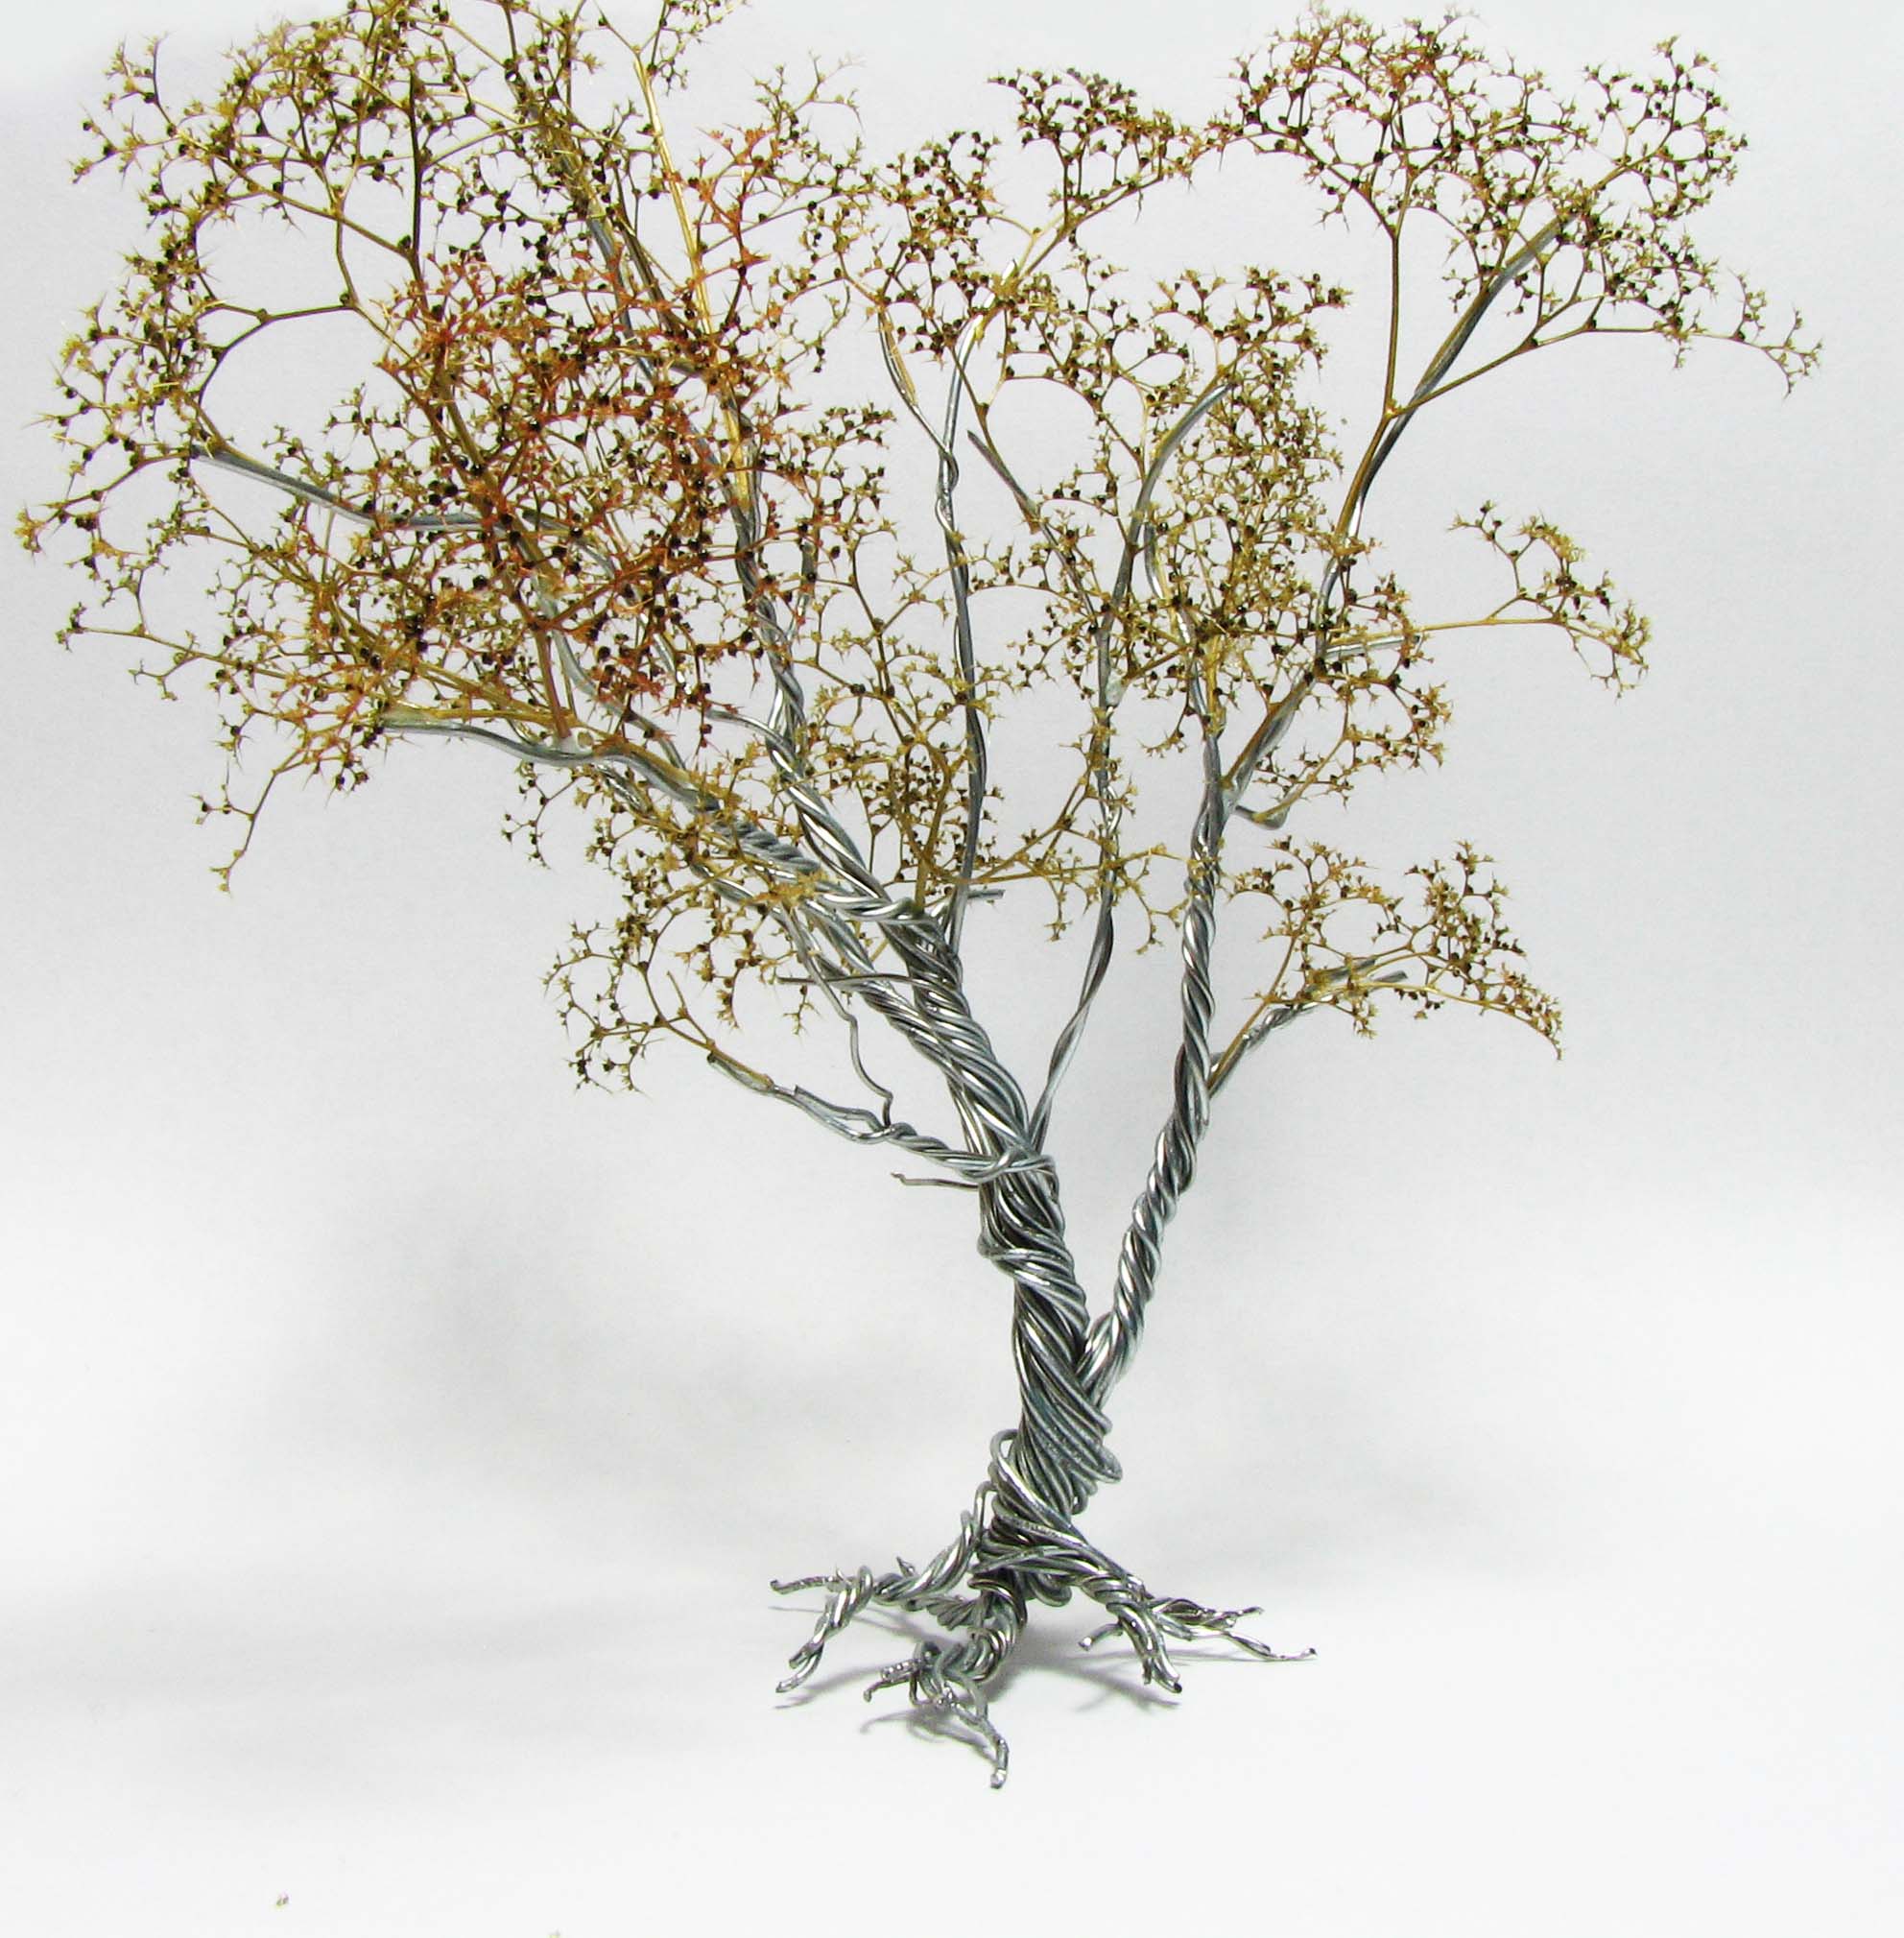
Take the 20 odd pieces of wire and bundle them together. Fold the bundle in half and twist the closed end to form a loop. This end will form be the roots. Cut the loop open when you finished the other parts of the tree and twist the wire to form the roots).
Go on twisting and shaping, once in a while separating a bunch of two or three strands of wire to form smaller branches untill you reach the crown. This is more of a trial and error procedure and it helps if you have a reference pic handy to guide you.
The seamoss twigs
Remove any dried leaves from the seamoss twigs and clean up the lower section if necessary. With some superglue attach twig after twig to the top of the wire branches. This is time-consuming, but will produce very realistic ramifications. Use the glue sparingly, so that it hardens almost immediately. You do not want blobs. This also disqualifies using hot glue. Hot glue will thicken the branches too much and a realistic appearance cannot be achieved.
When you are finished cover the entire tree in wood glue for added durability. I dilute it 1:1 with water and use a small spray bottle for this step. It helps if you also add a drop of rinse aid.

Gnarly bark
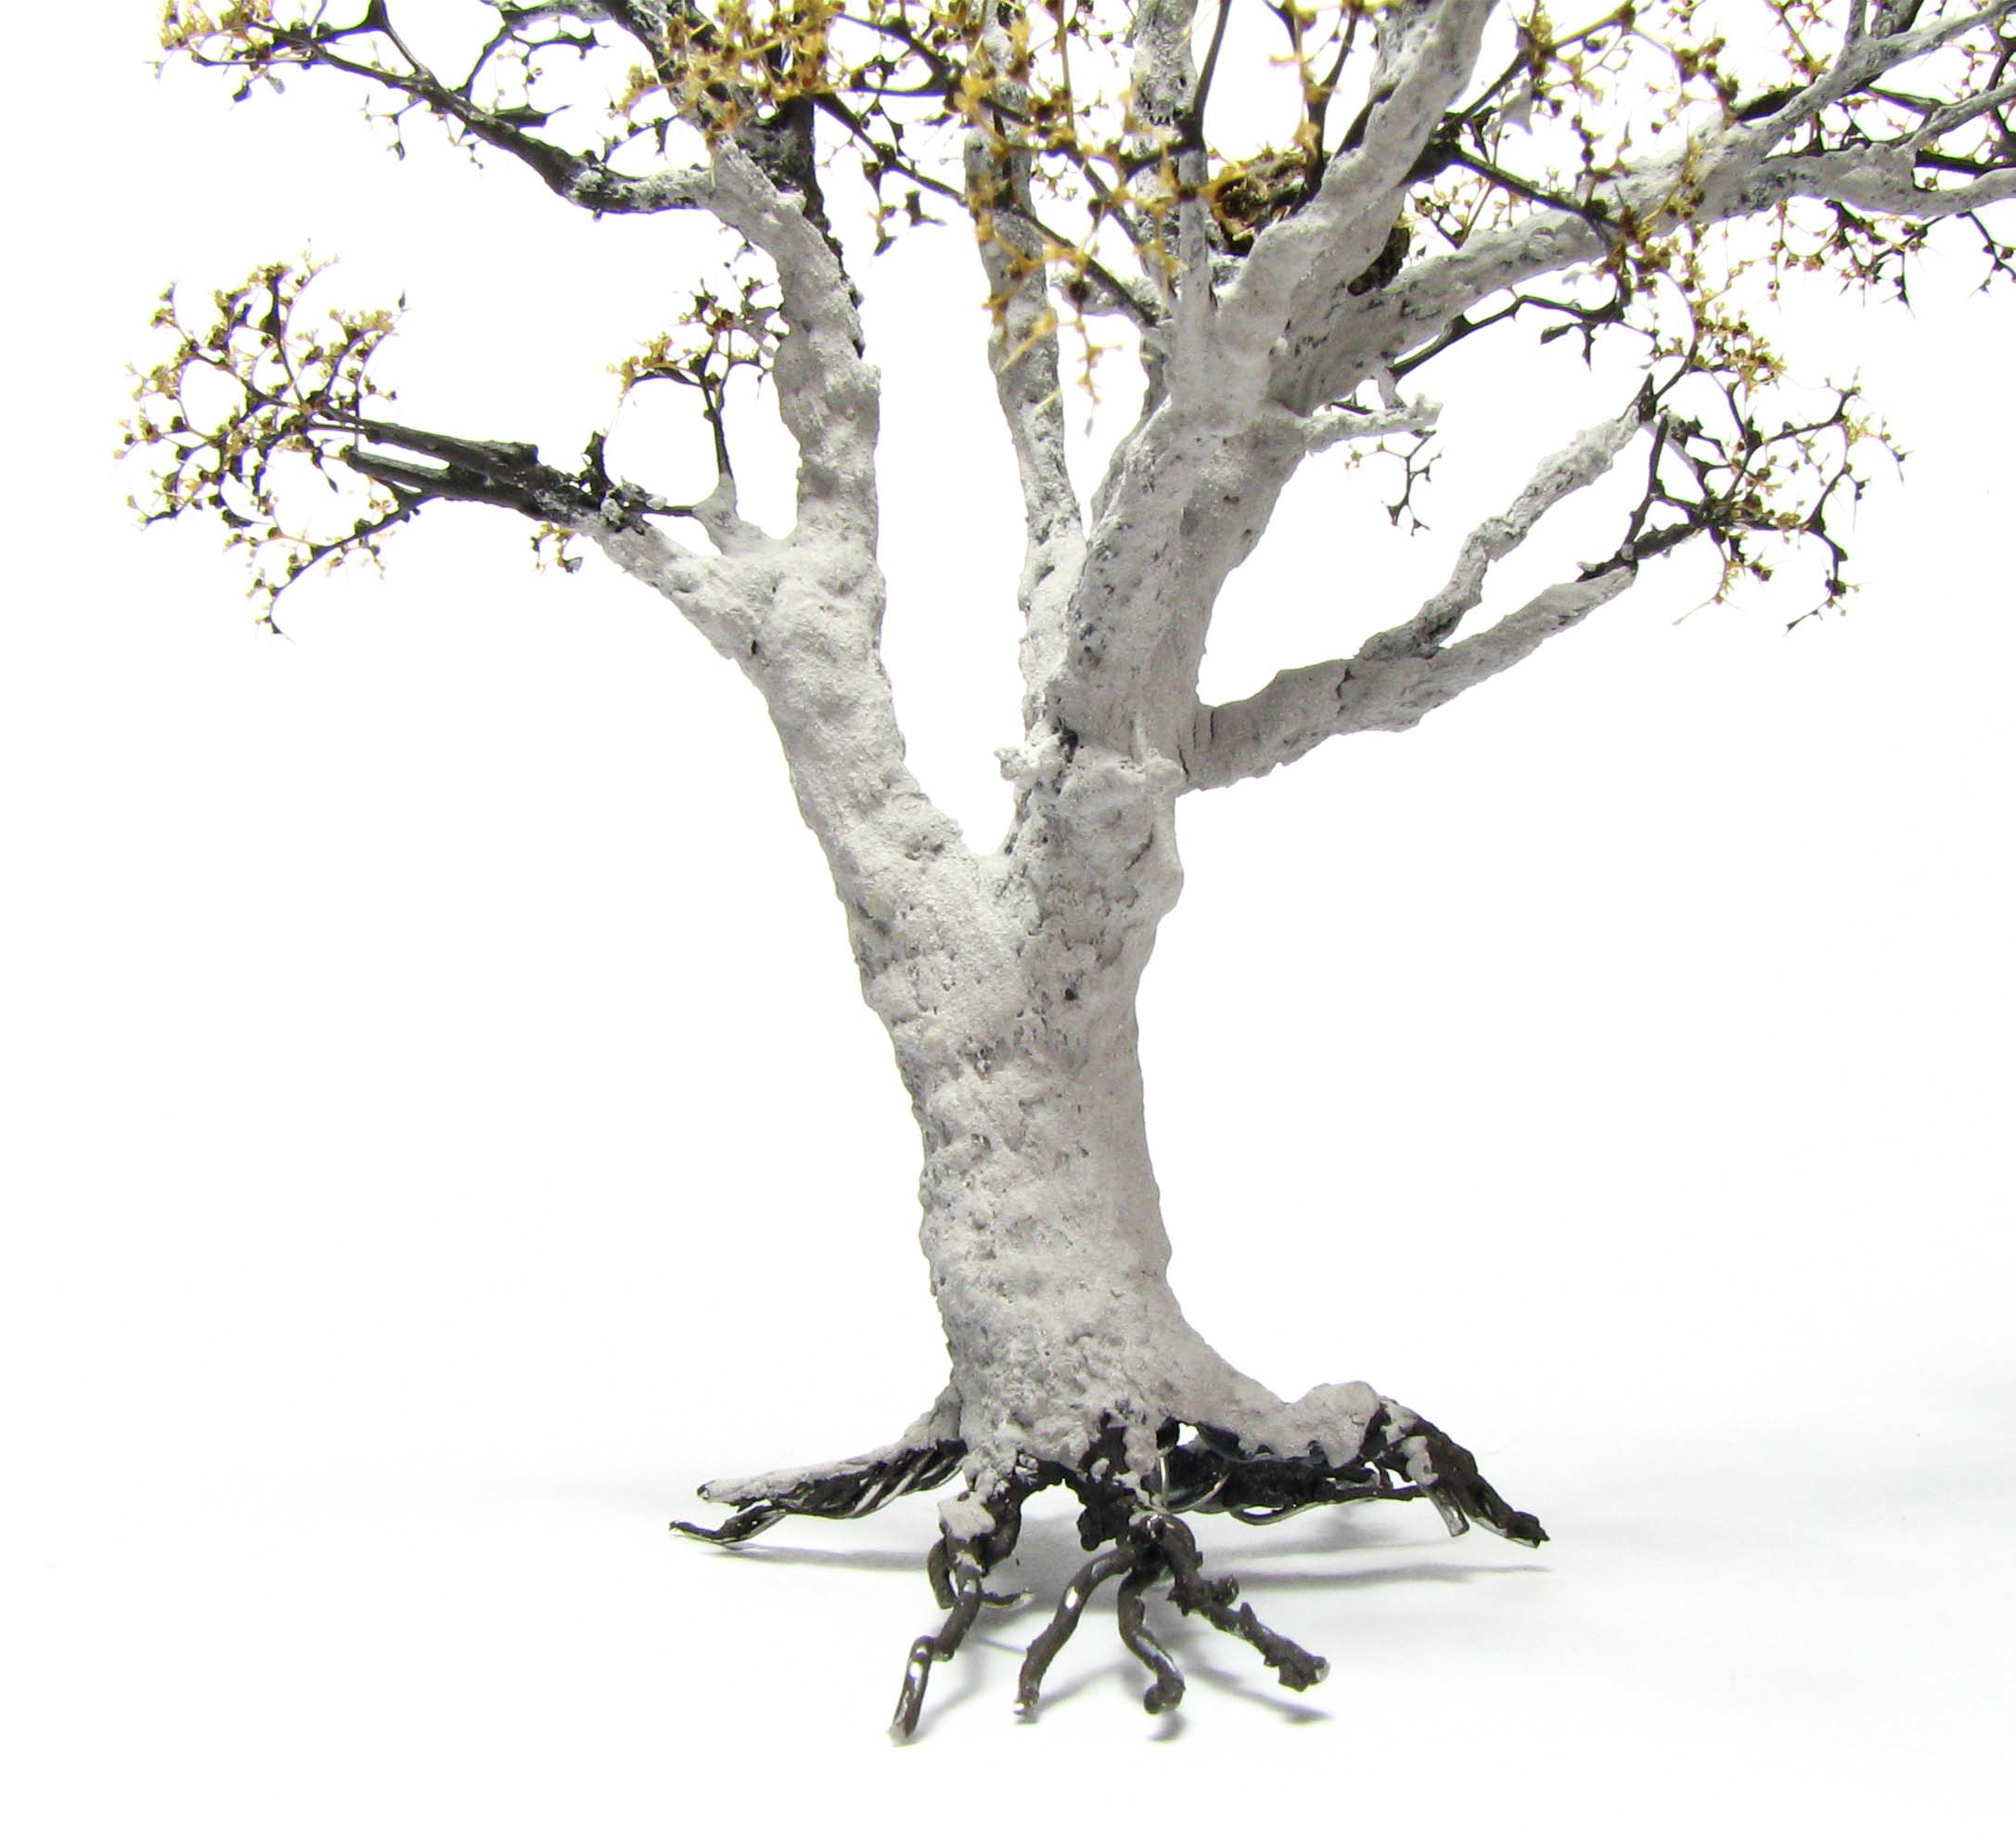
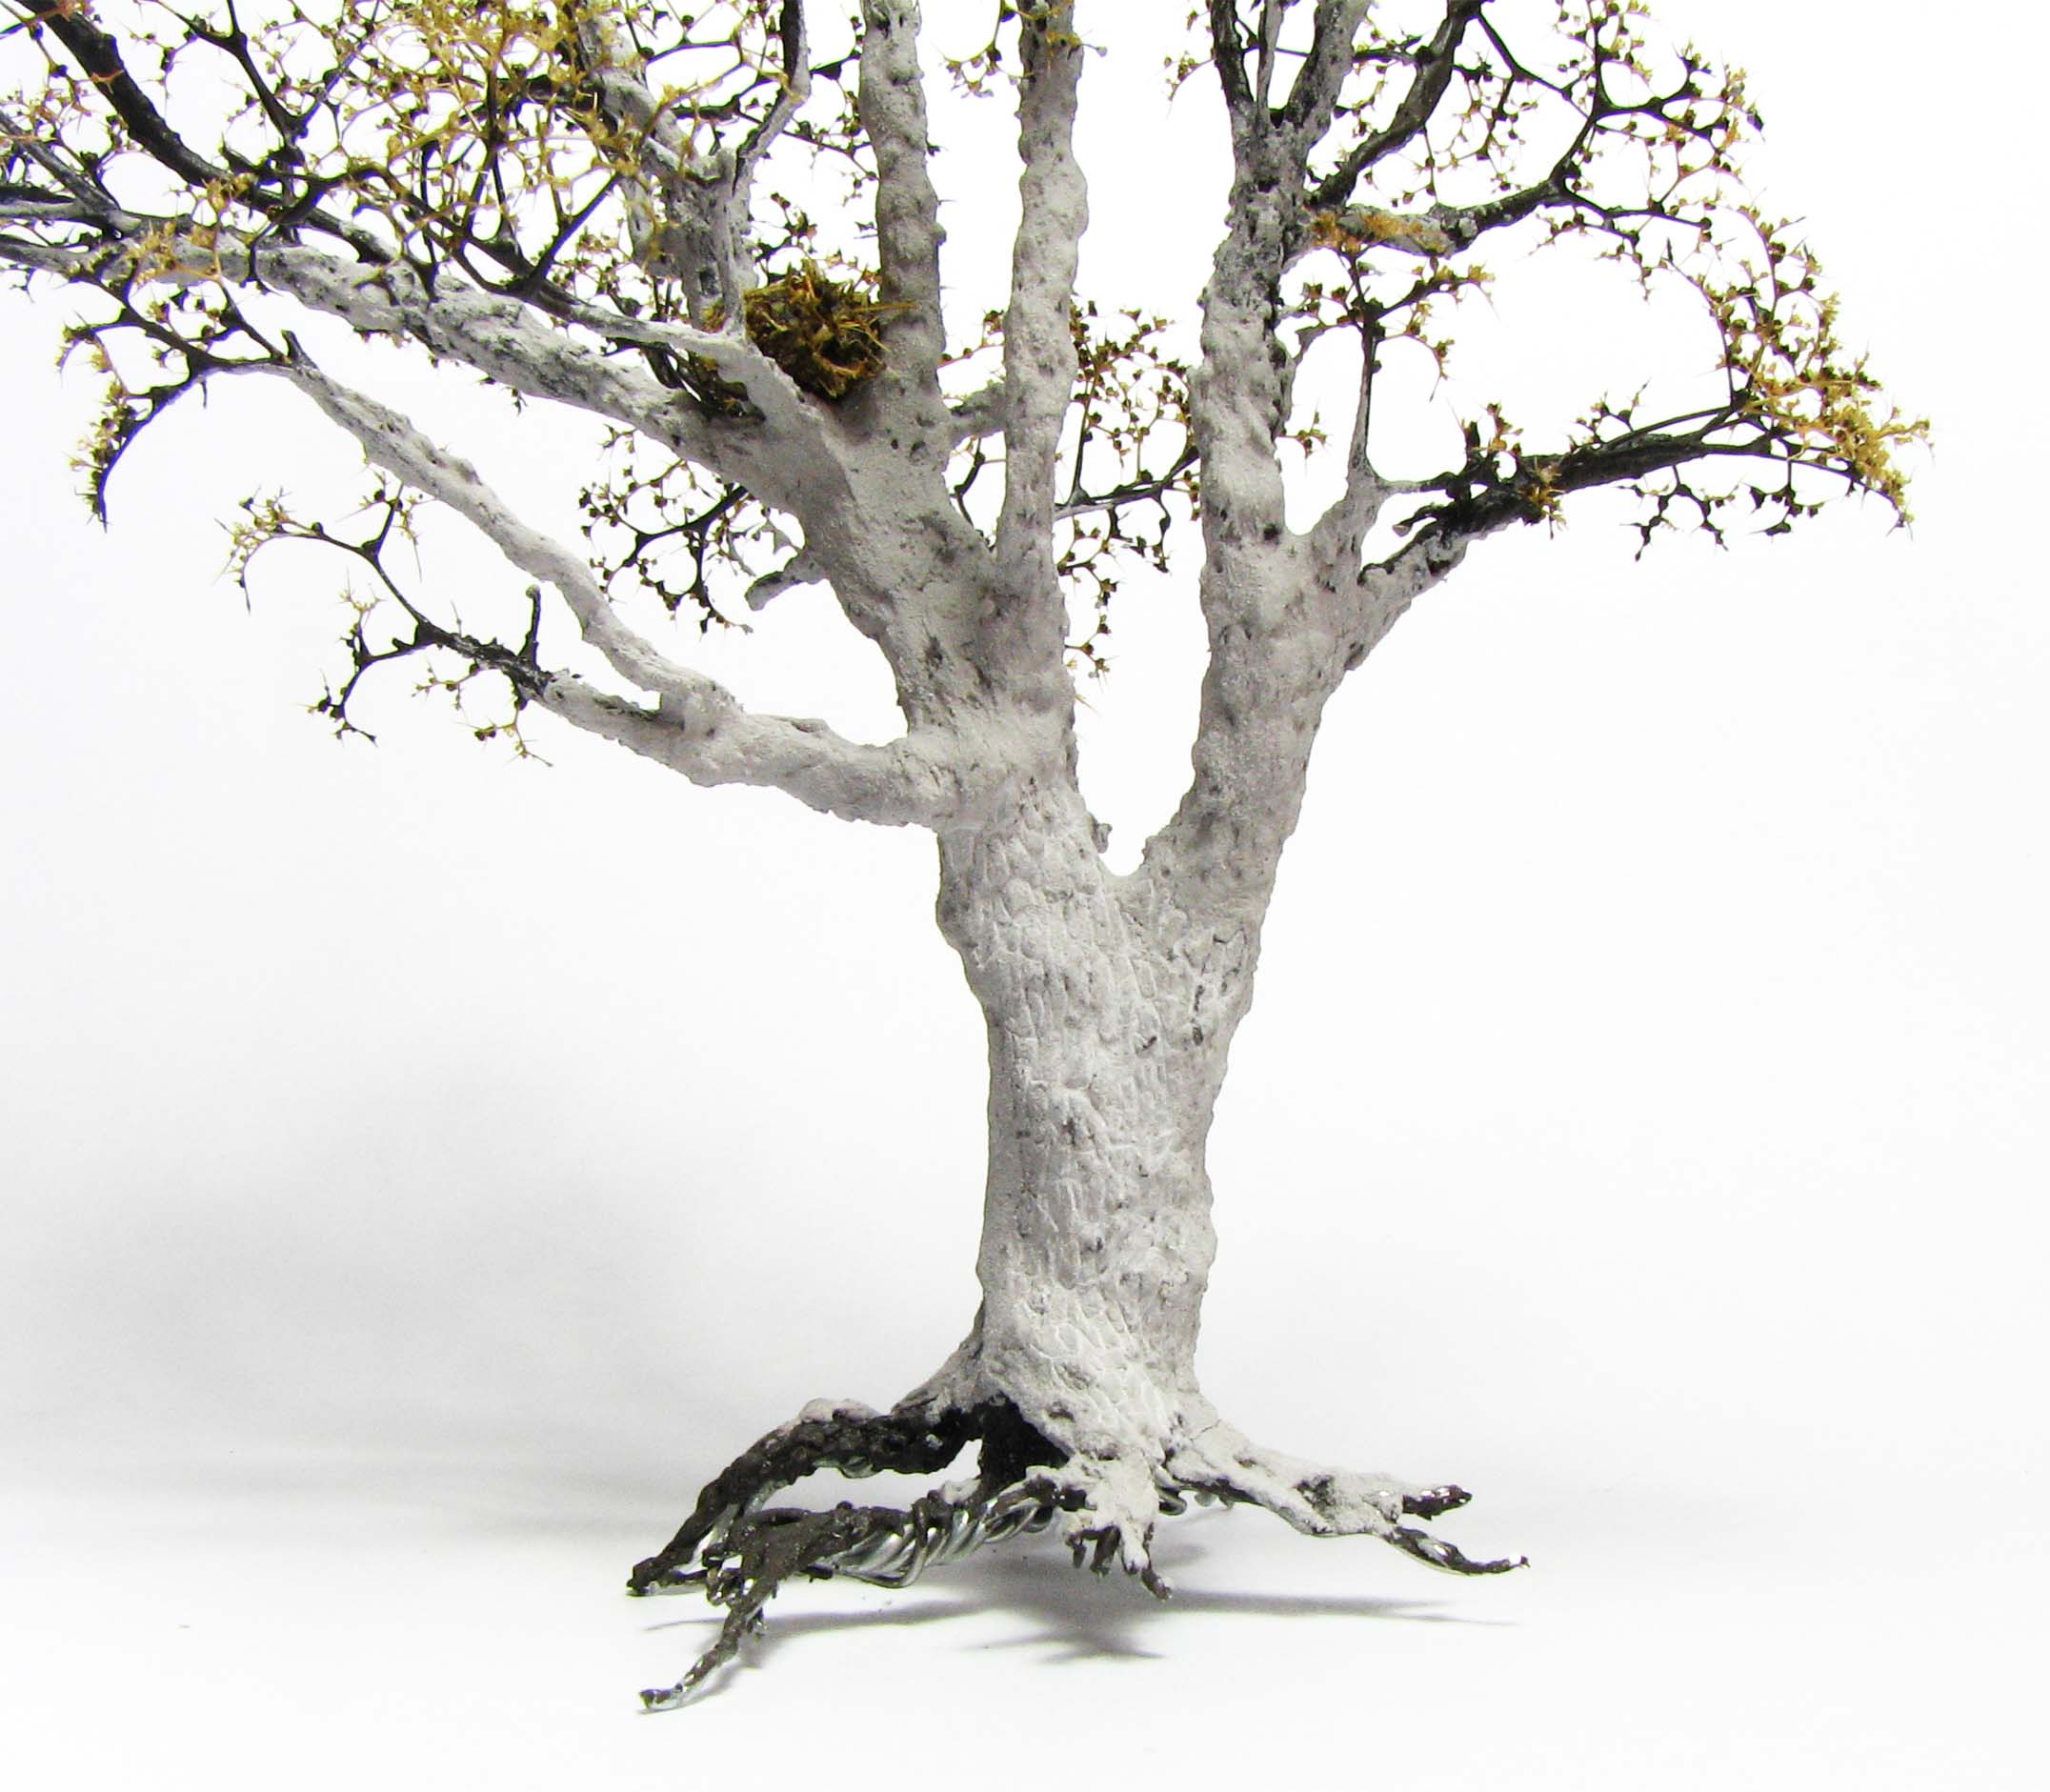
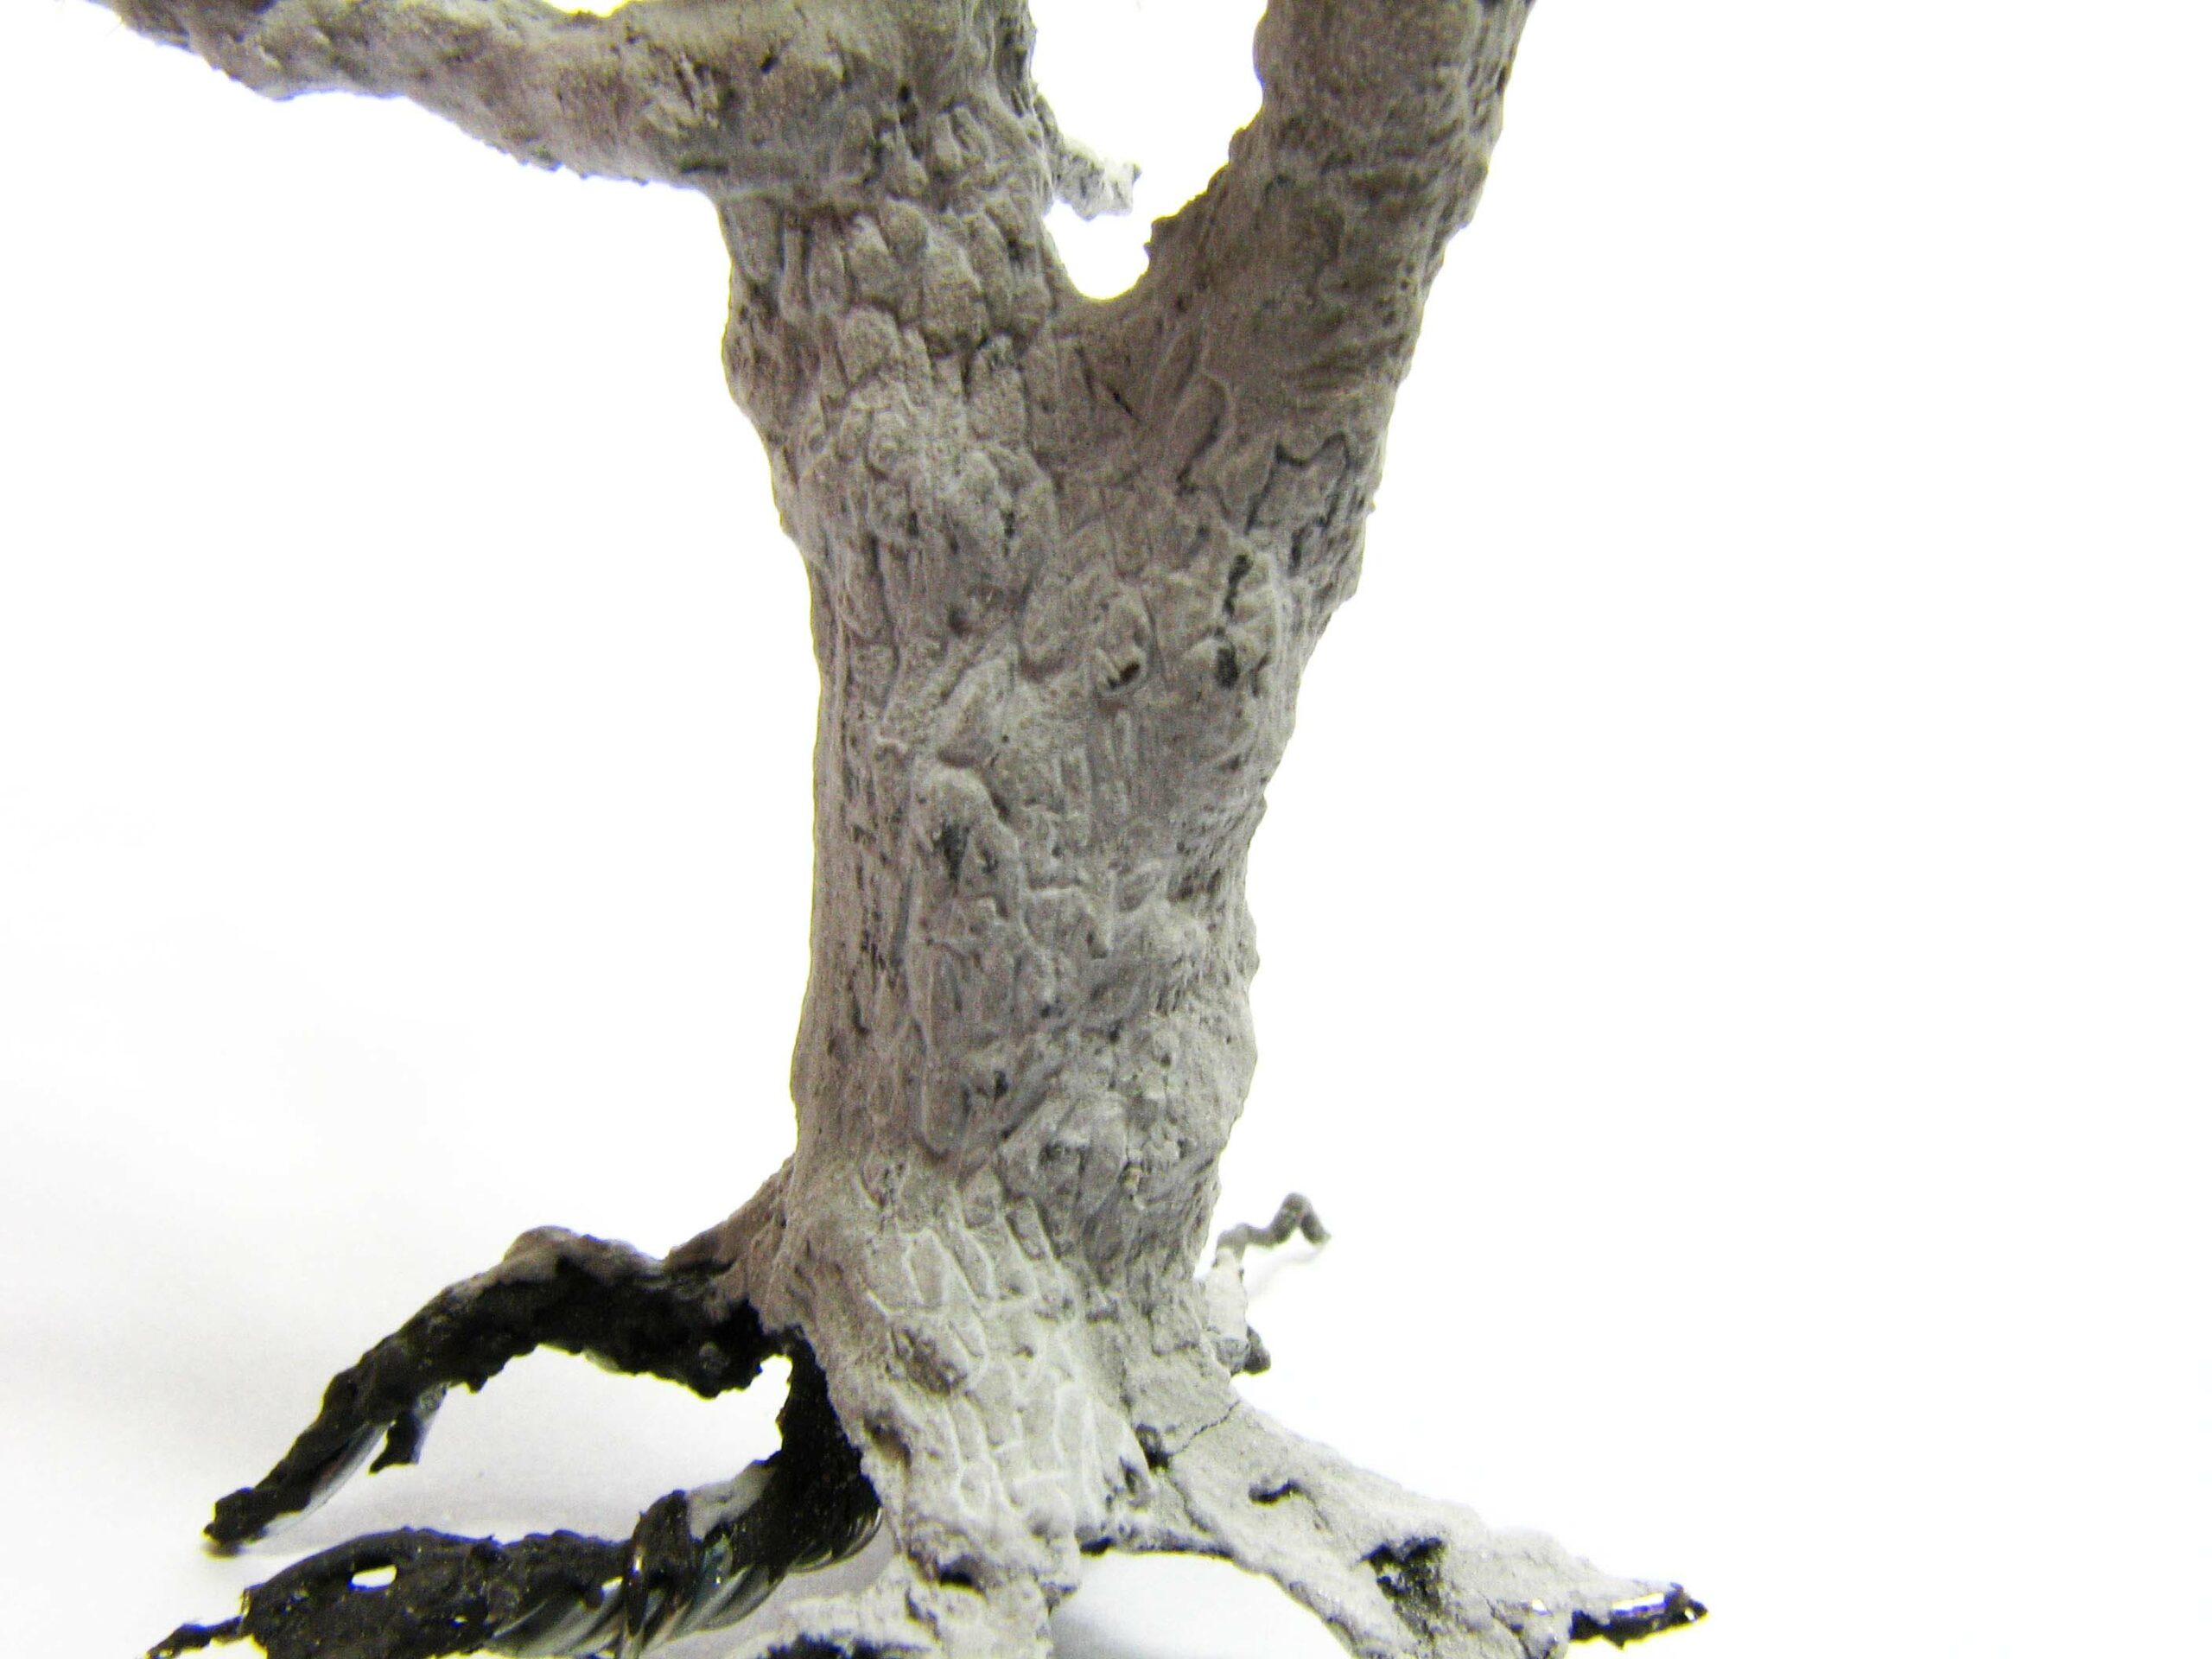
Onwards to the bark. For a rough first coat we use the caulking mixed with brown paint and a bit of water. You want a consistency that can easily be applied and spread with a brush. Divide the mixture in two separate cups and add some black tea for a coarser texture to the second batch. Brush the paste on the armature making sure that the twisted wire disappears. Make also sure that you don’t brush on too much when you reach the upper branches. They should taper off. To hide the transitions between seamoss and wire use the caulking without tea. Let dry completely over night.
With the help of some wood filler add some further texture to the trunk and other twigs in the lower parts of the tree. This also adds further thickness, making the overall appearance of the tree more realistic. Make sure that any remaining wire is covered up. Let dry completely.
Use a pointed sculpting tool or a needle to carve the bark texture into the wood filler. The caulking provides good adhesion, so the filler won’t flake off during this process. You also don’t need to worry about revealing the wire. Remove any filler dust with a brush when you are finished. To bring out the texture and check its look give the trunk a brown wash.
The squirrel drey
Now it is time to add the drey. Mix some acrylic gel with dried basil, finely cut seamoss and black tea. Form a ball between your fingers and let it harden. You can also make a nice bird’s nest this way. Just make a ball and indent it with a sculpting tool.
Painting the oak tree
Mix a brown-grey and paint the entire tree. It is much easier to do this with an airbrush, especially when you reach the finer branches. A spray can works, too. Now mix a lighter shade of your base colour adding white and drybrush the trunk and thicker branches. Repeat with lighter shades until you achieve the desired look. Wash the trunk with a brown wash. I like to use Vallejo Umbra Wash.
Let’s move on to the drey. We paint the drey in a slightly different brown tone, give it a wash and drybrush to bring out the details. When you are happy with the results glue it in a suitable place.
Moss and bark – a match made in heaven
Using the tip of your finger or a fine brush get some fine green turf or pigment and rub it in the bark’s recesses. Fix with Pigment Fixer or thinned down PVA.
Tidy up the root section and attach the tree either to a base or make it free-standing with a magnet . This way you can attach it to any terrain piece that is equipped with a magnet, too.
A hope this tutorial will inspire you to give it a try yourself. Please comment below if you have suggestions or would like to share your own techniques to achieve realistic trees.
[…] any. However, I really don’t see myself making my own trees. I’ve seen the tutorial by daggerandbrush, who makes fabulous trees, but I don’t think I have the patience to do this. So, unless […]
Very nice. I’d never thought to make my own trees.
Thank you. I would say give it a try. It takes time, but I find it very rewarding.
Truely amazing and inspiring! It’s very encouraging to see a terrain artist at this level. Well done sir! I’m so glad I found your blog.
I realise I did not reply to your comment. Thank you very much. I have some more trees in the making right now and quite a number of other projects, so I hope you’ll find something of interest on my blog this year, too.
I am really struggling to get the right color on my trees and yours look fantastic!
What colours did you use to get the brown-grey color from step 10?
Thanks!
Hi Andreas,
thank you for your comment. I use Tamiya Flat Brown as a base colour and add some grey. I basecoat the entire tree and then mix succeedingly lighter shades of this base colour for the drybrushing. depending on the tree you want to depict you might need to add more brown or beige to your base colour.
‘Mix some acrylic gel with dried basil, finely cut seamoss and black tea’ I love how this tutorial combines tree making and also apparently some sort of recipe instructions 😉 The finished tree is gloriously realistic – such a fantastic job!
Thank you! Well I am a wizard at heart…at least when it comes to RPG’s and we all know a high alchemy skill comes in handy. 😉
May I ask where you get the Seamoss from?
Hi, thank you for your comment. I bought it years ago back in Germany. Busch should still sell packs of it. In NZ I did not see any supplier so far, so maybe you have to order it overseas.
Fantastic post and great images too!
Thank you! Glad you like the tutorial and the images.
Fantastic looking, as always. I’m envious of your talent, persistence, and patience!
Thank you for your kind works. Much appreciated. I return the praise, as your projects (and amazing gaming tables) are always an inspiration for me and have this model railroad feel to them I always strive for.
Yep, best model tree by far . The bark is amazing but looks seriously hard work 🙂
Thank you. It takes a while, but the effort is worth it. It has something oddly meditative about it, working on such a tree.
This is incredible! I’ve never seen model trees like those.
Thank you! Much obliged. I’d say in the model railway community one does find quite a couple of tree obsessed people, given I always wanted one as a child it is only natural to come back to it now. 😉
Spectacular.
Projects like this are a bit too involved for impatient sorts like me, but there us no denying how beautiful that looks.
Wonderful work.
Thank you for your comment sho3box.
It is very involved, but out of any reason as rewarding as painting up a miniature. I guess I just really enjoy makimg trees :p.
It’s a “whatever floats your boat” thing. The results speak for themselves 🙂
Ah, just like your last tree post, these are brilliant as well! Nice job…very inspiring. 🙂
Thank you, much appreciated!