
What could be a more essential wargaming terrain piece than the common hill? No matter what period, no matter what setting, hills are a feature. They add visual interest and tactical complexity to any gaming surface, may it be modular boards, gaming mats or just a green table-cloth.
They may be an essential piece of gaming terrain, but making naturalistic looking hills that not only allow easy placement of models, but also easy placement and removal of trees or other terrain features, can be a challenge.
In this post I show you my take on such hills and try to solve some of the problems one may encounter by using the fantabulous power of magnets *gasp*!
Wargaming hill design – trust me it’s a thing!
We all know how a hill looks like. While some of them feature rock or even cliff faces, it is not that common that they have neat steps (even though nature can create crazy terrain features at times) with each step being entirely flat. That said this classic wargaming hills design is the most practical for troop and single model placement. Unfortunately it does not look very naturalistic.
Thus we have to compromise. In general a slight incline will not interfere with placement of regiment bases or single miniatures. However, sometimes one does want a more dramatic effect, a cliff face for instance with a steep incline.
Given that most rule systems restrict the size of terrain pieces it is often unavoidable to have such steep inclines to fit everything within a given diameter. Accordingly miniature placement is impossible or difficult. It depends if you are more of a tournament gamer where every millimeter counts or if you are happy to accept some inconvenience in exchange for better looks. The Terrain Tutor featured a video on this very topic and came up with a maximum incline that suits most miniatures.
My advise for designing your standard hill is to keep your preferred rule set and gaming style in mind. Design the hills to suit your models and place some of your models on the piece during construction to see how they work on the surface.
Additional terrain features
Another important factor is placement of additional terrain features on a hill. In many rule sets a hill can be forested or even feature a settlement.
The latter may need some proper integration and I do not think a settlement would look very convincing if only set on top of a hill without the buildings conforming to the hill or mountain. Accordingly this would need to be a special terrain piece (do I see a future tutorial taking shape?) with very limited troop placement options, but enormous visual appeal.
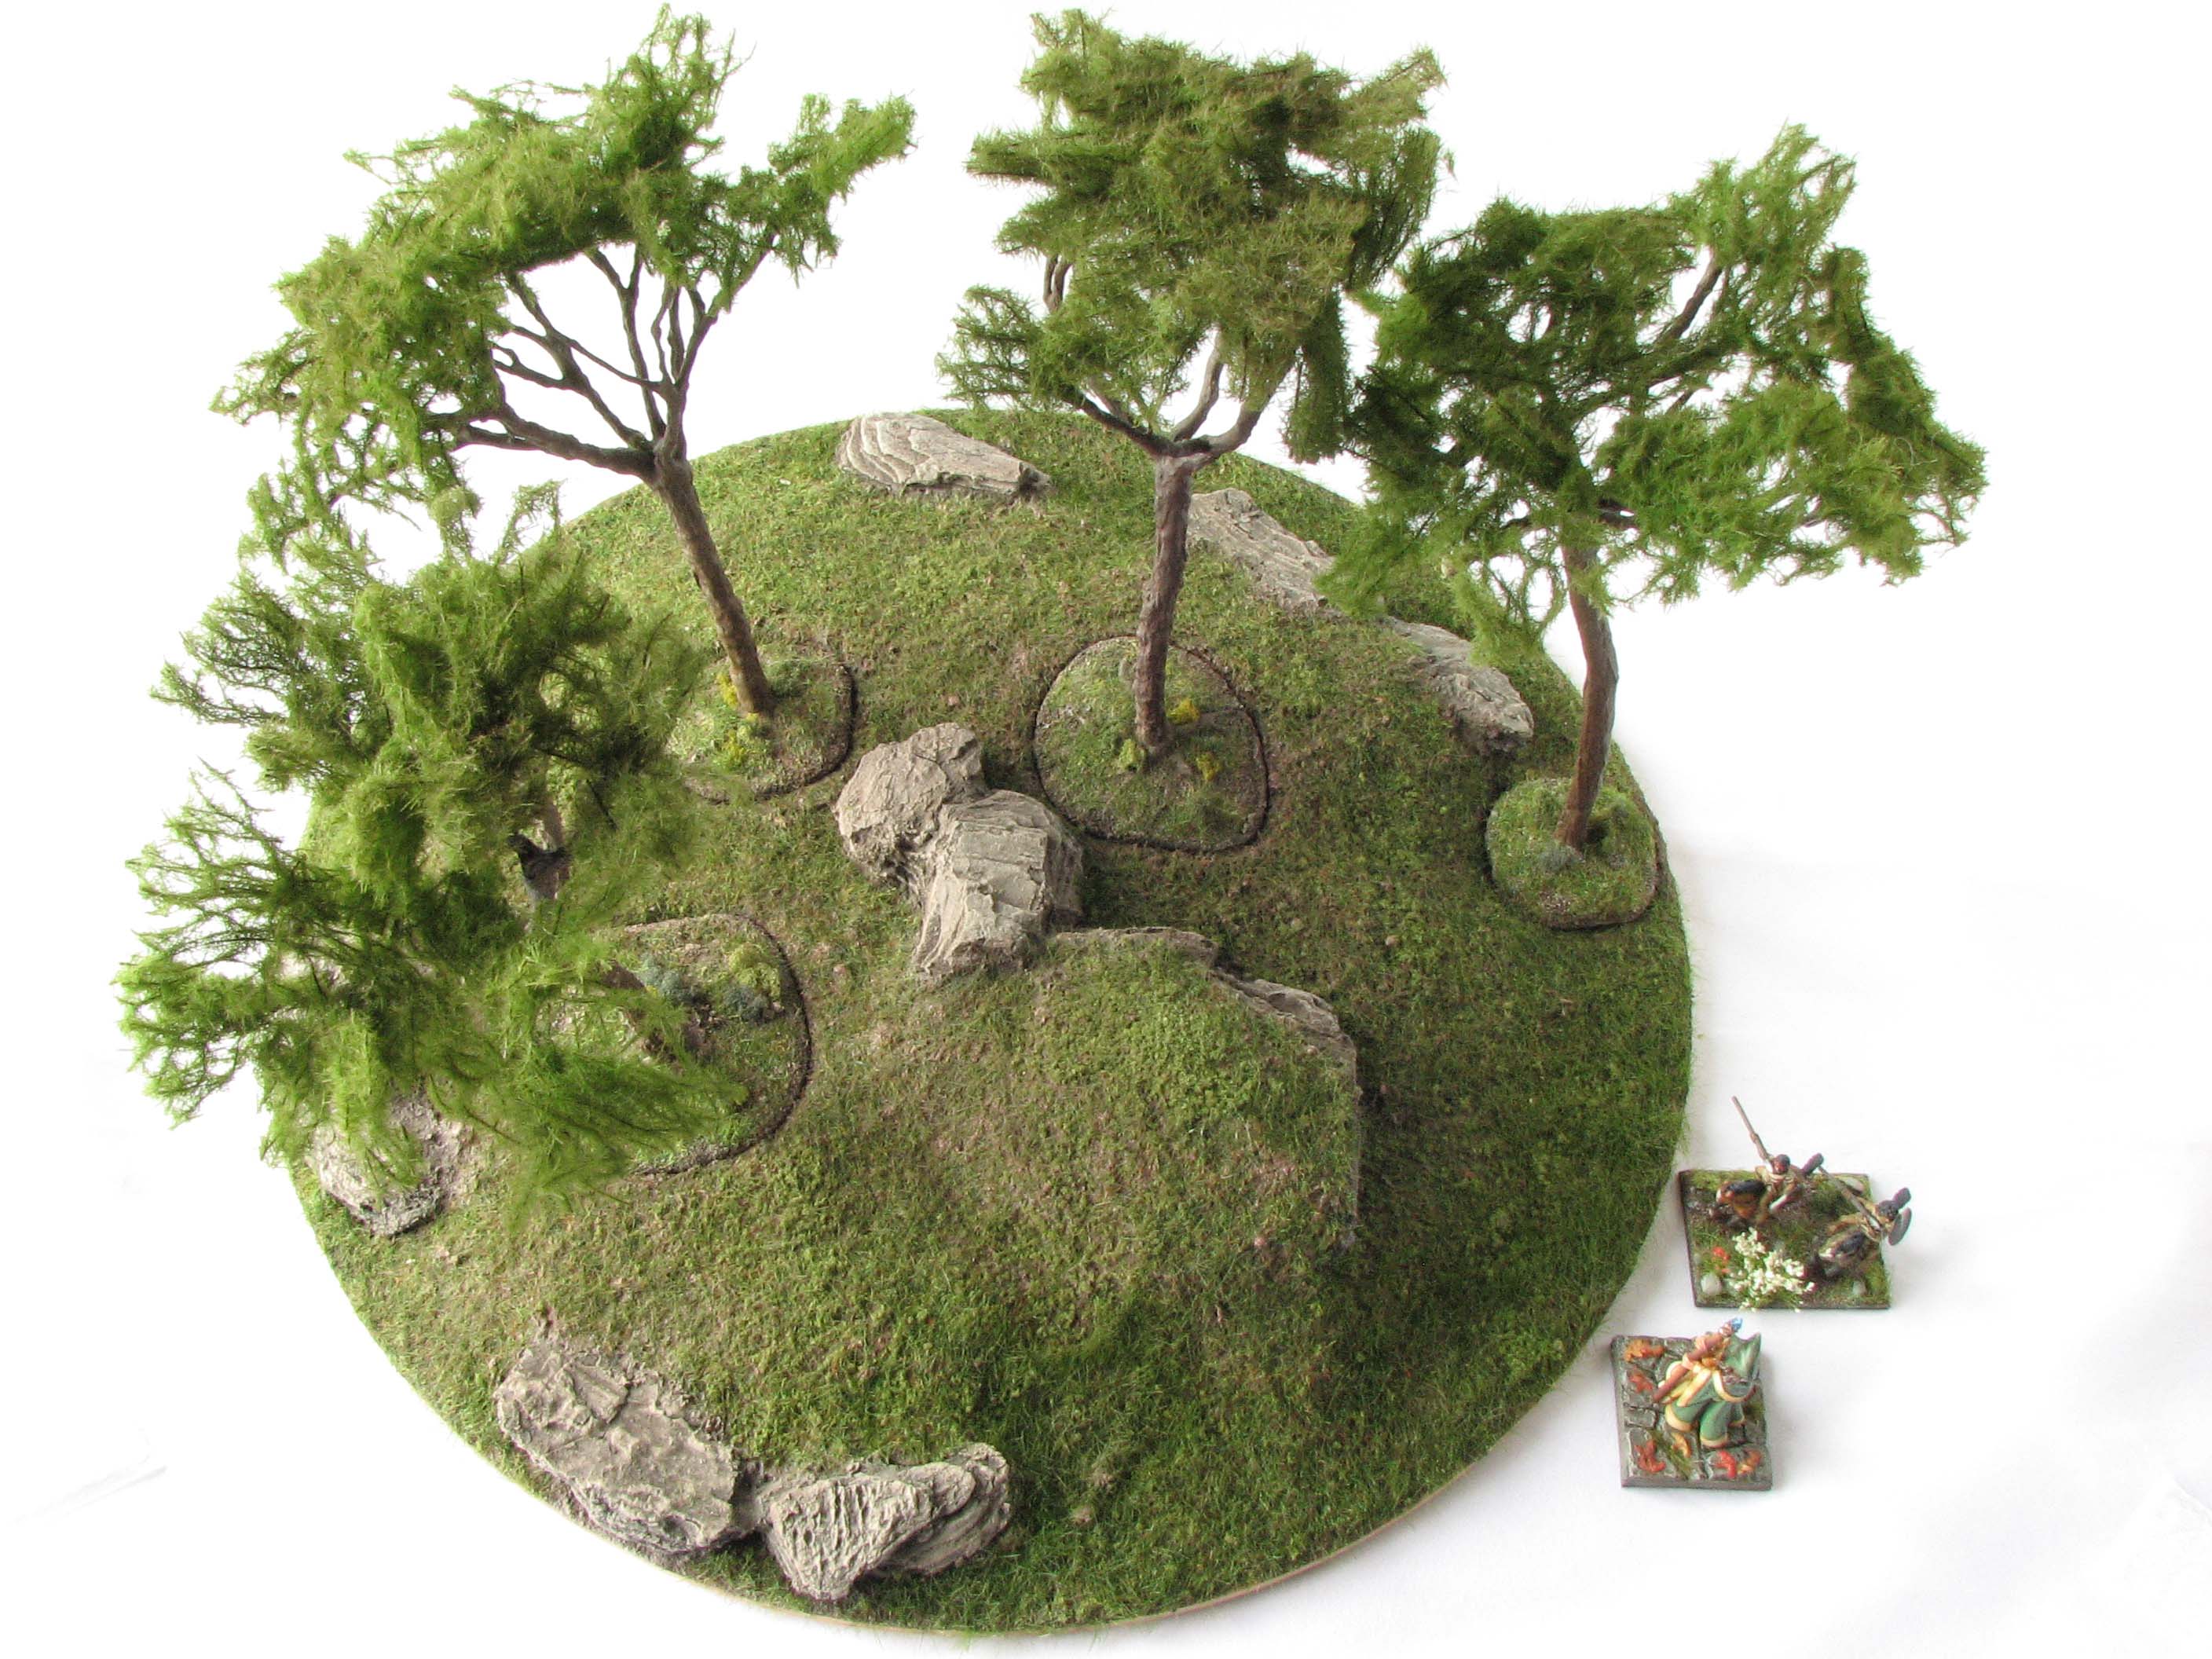
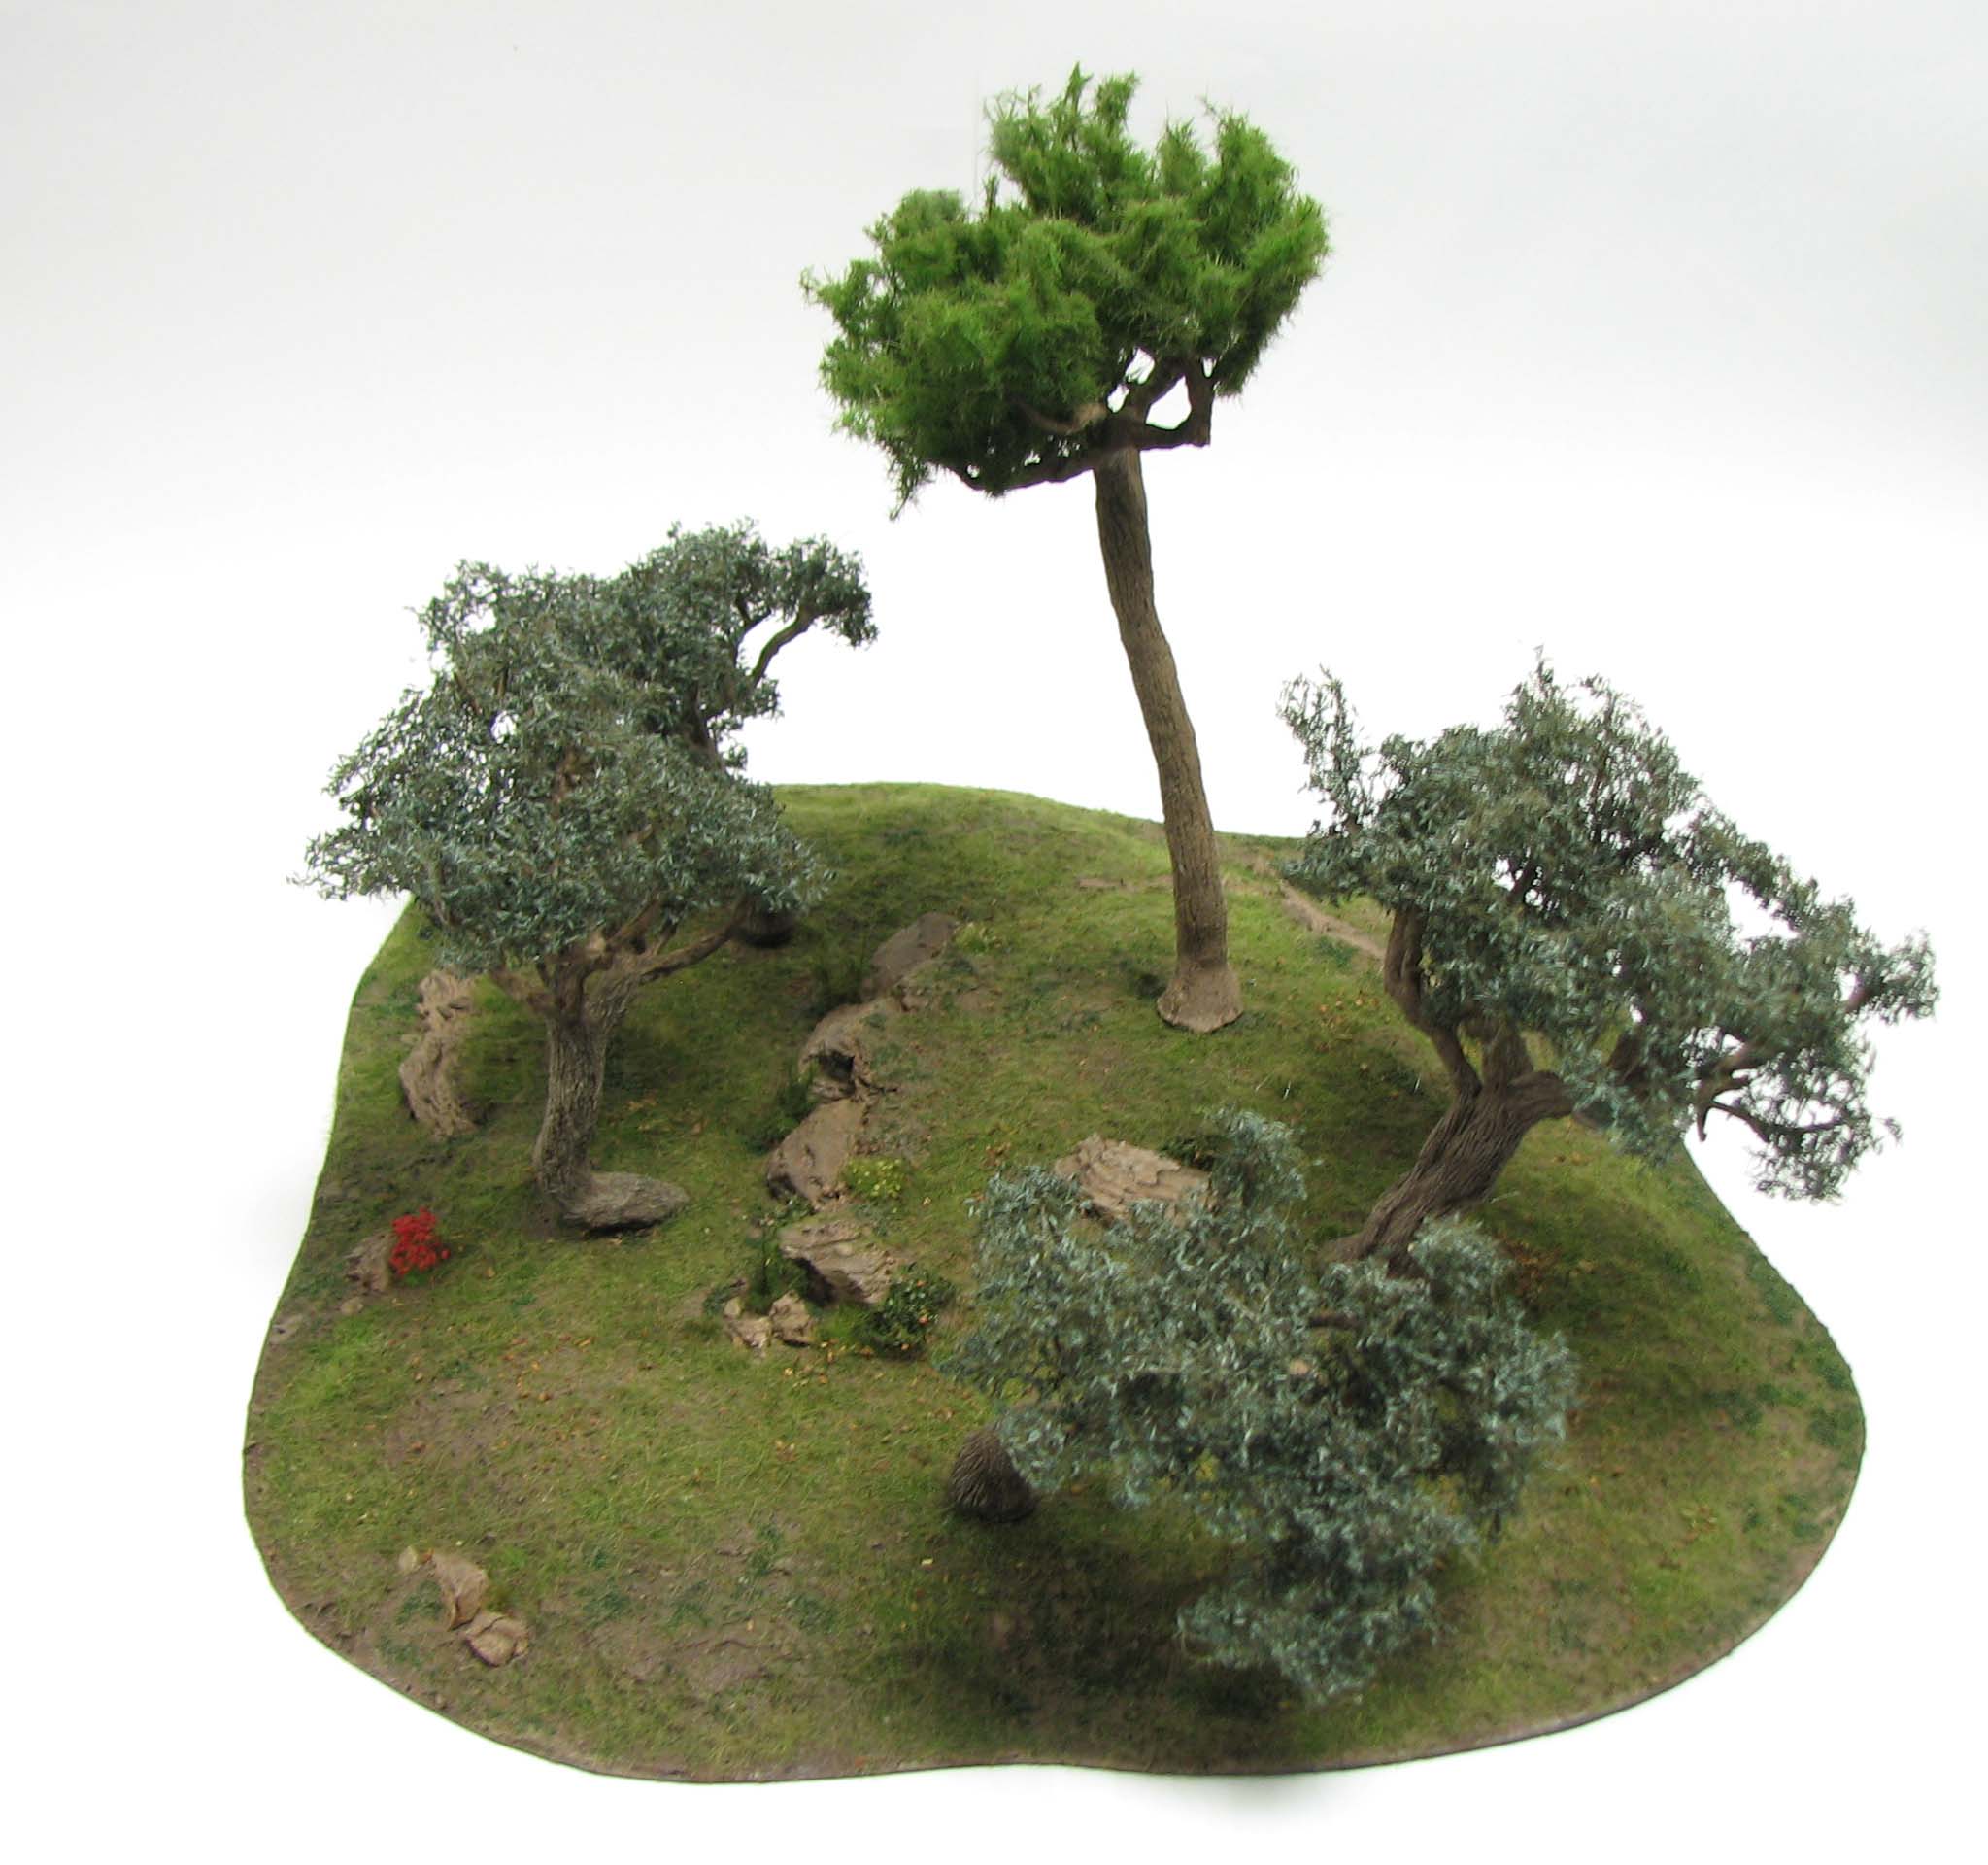
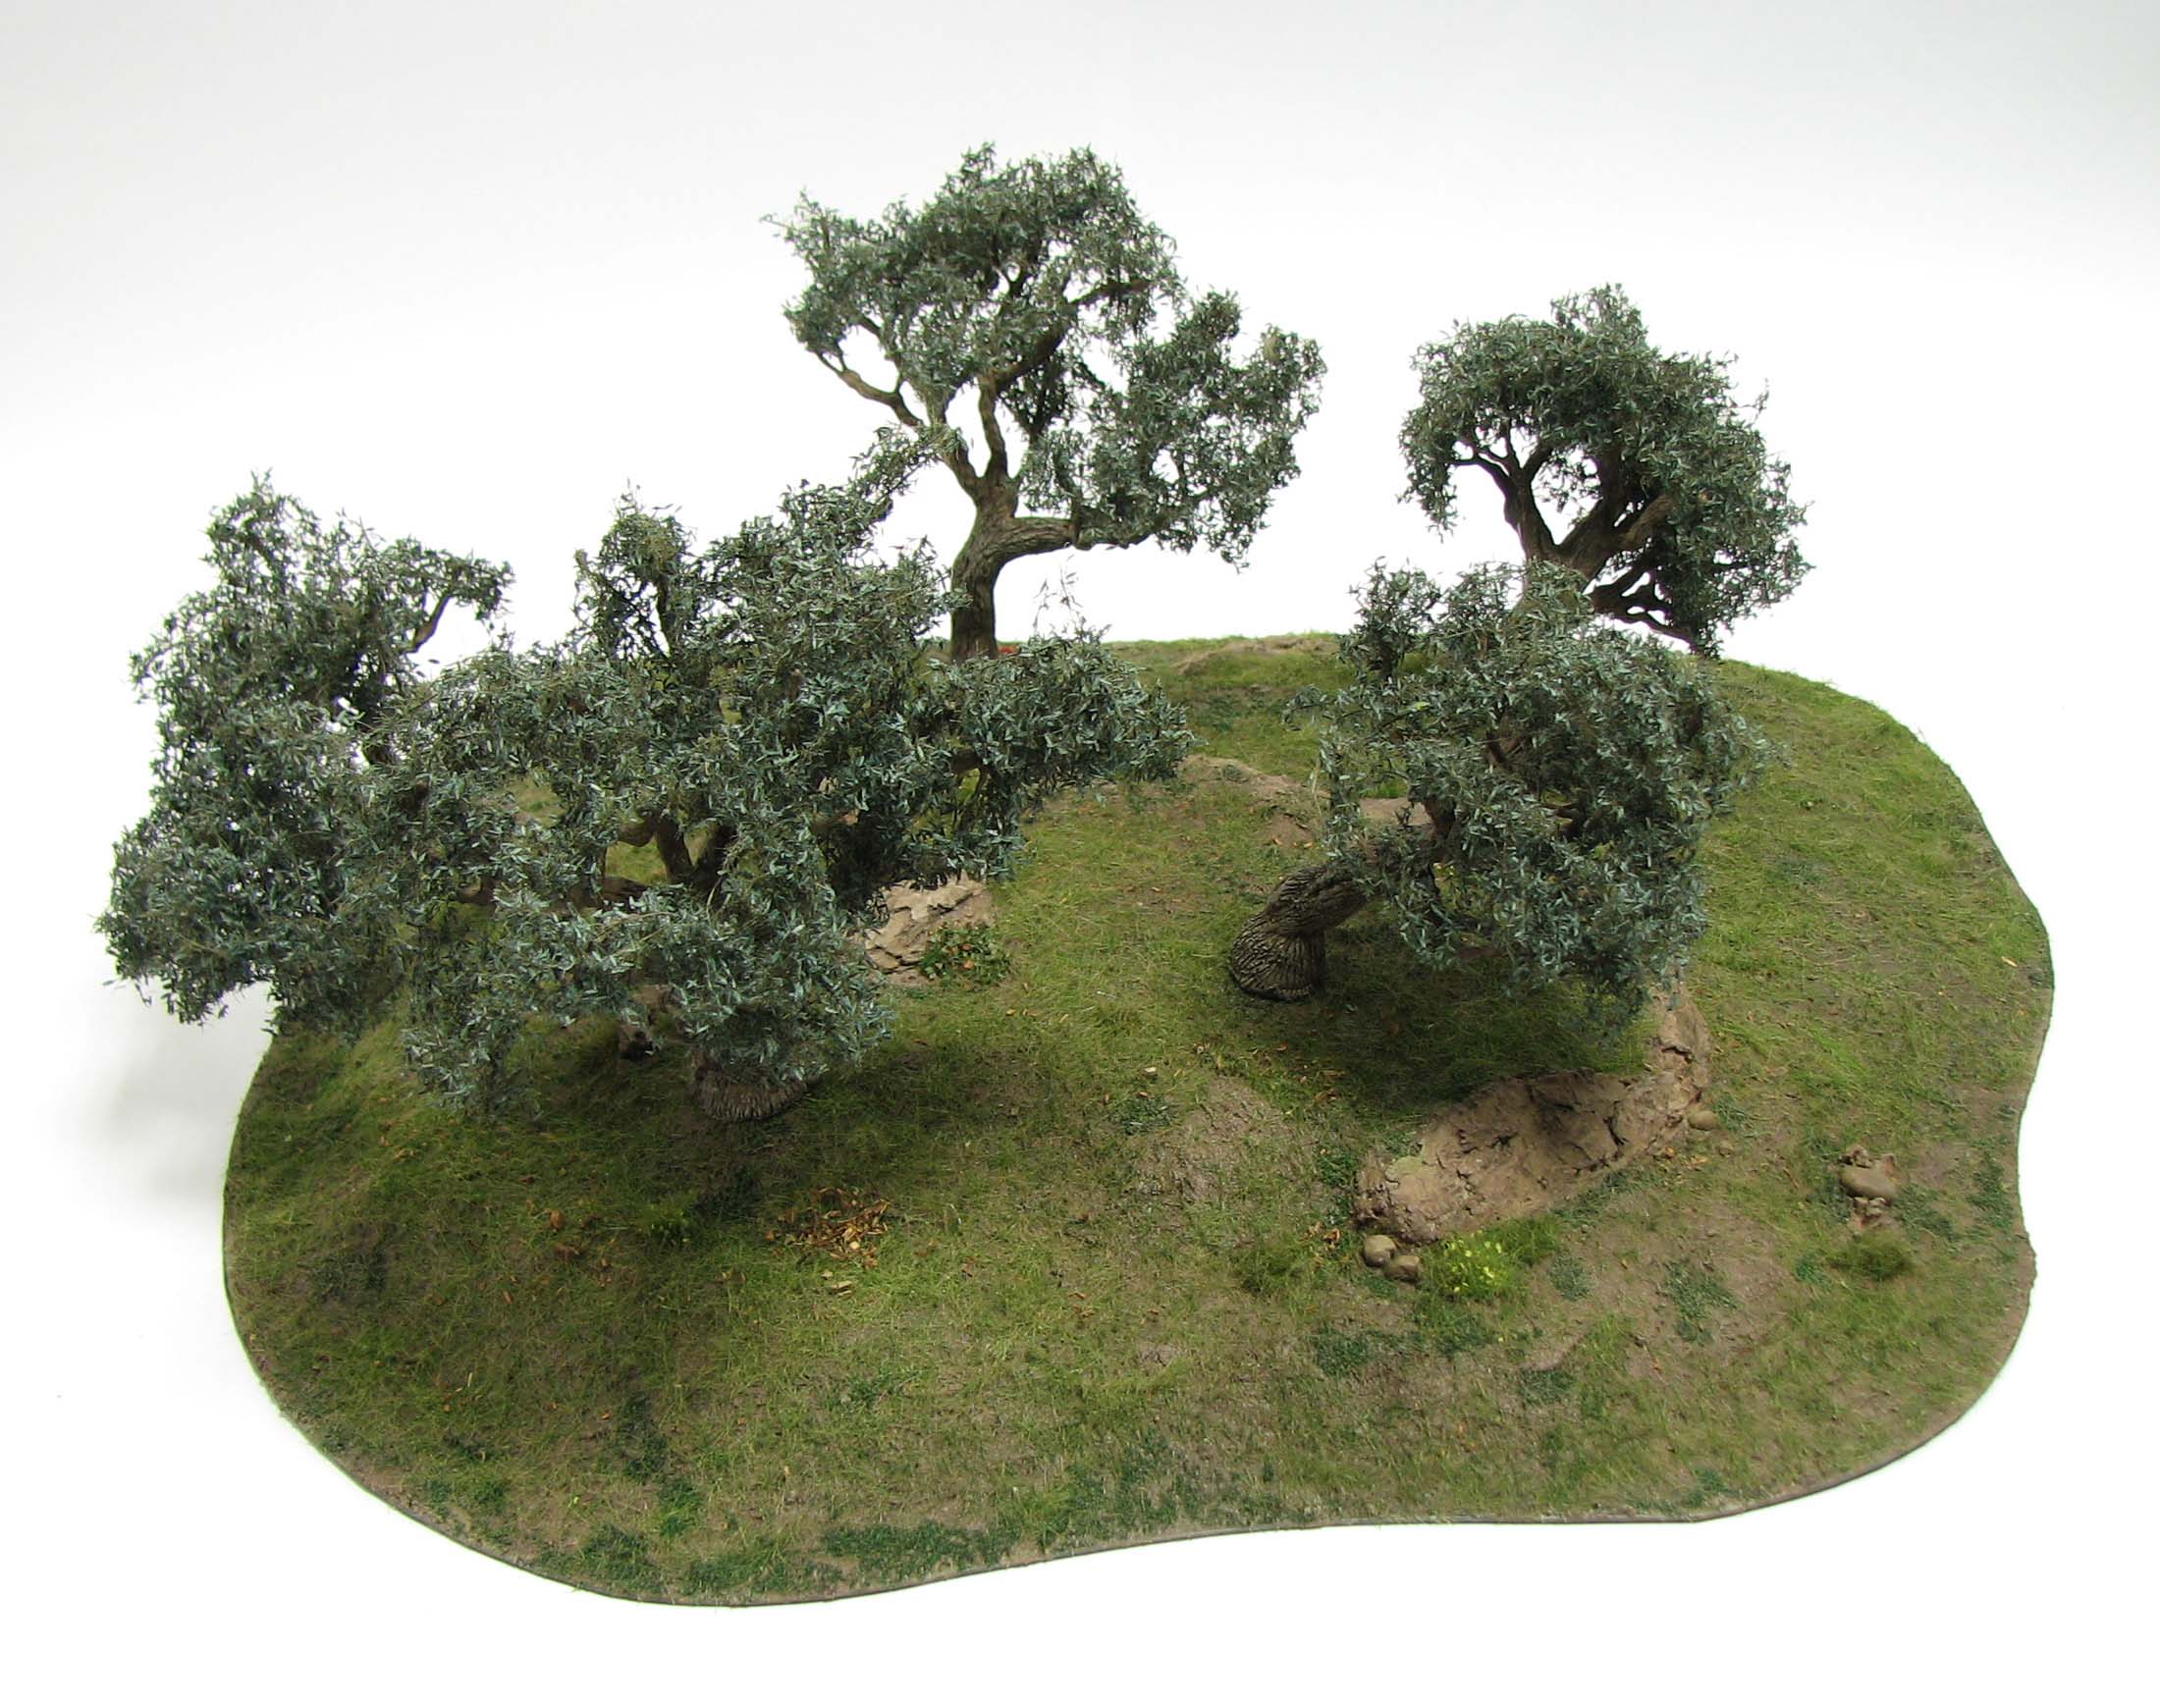
Trees do not pose such a problem and can be placed easily. Naturally a dense canopy would have an effect on the ground vegetation, accordingly we need to decide if we want to depict a forested hill or a plain hill with the option to place some singular trees. If you want to make your own trees for your wargaming hills, check out my comprehensive tutorial.
Slots or magnets?
Finally we have to consider if slots should be utilised to place trees (or other terrain features, for instance rock outcrops) or if we use magnets to attach trees at a moments notice. I would argue that the second option is superior, as it will not interfer with the naturalistic appearance of the piece. The only disadvantage would be that if you want to place trees on open ground you need to make bases that are either magnetised or have some steel discs embedded.
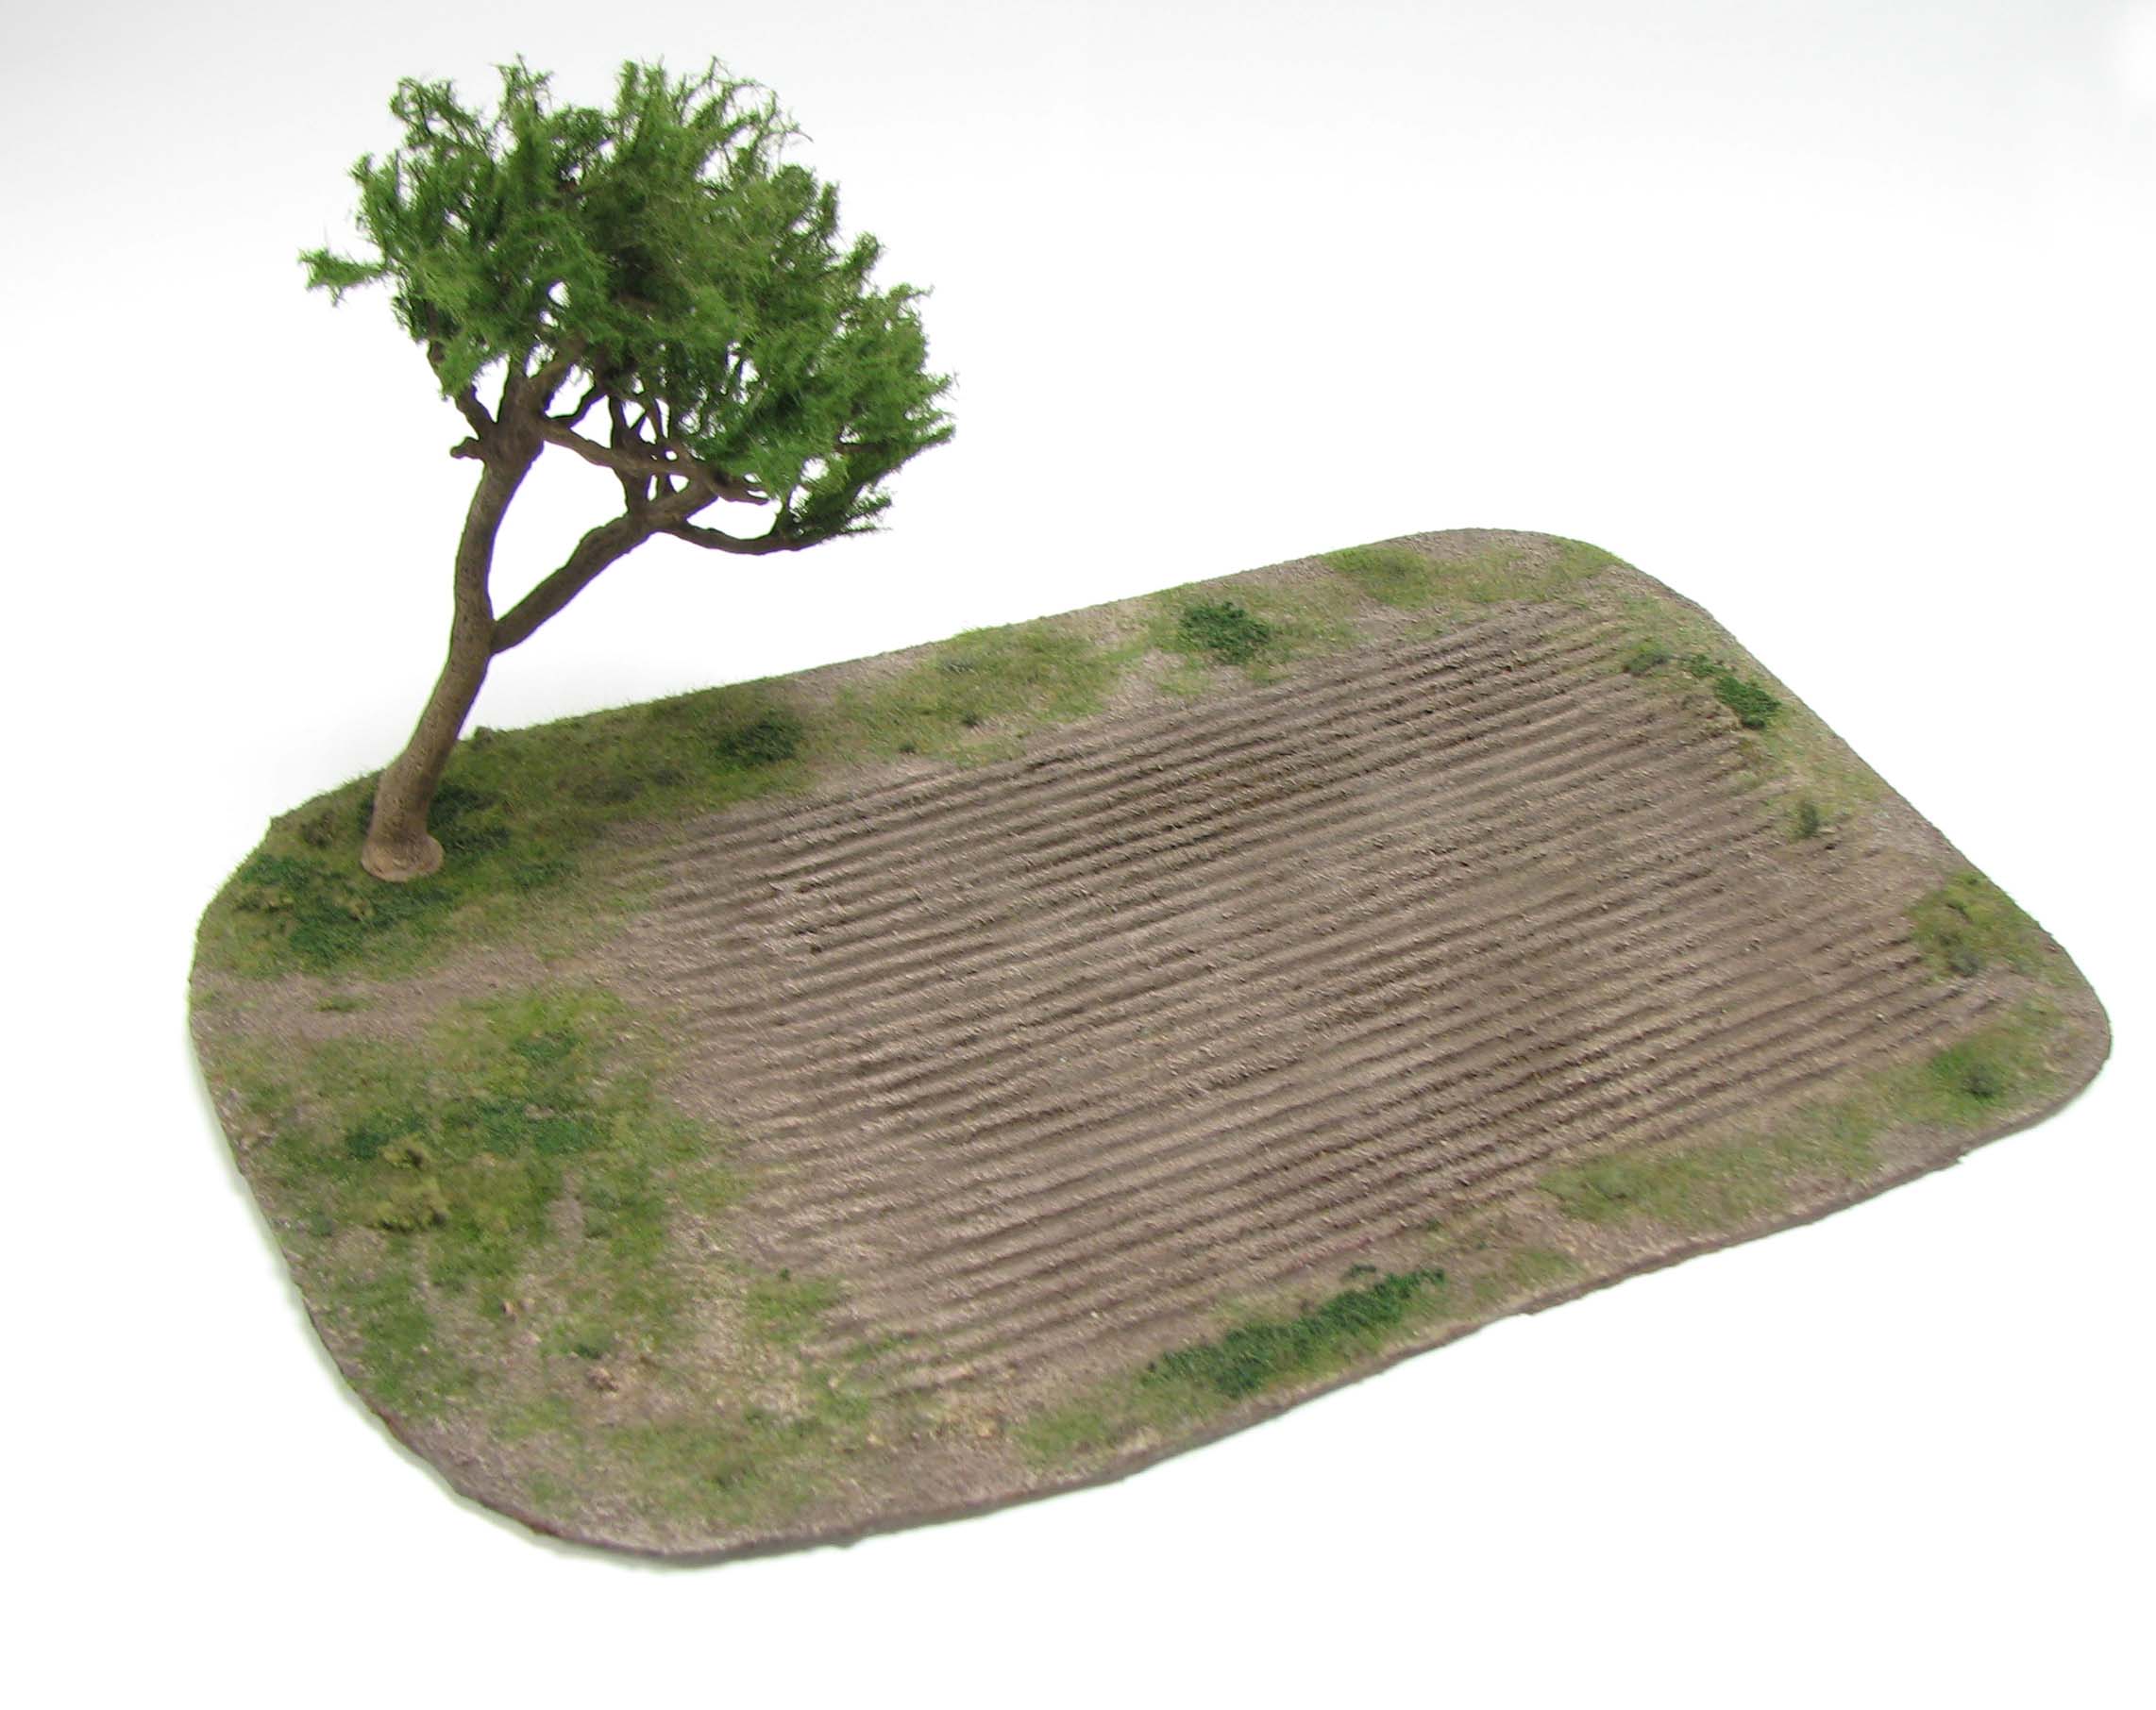
In terms of magnet strength you should definitly go for neodynium magnets, anything else will be too weak. While smaller trees will be held in place with a N45 grade magnet (10mm by 1mm) it is surely not a bad idea to go for some slightly stronger magnets (10mm by 2mm) or even the N52 variety. This especially true for tall trees like pines or wind swept trees that tend to lean to one side. For the strongest possible connection I recommend using two magnets: One in the scenic base, one in the tree trunk. Naturally you need to be careful about the polarisation of your magnets if you do this. The attraction of magnet to steel disc is slightly weaker, so in this case go for stronger magnets if in doubt.
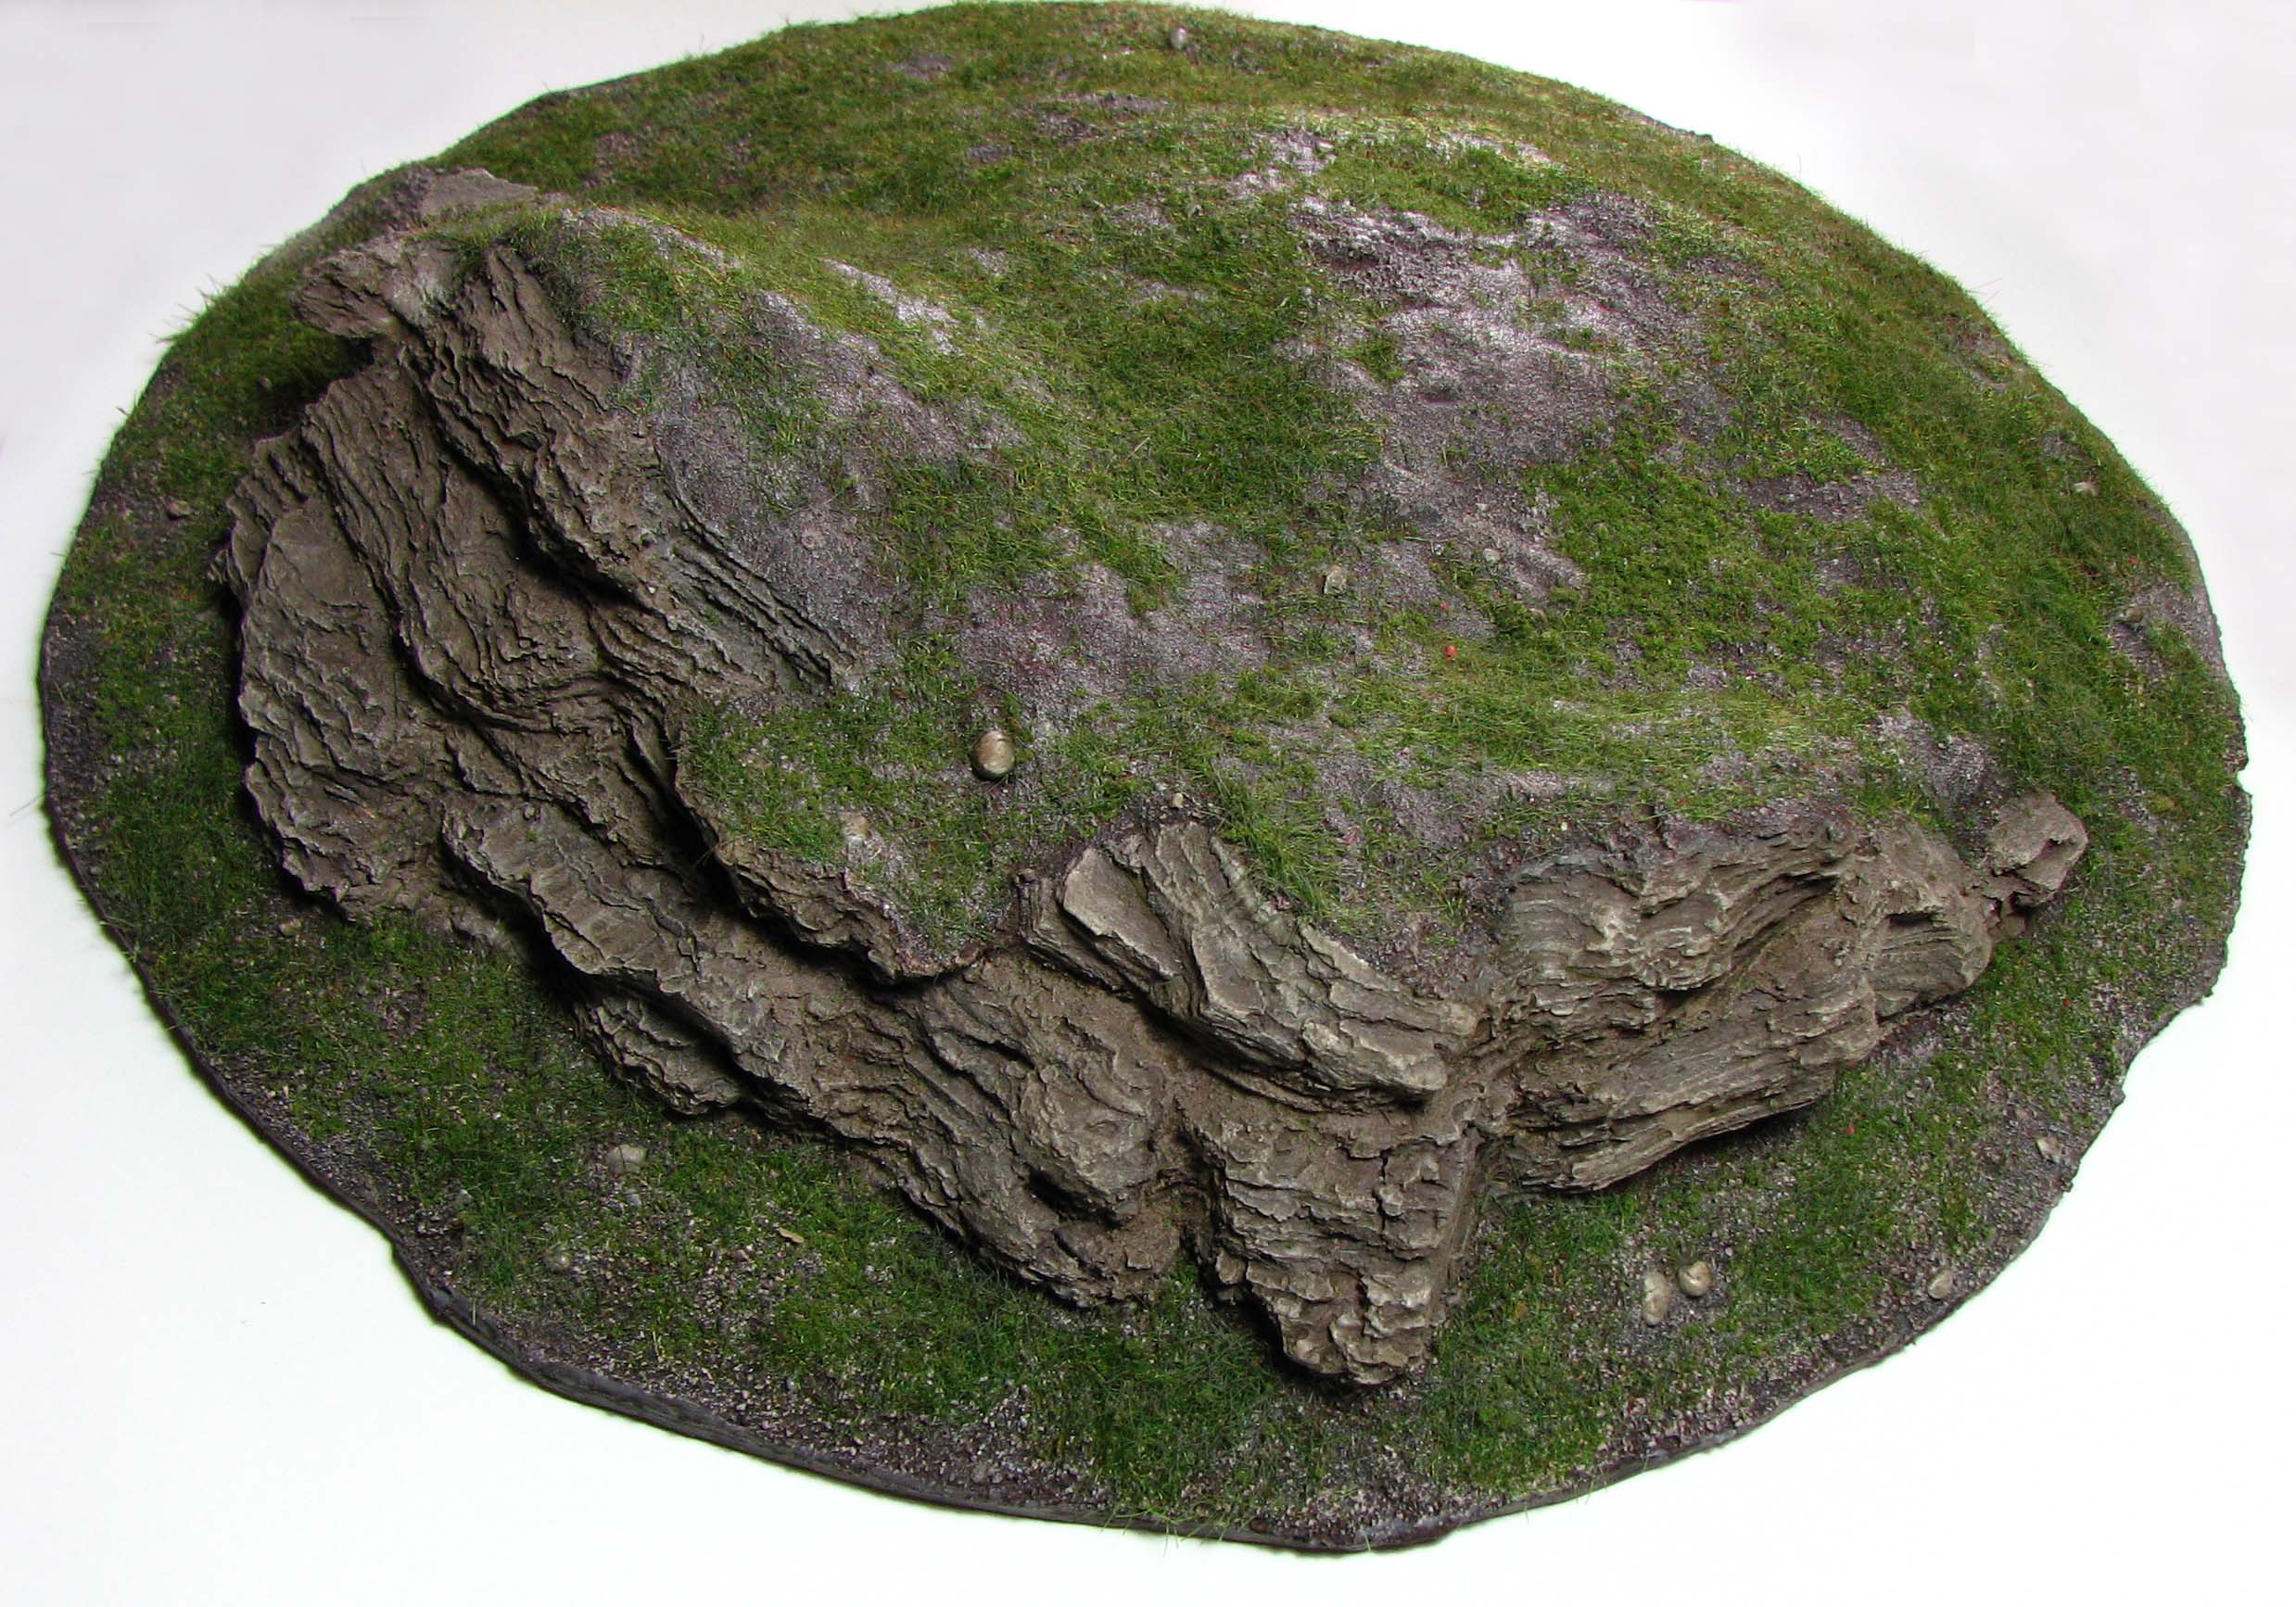
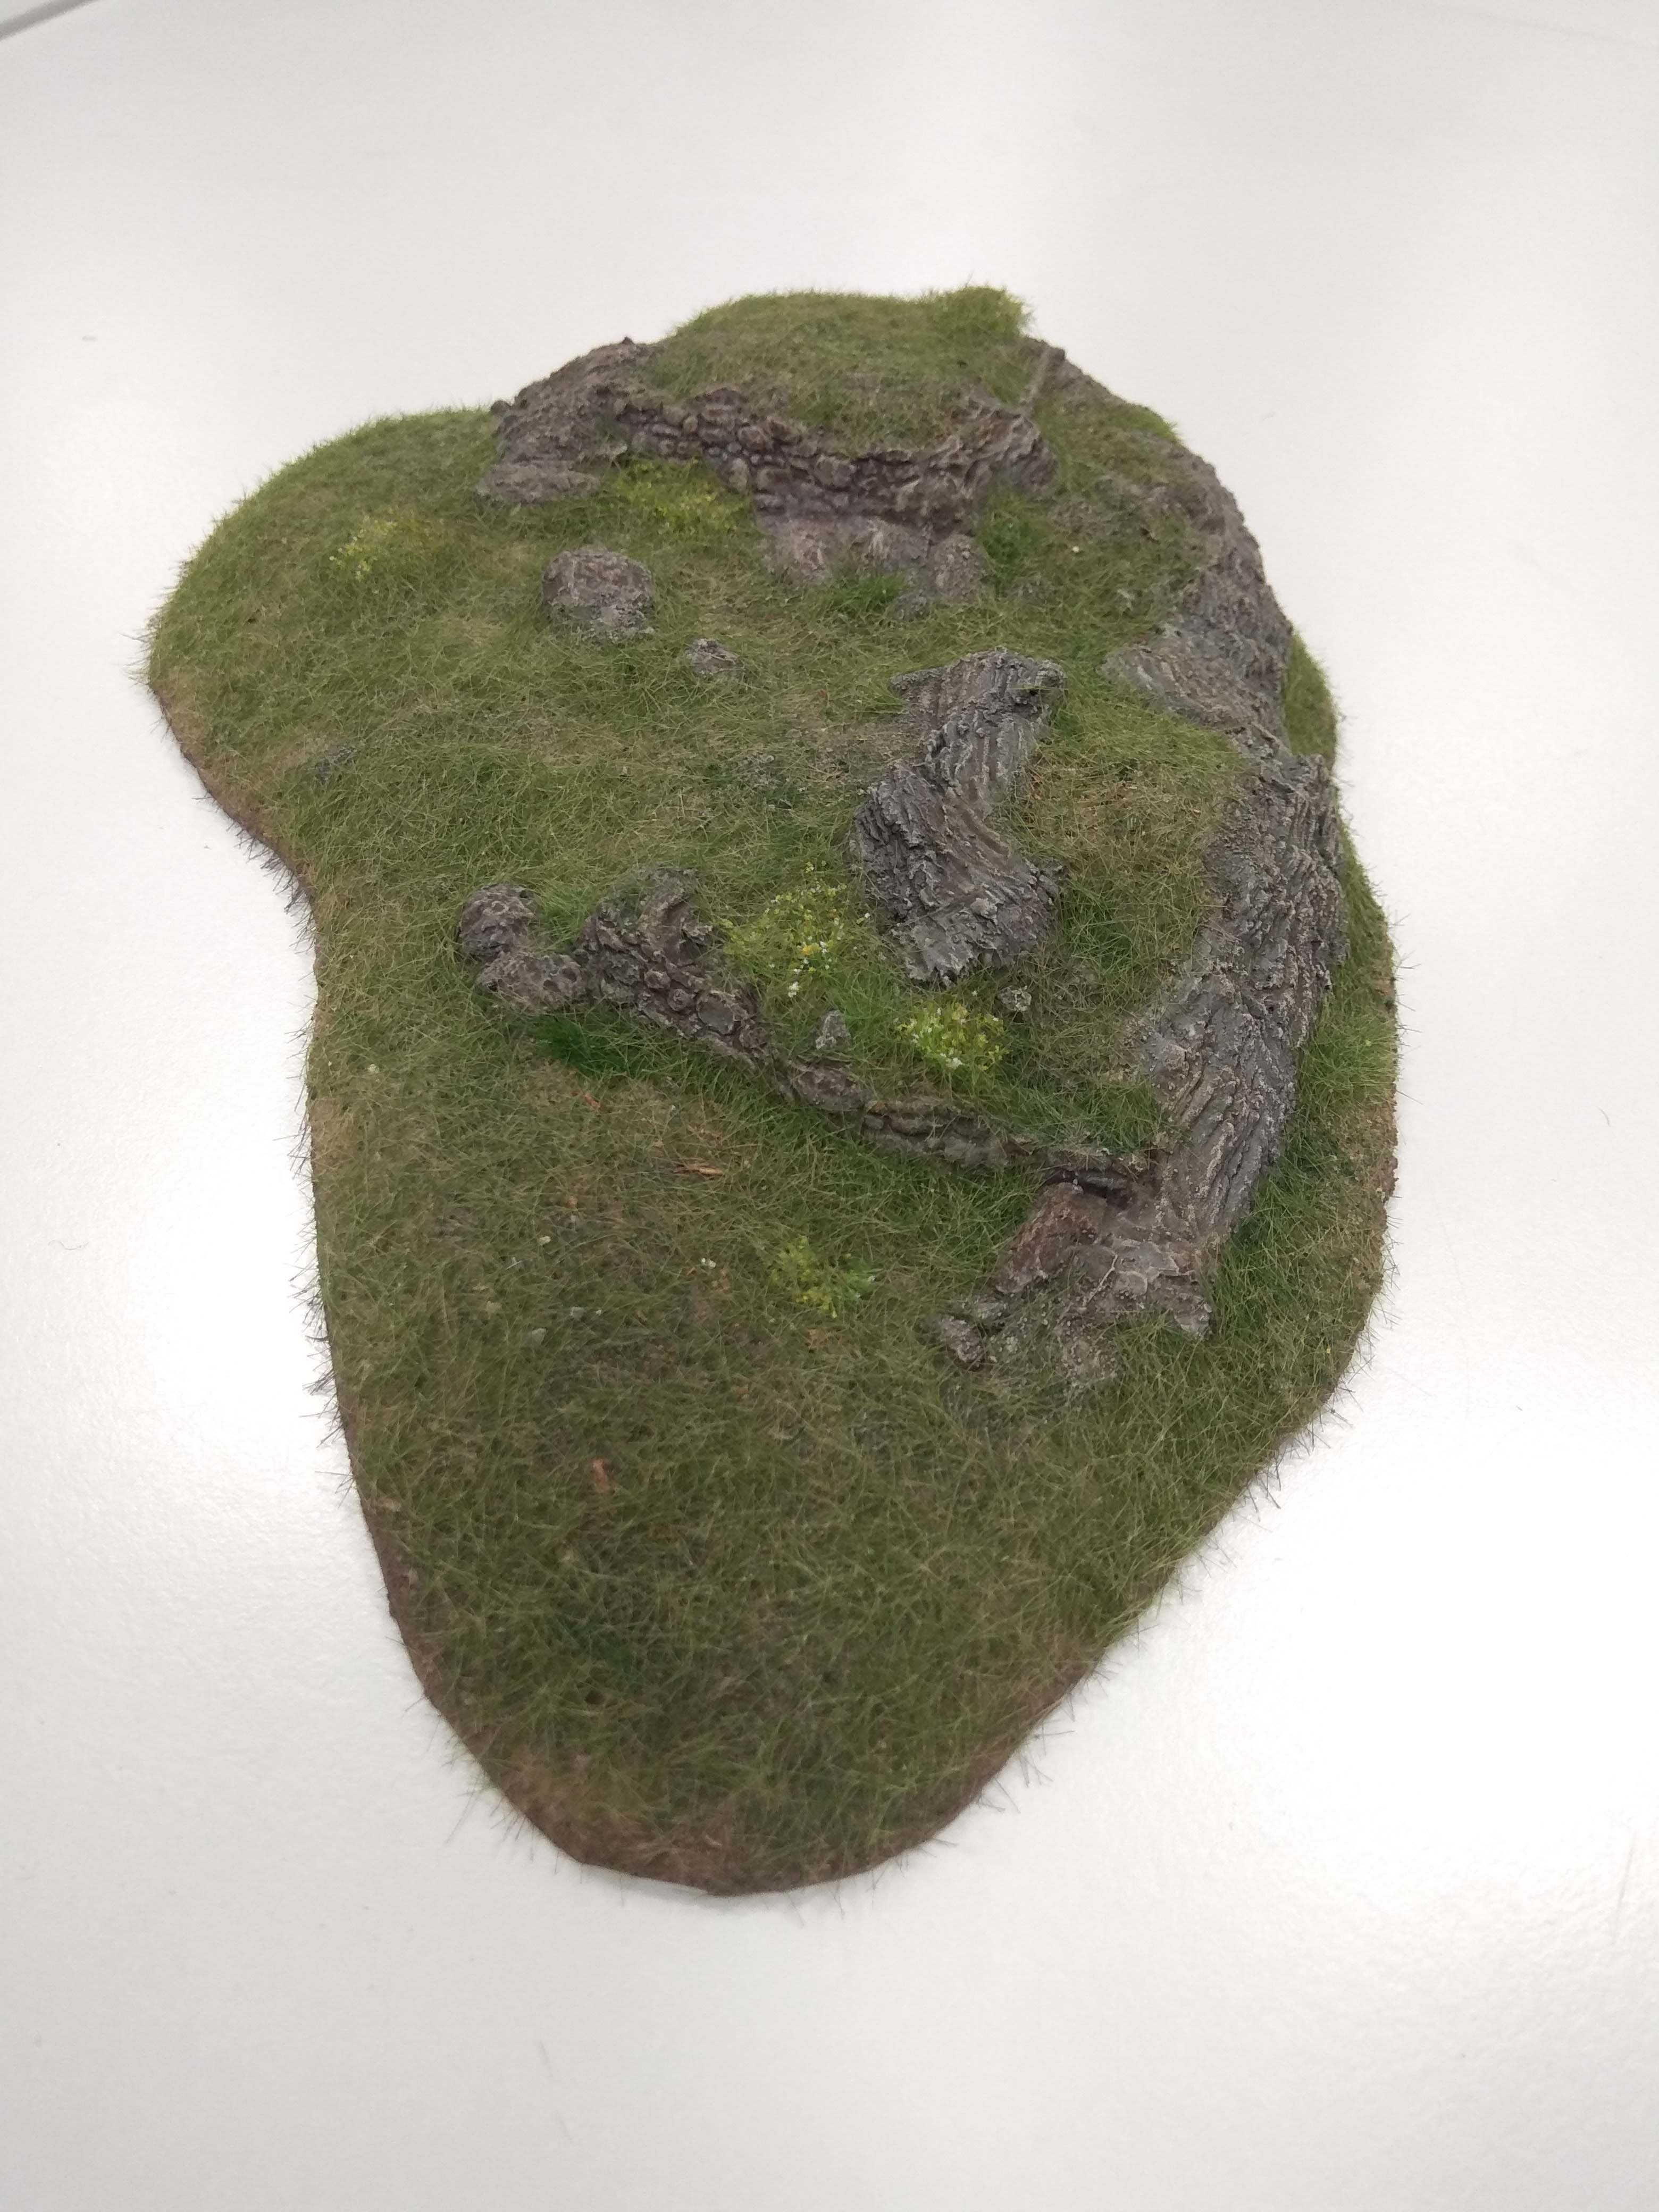
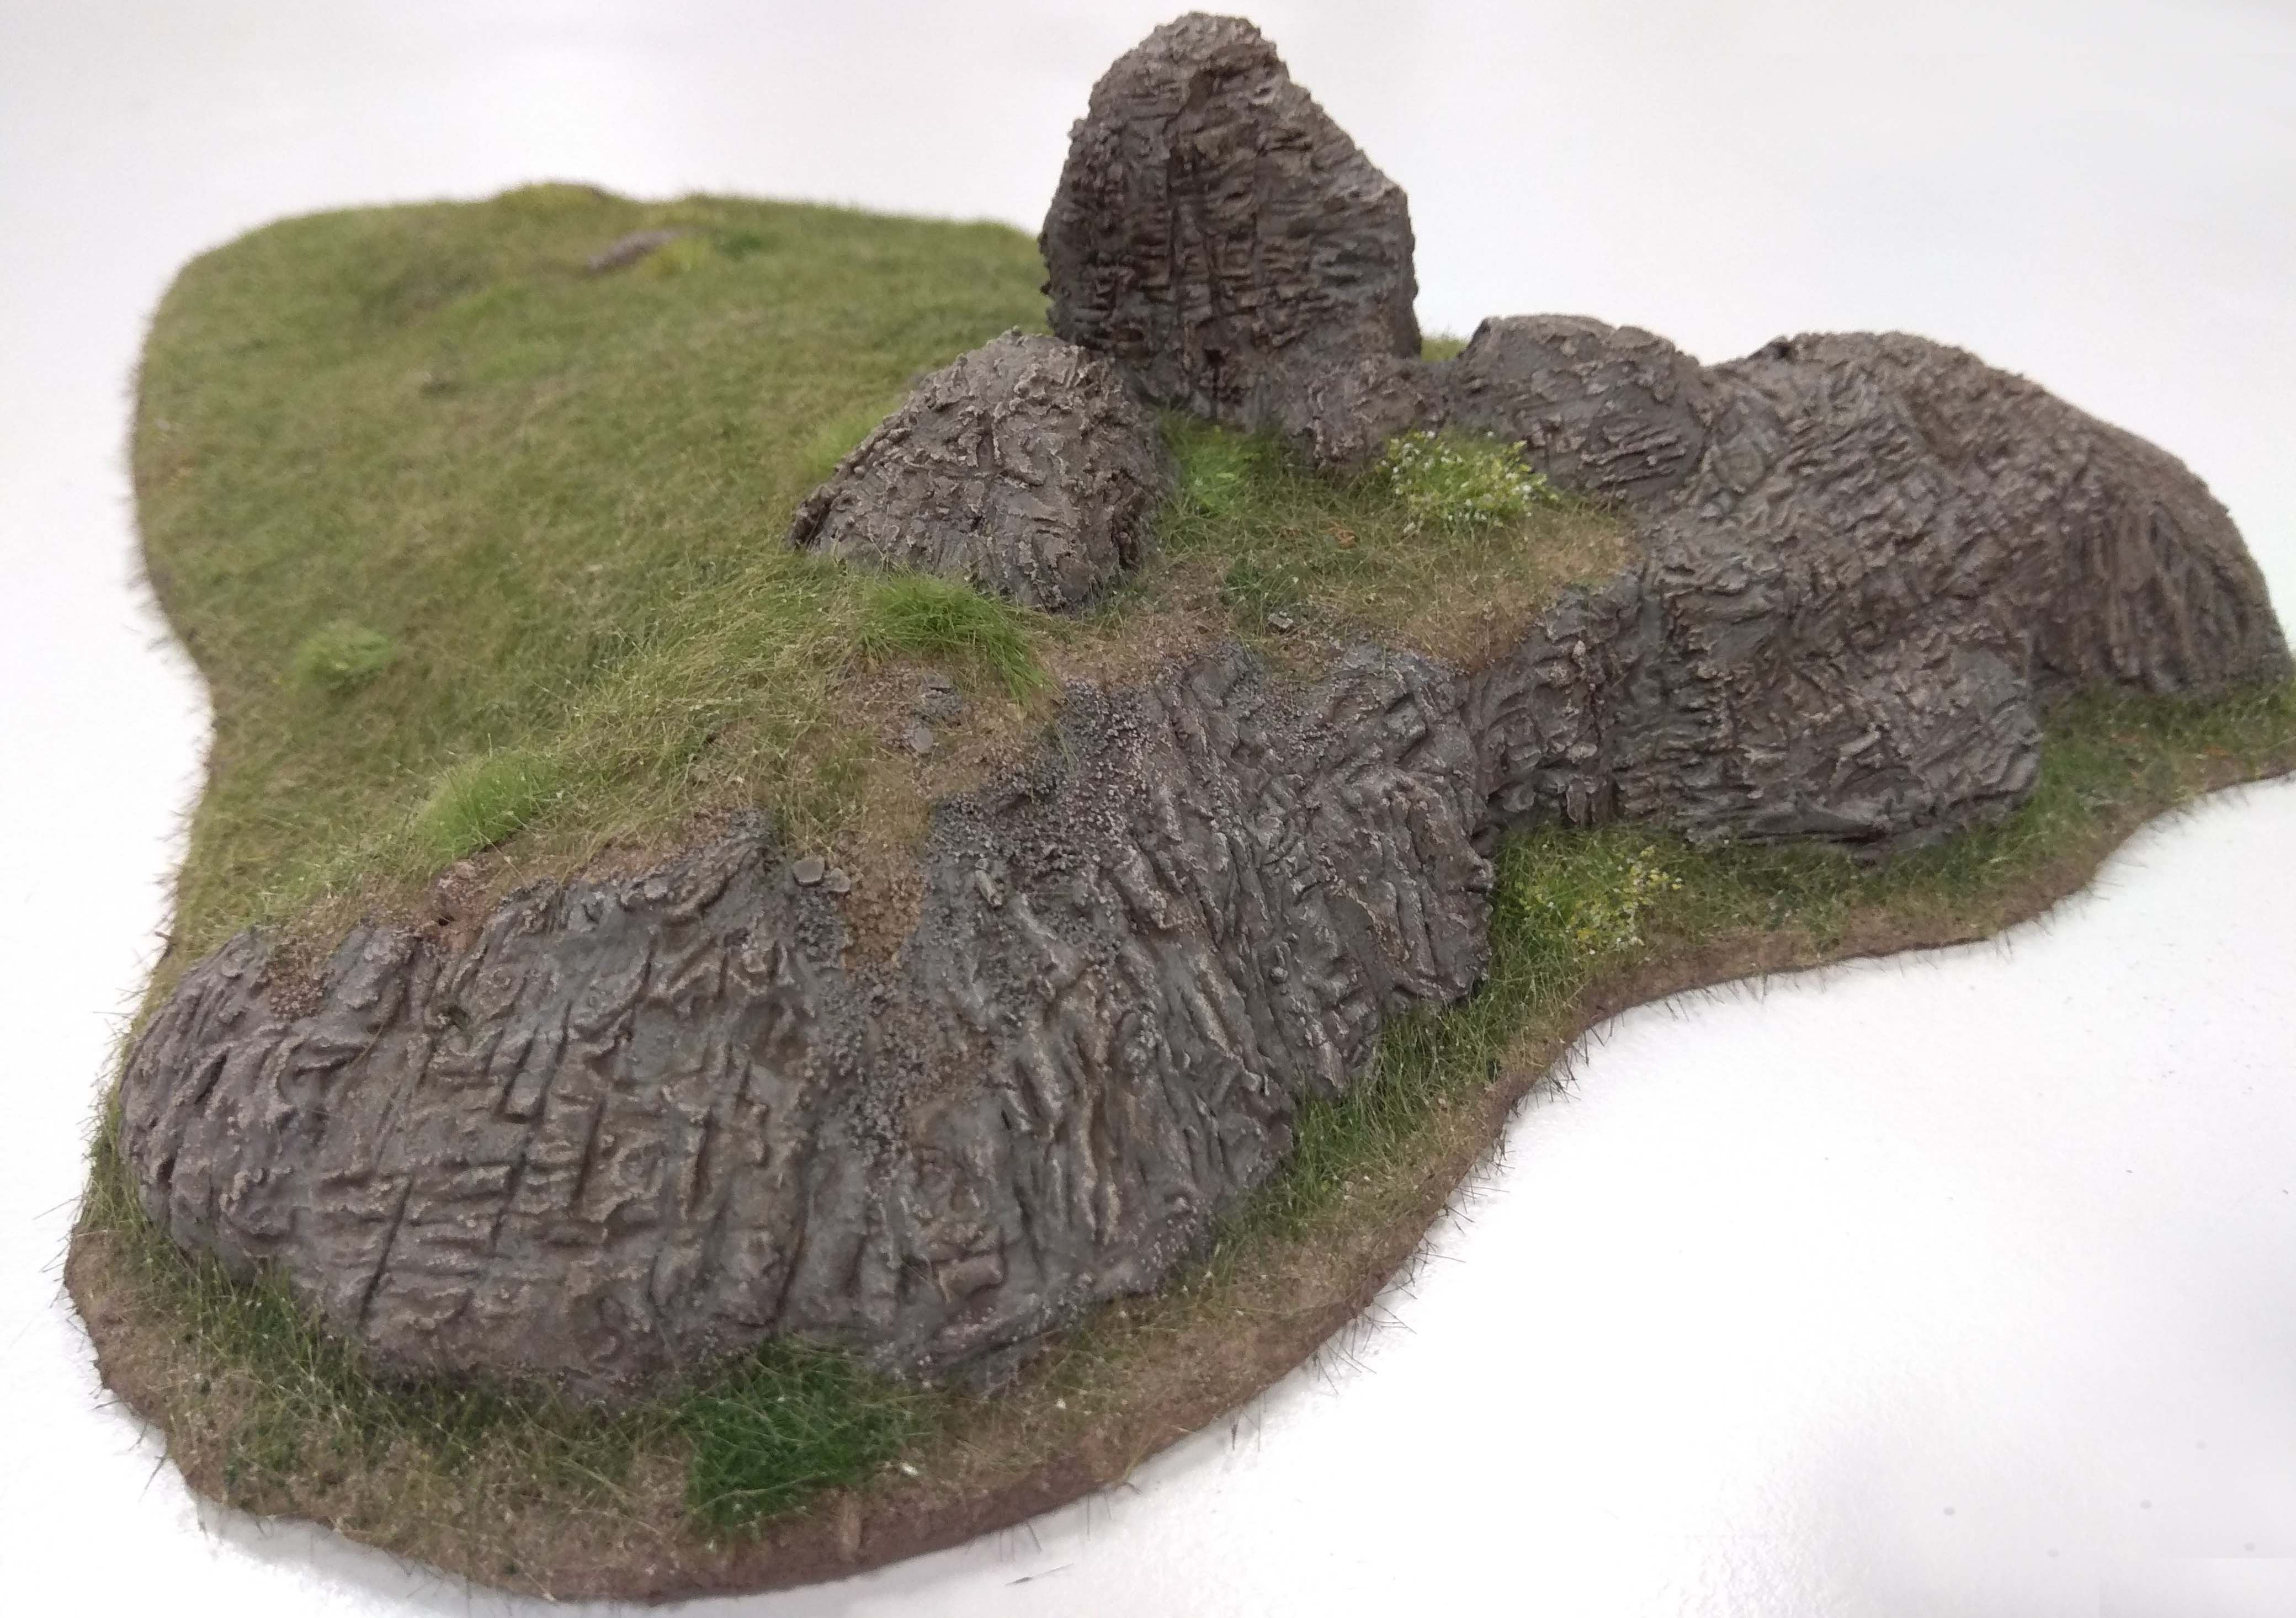
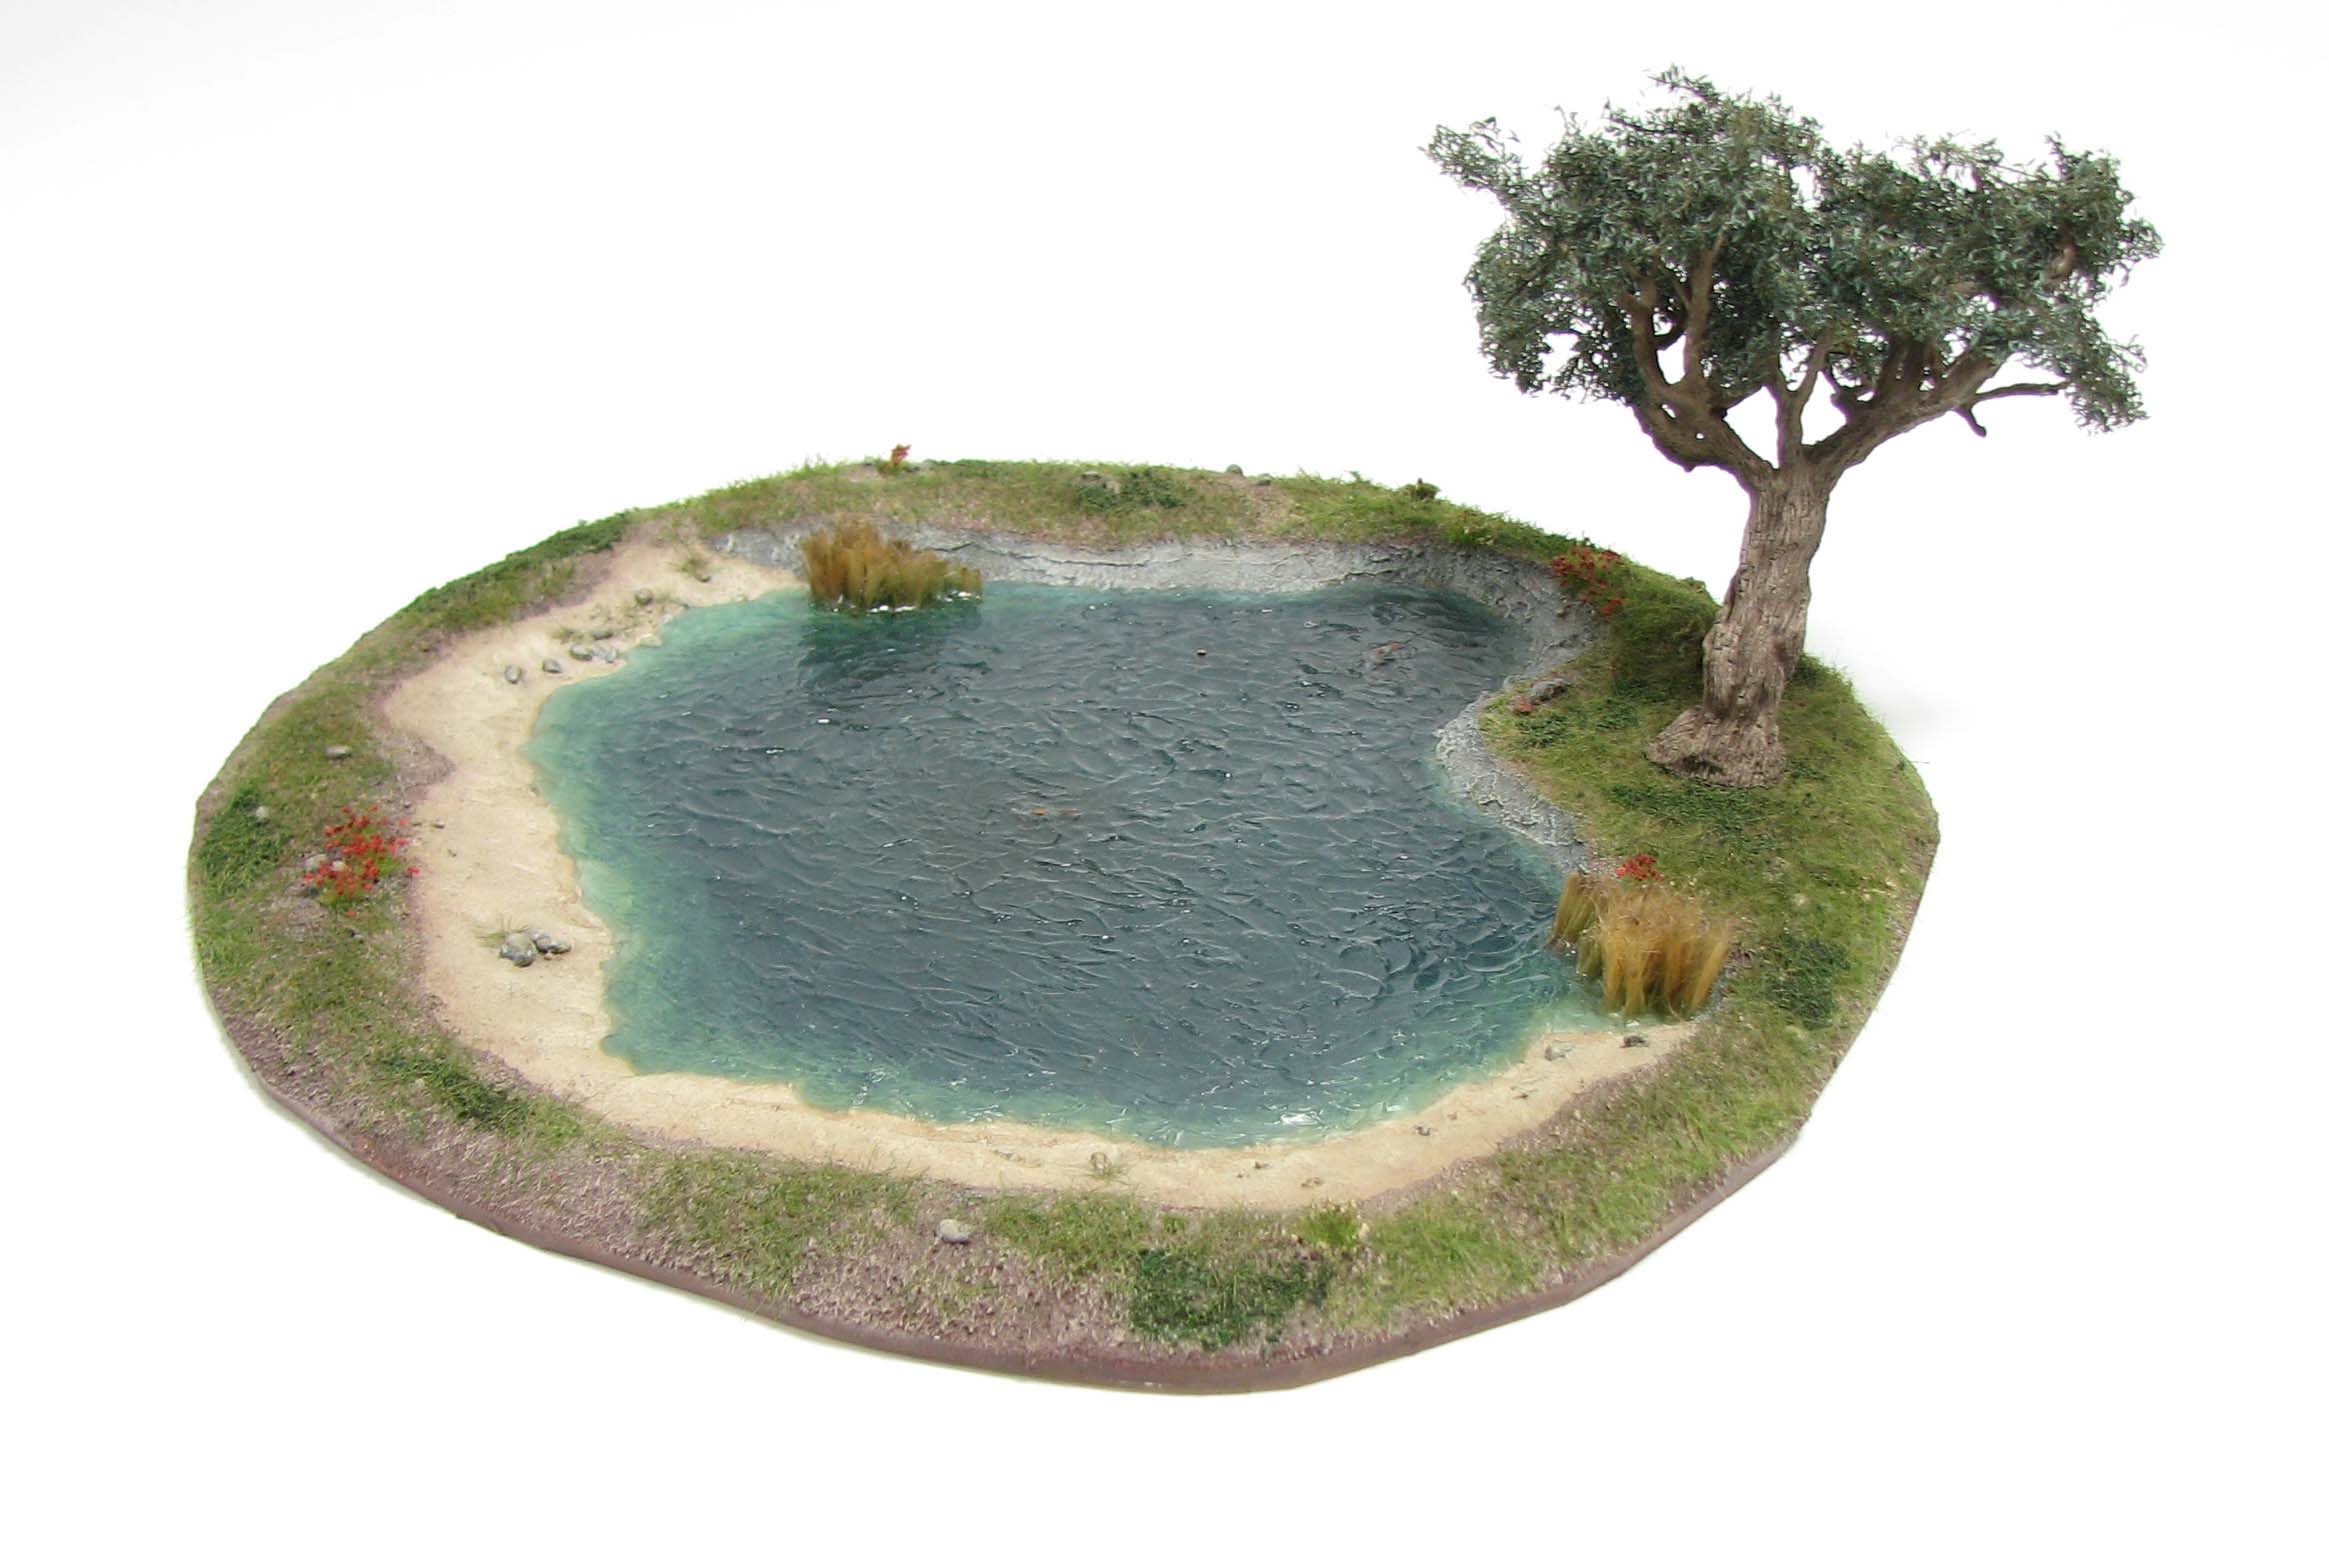
Considering all this I went for a very generic hill with some rock outcrops that can be used on its own or with some single trees on it. Later incarnations might have some special features, for instance the aforementioned village or a spring. But how do we go about making such a terrain piece?
What you need
For the basic structure
- Black or white styrene sheet to cover the bottom of the piece. I went for 1mm thick black sheet as it gives a nice, clean and resilient finish to the bottom. You can choose if you want the glossy or matte side to be visible, but the glossy one scratches easily. Naturally, if you want to make a snow covered hill you should use white styrene sheet.
- Some glue that can bond extruded polystyrene to styrene sheet. I used Selleys Liquid Nails Fast.
- Styrofoam to provide the basic structure for the hill. This needs to be the denser variant – extruded polystyrene not expanded polystyrene – as it is easier to work with and less brittle. I used sheets with a thickness of 1 cm, but thicker sheets can obviously be used, too. You can fixate the sheets with a toothpick while working on them.
- Any glue that can glue Styrofoam. I use Selleys Liquid Nails Fast for this task. Some glues can dissolve styrofoam, so read the label and make sure it is suitable.
For the groundwork
- A tube of caulking/ gap filler. I use Selley No More Gaps. You could use already coloured filler, but that is not necessary. A plain white no-name brand will do and should last you for several hills.
- Different kinds of sand or soil, ranging from very fine to coarse. I use some black sand in my mix, too, as it provides a bit of colour variation in the final top layer.
- Brown paint to mix into the caulking.
- Bark pieces and coarse cork pieces to depict rock outcroppings.
- Different shades of brown acrylic paint.
- Neodymium magnets or steel discs. I use 10mm by 1mm magnets or discs. Nail heads work quite well as do washers.
For weeds, brush and moss
- MiniNatur grass tufts, birch and apple foliage nets. I use a selection of autumn and summer grass tufts. The foliage nets can be used to depict floor creepers and bushes.
- Static grass. If you have different brands mix them all up for a more nuanced and realistic appearance.
- Matte spray varnish to reduce the shine of the static grass. I use Tamiya Flat Clear.
- Brown acrylic spray paint to slightly darken the tufts or alternatively a brown wash to dull the shine of the tufts and grass.
- Fine turf e .g. Woodland Scenics range of fine turf in dark green or any other fine turf. This is basically very finely ground coloured foam. We will use this to depict ground cover.
- Dry tea leaves or basil to depict fallen leaves.
- Wood glue or acrylic matte medium to fixate turf and leave scatter.
- Dark or medium green, yellow and beige acrylic paint to highlight the fine turf. A light brown tone to drybrush the static grass.
Final touches
- Acrylic medium thinned 1:10 with water to seal the piece. Apply with a vaporizer or an airbrush. This will also take away any remaining shine.
Tools needed
- Scissors (to cut the styrene).
- Caulking gun.
- Hand-saw.
- Plastic bag.
- Nitril-gloves.
- Spatula.
- Sculpting tools.
- Different grades of sanding paper.
- Brushes of various sizes to apply paint, wood glue and acrylic caulking. Old bristle brush for dry brushing.
- X-acto knife or scalpel.
- If you have it: A hot knife to cut the styrofoam.
- An airbrush or a spray bottle.
Do it! Do it now!
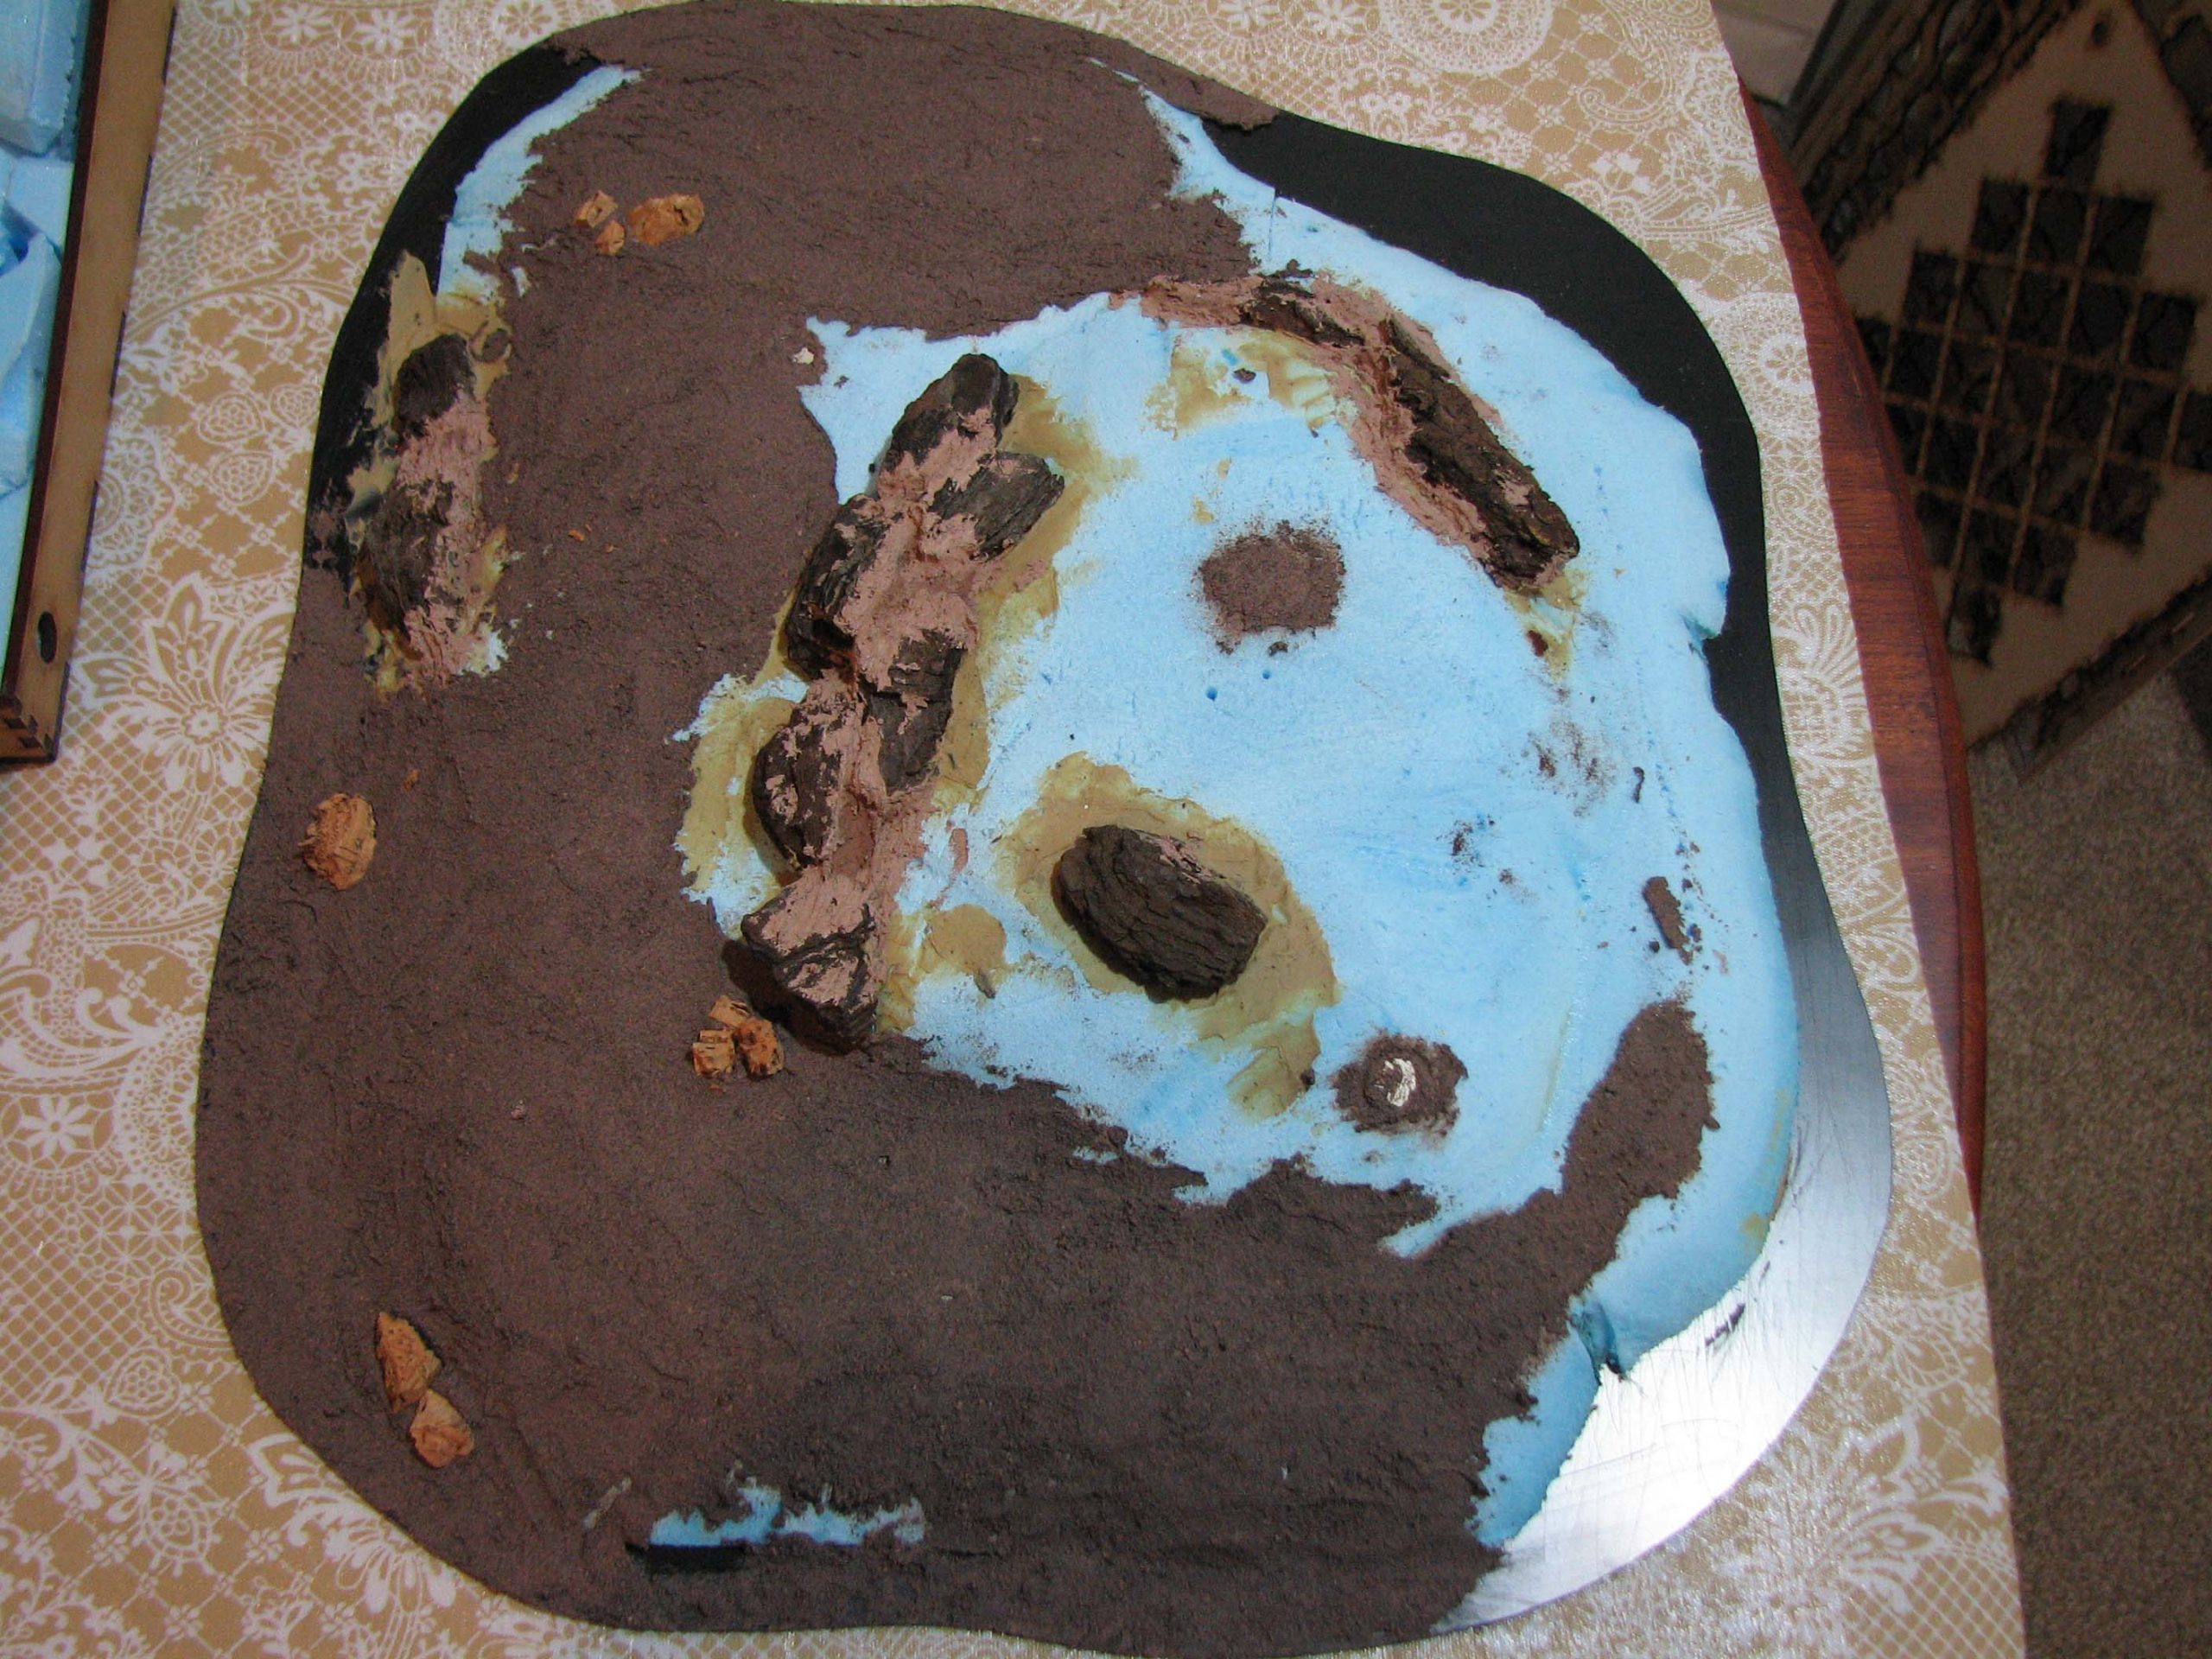
The basic structure
We start easy: Cut the styrene sheet to size, but make it slightly bigger than the piece of styrofoam. That way you have a bit of room to create a smooth transition to the gaming table, avoiding a visible ridge. Score the glue-side with some coarse sanding paper.
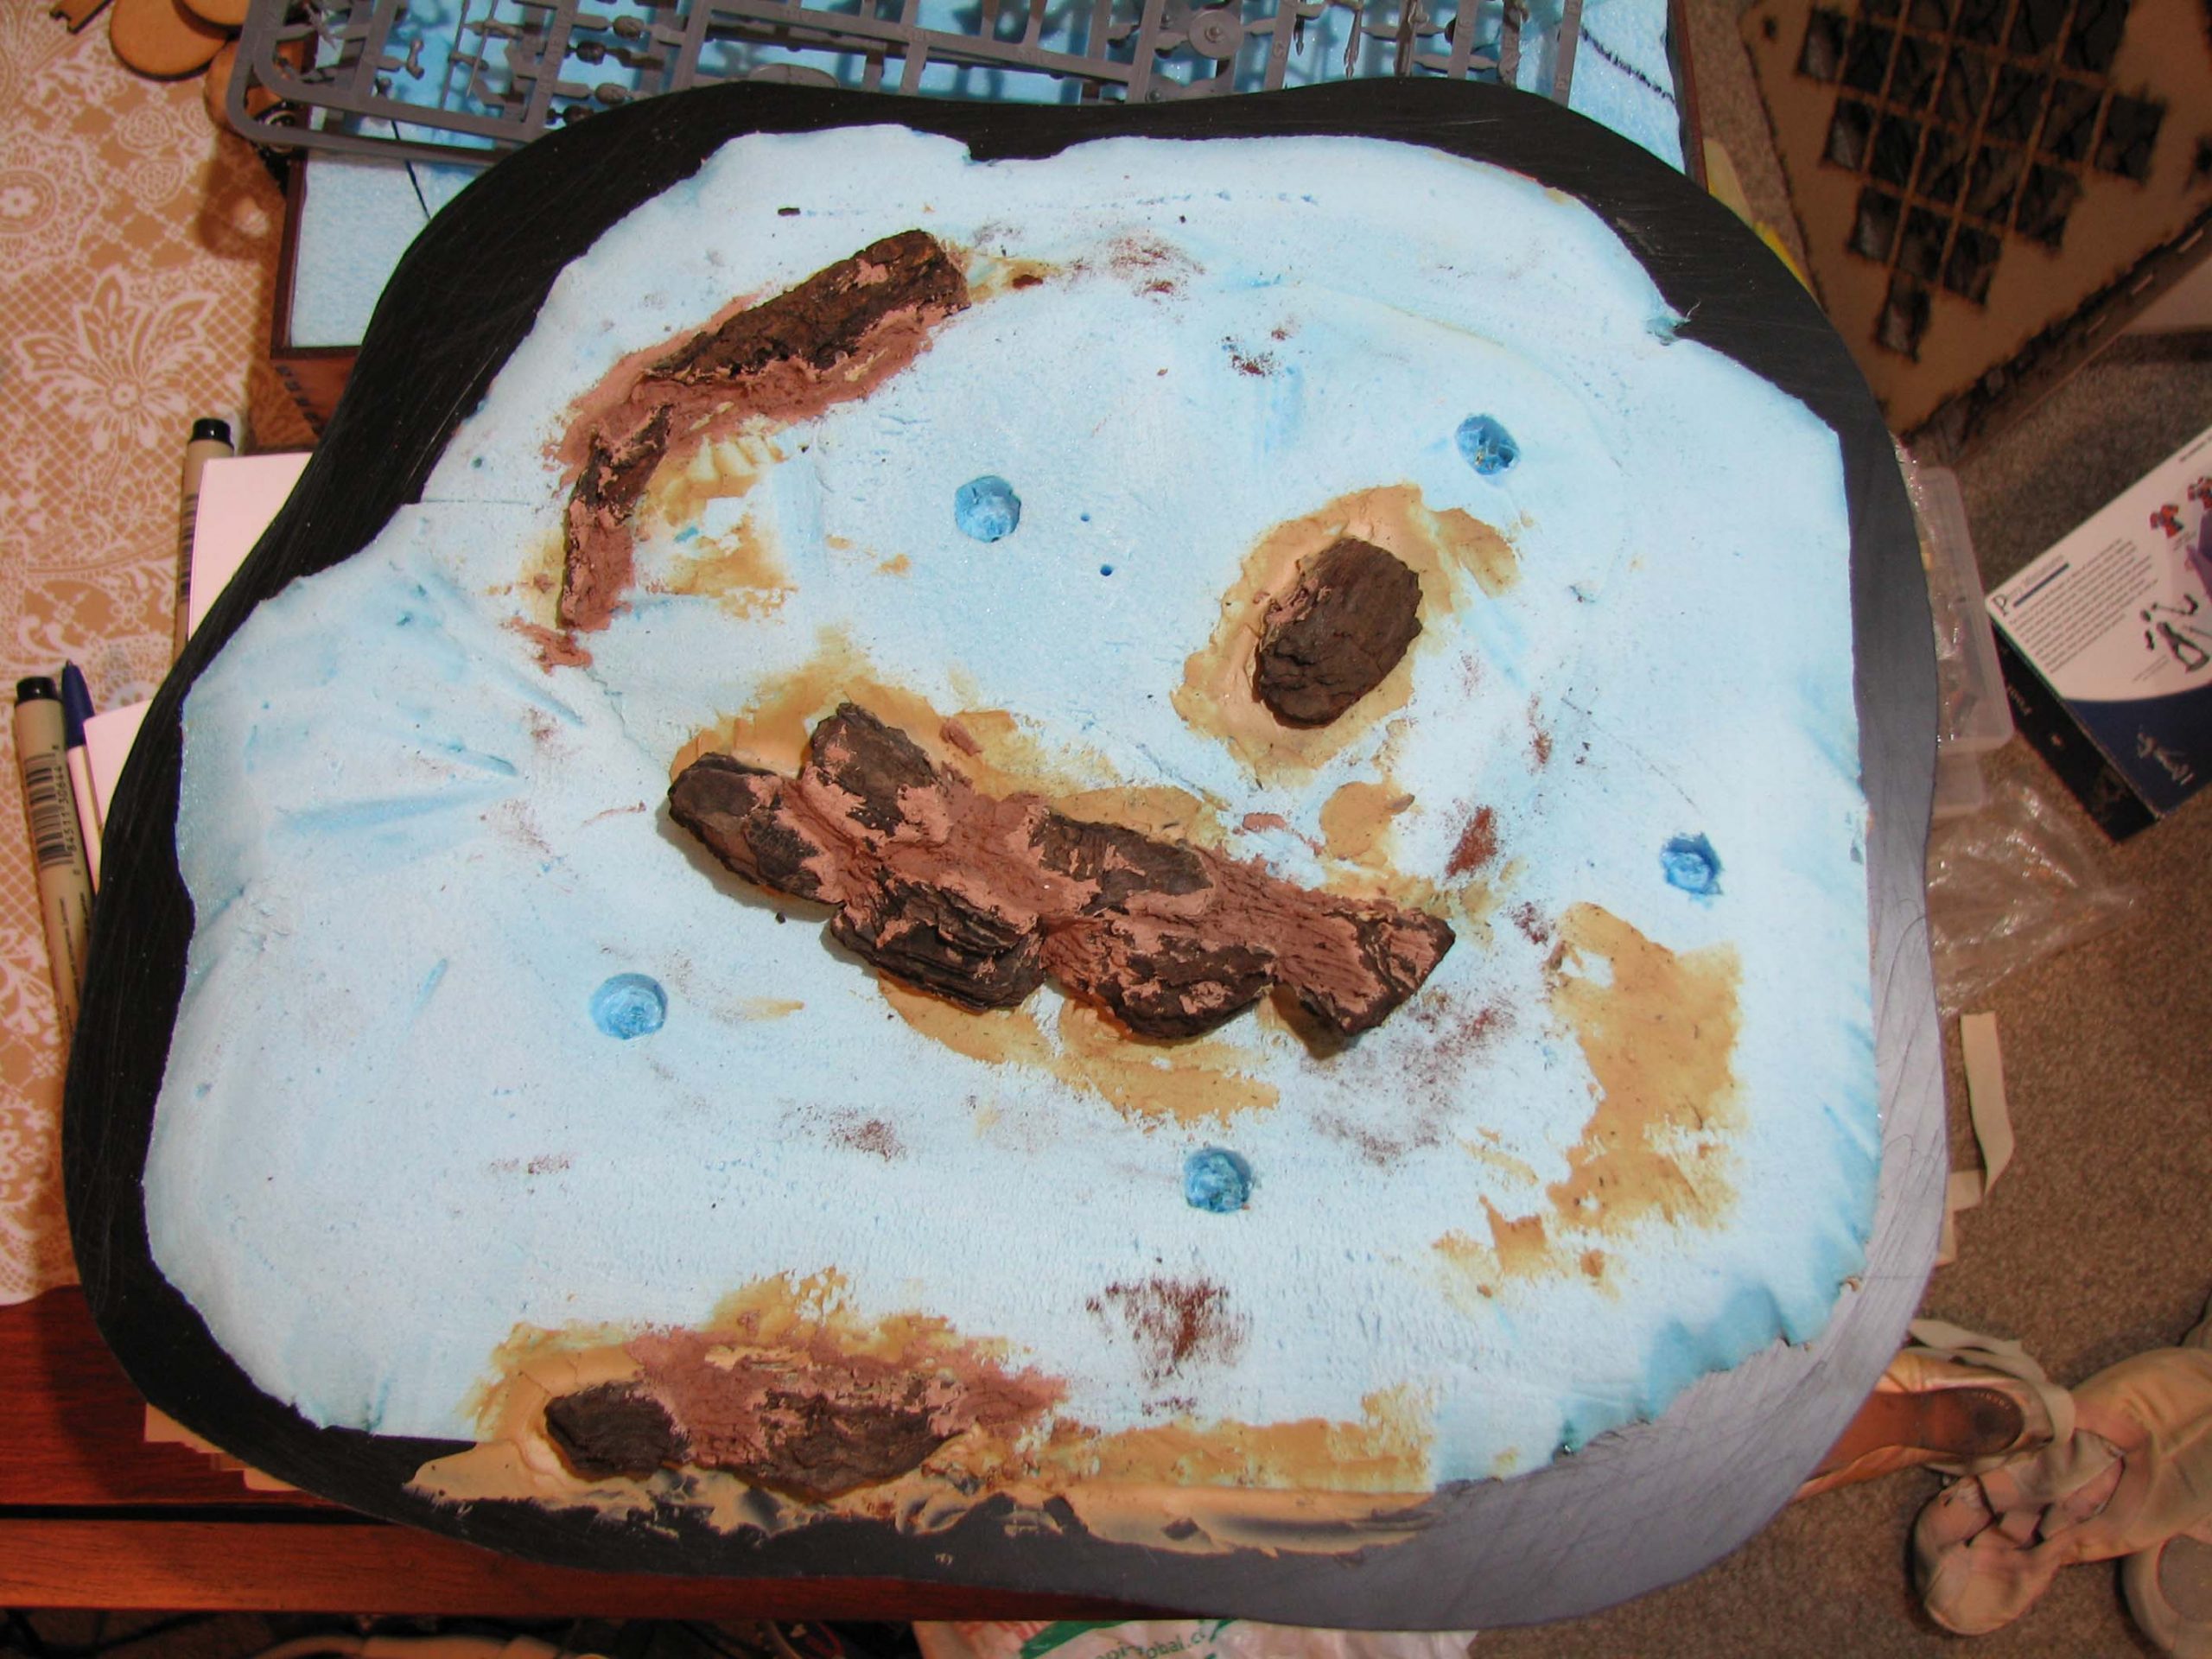
Now cut the styrofoam sheets to size using a (hot) knife. Assemble the rough hill shape and use some fine sanding paper to smooth the surface. You can leave some more angular areas if you want to depict underlying rock, but I find it more pleasing if the surface is sanded down to a smooth finish. Do this outside if you are able to and wear a dust mask. The dust gets everywhere and is not good for your lungs. If you use sheets I would also not glue the sheets together and then sand, but rather fixate them with toothpicks. Only when everything is nice and smooth glue the sheets together.
Any gaps between bark pieces can be filled with air dry clay. Use the sculpting tools to make the transition between pieces as natural as possible. Use the bark texture as a guide. I recommend applying a protective layer of acrylic medium after the clay has fully hardened.
Now is also a good time to cut circular holes into the styrofoam to later hold the magnets or metal discs. Finally, glue the styrofoam on the styrene base and let it all dry over night.
The groundwork
Mix sand, acrylic caulking, brown acrylic paint and some water. You want it to be stiff enough to be applied with a spatula, but not too stiff, so you can properly smooth it out. Cover the entire piece with the groundwork mix. You can embed small pieces of cork or small pebbles in the mix to add further interest to your piece. This can be messy, so I advise to wear gloves and to put a plastic bag or some newspaper under the piece.
When you embed the magnets do not use too much mix at once and make sure it is not too watery. Depending on its composition the sand might get attracted by the magnet and form a mound. Try to avoid this, as you only want a very thin layer over the magnet. If you use steel discs you can simply cover them with a thin layer. Let dry over night.
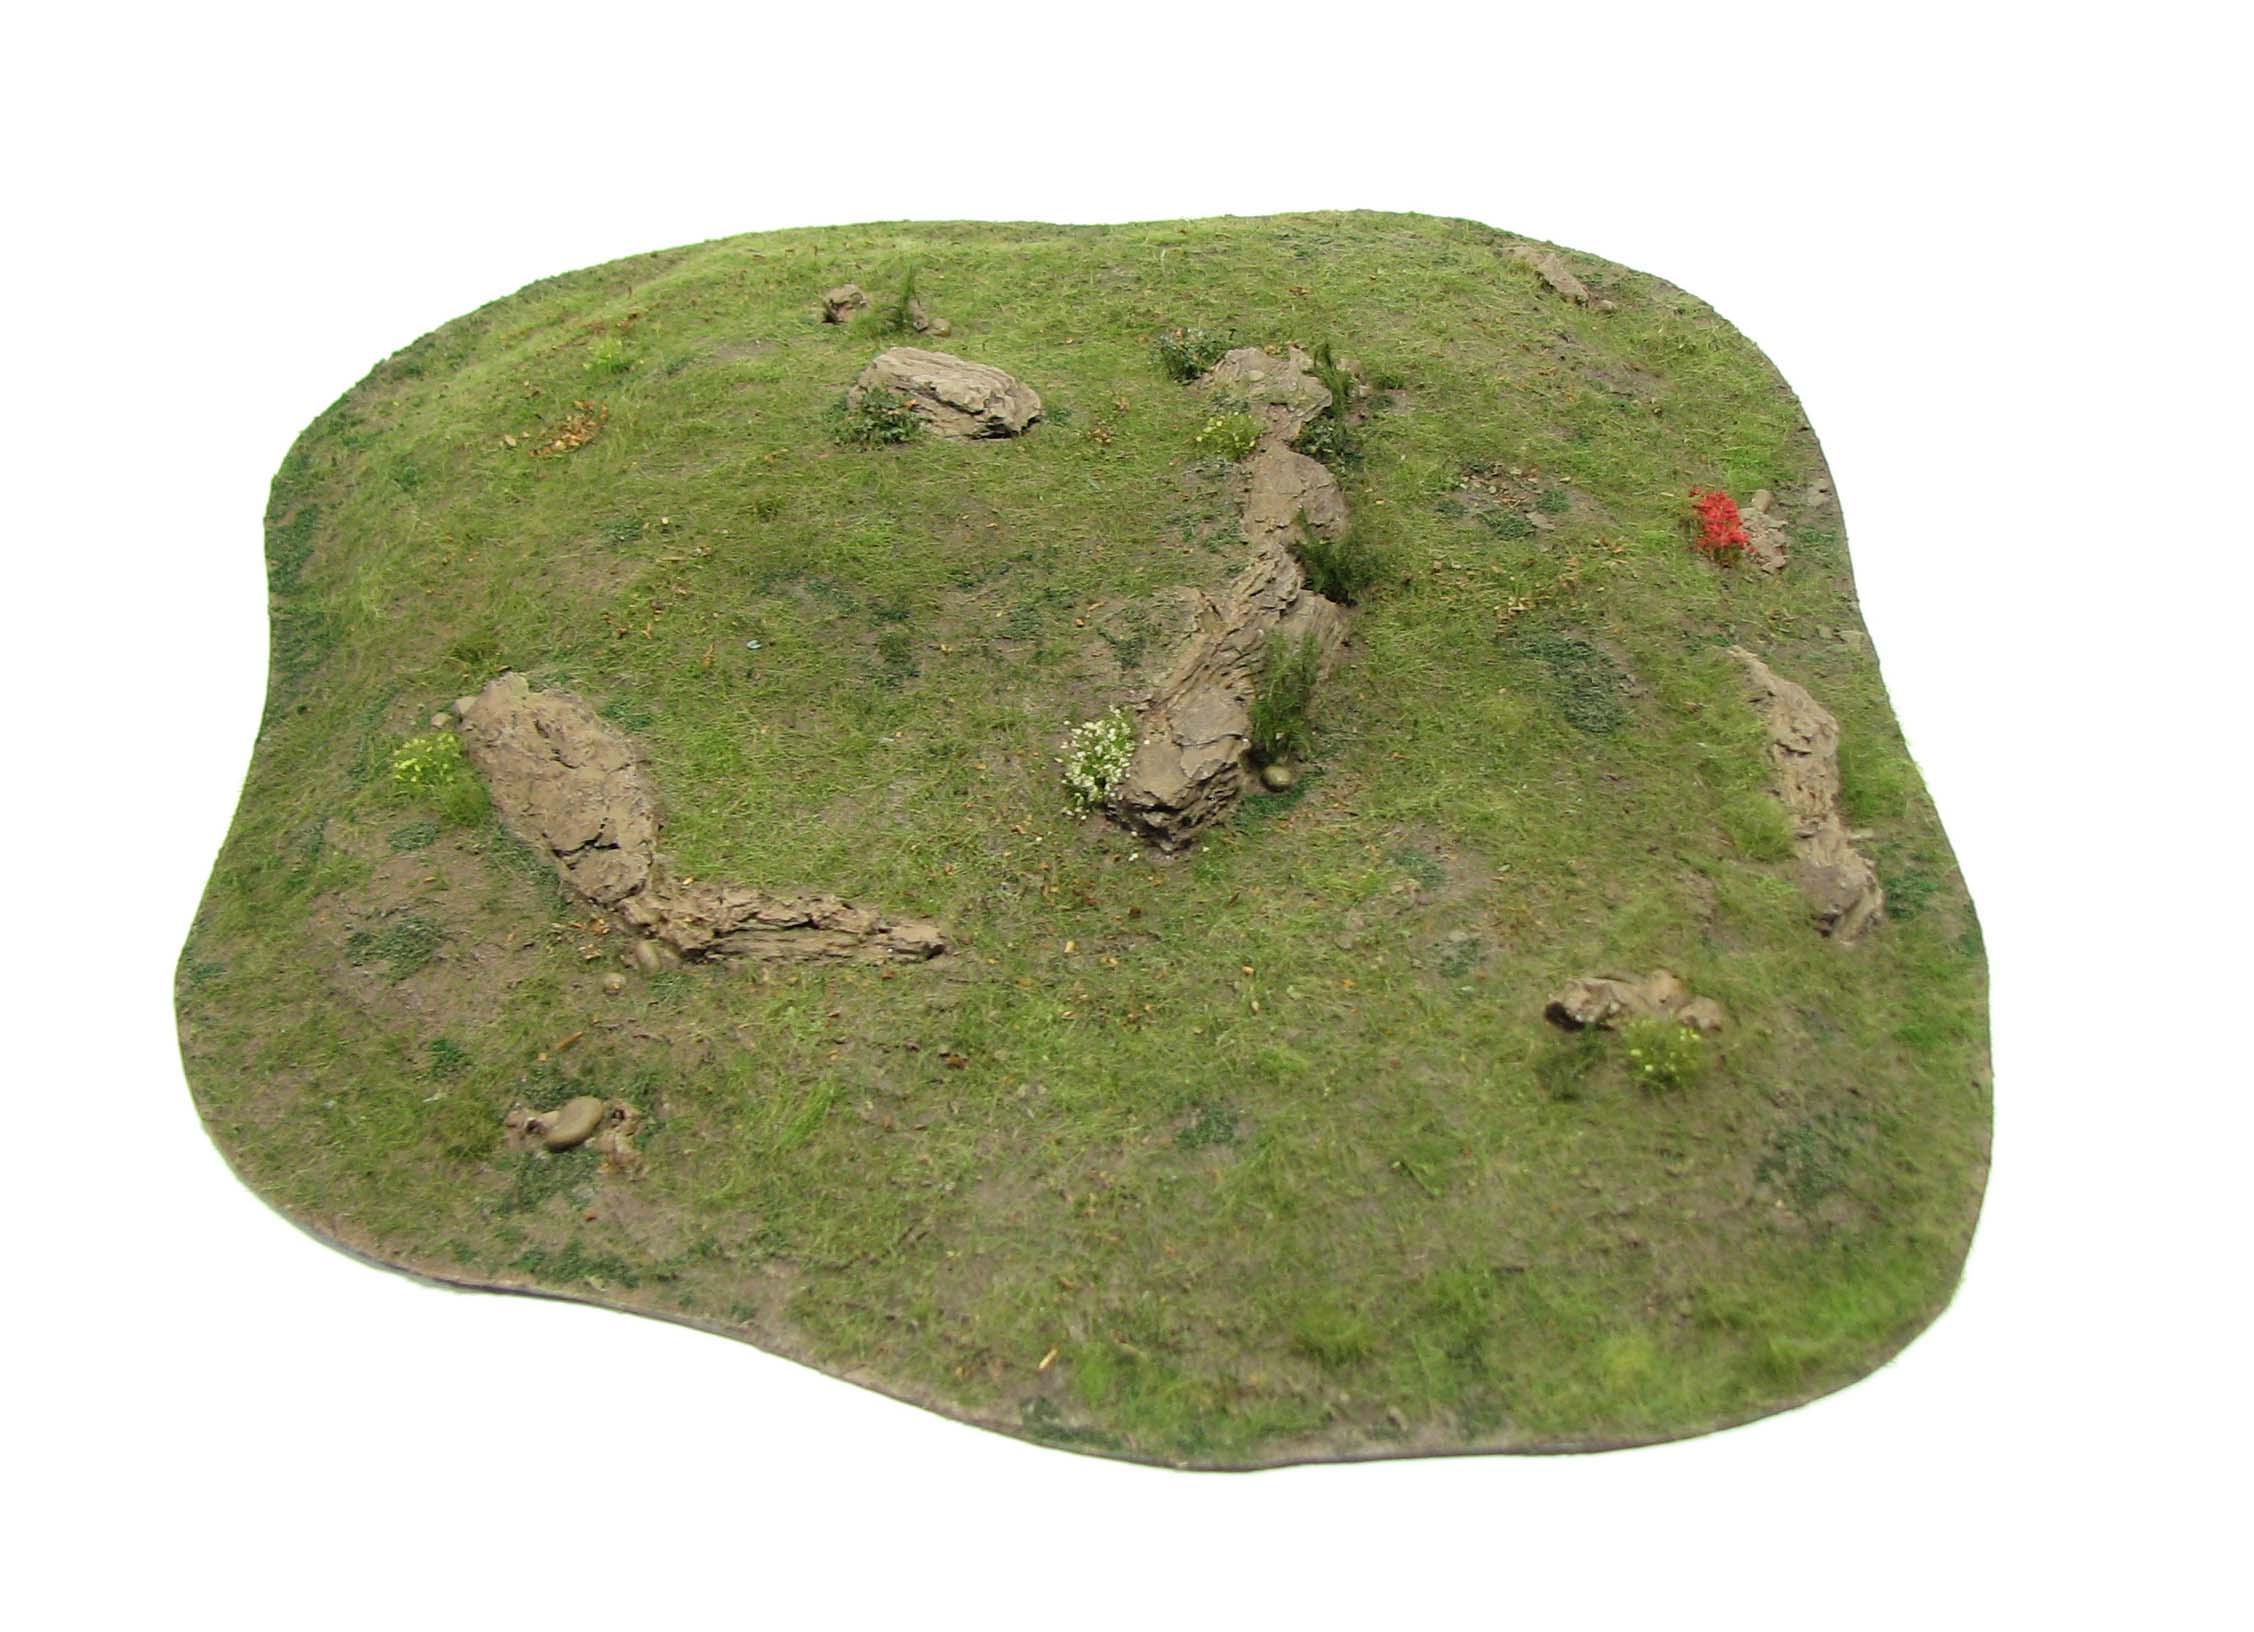
Drybrushing the groundwork
The next day apply a light drybrush with succeedingly lighter shades of your basic brown tone. You can also use some brown wash and apply it in selected areas. Don’t overdo it, subtle variations will look more naturalistic than stark transitions.
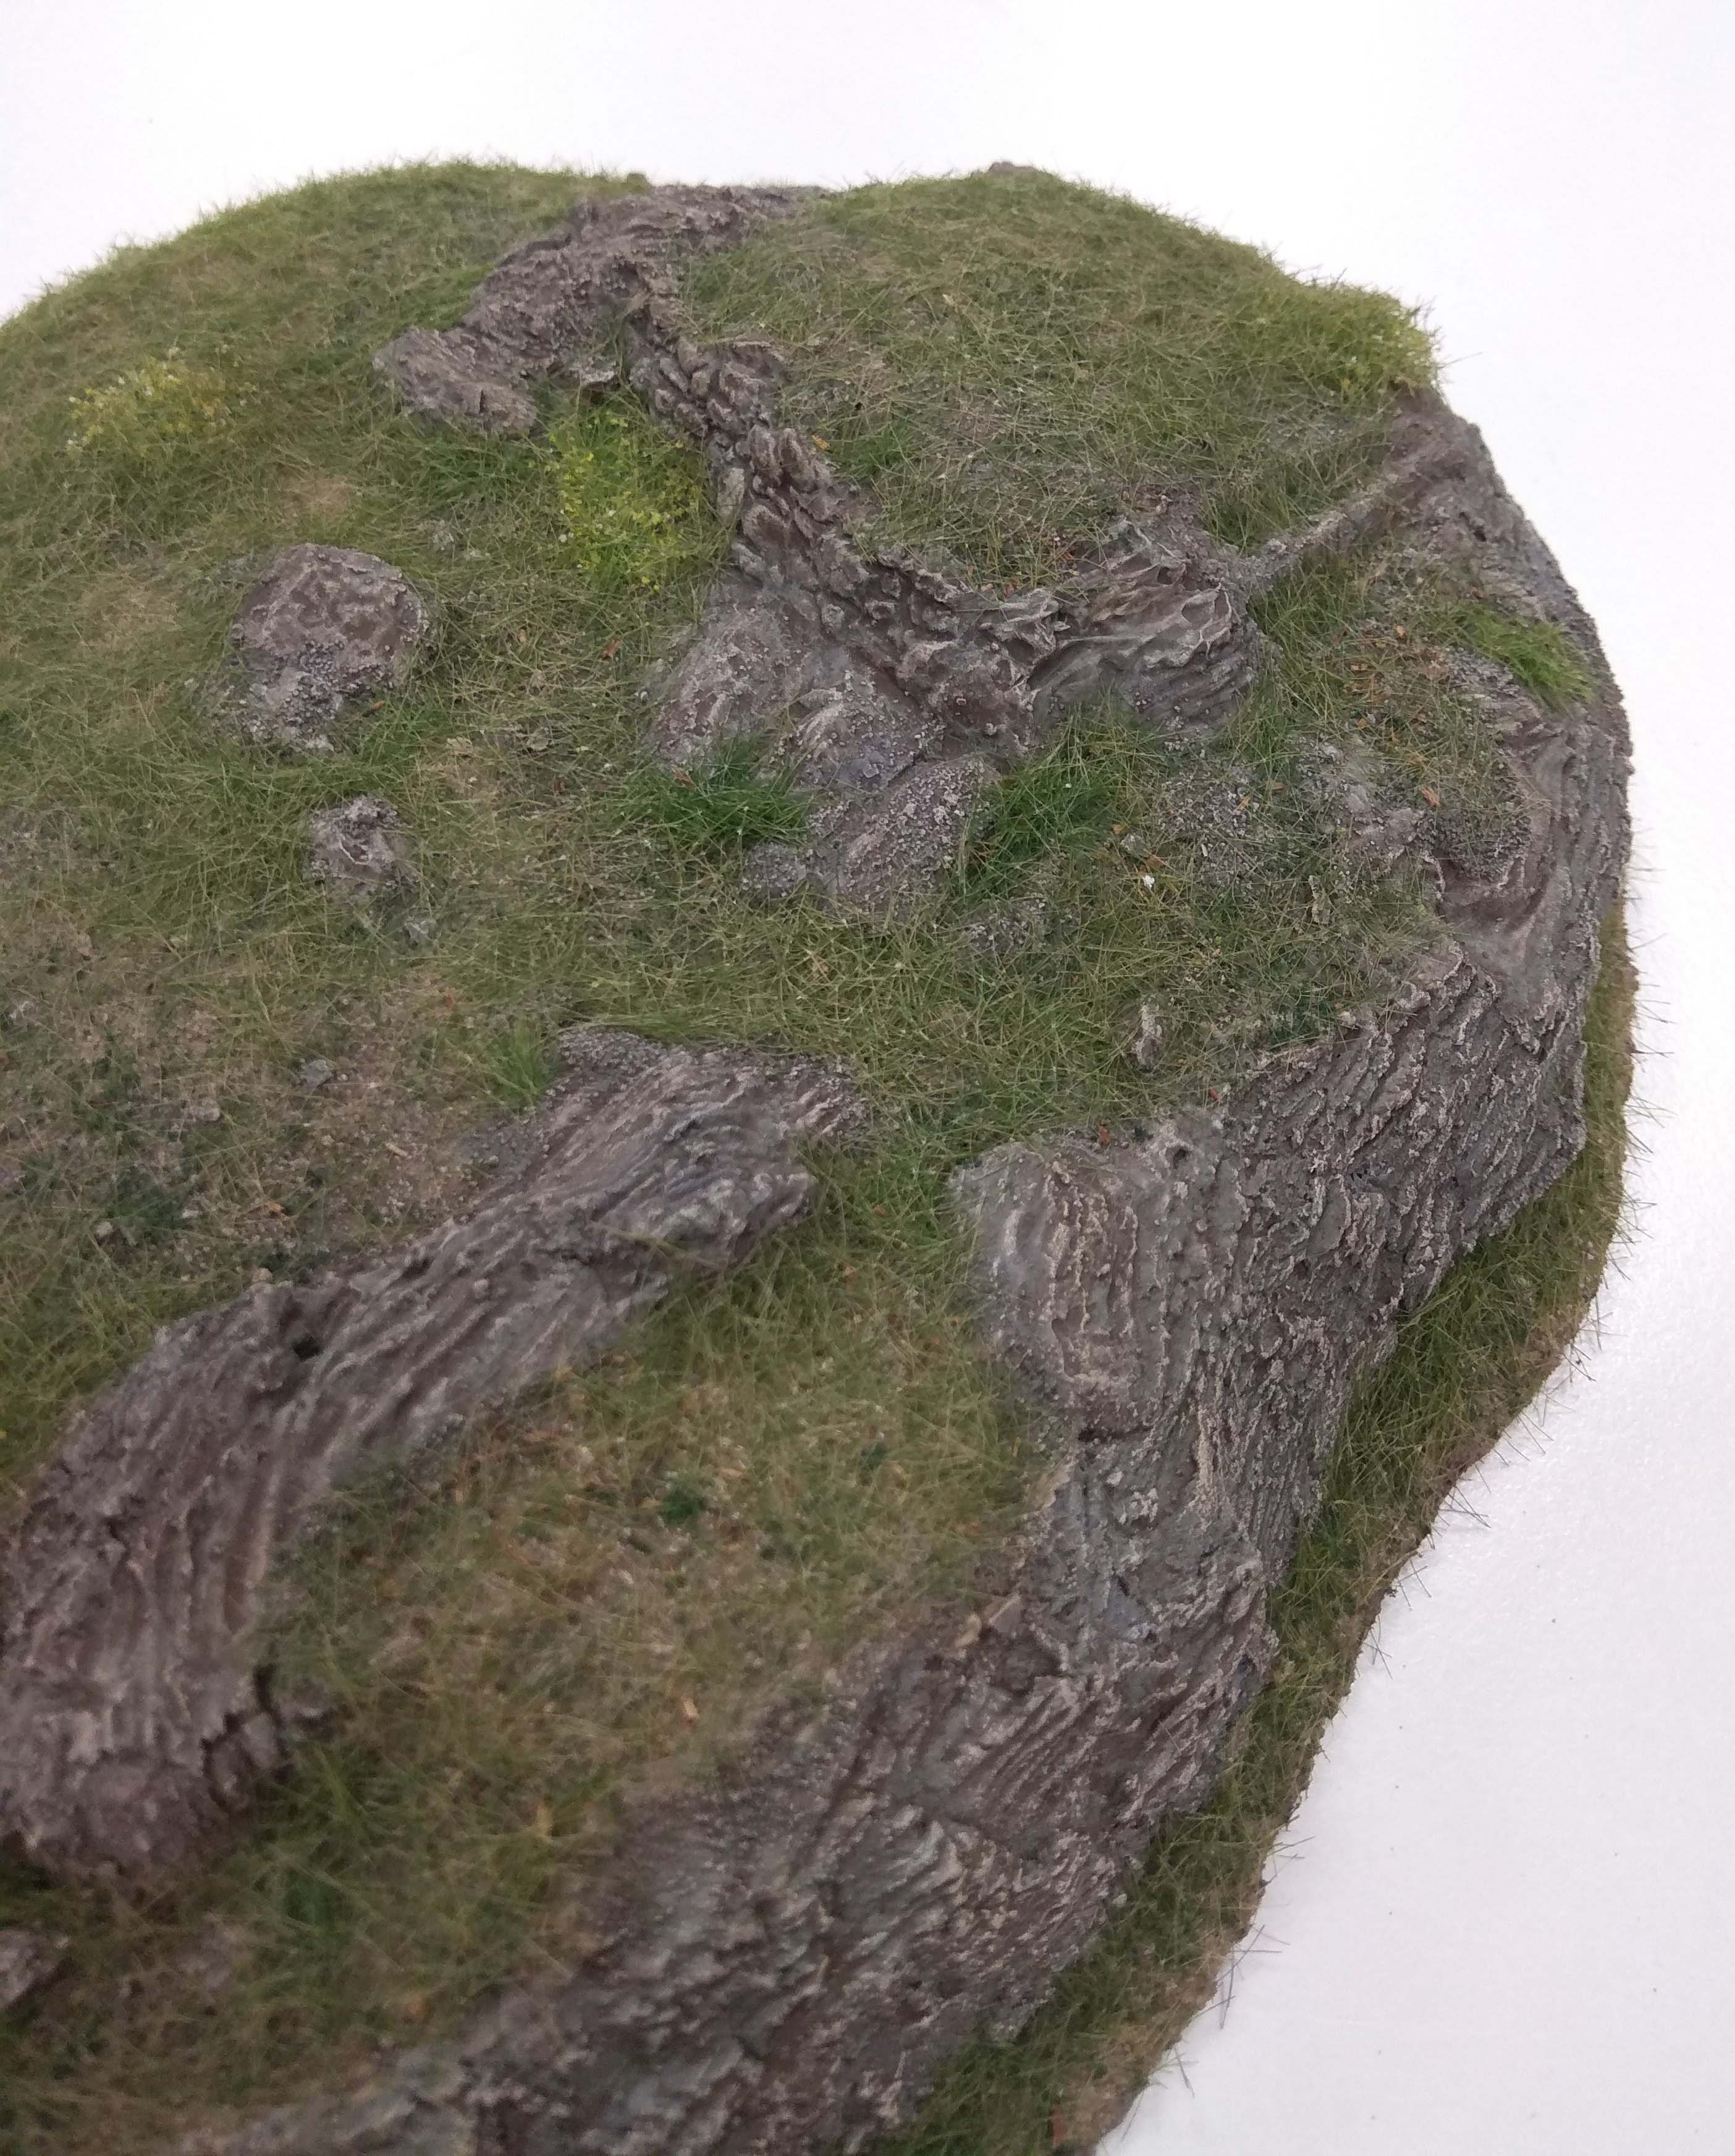
Onwards to the rock outcroppings. Use a beige tone as basecoat, wash with brown and then drybrush with lighter shades of the basecoat mixed with white.

Vegetation and sealing
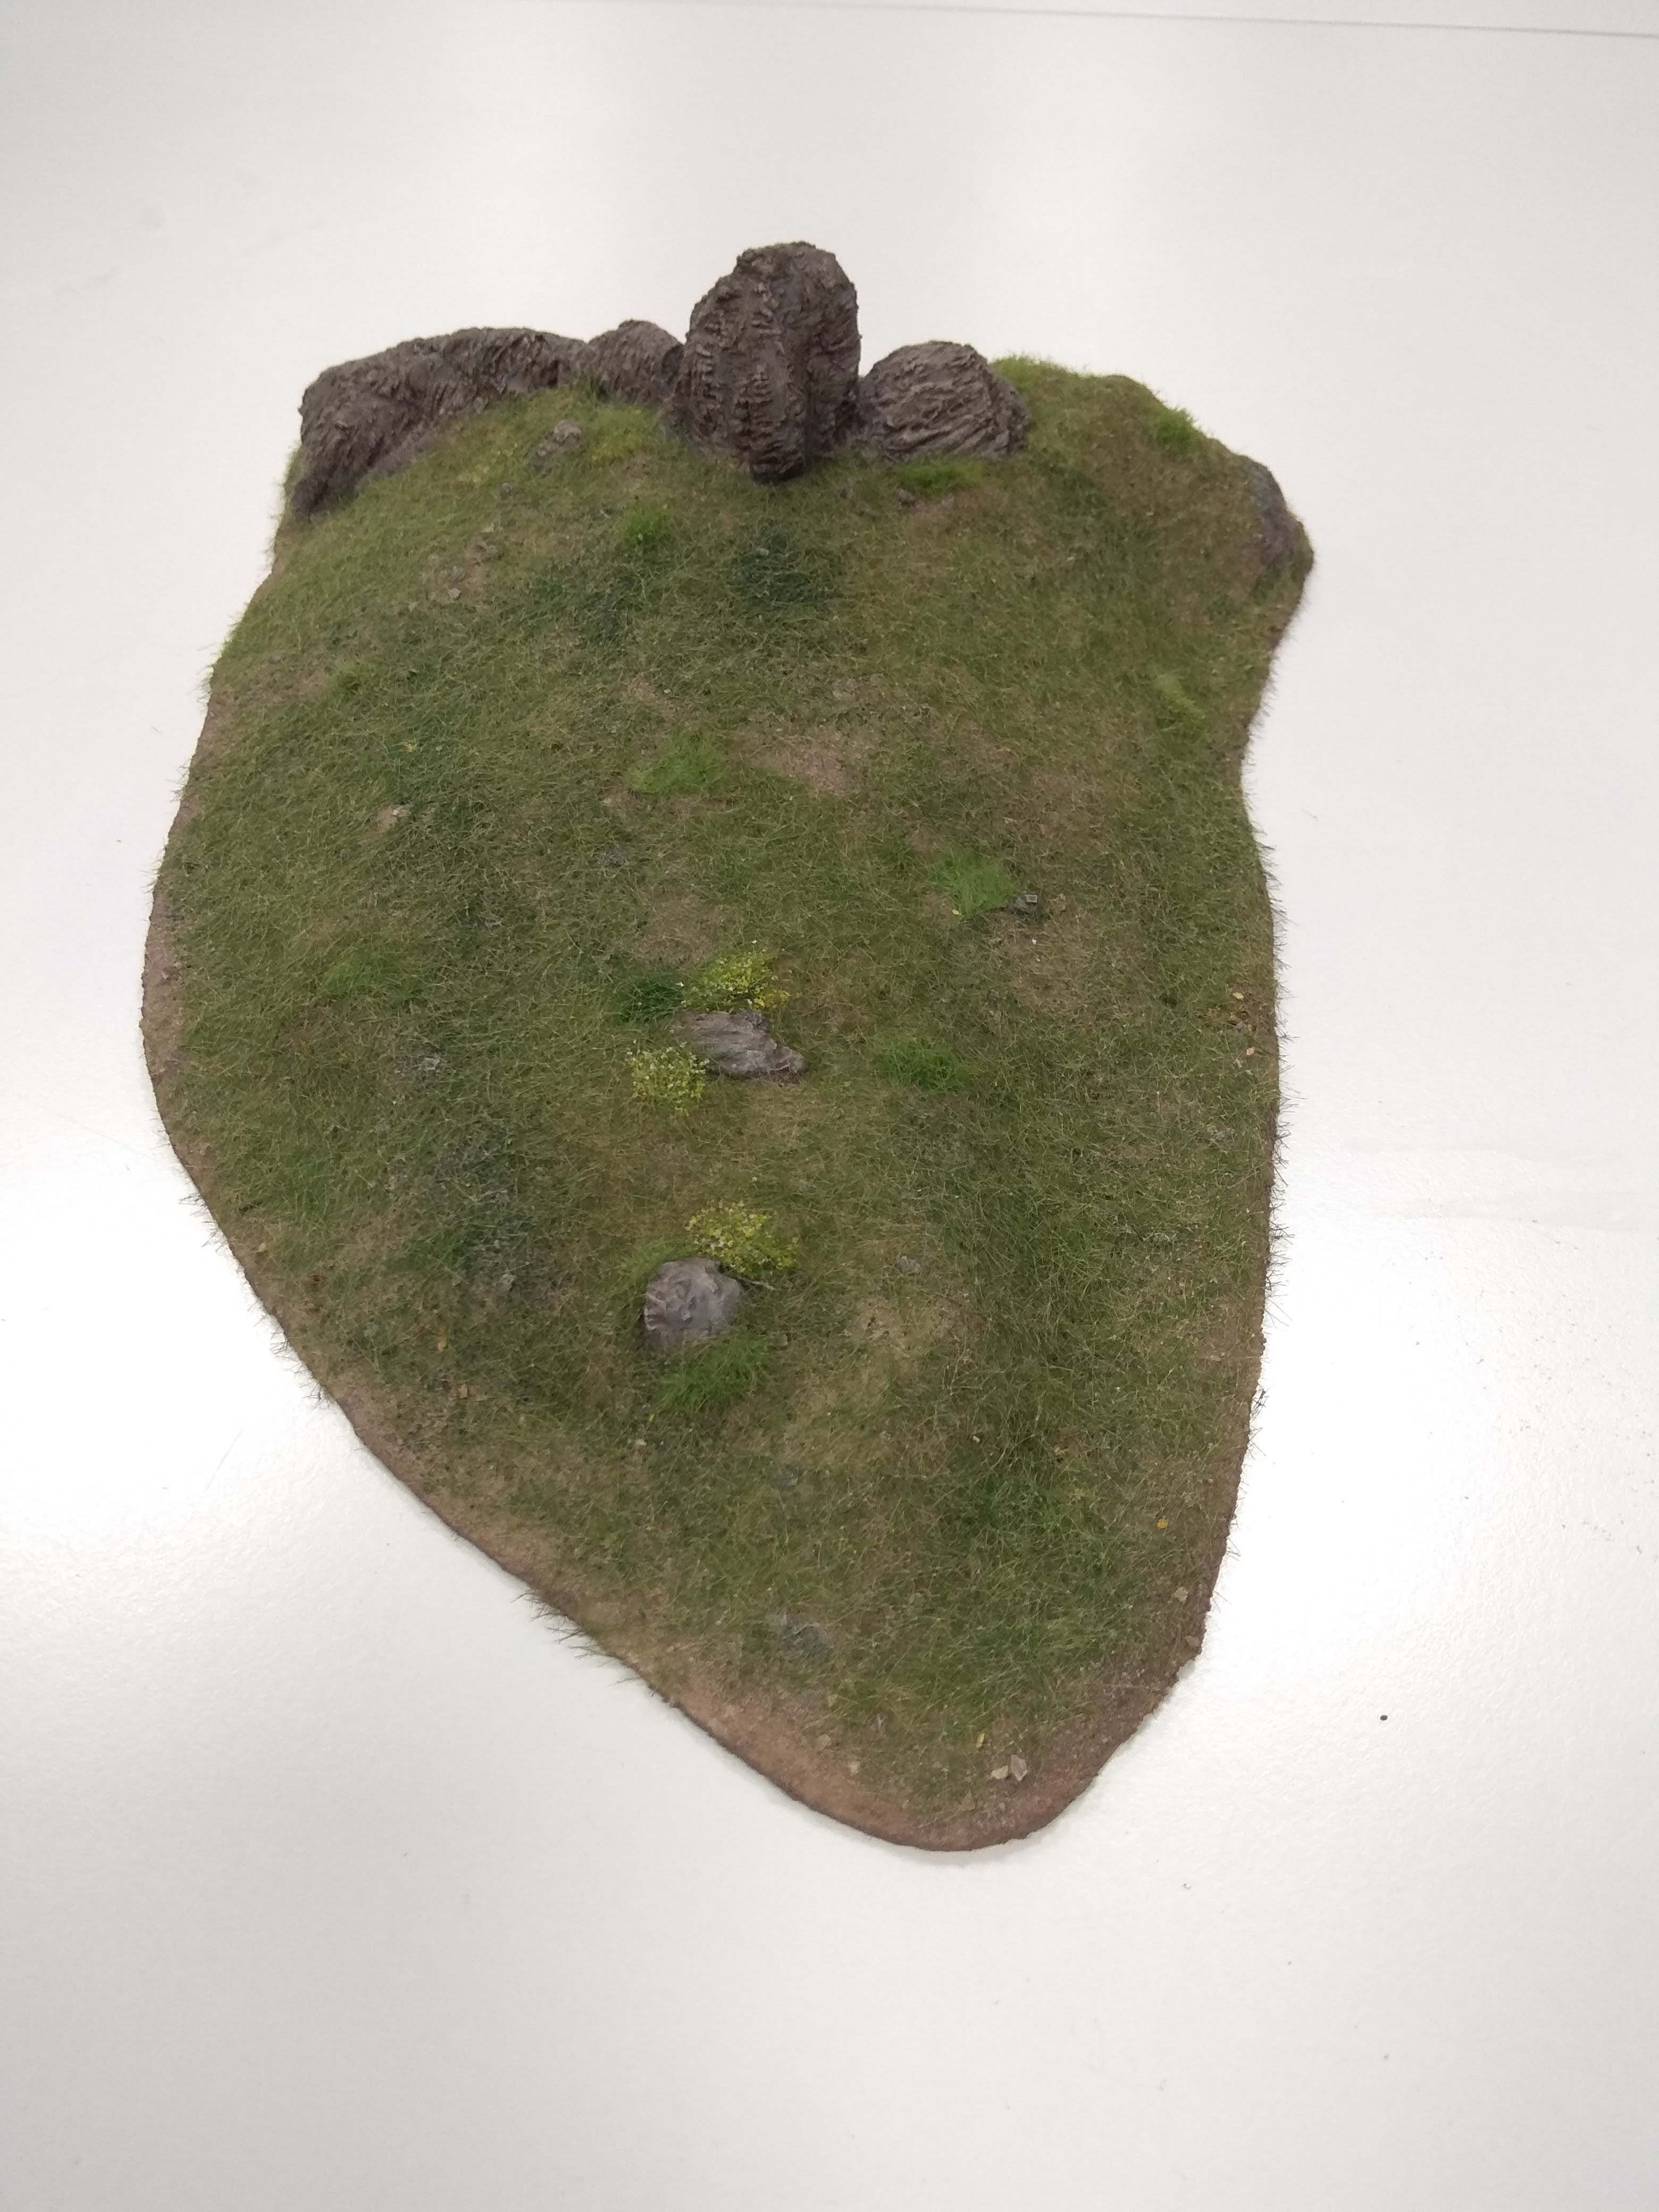
Place the MiniNatur bushes in a random pattern on your piece. Make use of different colours and textures to add interest.
Now cover the entire piece with thinned down PVA or matte acrylic medium. Apply fine turf, static grass and the dry basil and tea leaves in a random fashion. Let dry completely and then use a vacuum cleaner with some pantyhose over the opening to remove (and later reuse) any excess static grass. Depending on how verdant you want it, you may need to repeat this step until you are satisfied.
With an airbrush or with a brush apply a brown wash to reduce the shine of the static grass and to draw together different shades of green. Let dry and apply a very gentle drybrush with beige to the static grass. This should further reduce shine and also add some more colour variation. You can also highlight the fine turf using lighter shades of green and yellow.
After the entire piece is dry, use an airbrush or a vaporizer to apply a sealing coat of thinned down acrylic medium or PVA (about 1:10, PVA/Medium : Water). Let dry and repeat if necessary. To kill the last bit of shine you can also apply a coat of matte varnish at this stage.

More magnetised terrain ideas
There is no need to restrict this method to wargaming hills alone. You can embed steel discs or magnets in pretty much any terrain piece to allow easy placement and removal of trees.

In the future I shall also show you how to make the actual olive and pine trees for such magnetised terrain pieces. I hope you enjoyed this tutorial and maybe it helps with your next batch of hills. And never forget: wield your brush with honor!

Inspirational stuff sir and a lot to bear in mind next time I’m in the market for some terrain building.
Many thanks, Roger.
Thank you for your comment Roger. Glad the tut helped with your own projects.
Sehr inspirierend. Das Werde ich demnächst auch mal versuchen. Danke für das ausführliche Tutorial.
Ahoi Luferox. Danke für dein Kommentar. Schön, dass dich das Tutorial inspiriert hat und auch für deine zukünftigen Projekte von Nutzen sein wird.
Danke für dieses sehr gute und ausführliche Tutorial! Leider ist Gelände etwas, das ich immer viel zu sehr vernachlässige obwohl ich es liebe meine Püppies über toll gestaltete Platten zu schieben. Vielleicht inspiriert mich ja dein Tutorial mal ein wenig mehr “Drumherum” zu wagen.
Danke für dein Kommentar. Es freut mich, wenn dich das Tutorial inspiriert es selbst zu versuchen. Dann hat es seinen Zweck erfüllt :).
Gutes Timing, ich brauche unendlich dringend Hügel 😀
Danke für dieses tolle Tutorial, ich werde es echt gut gebrauchen können!
Hab auch schonmal überlegt, da meine meisten Minis einen Magneten haben, ob ich nicht irgendwas aus Metall einarbeite (Reißzwecken o.ä.)..
Theoretisch könntest du direkt Nagelköpfe einarbeiten, oder dünnes Stahlblech. Dieses dann mit Acryl überziehen und begrünen. Kann aber gut sein, dass du da nen recht starken Magneten brauchst in der Base.
Excellent ideas and brilliant tutorial. Consider all these ideas stolen as I embark on a spring and summer terrain project!
I endorse thee.
Very cool idea! I, for one, am really looking forward to the Dagger and Brush hillside town tutorial, though. 🙂
For a long while now I want to build a scaled down Iberian settlement. There is a site called Puig de la Nau which was built on a hilltop. The layout and structures are pretty simple, but the interiors will be more complex. I think it will need to be 15mm, but for the Punic Wars project I might also have a farmstead in 28mm. However, I feel this has to wait till next year.
Fantastic tutorial and very helpful. I have used magnets similarly to mount crew members of ballistae and cannon (detailed on my blog). Thank you for this generous gift of information!
Thank you Mark, much appreciated. I think magnets can be used for all kinds of cool stuff in our hobby. I just wished NZ post would be less dogmatic about shipping them (that is not shipping them at all).