
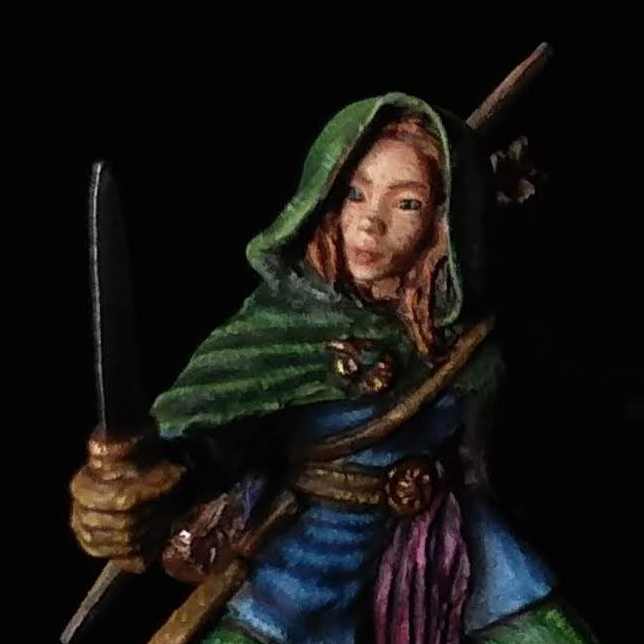
In the early morning hours you finish your latest work: it turned out exactly as you envisioned; it looks glorious. But wait, how to share your work with the wider wargaming community? Easy! You take out your smartphone and take a snapshot. You look at the picture and, to your detriment, all the glory disappeared. All you got is a blurry picture that is way underexposed.
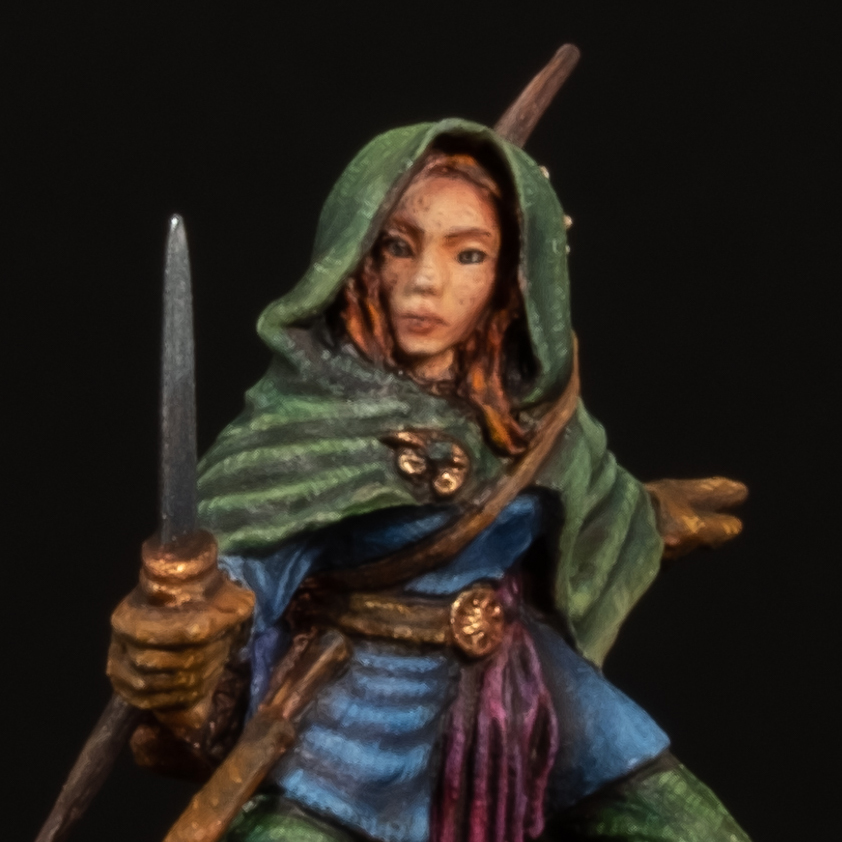
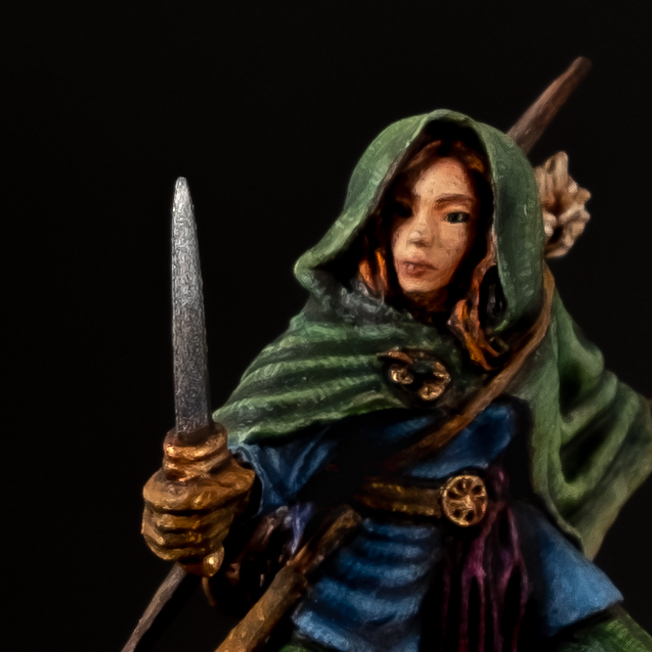
However, you don’t need expensive equipment or even a light box to make nice pictures of your miniatures. In this tutorial I will show you how I take my scenic shots. I am not a professional photographer, but I try to improve my photography skills on an ongoing basis and would like to share the experiences I made so far. I will cover the camera I use, materials needed to set up your scene and provide before and after shots to illustrate the ‘dos’ and ‘don’ts’. A second installment guides you through a complete photo session, moving from the general to the specific.
Camera
Arguably the camera you take your photos with is one of the most important aspects of miniature photography. If your camera has problems taking good pictures in general, it will have problems taking close-ups of delicate 28mm miniatures.
You don’t need to invest in a system camera, but if you already have one with a selection of objectives you are well advised to use it. If you have only a smartphone with a decent camera this will also suffice. In fact, you will have an advantage over a system camera: depth of field (DOF). Given that smartphone cameras are basically pinhole cameras you will have less trouble getting a miniature focused along the entire picture plane.
While this can be an issue with a system camera, you will achieve significantly sharper results and could always use focus stacking. This is naturally dependent on the quality of your objective, too. Always keep in mind that any objective has a sweet spot, so you should not just dial up the F-stop to a small value like 22 and expect a good DOF and crisp pictures. Also do some research at which focal length the objective performs best. Otherwise you may get blurry results due to refraction.
No matter what you use, it is important that you have a way to change settings. Control is key! Either in the photo app or via dials and menus on the camera body. The option to manually adjust the F-number and the shutter speed is essential. If you have a camera that does not offer these features you might still be able to use it, but some shots – low light for instance – might be difficult or impossible.
To reduce camera shake you should always use a tripod or put your camera on an even support. The budget version are MTG or playing cards. They work well for this, as you can take some out of the stack to vary the height.
I now use a Fujifilm XT-3 system camera with the kit lense for all my photos. Back in the day it was a Canon Powershot S III bridge camera. The Fuji is an expensive piece of equipment, but I was also looking for some uncropped 4k video functionality. So, you may also be just fine with a Canon M50 – should you venture down the system camera path.
I liked the Powershot for its very good macro function. You could literally focus on a corn of dust stuck to the objective. Sadly it stoped working after more than 10 years and the shutter didn’t open anymore. The Fuji offers a wide range of presets combined with fully manual modes. The kit lense is just fine, but an upgrade would improve the minimum focus distance (30cm) as well as performance on a higher F-stop or longer focal length.
Lighting
Lighting is hands down the most important aspect of taking good pictures. Stark shadows, washed out detail or glare will effect the impression a viewer will get of your miniatures. With bad lighting carefully placed highlights and shadows may get swallowed and colours could appear very different than they do to the naked eye.
There are two options, that work really well:
- Daylight: This option doesn’t cost anything. However, this only works if you can adjust the exposure settings and have tripod. You arrange your scene perpendicular to a window. Avoid direct sunlight, as you want diffuse light without a tendency to cast stark shadows.
- Artificial light: If you can’t take pictures in daylight, you can use a daylight LED ring light and a smaller secondary light. It is important that both light sources are diffused. Parchment paper is the budget version. Just fasten it to the light source. Sometimes lights come with a diffuser, so this would be the more professional solution. I am very happy with the Rollei bi-colour ring light and the Apurture MC . Both can be controlled via an app and have a high colour rendering index of 96+.
Materials
While a camera can be an expensive toy, the actual materials you need for the background and for reflecting light are very cheap and widely available.
Background
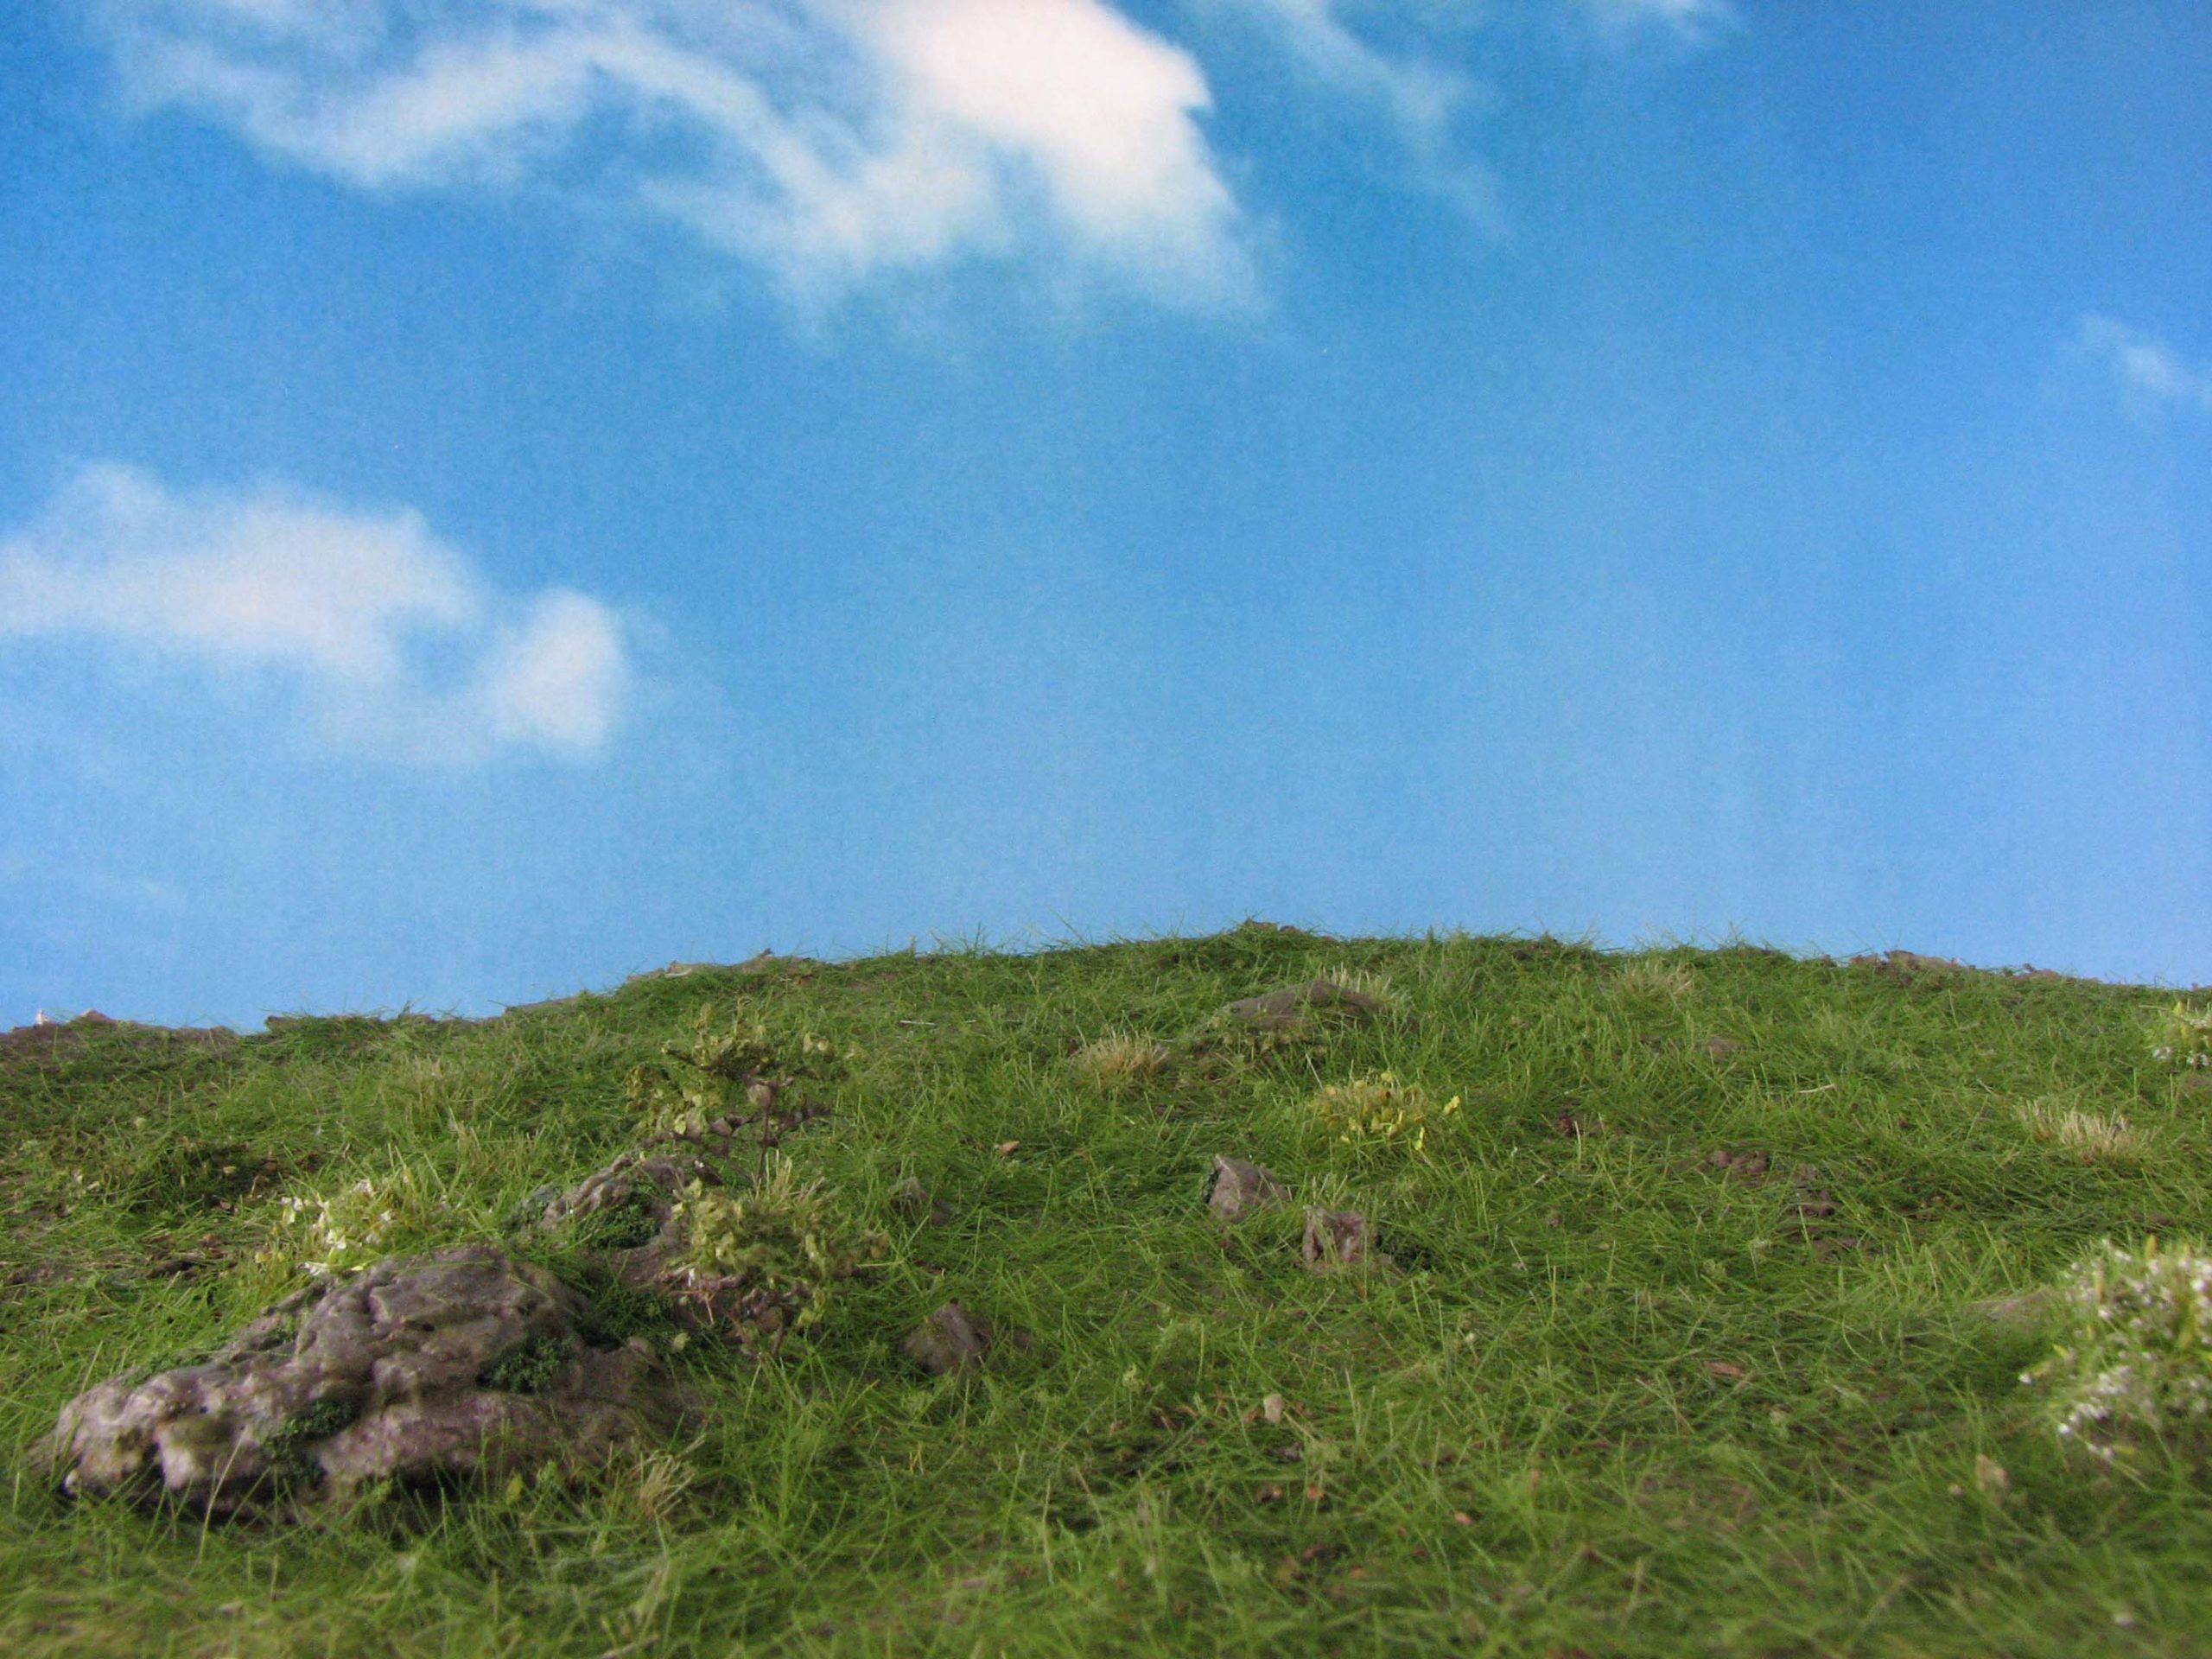
For an evocative scene we need some sort of photo background or alternatively a hand-painted scene. You can use quite distinctive landscapes for this, but there might be a disconnect between foreground and background. This is especially true if the terrain pieces you use differ stylistically from the background photo. What works well is a neutral blue sky. Some clouds can add interest and you can also experiment with a star lit night sky or a sunset.


Blue Sky with Clouds by DaggerAndBrush is licensed under a Creative Commons Attribution-NonCommercial-ShareAlike 4.0 International License.
Print the photograph on a DIN A3 page and cut off any white borders. You could also try to find matte photo paper in this size, which will give a superior result. For added stability glue the print on a piece of white foamboard. Finish it with a light cover of matte varnish to reduce any lustre (not necessary if you use the matte paper). If you used an inkjet printer don’t do this or the colour may run.
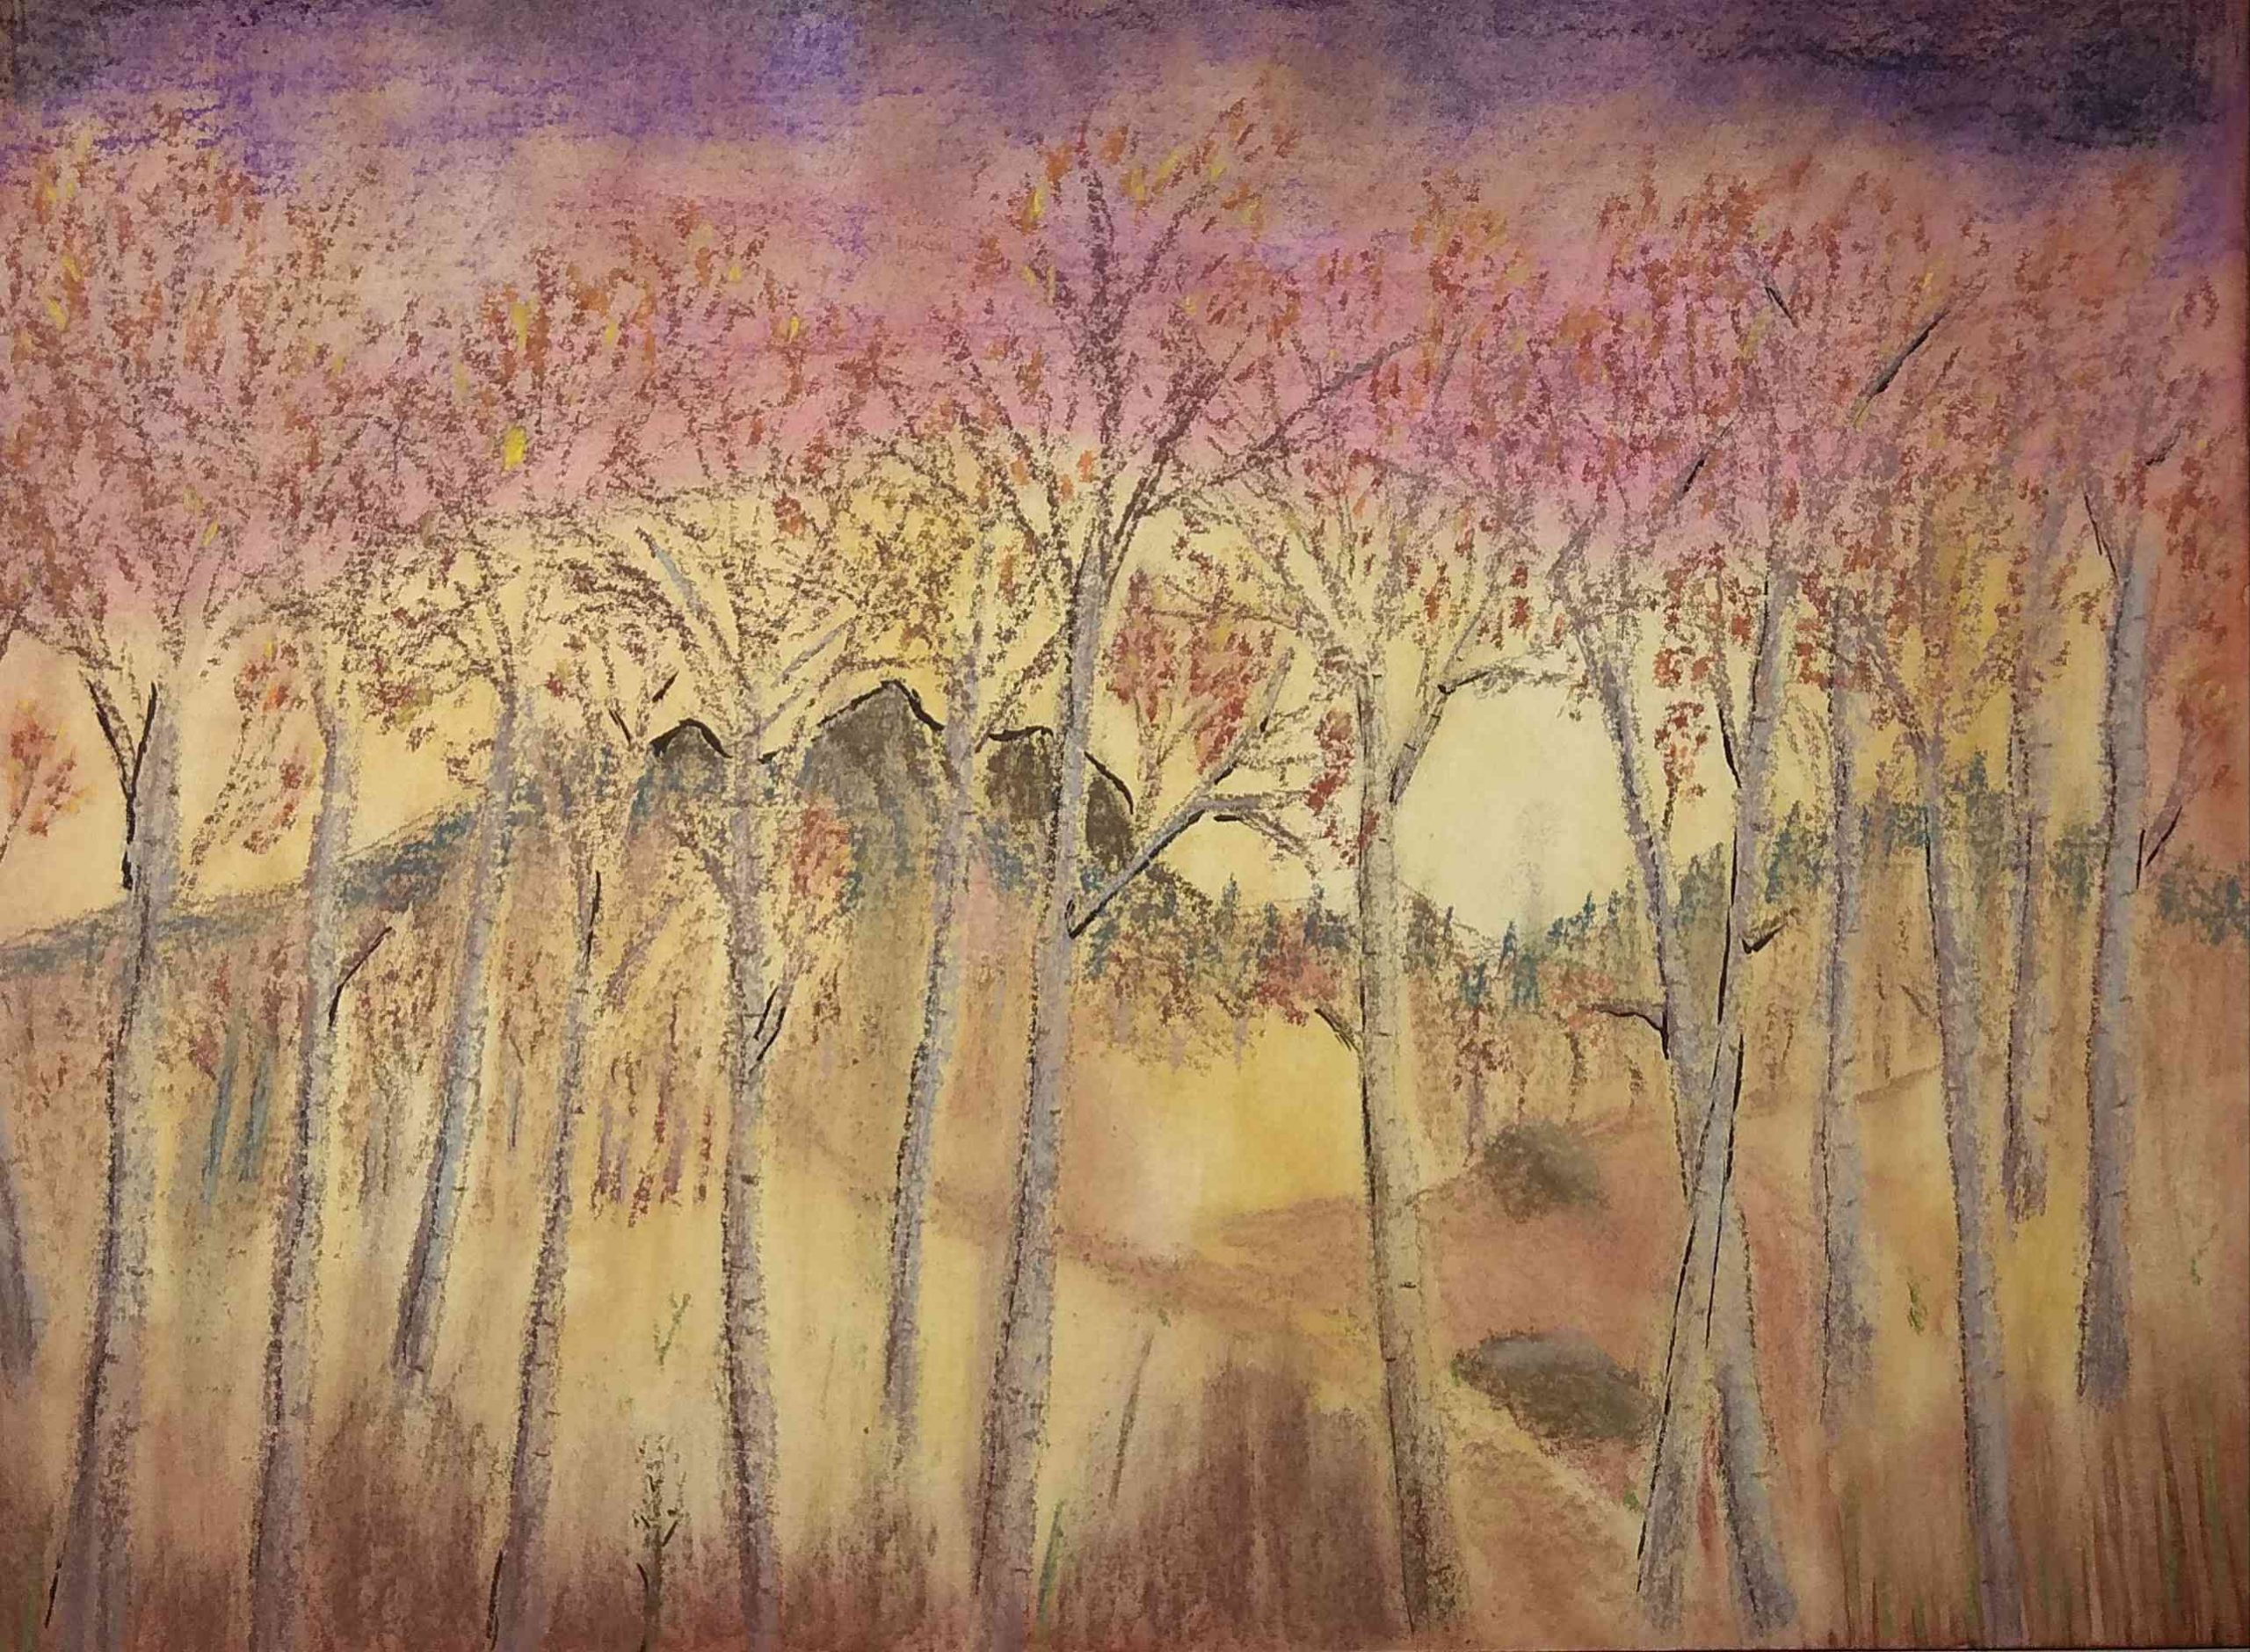
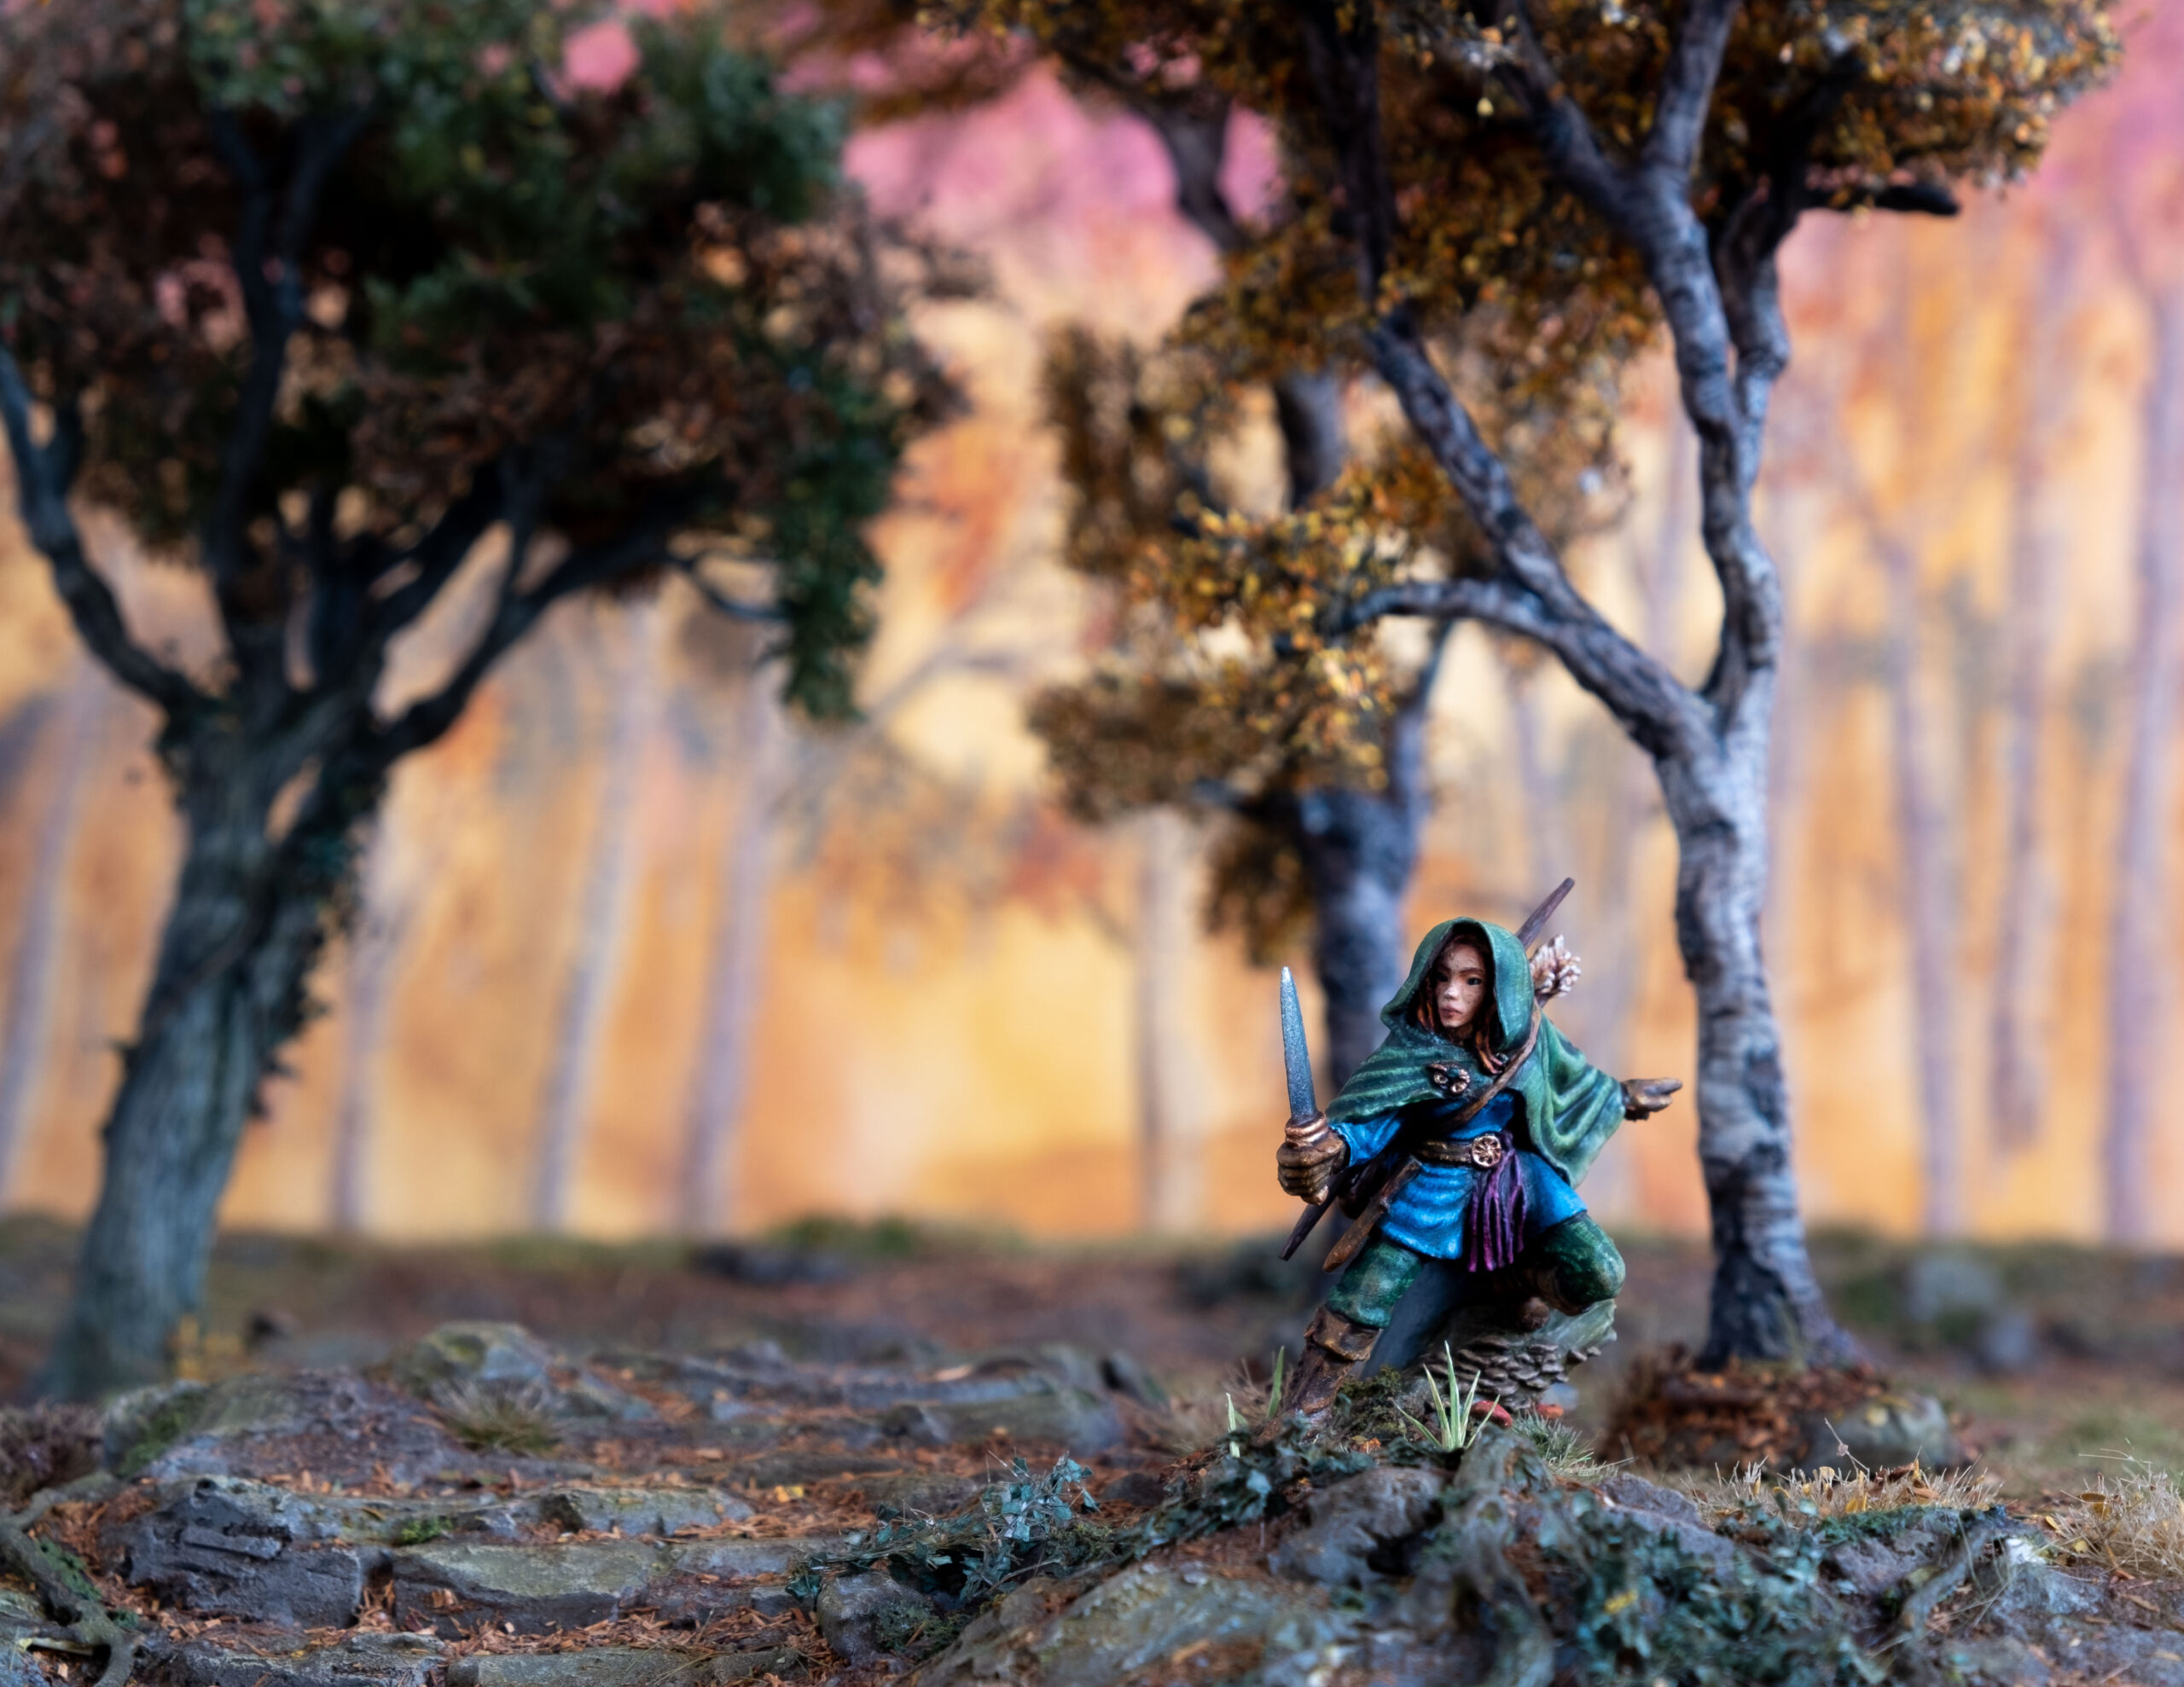
If you want to try your hand at a Bob Rossian landscape get yourself some 300gsm water colour paper. You can use acrylics, water-colours or pastels. Naturally you can also go the mixed-media route. The forest landscape below started with a watercolour gradient. I added trees and further details with pastels. That gave a nicely textured appearance. In most cases the background will be out of focus, so too much detail might be unnecessary.
Reflecting light
To reduce shadows, evenly lit your miniatures. This often requires reflecting incoming light. If you have some scrap pieces of white foamboard lying around, you can use these pieces to reflect the light back onto the scene. I always put one large sheet opposite the main light source and then several small ones were I feel more light is needed. You can also block light, for instance if you use a black background and want to avoid light spill. You can fixate these pieces with blue tack.
Be careful that the background does not reflect any incoming light. This is a usually a problem with prints, less so with water-colour paper, as it is very matte. This also implies that the background should be positioned perpendicular to the light source to minimise reflections and resulting glare.

Groundwork
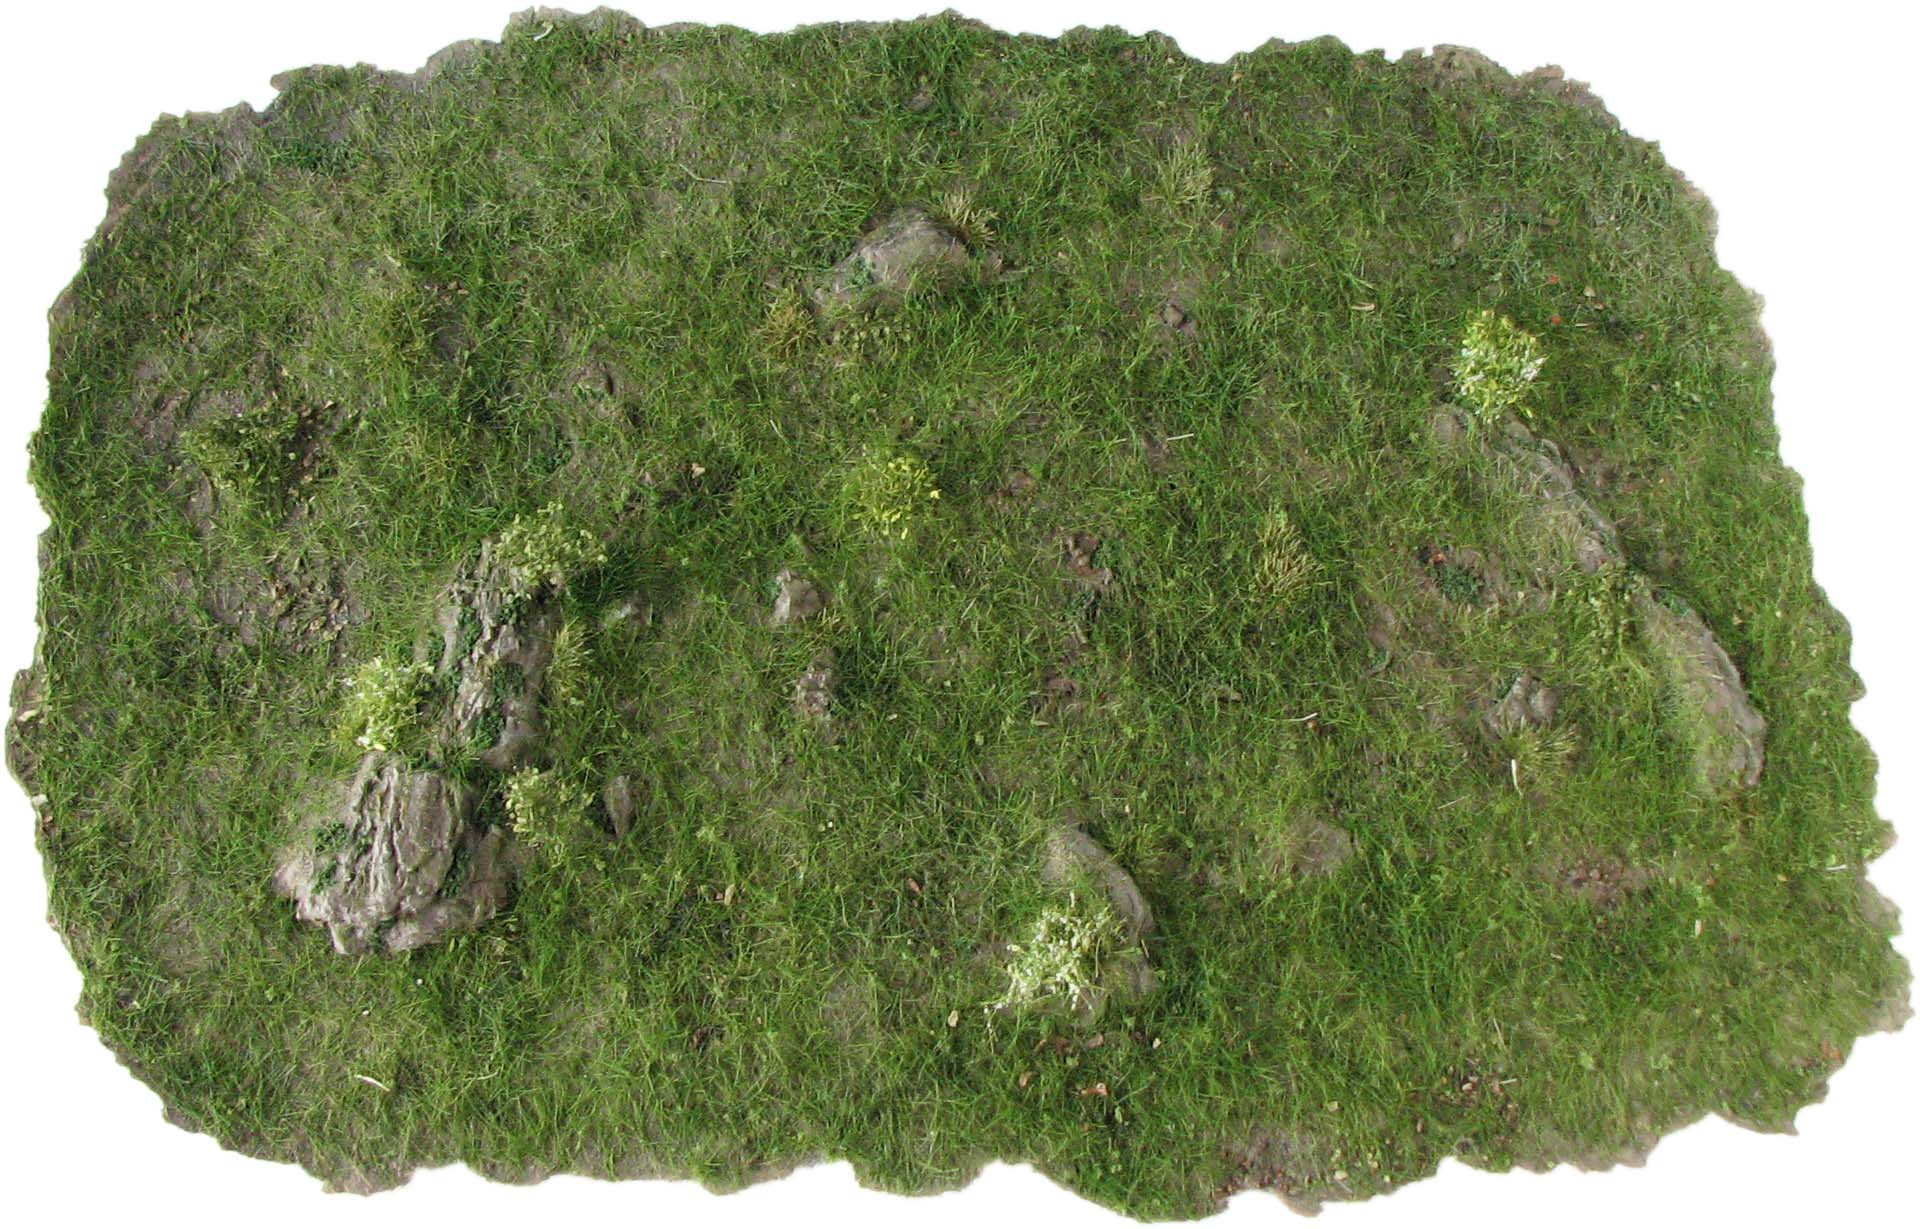
The surface you take your pictures on needs to be even and large enough to hold your scene. However, you also need some suitable groundwork to create a sense of space and a realistic final result. For this purpose, especially if you don’t have a big gaming board, you can use the versatile caulking mat technique to create a photography mat. I adopted the technique and made a smaller version of such a mat with embedded steel tacks. You can easily place magnetised terrain on it and change its appearance accordingly.
Setting the Scene
Now it is time to be creative. A good shot begins with a good idea for a scene. What story do you want to tell? Who are the protagonists? What are your limitations terrain wise? Answer these questions first and then select miniatures and terrain pieces to bring your idea to life. This is really were you have to develop a feeling for what works and what does not.
Bad lighting – bad scene
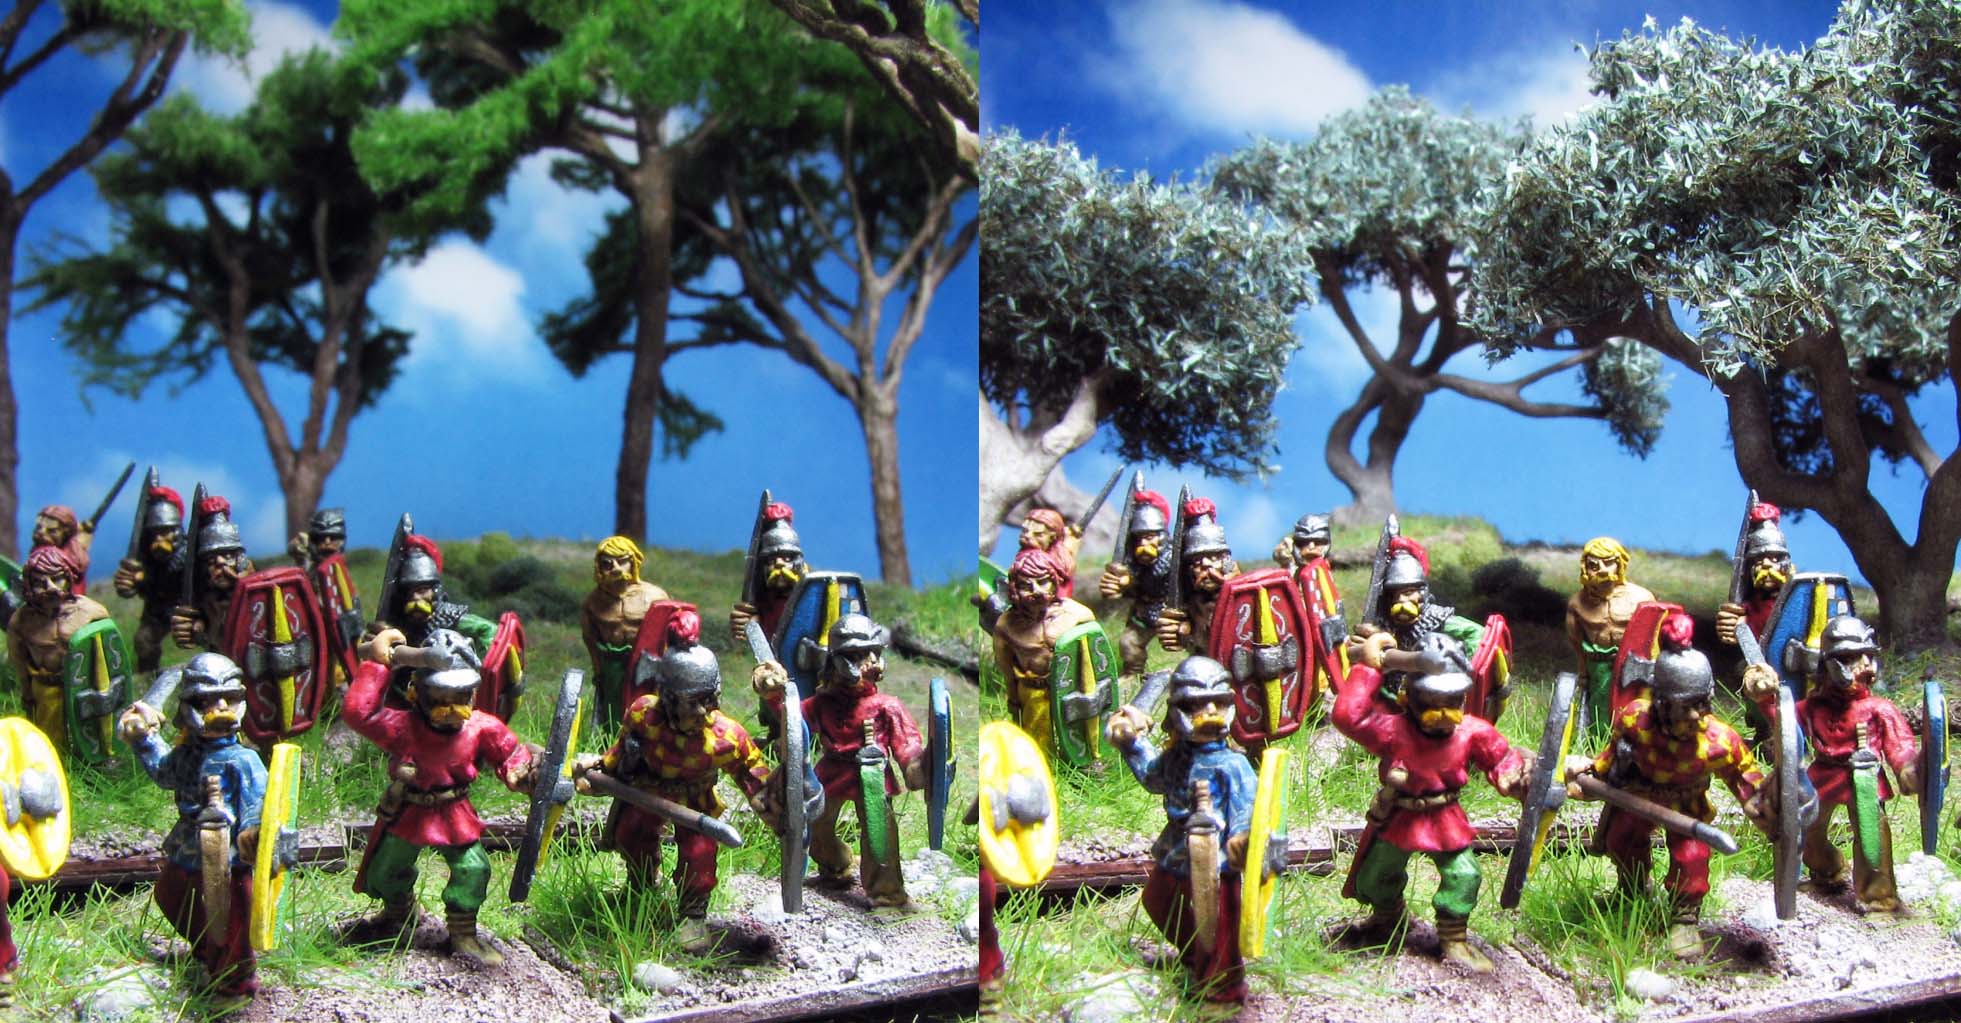
Both shots below have a lighting problem, but the scene is also not very engaging. On the left the Celts are too dark. This is somewhat mitigated on the right. However, the camera is too close, not allowing to really get the impression of a battlegroup advancing. Changing the trees in the background from pine trees to olive trees does give the pictures a different mood, but does not affect the composition as much as the placement of troops and proximity to the camera.
Scale your scene
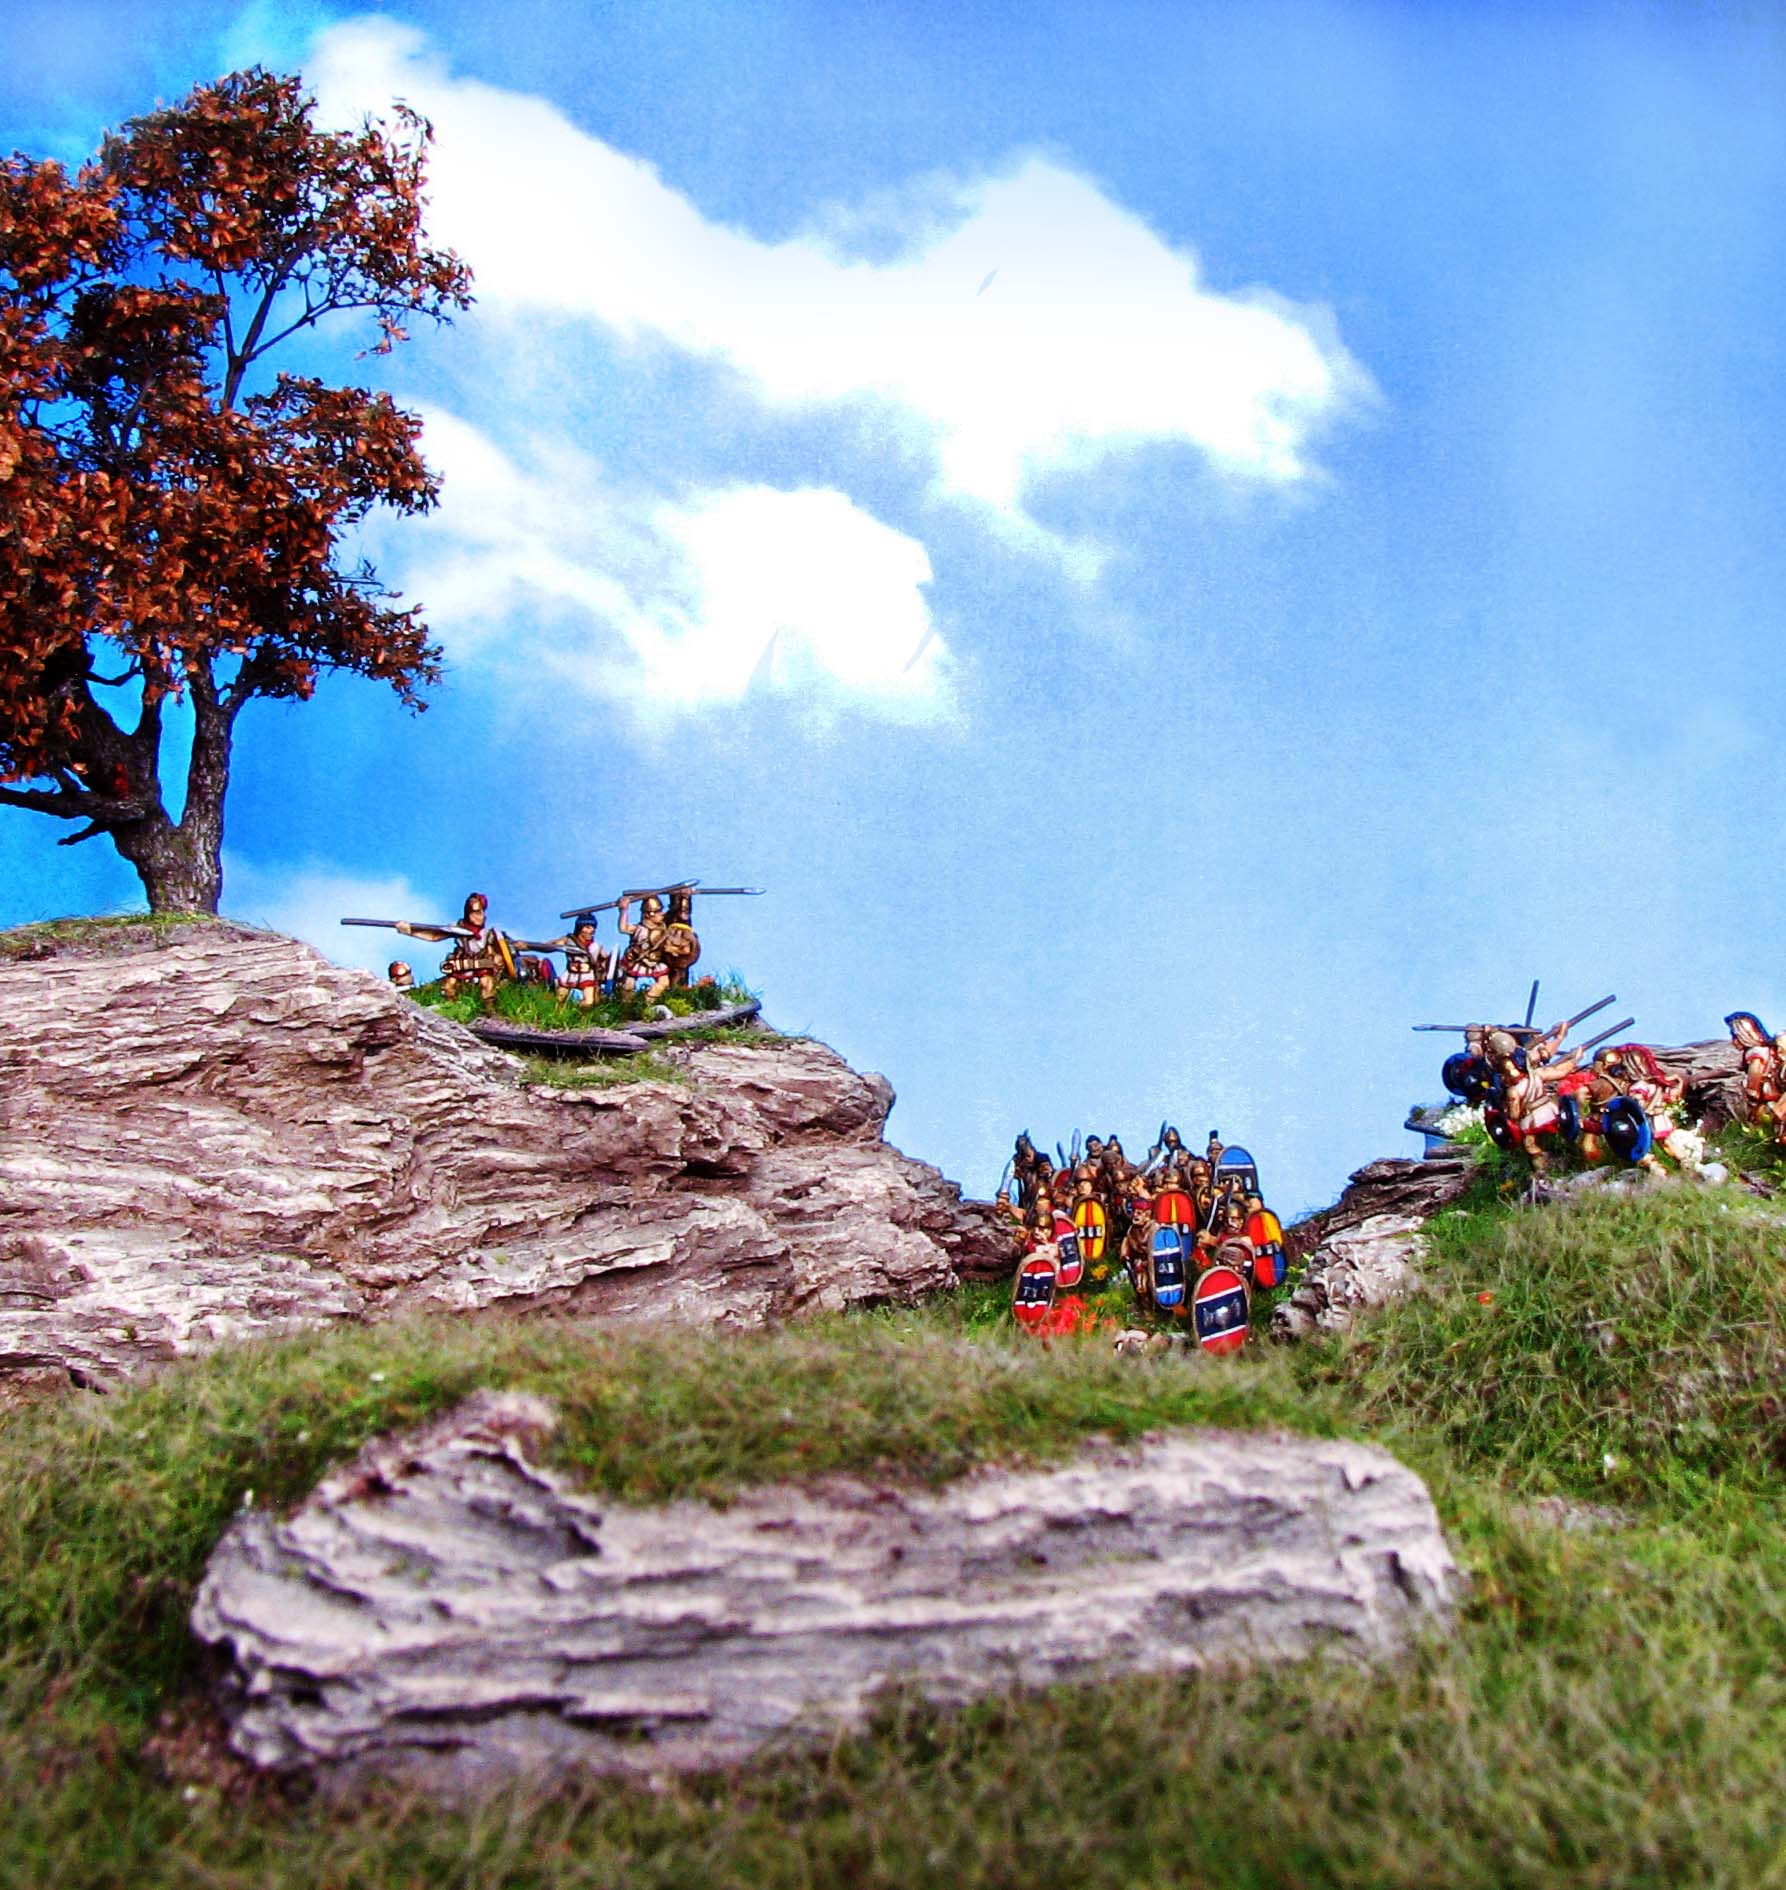
The ambush scene below is a good example how the scale of an engagement can be conveyed in using a wide-angle shot. Unfortunately the background is not evenly lit, but it is not as much a problem here. Another thing to consider is how elements in the foreground work with elements in the back. The cliff face in the front can look a bit out of scale, because it is so close to the camera.
Eye to eye – perspective
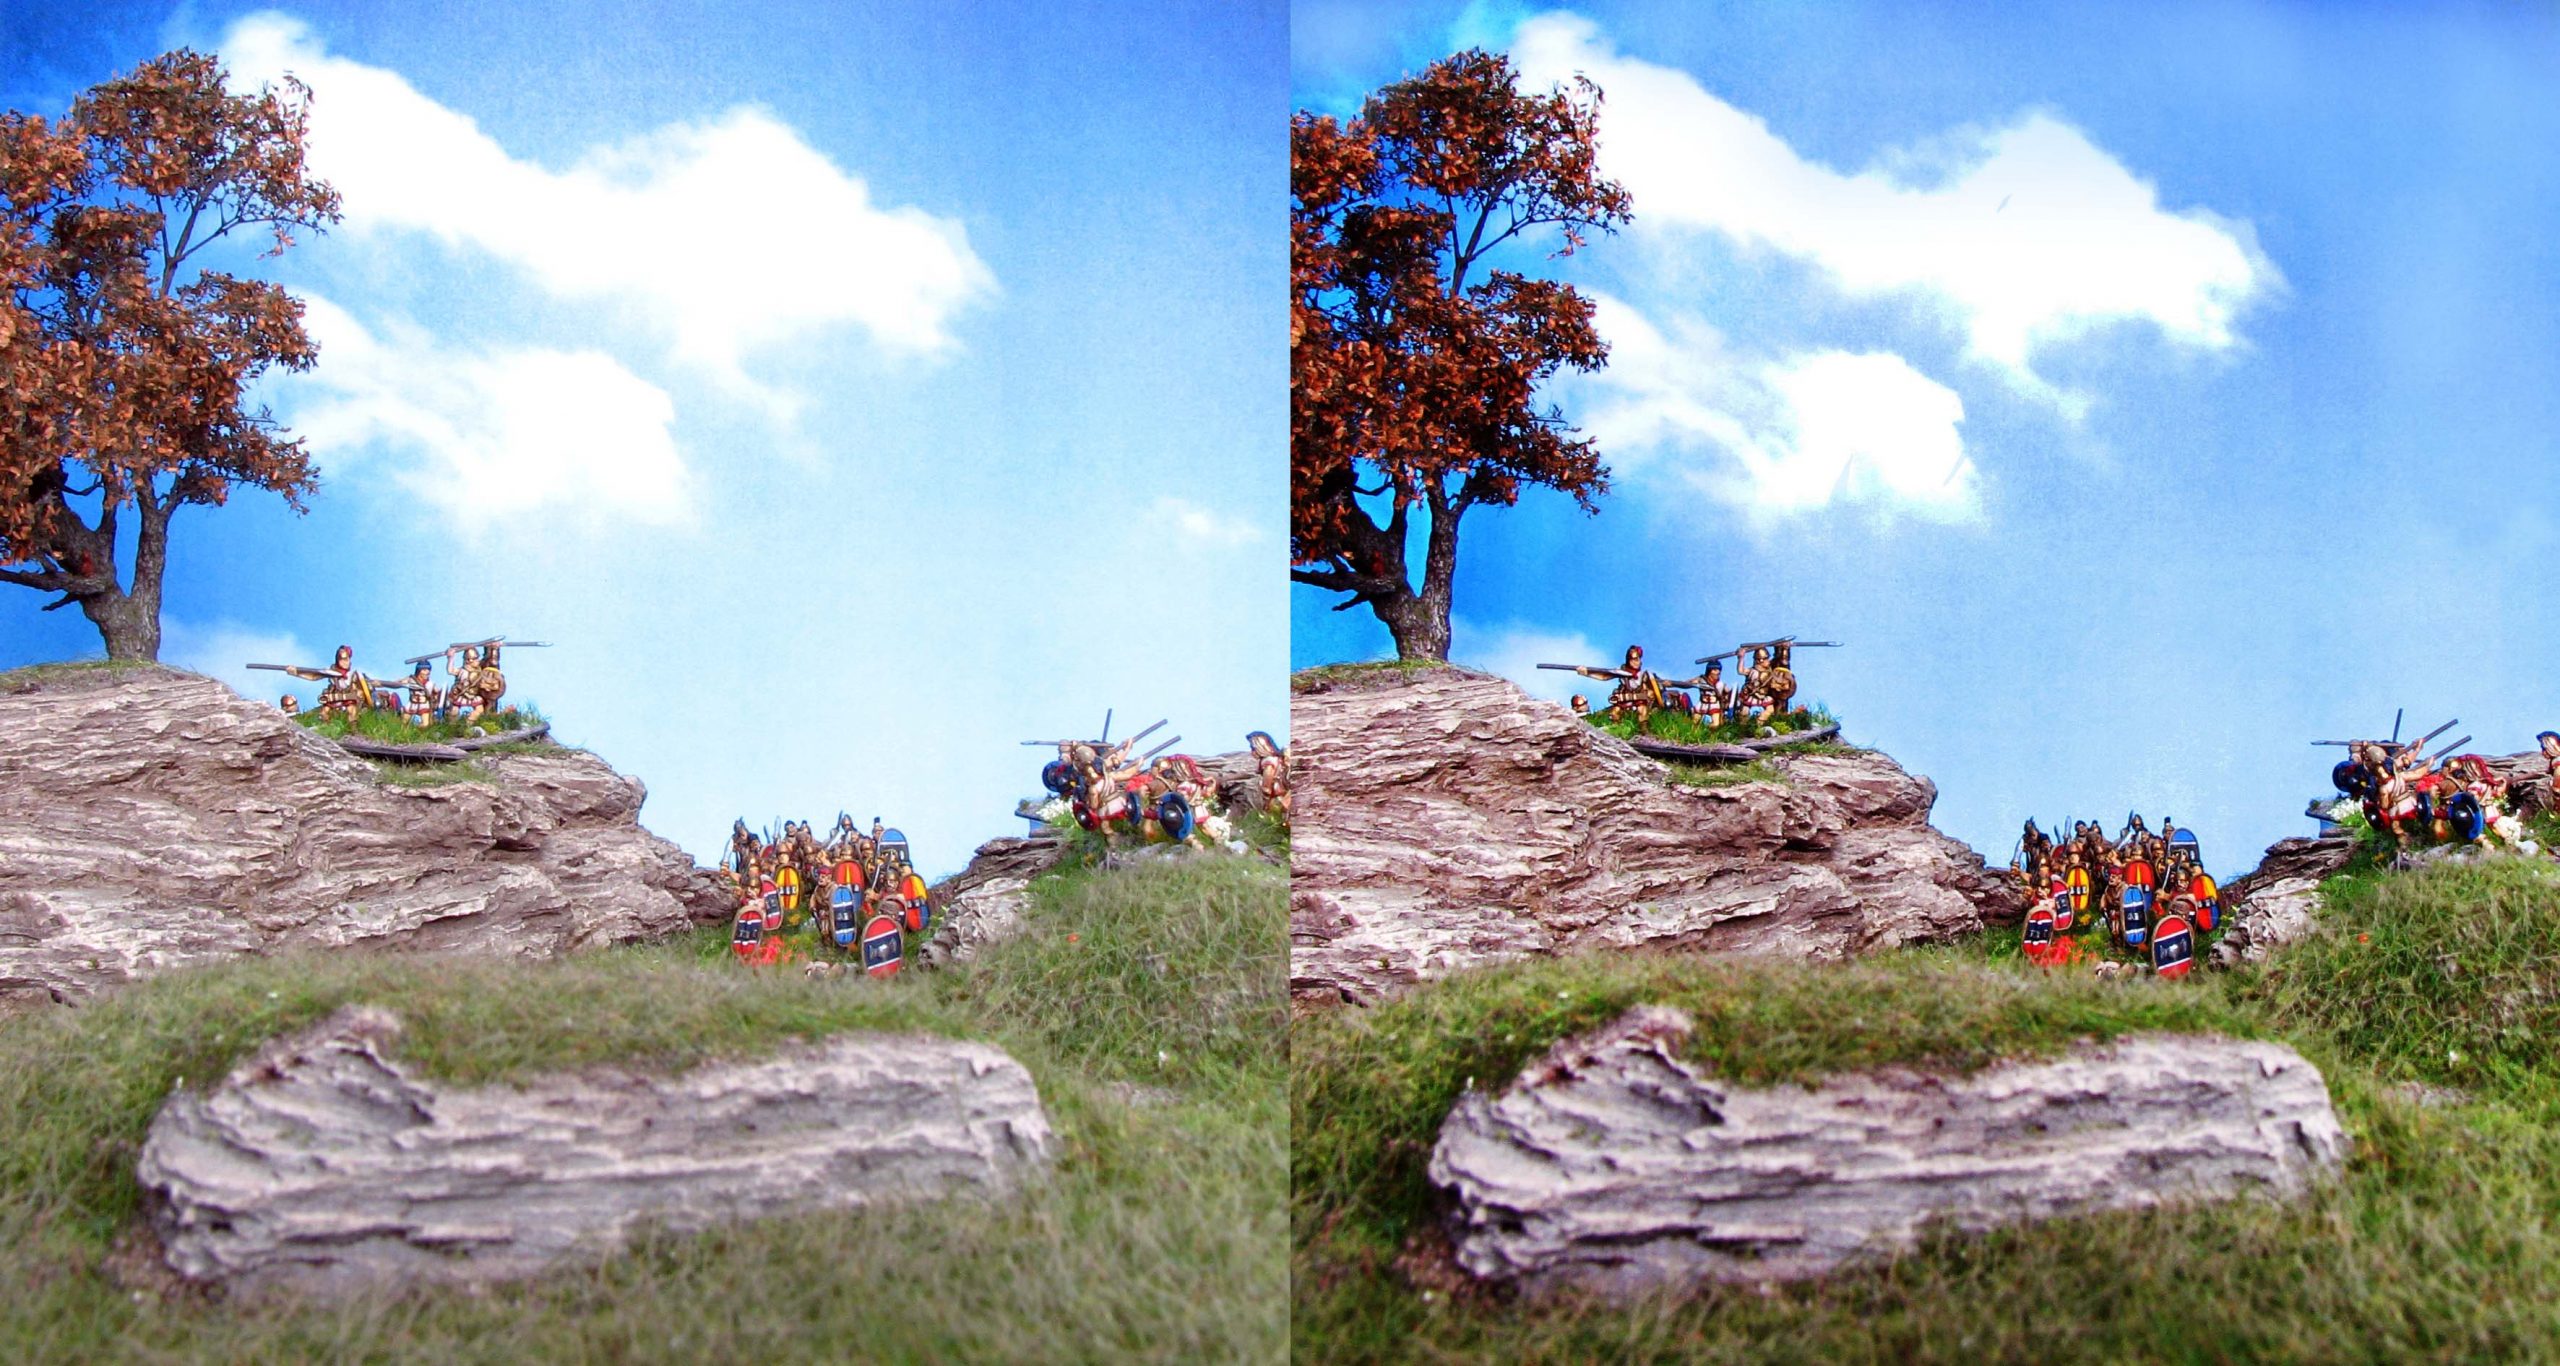
You also need to take the perspective into account. What looks good from a bird’s-eye perspective may not work with an eye-level perspective (that is the level of your miniature’s eyes) or vice versa. The tree you positioned in the foreground may now look out of scale or the hill in the background doesn’t show its nicely carved rock face.
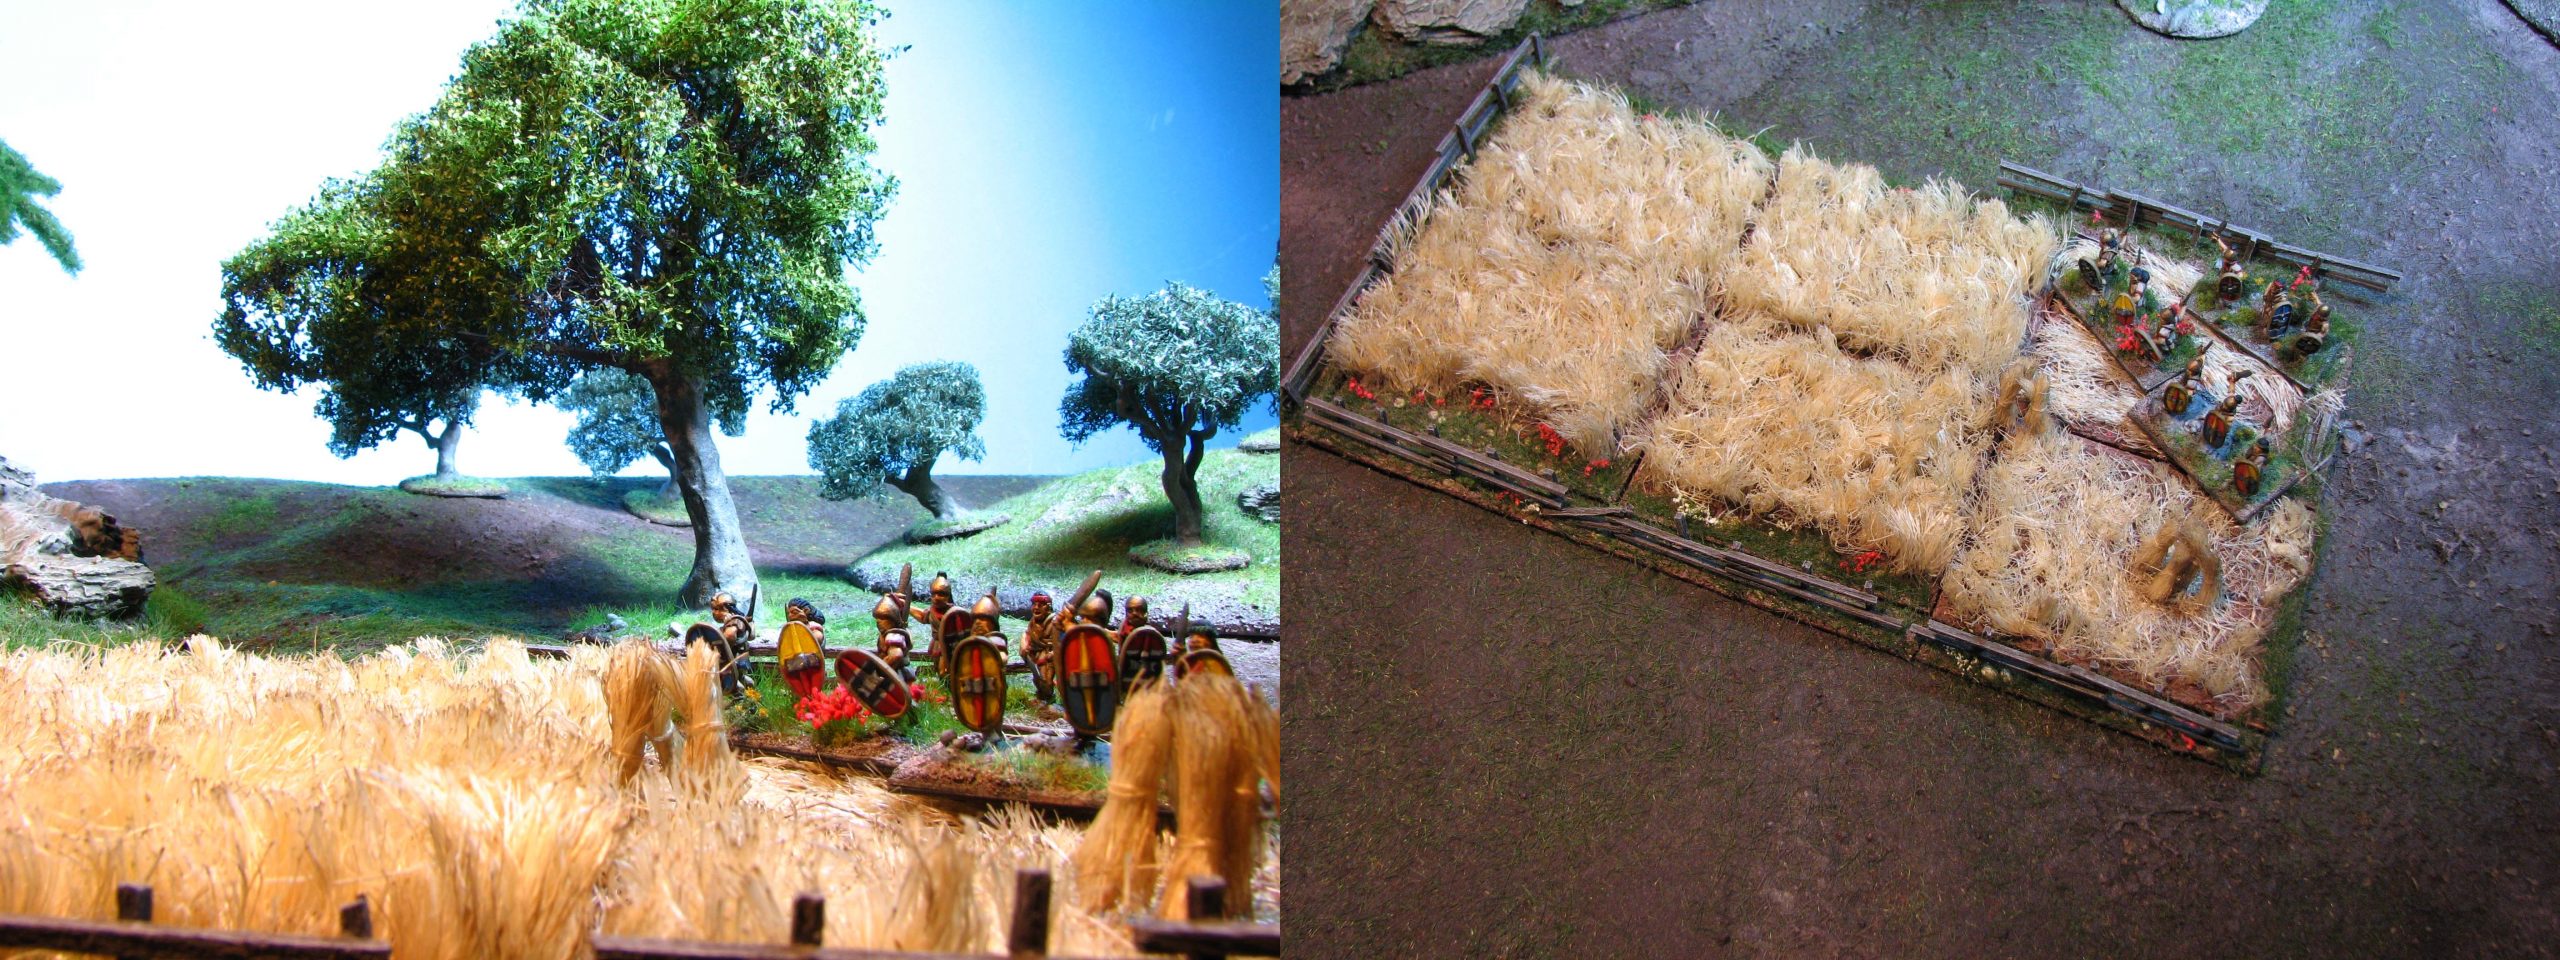
As you can see above, all things being equal, the perspective makes quite a difference. In the left picture one feels much closer to the action and assumes the role of a spectator. The picture on the left side has, however, another problem: The background is not evenly lit, a problem you encounter often when taking pictures using artificial light. In addition the trees cast shadows that are a bit too stark. The picture on the right has a similar problem. It is a bit dark which makes it very hard to see all the details.
Trial and error
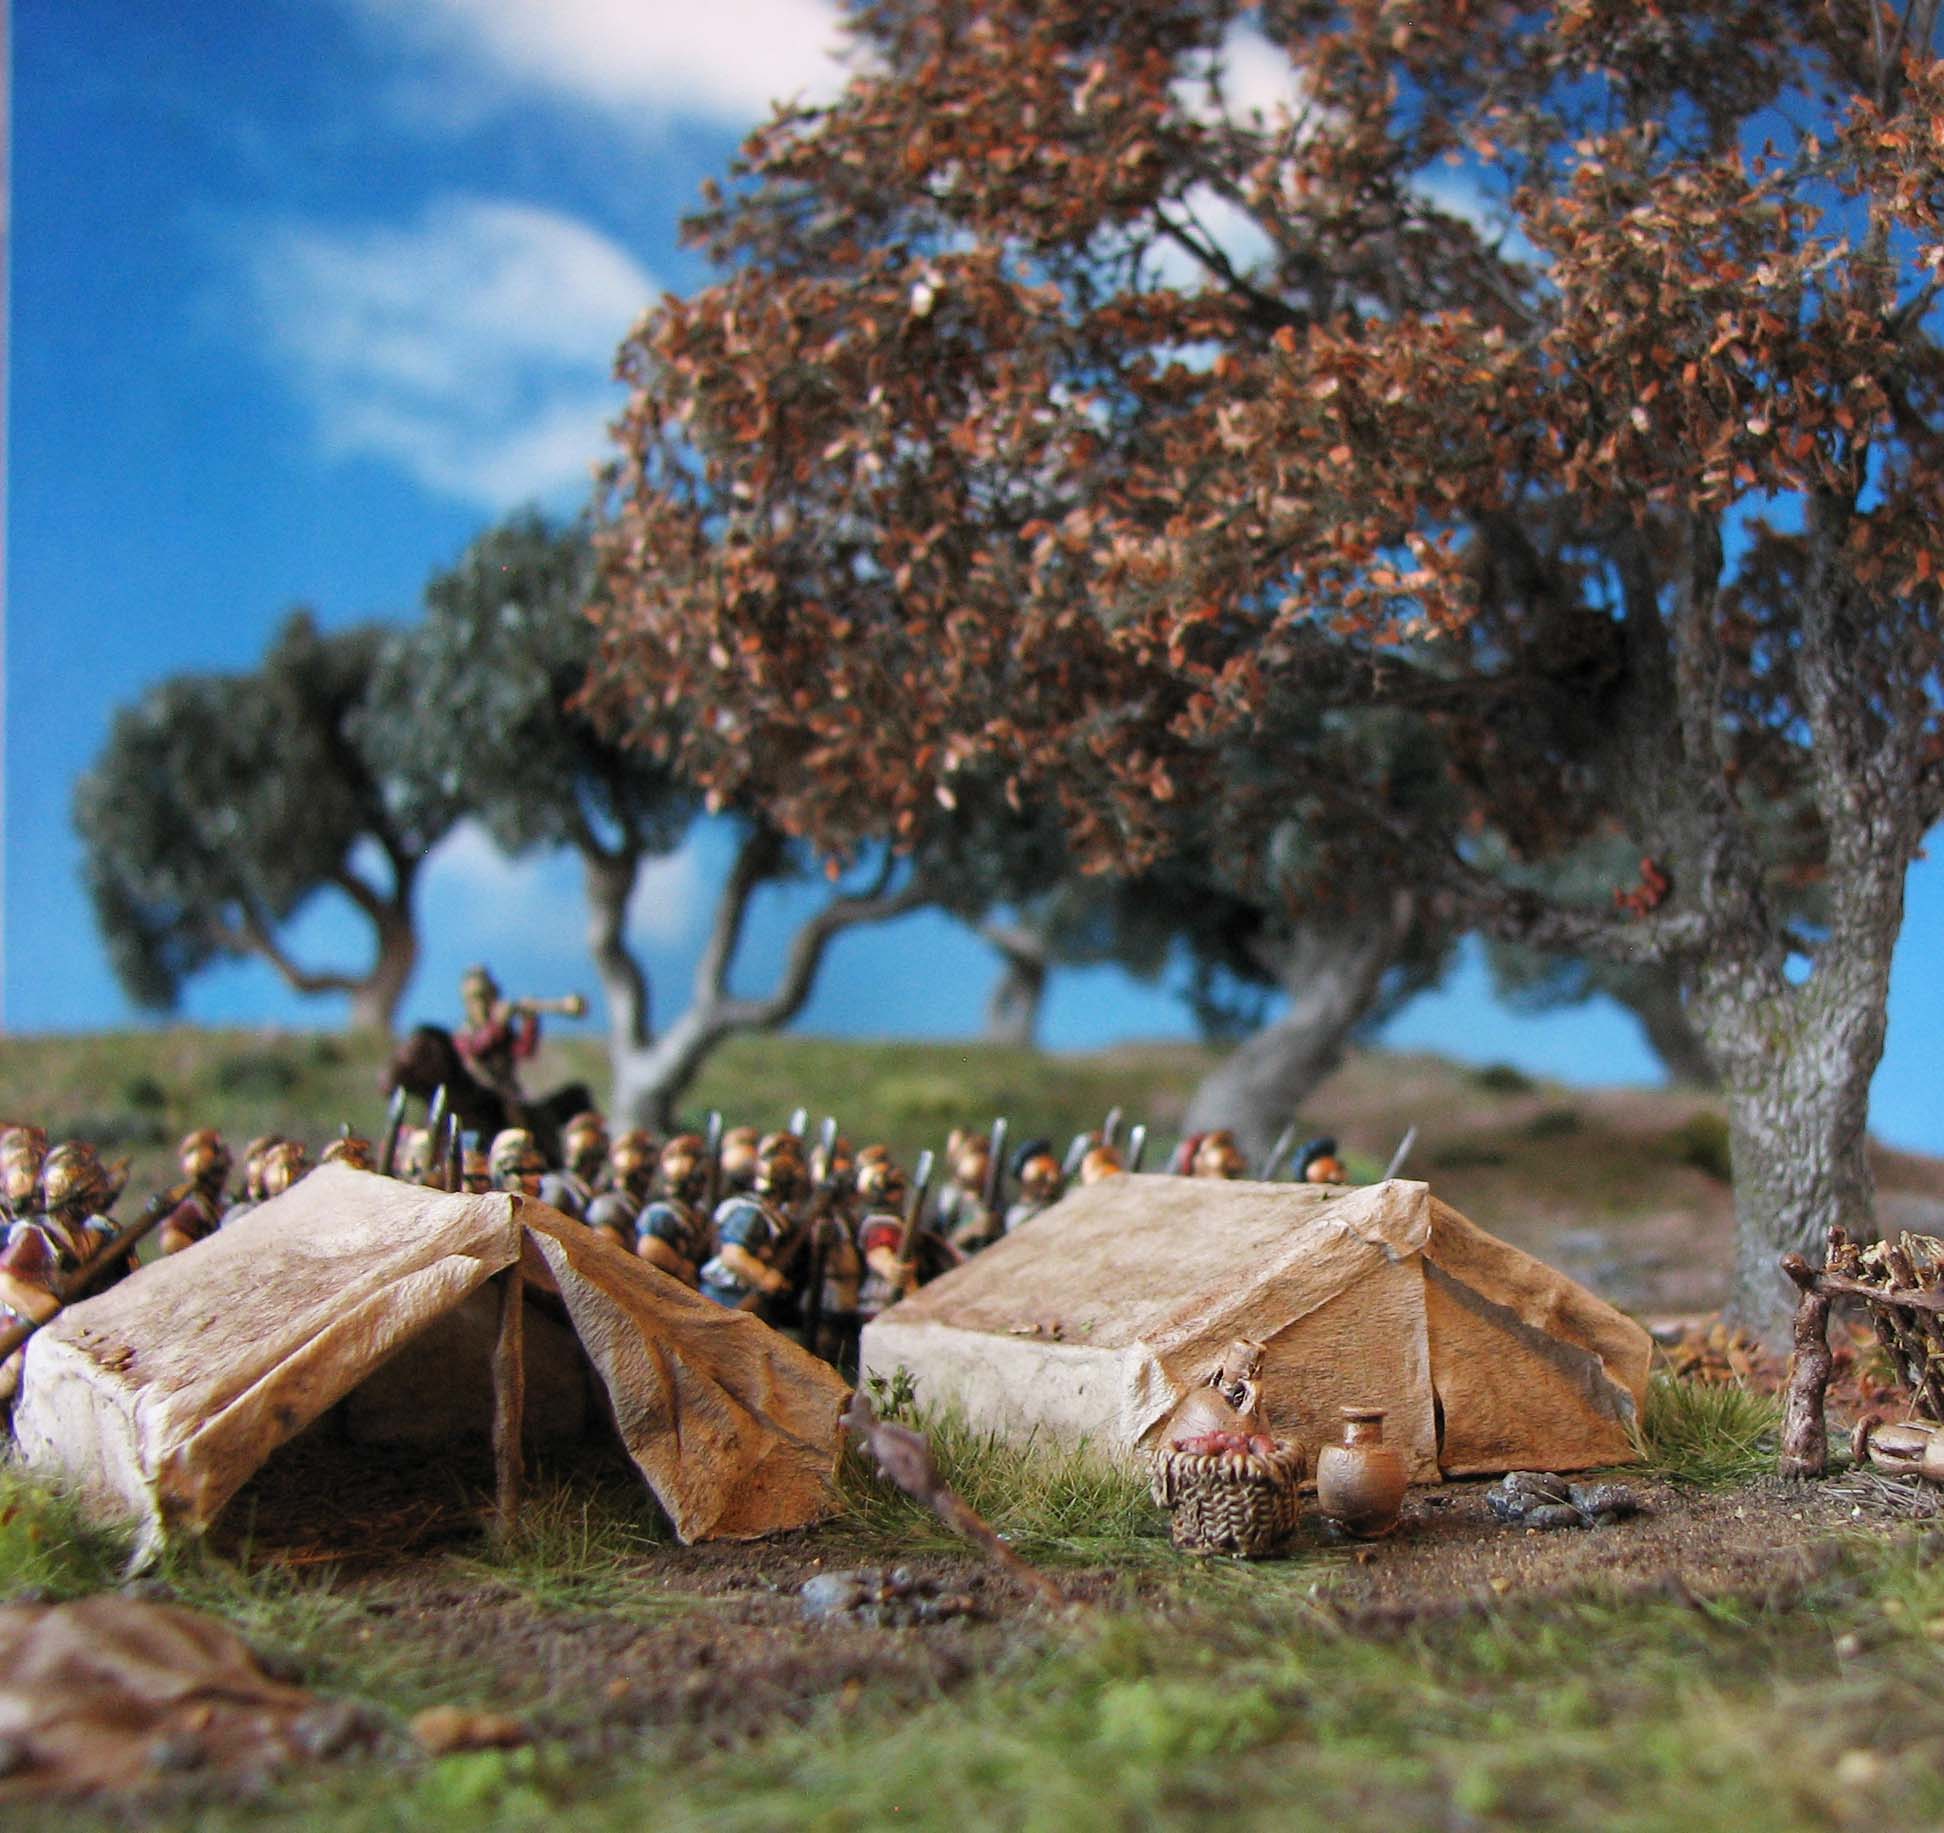
Make a couple of test shots to establish if the scene works. In time you will be able to judge this more easily. Arguably the shot below is a much better composition. The background is evenly lit and with only a single tree and two miniatures the scene is more focused. In selecting the poses carefully the idea of two men on watch can be easily conveyed. This is further emphasised by the cliff face. It not only suggests an elevation, but also frames the picture.

It gets more complex if you want to place whole regiments or depict a battle scene. Make sure they don’t cover each other up or are at an odd angle. Sometimes weapons overlap and give a strange appearance. You might also need to elevate some of the miniatures to present them properly, even though they look alright from above.
Hiding bases
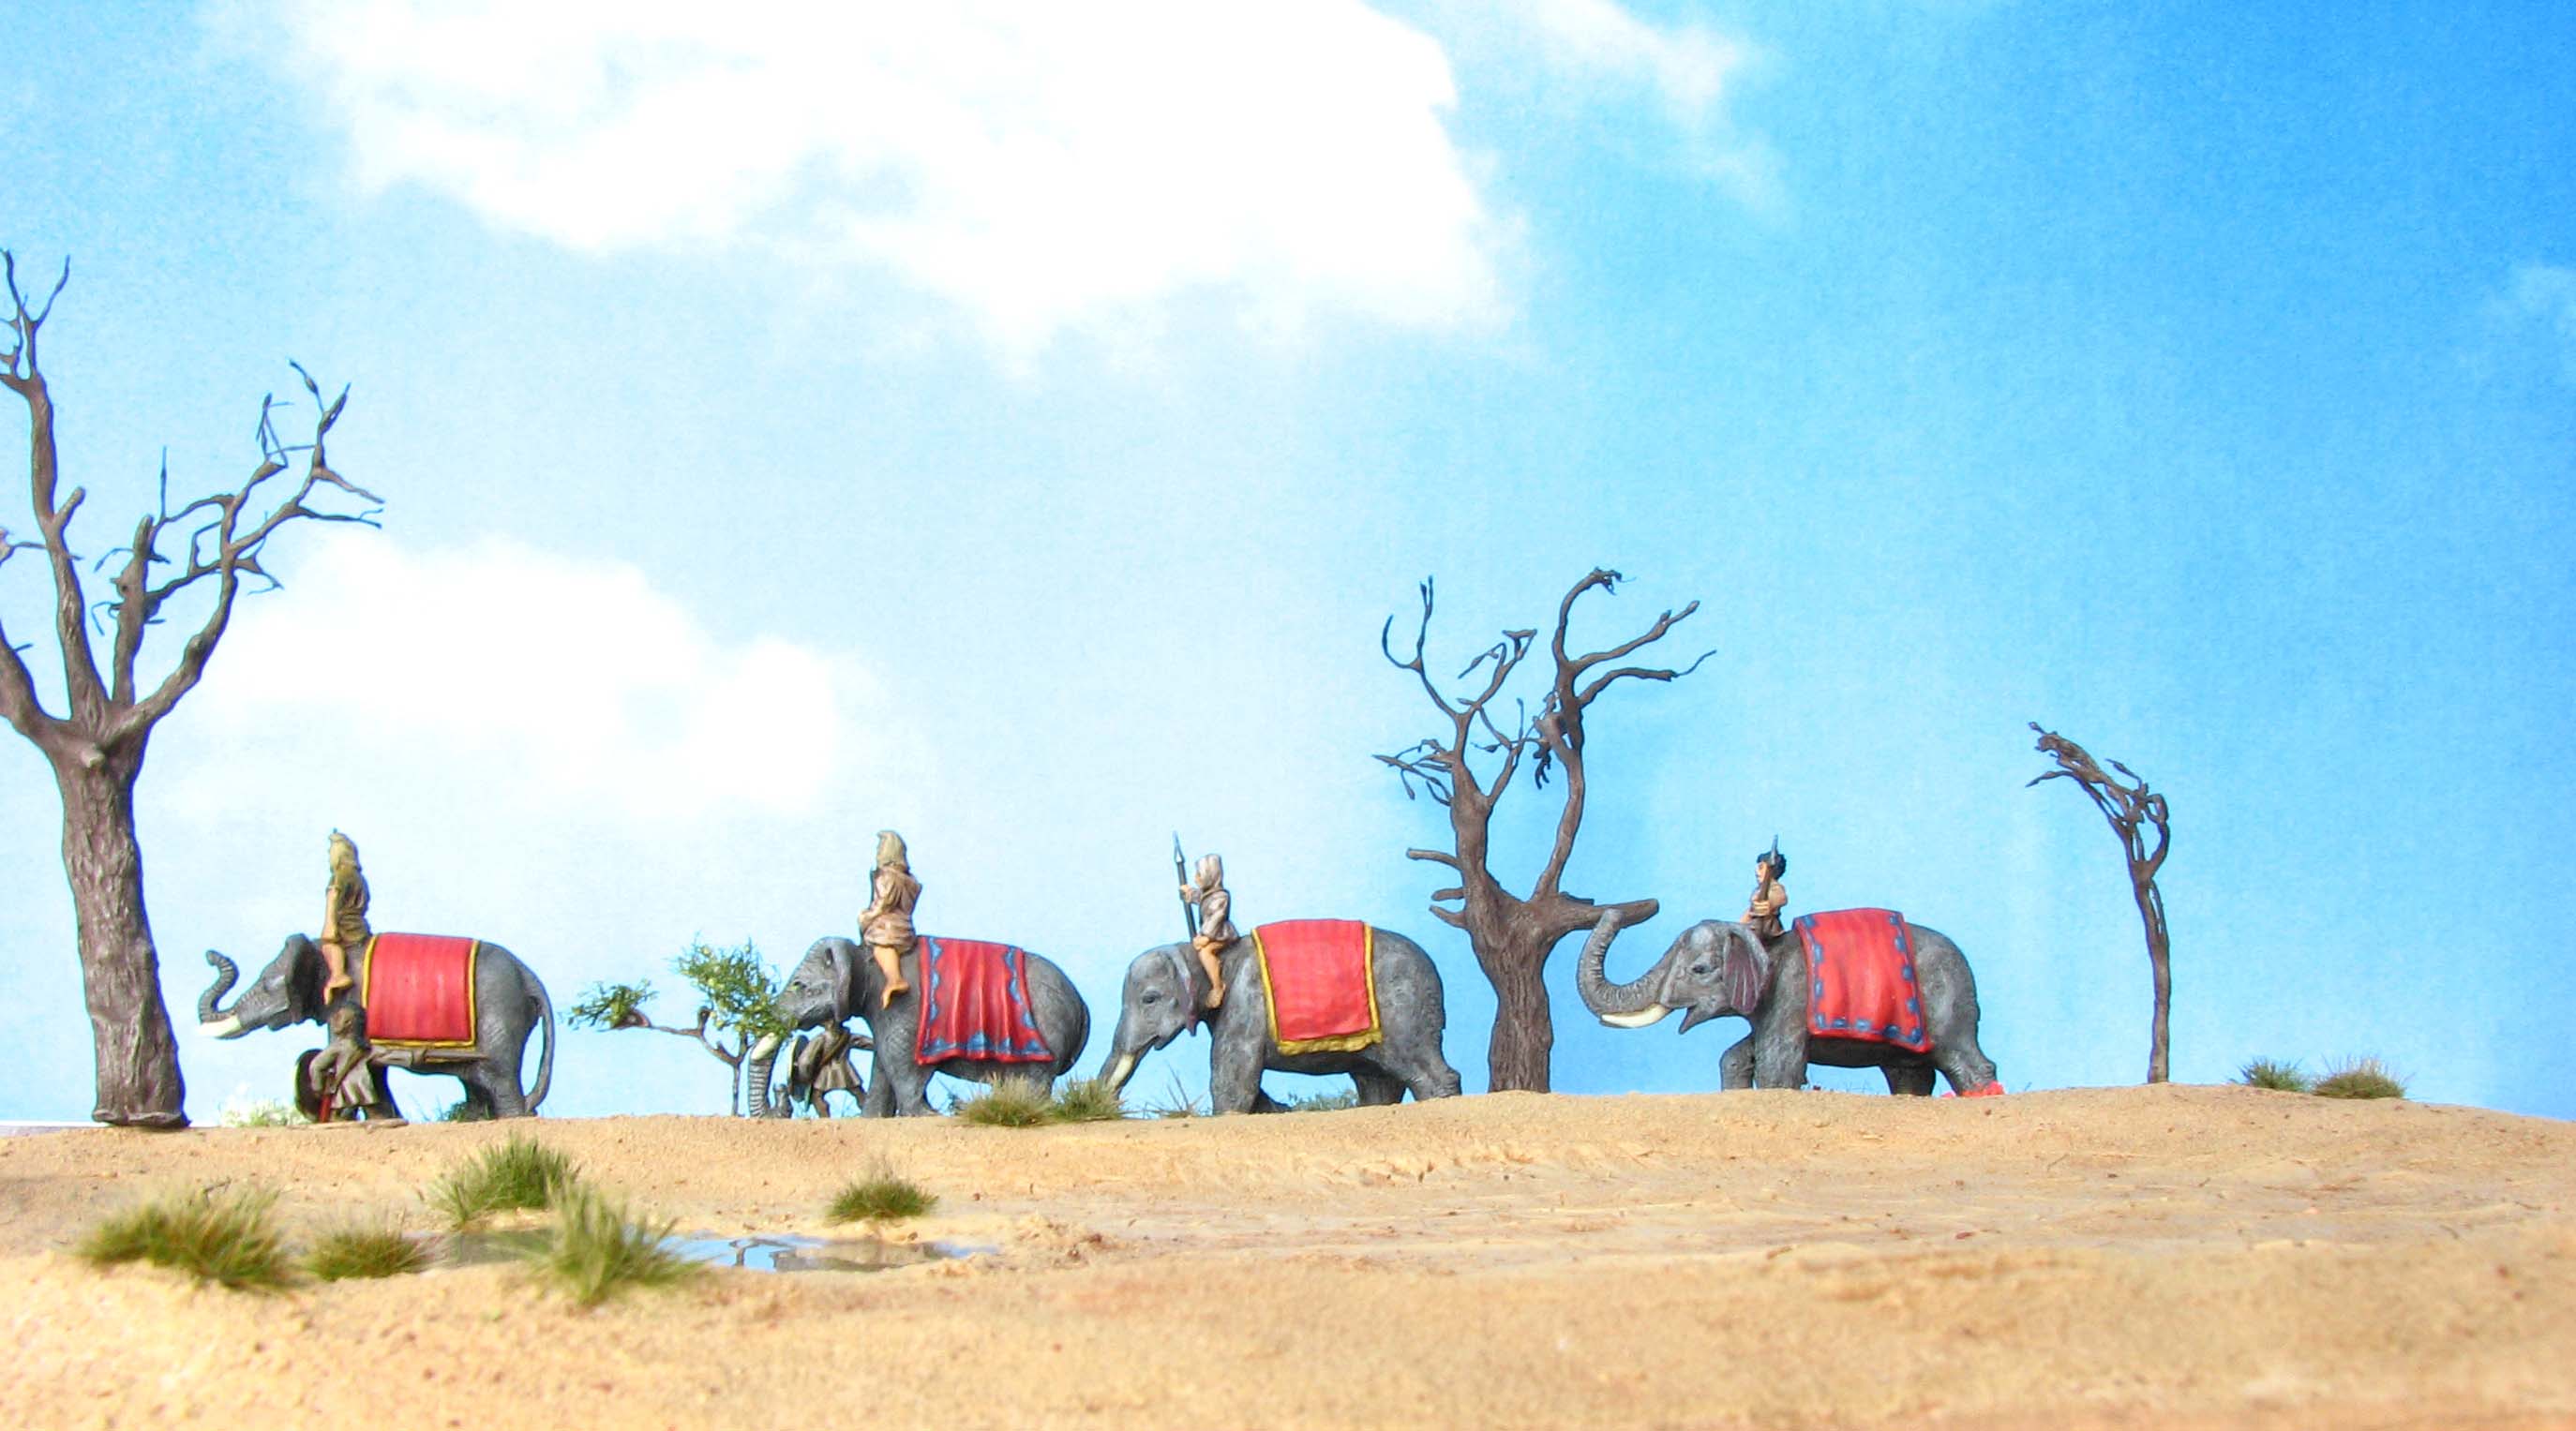
Another thing to consider are bases. Naturally a desert or snow scene would ask for matching bases, but with using perspective effectively you can take a photo that will not show the bases prominently. A good strategy is to use the base of a terrain piece or a rockface to hide the bases.
The elephants below have a base that depicts lush Mediterranean vegetation, entirely unsuitable for a desert scene. However, in positioning the camera such that the terrain piece hides the bases, this problem can be solved. While the picture is reasonably nice, it has a flaw: The trees on the right cast shadows on the background. Moving the background further back usually solves this problem.
Framing
The scene is set up and you are ready to take your pictures. Now you have to decide which section of your scene you would like to photograph. You will be limited by the size of your background to some extend. You do not want your living room to show on your photo. So make sure that you frame your picture right the first time and save yourself some frustration. Instead of rearranging your whole scene it is often easier to move your background slightly or correct its angle.
It is also a good idea to use some of the terrain features to frame your shot. A tree to the right gives your shot some closure and provides a visible border. Movement can be suggested by portraying only part of a unit coming in the scene from the left.
Artistic blur
You can also use artistic blur to focus the gaze on a specific section of the picture. You need to experiment a bit with your F-stop here to achieve the desired result. This is obviously much easier to accomplish with a system camera and focus stacking.
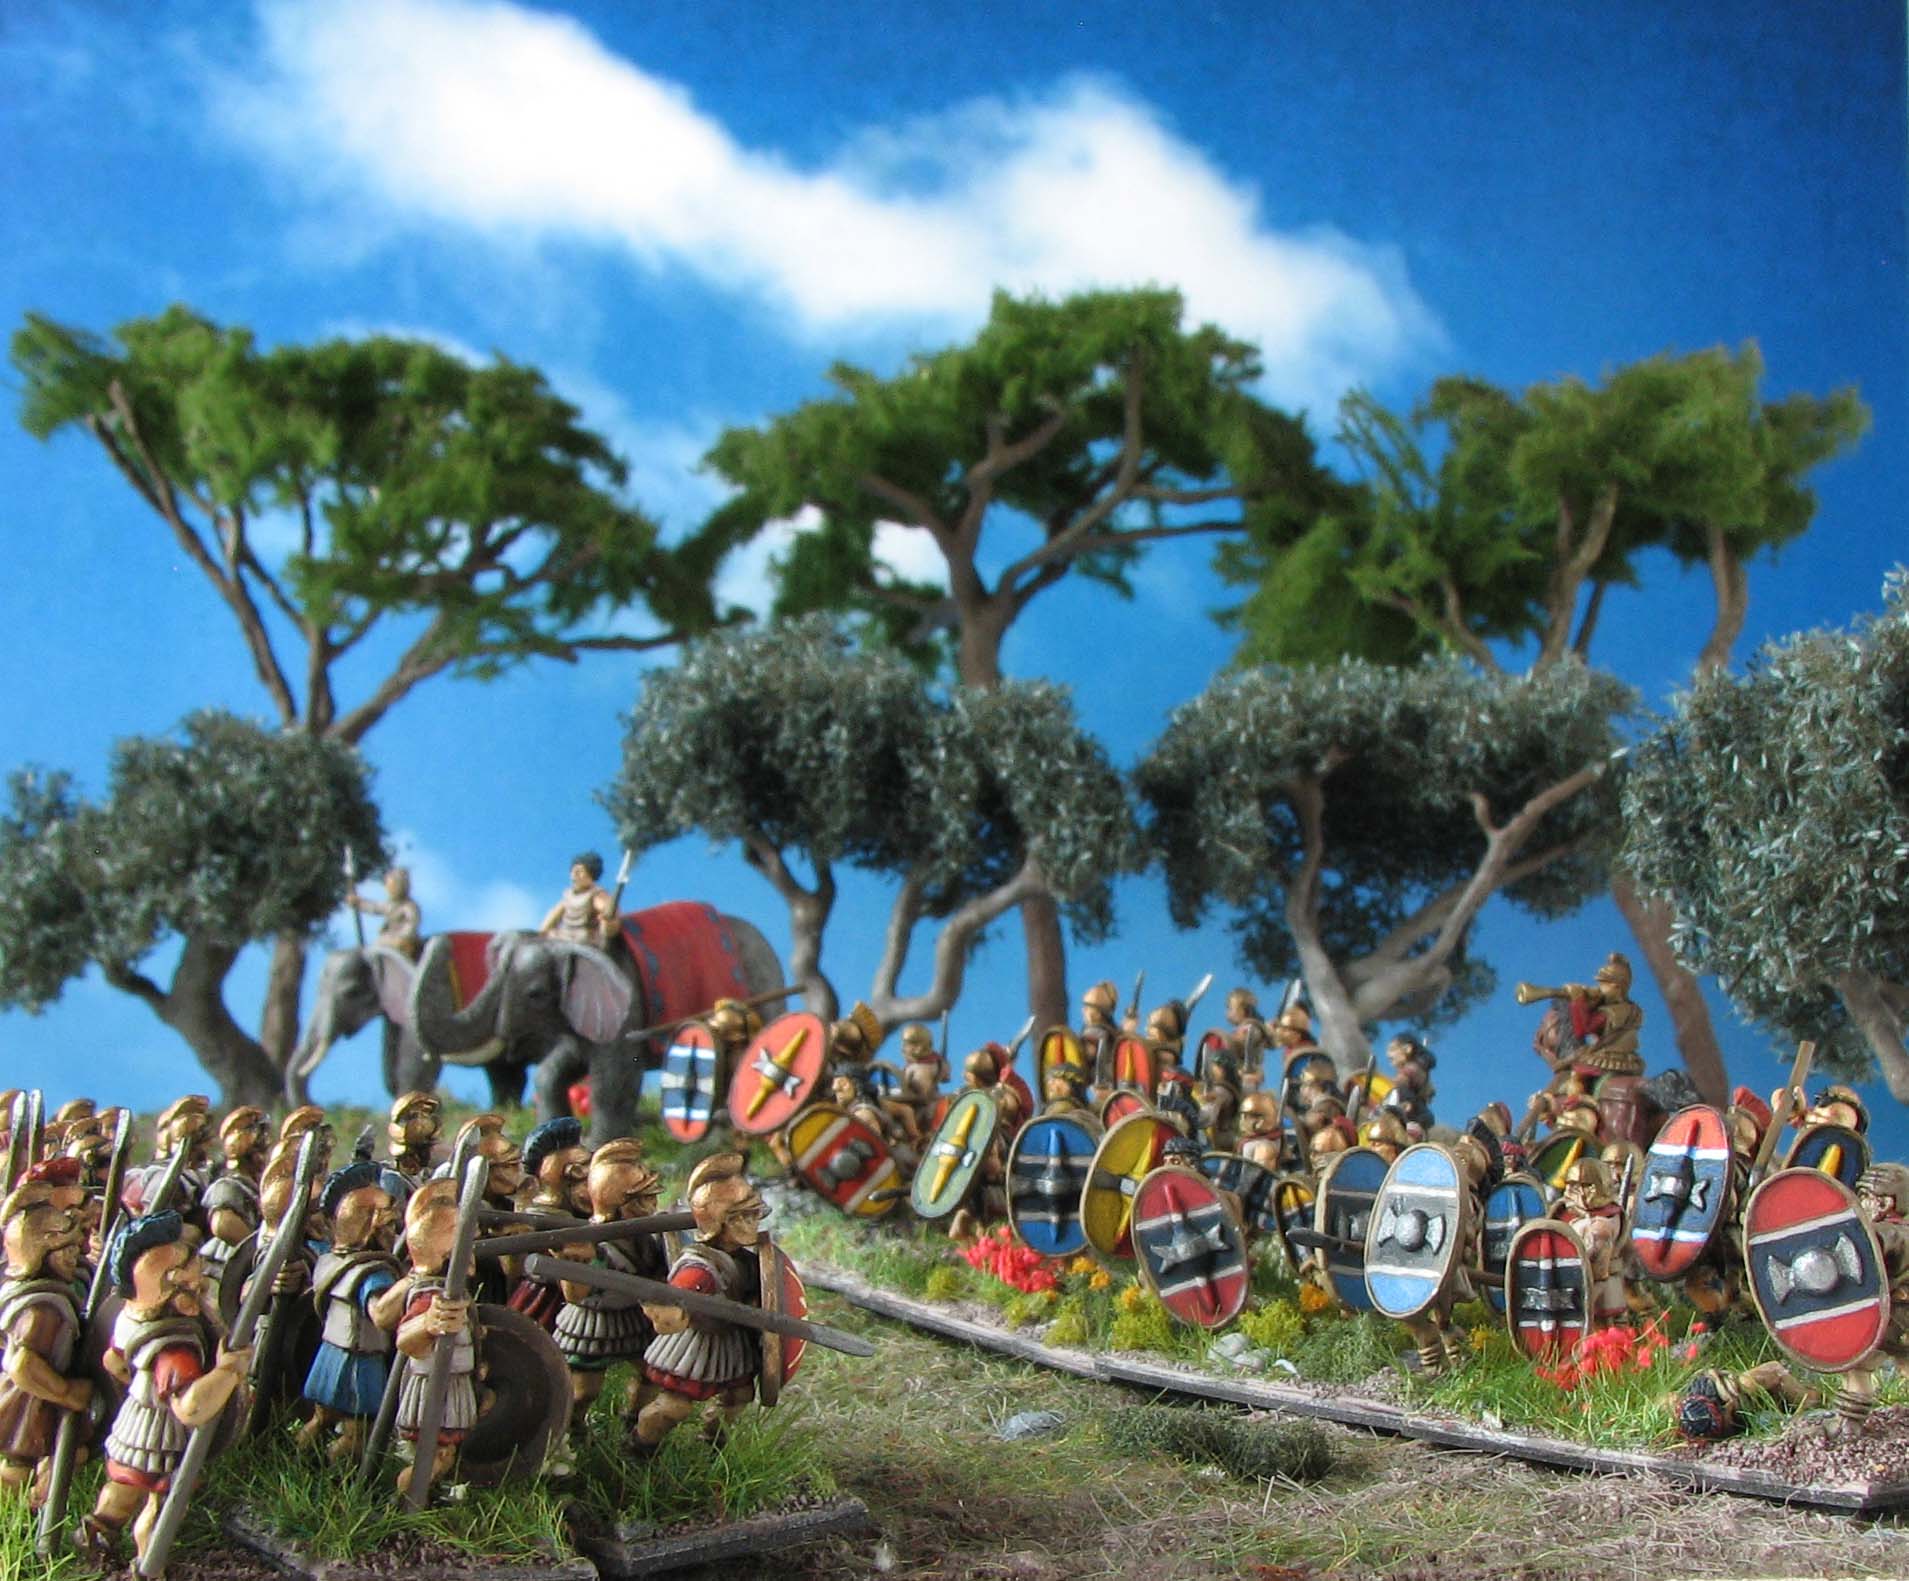
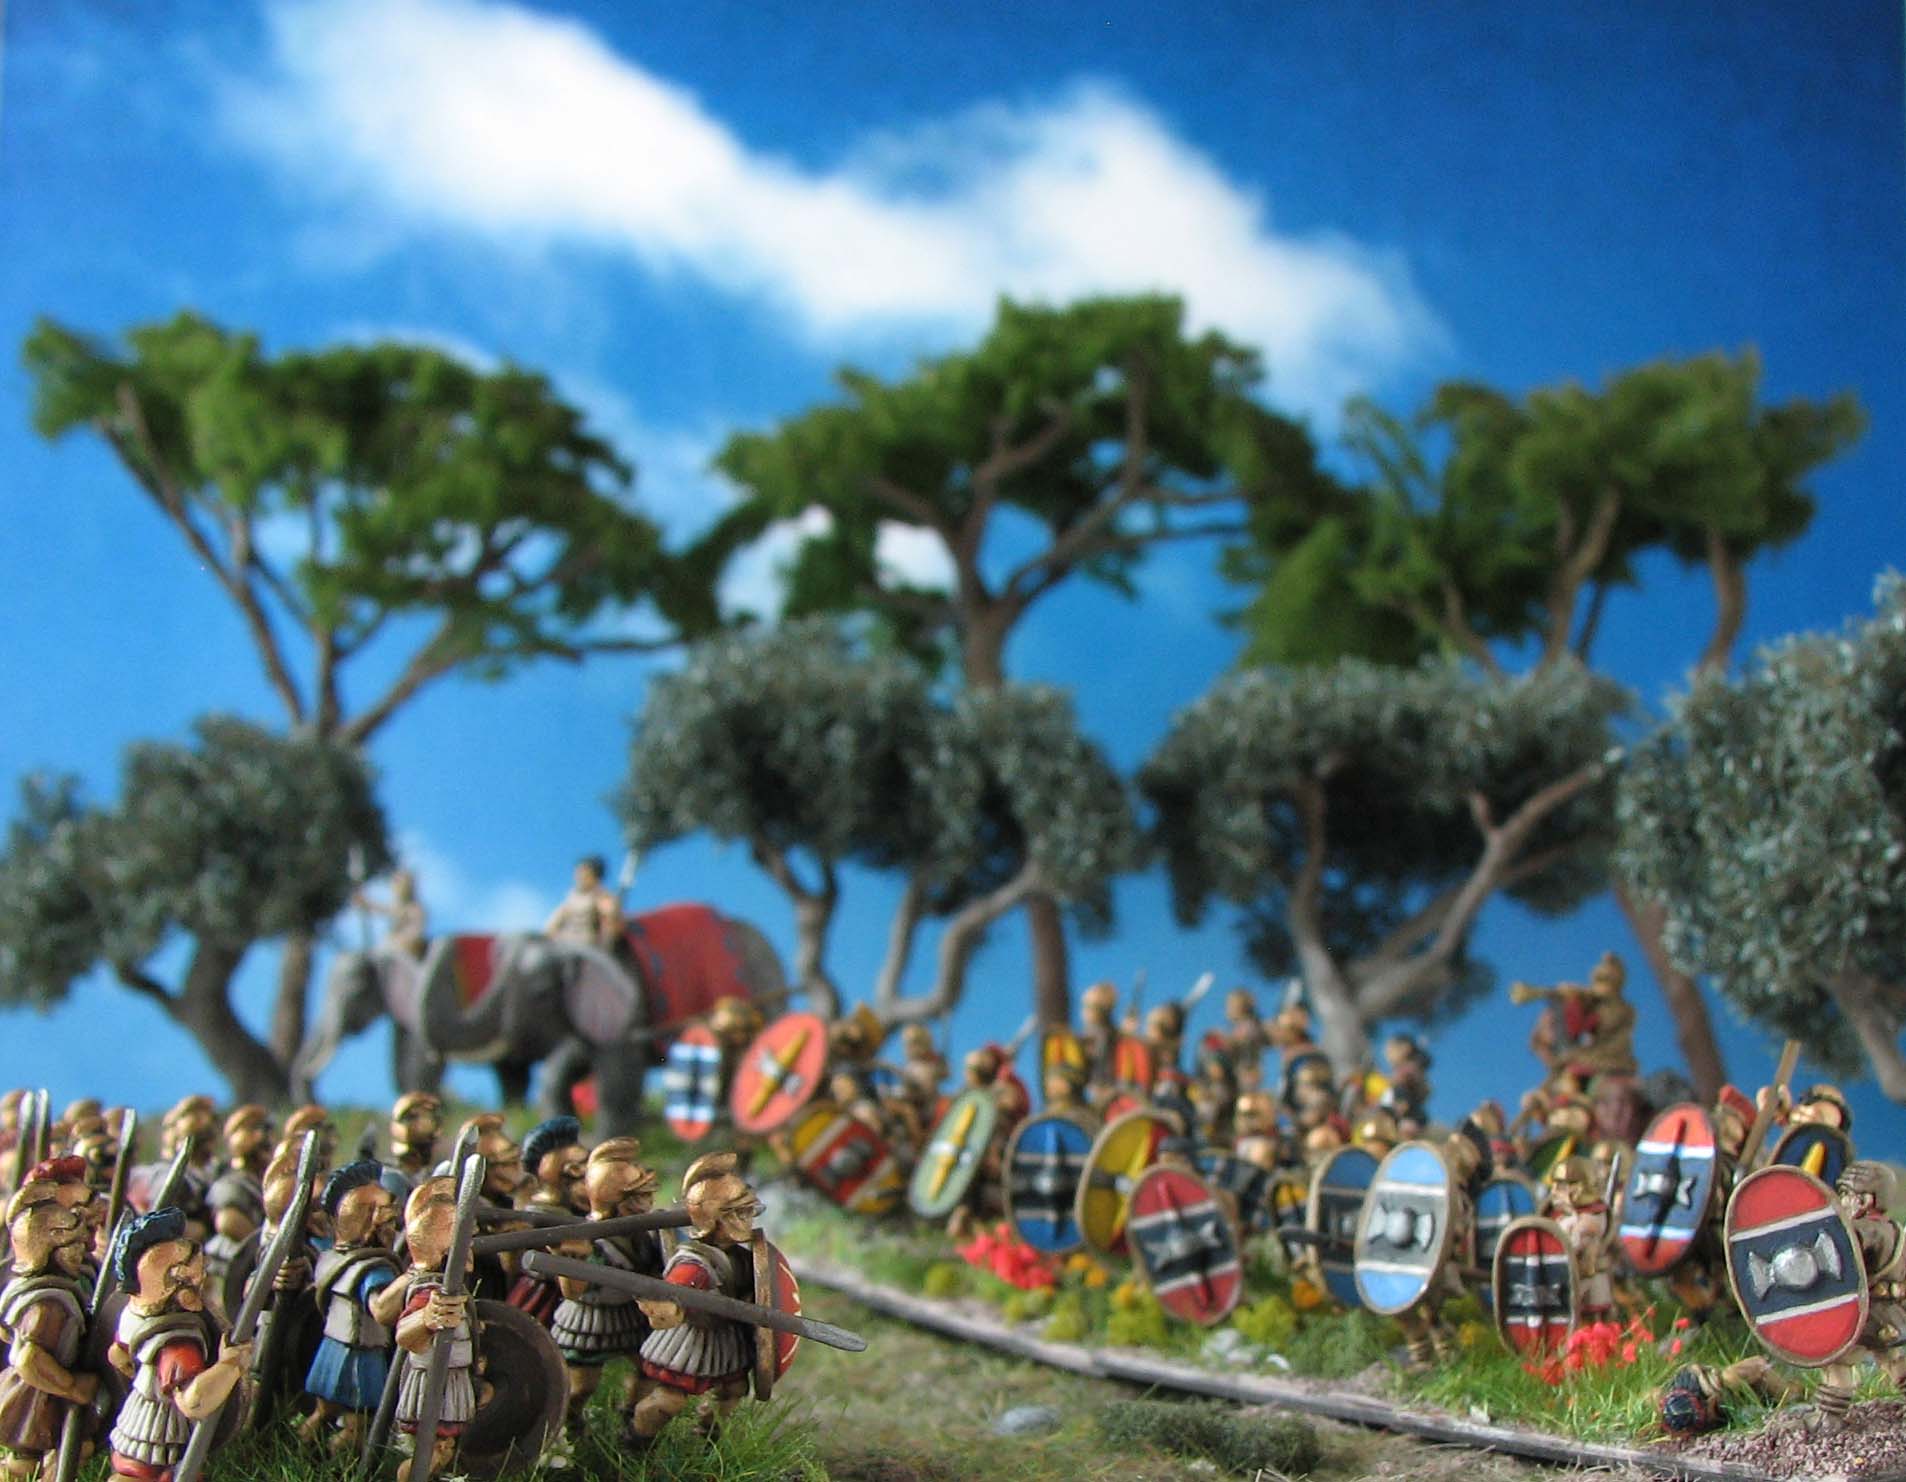
Photo editing
After you took a number of pictures it is time to start-up the PC and use a program like Photoshop or Gimp to make some final adjustments. I usually limit this to cropping the picture.
However, sometimes you only realise sitting in front of your PC that there is a small gap in the background, speckles of dust, or a fibre somewhere. Here the clone stamp tool comes in handy. This Youtube tutorial by EverydayHDR shows you how to do it.
With Photoshop or really any photo editing program you can also correct colours and modify specific areas of a picture, e. g. to increase or decrease brightness and contrast. This video tutorial by Michelle Kane shows you how to utilise layer masks to achieve this. However, this is time-consuming and it is a much better idea to get it right when you take the picture. To avoid frustration always keep your scene assembled and note down your camera settings. Go to the PC and check the pictures. These days this all works wireless, so you don’t even have to move the camera.
In the shot below I made an attempt to correct the uneven lighting of the background with a layer mask and also to saturate the colours more. I also darkened the tree slightly, as it would cast a shadow. Still, if I would have corrected these problems when taking the picture the result would be much better.
Summary
To take evocative scenic shots of your miniatures you need some time on your hands, patience and imagination. All the technical skills will develop in time and through trial and error. However, for a good start:
- Make sure that your camera has a good manual mode, so you can adjust exposure, aperture etc.
- Put your camera or smartphone on a tripod.
- Good lighting is essential. You won’t need a light tent, but invest in some good LED lamps or go with natural daylight.
- Use foamboard to reflect light to evenly light your scene.
- Take your time in creating your scene. Use a flexible caulking mat as groundwork and keep the perspective in mind when setting your miniatures and terrain up.
- Try to get the best picture possible to save time when it comes down to final editing.
- Make use of photo editing software if necessary, but try to keep it to a minimum.
If you follow these guidelines you should have an agreeable picture in the end. I hope this short introduction to taking scenic shots of your miniatures gave you some ideas. So what you are waiting for? Go take some pictures, but always wield your camera with honour! Oh, and check out part 2.
Eine sehr schöne Hilfestellung!
Da möchte man direkt die Kamera auspacken..
Vielen Dank für die Inspiration!
Habe gerade gemerkt, dass ich nicht auf dein Kommentar geantwortet habe. Schön, dass das Tutorial eine Inspiration war. Bei deinen/euren Photos geht es mir ebenfalls so und ich bekomme direkt Lust eine neue Periode/ ein neues Spielsystem anzugehen.
Fantastic tutorial! Thanks so much for this, really needed such a guide 🙂
You are very welcome!
Fantastic tutorial! I’ve been meaning to take more scenic photos and this is going to help a lot. Thanks for sharing all your advice. 🙂
Thank you for your comment. I hope you will share your results. 🙂
Fantastic job on the tutorial!
One thing you didn’t mention, that I’ve noticed you often do in your photographs, is to have objects in the foreground, middle ground, and background. It’s a really effective way to make a rich scene, helps make the use of depth of field more effective, and gives you opportunities to lead the eye through the picture in multiple directions.
Thank you arkiegamer. I indeed did not mention this. I think I’ll work it in the second part. I actually really didn’t think about it consciously as I normally just set up the scene and see what might work, but you are right that it is a common feature. 🙂
Must be natural talent, then!
Great tutorial! I hope to put these lessons to use this year.
Thank you very much! I look forward to your creations!
thanks a lot for the tips. well done with all the photos, they look awesome!
Thank you for your comment. Glad the tutorial is useful!
I like the idea of using parchment paper on a daylight lamp,never thought of that before. Excellent tutorial as usual sir😀 . I am also about to get some landscape photos mounted panoramic style onto some card for background use so I will let you know how this turns out .
Thank you. Parchment paper works indeed quite well and does not block out as much light as a proper lightbox would. I’ll be very intersted in your choice of backgrounds. I am still looking for some stuff that is in the public domain (or provided free to use via creative commons). For instance a forest or a valley.