
Last time we focused on general advice if it comes down to taking scenic photos of your treasured miniatures. We covered the choice of camera, lighting, backgrounds, scene composition and photo editing. If you did not read part one of this tutorial I suggest to go back and have a look, as this part will be based on this general information.
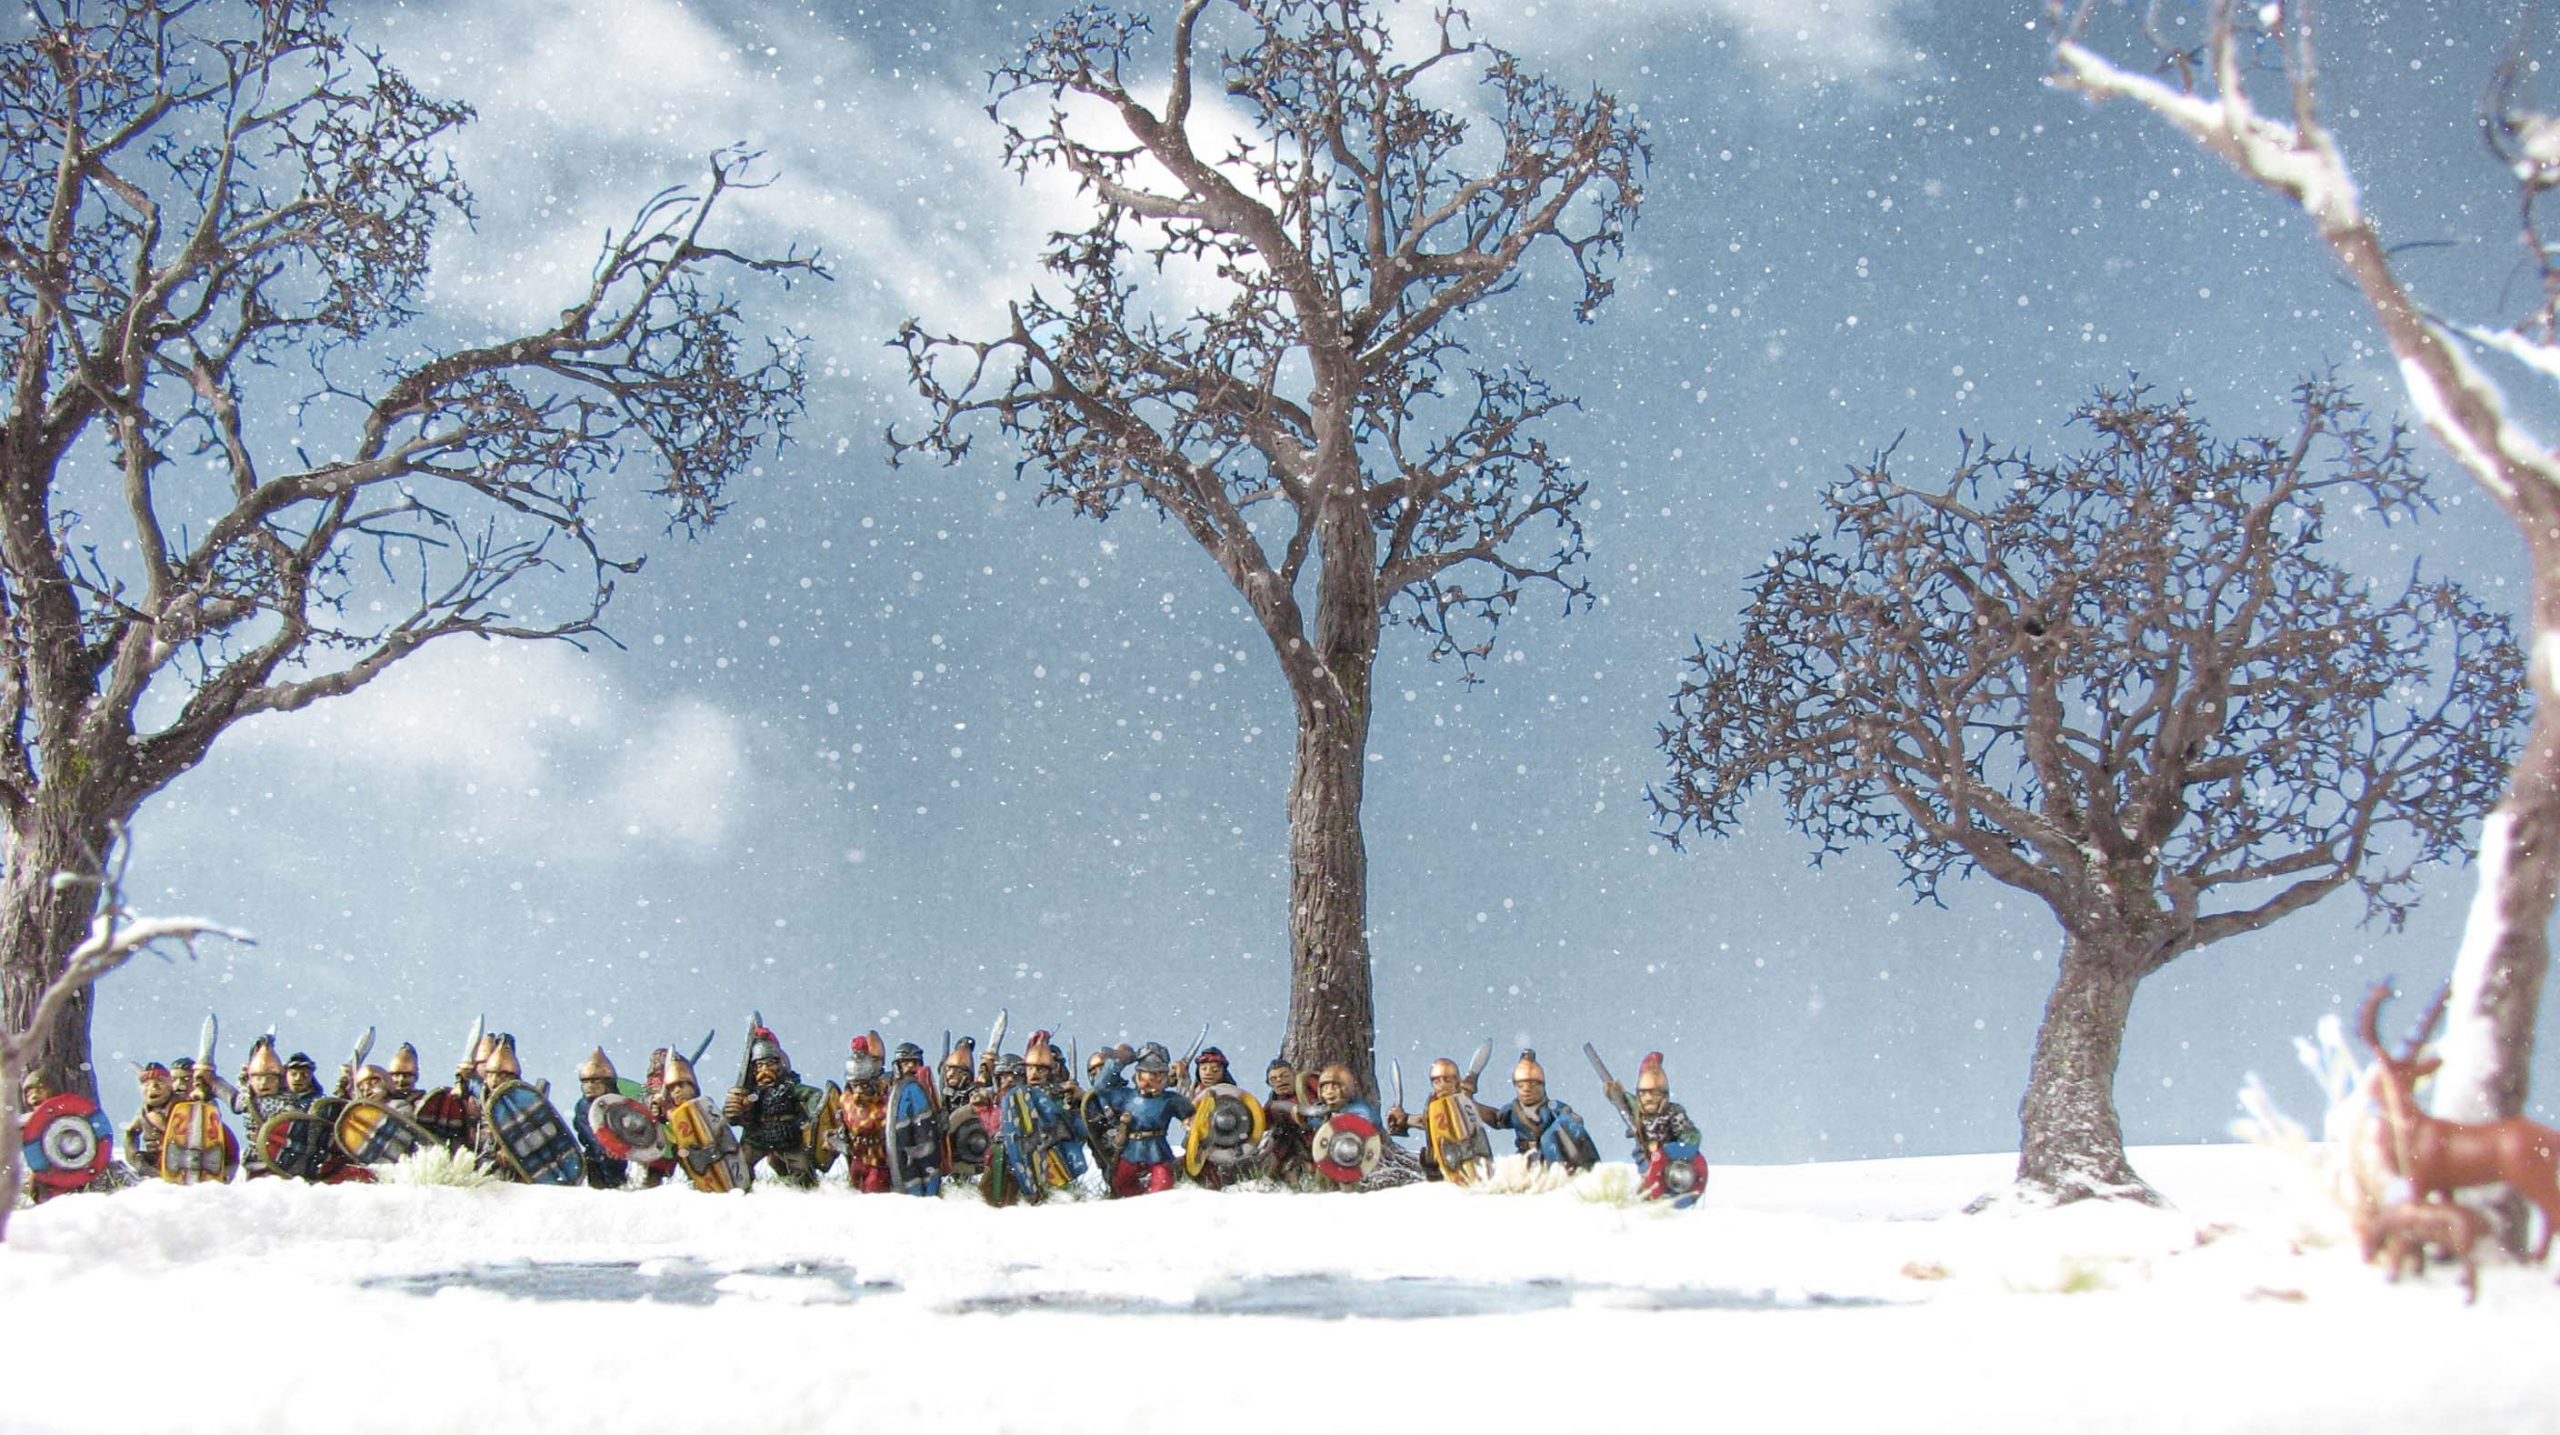
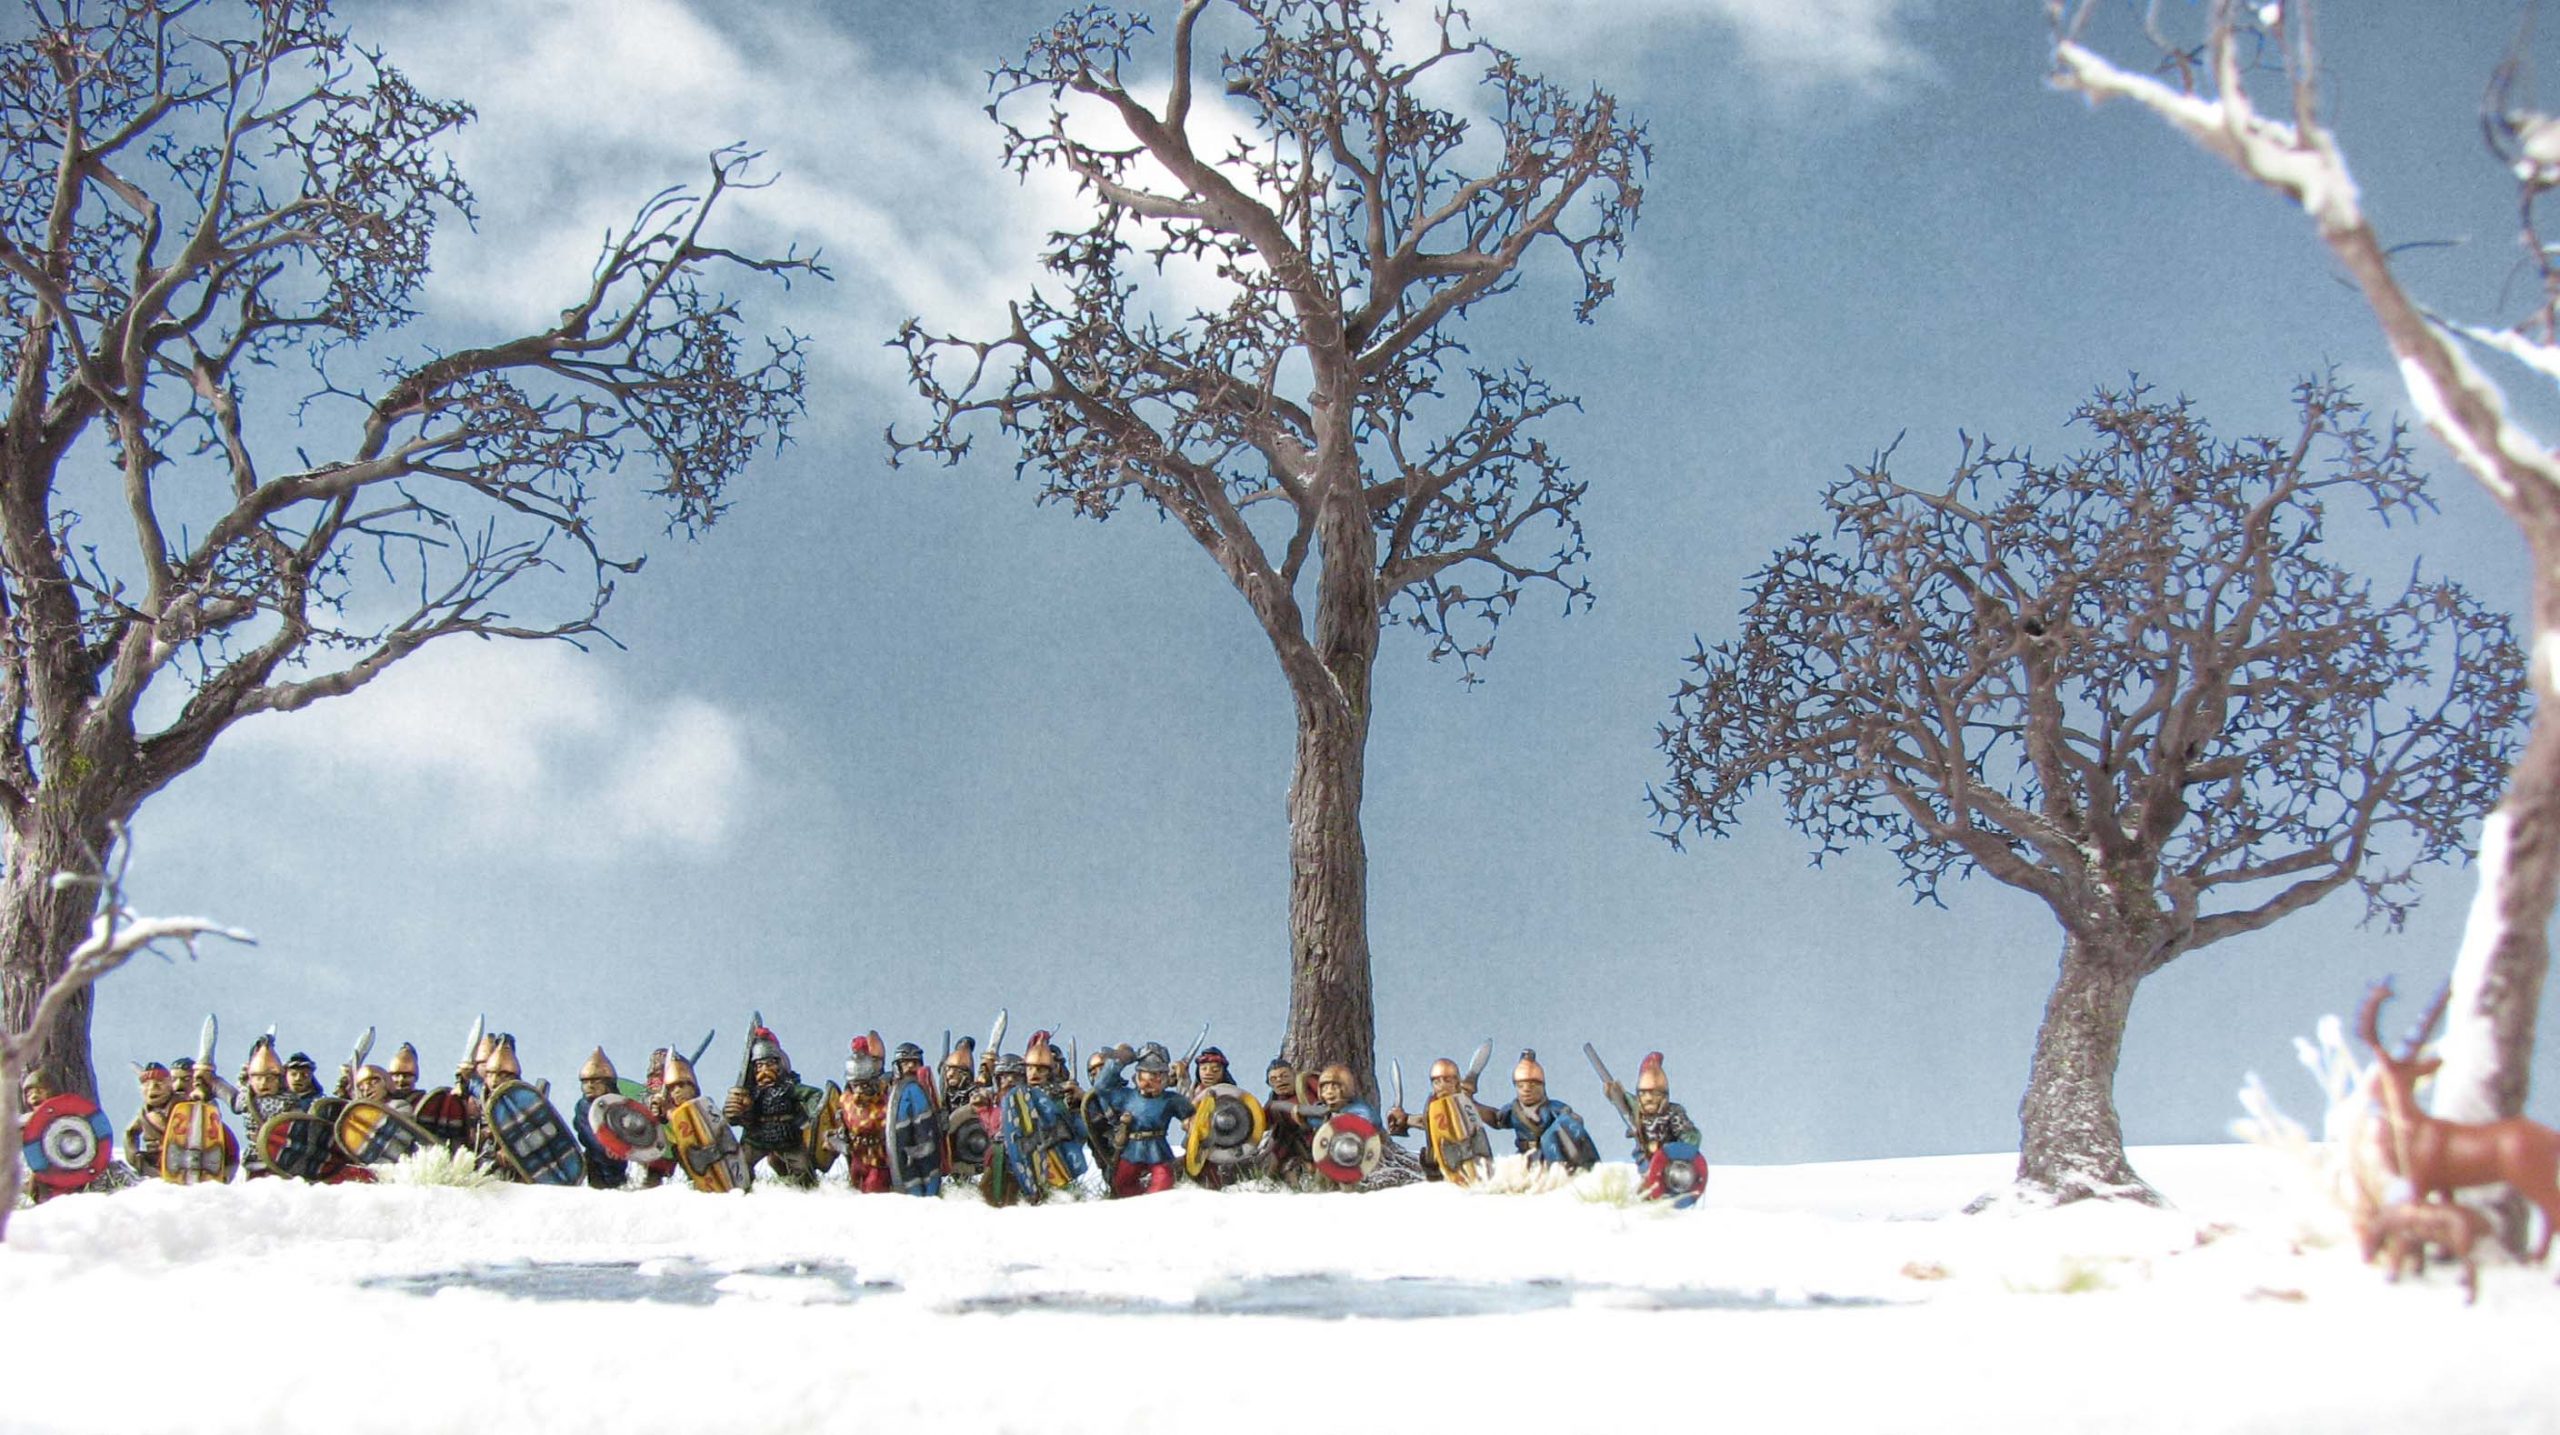
This time I want to depict a warband of Celtiberians in a snow-covered forest. Definitly a challenge, but I take you through all the steps: Dealing with white as a dominant colour, finding the right props for the job, setting and framing the scene, and finally photo editing.
The idea and its challenges
The idea seems simple at first, but does come with a number of challenges. With regard to miniature selection for the shot, only the Celtiberians did suit. They are the only historical miniatures I own depicted with trousers and cloaks. I also have some Celts, but some of them are bare-chested. Not very suitable attire if you are out in the snow – even if you are a badass Celtic warrior. Accordingly, the initial idea limits the pool of miniatures for the shot.
With white being the predominant colour, getting the white balance right can be challenging. All the white surrounding the miniatures makes it tricky to not over- or underexposed the picture. Some test shots can help finding the right settings.

Setting the scene
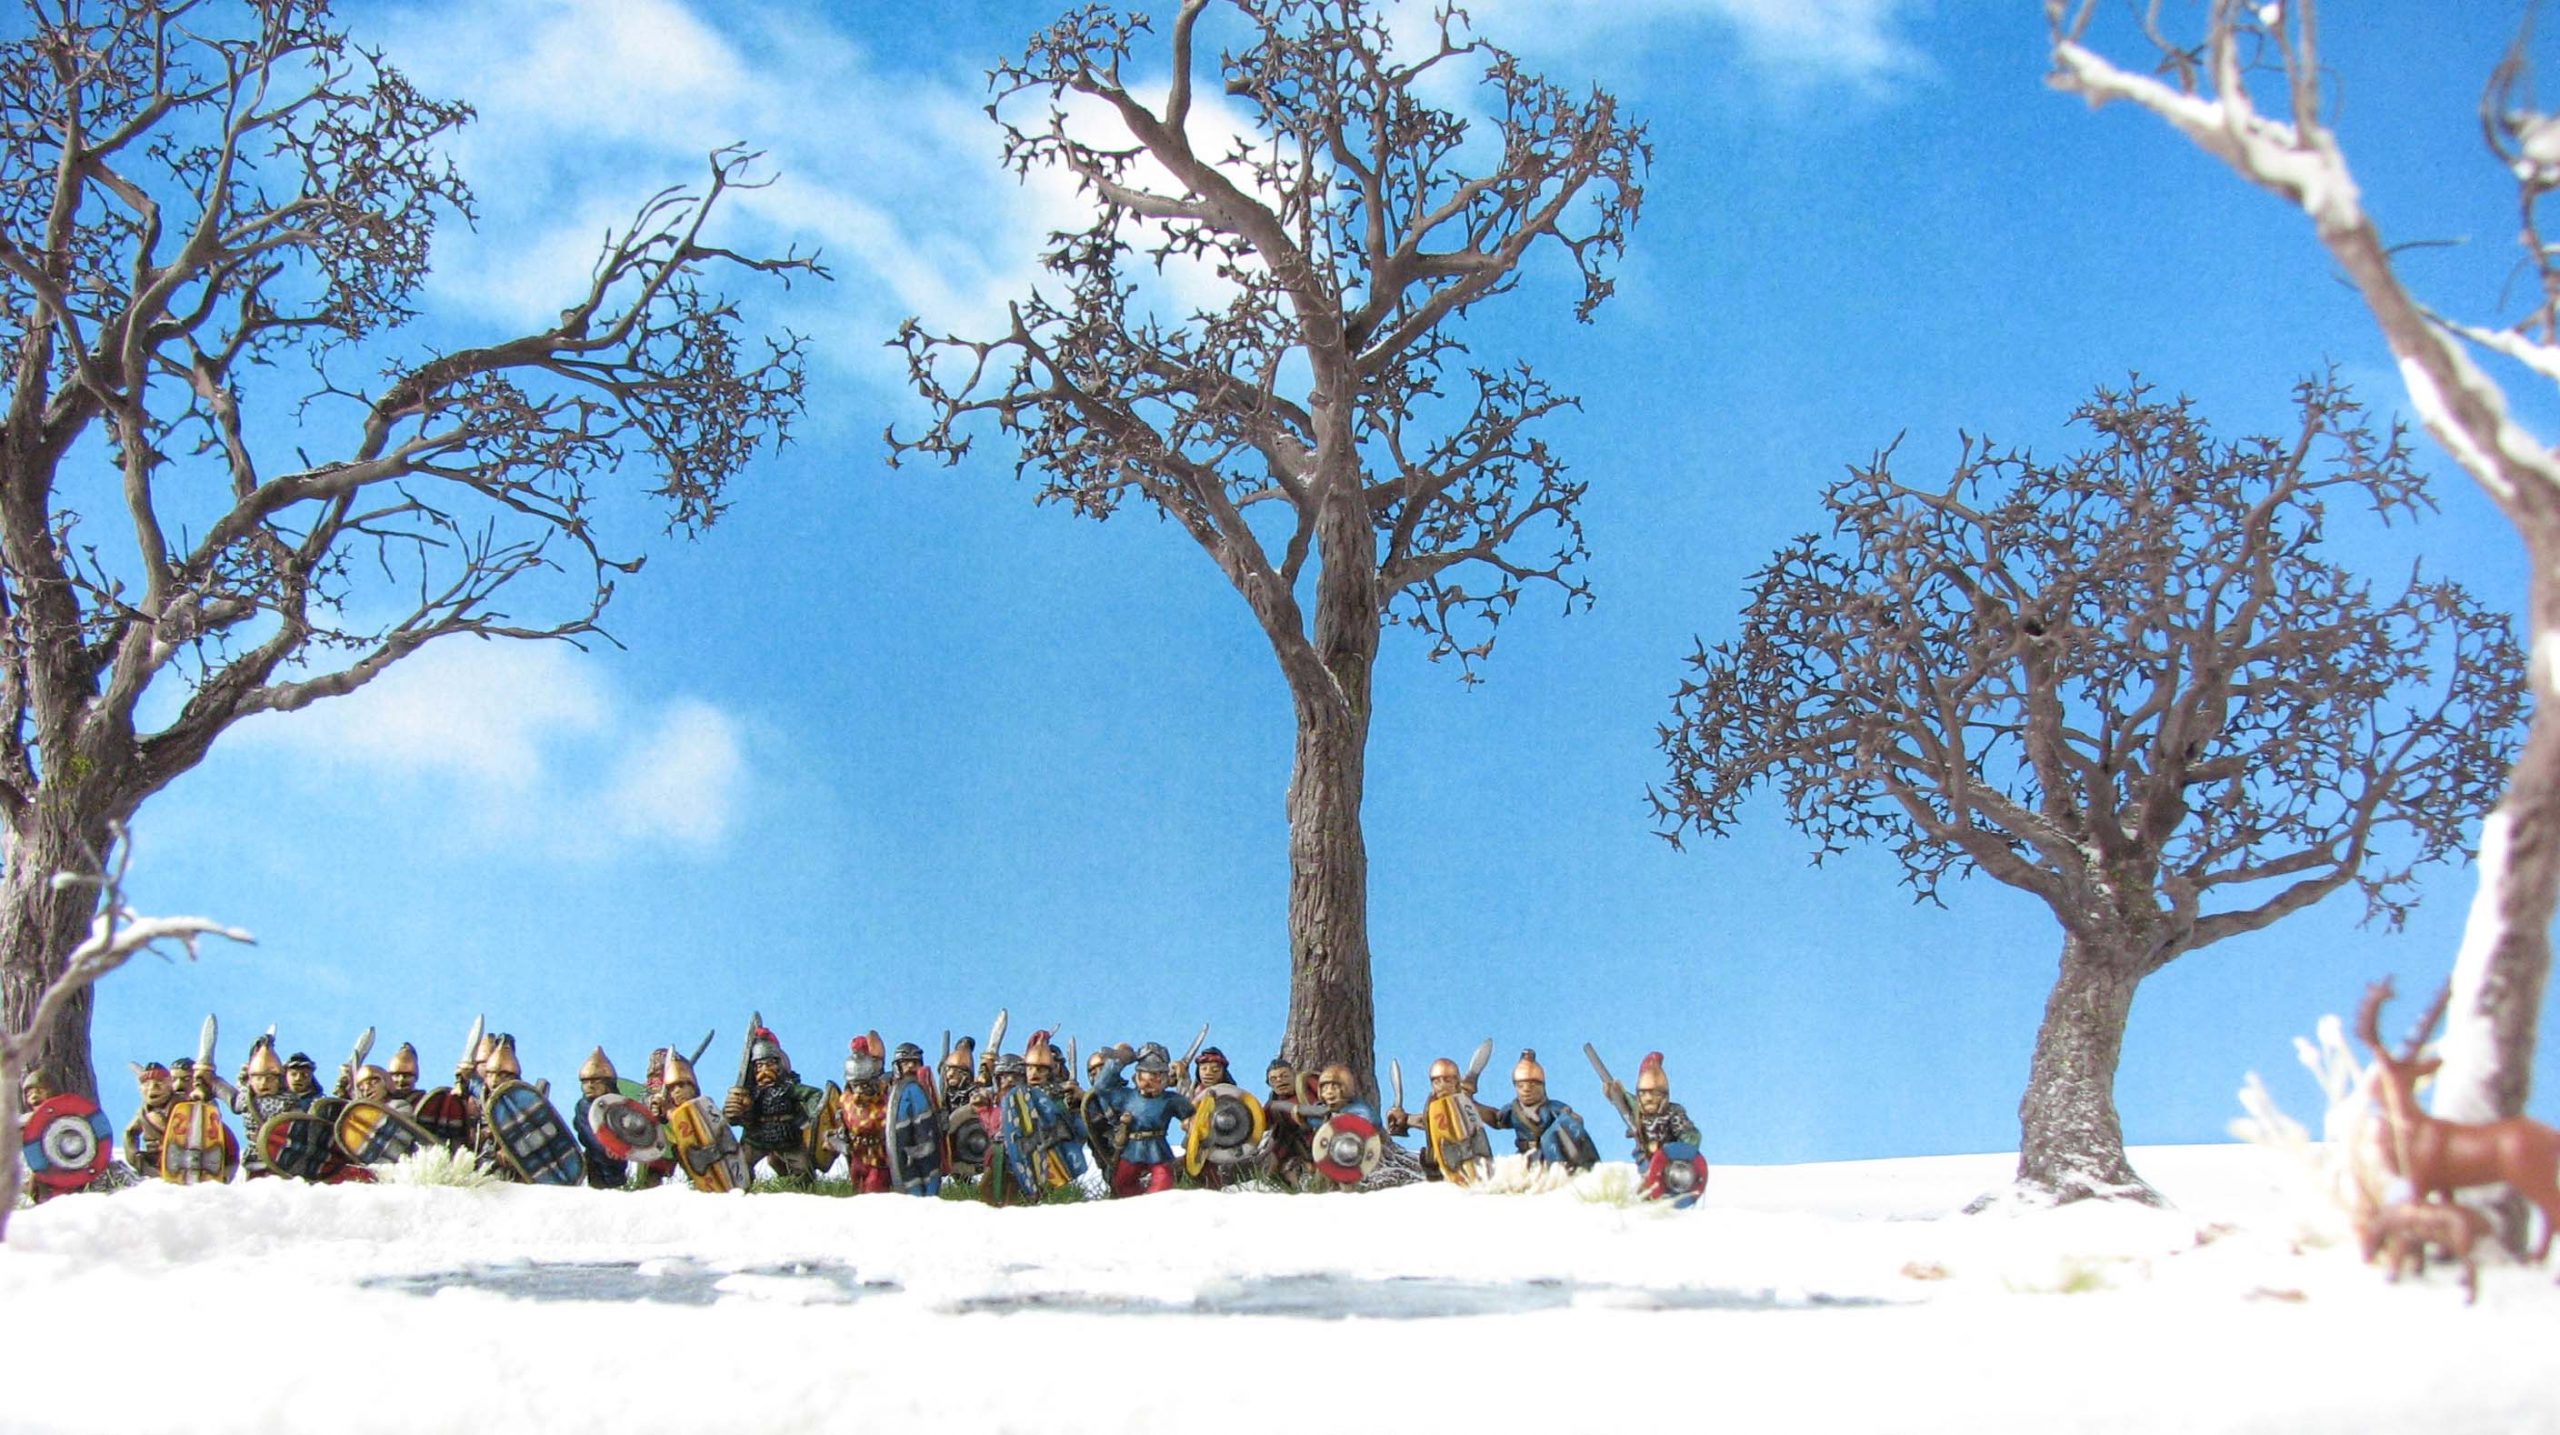
The terrain you have obviously limits the scenes you can build. That said, I only had a small frozen pond terrain piece and a few barren trees. The pond comes in handy to hide the Celtiberians’ ‘summer’ bases. But how to arrange the pieces? I worked on four planes: a photo background, the trees, the miniatures and the lake. The idea was to give the shot some depth.
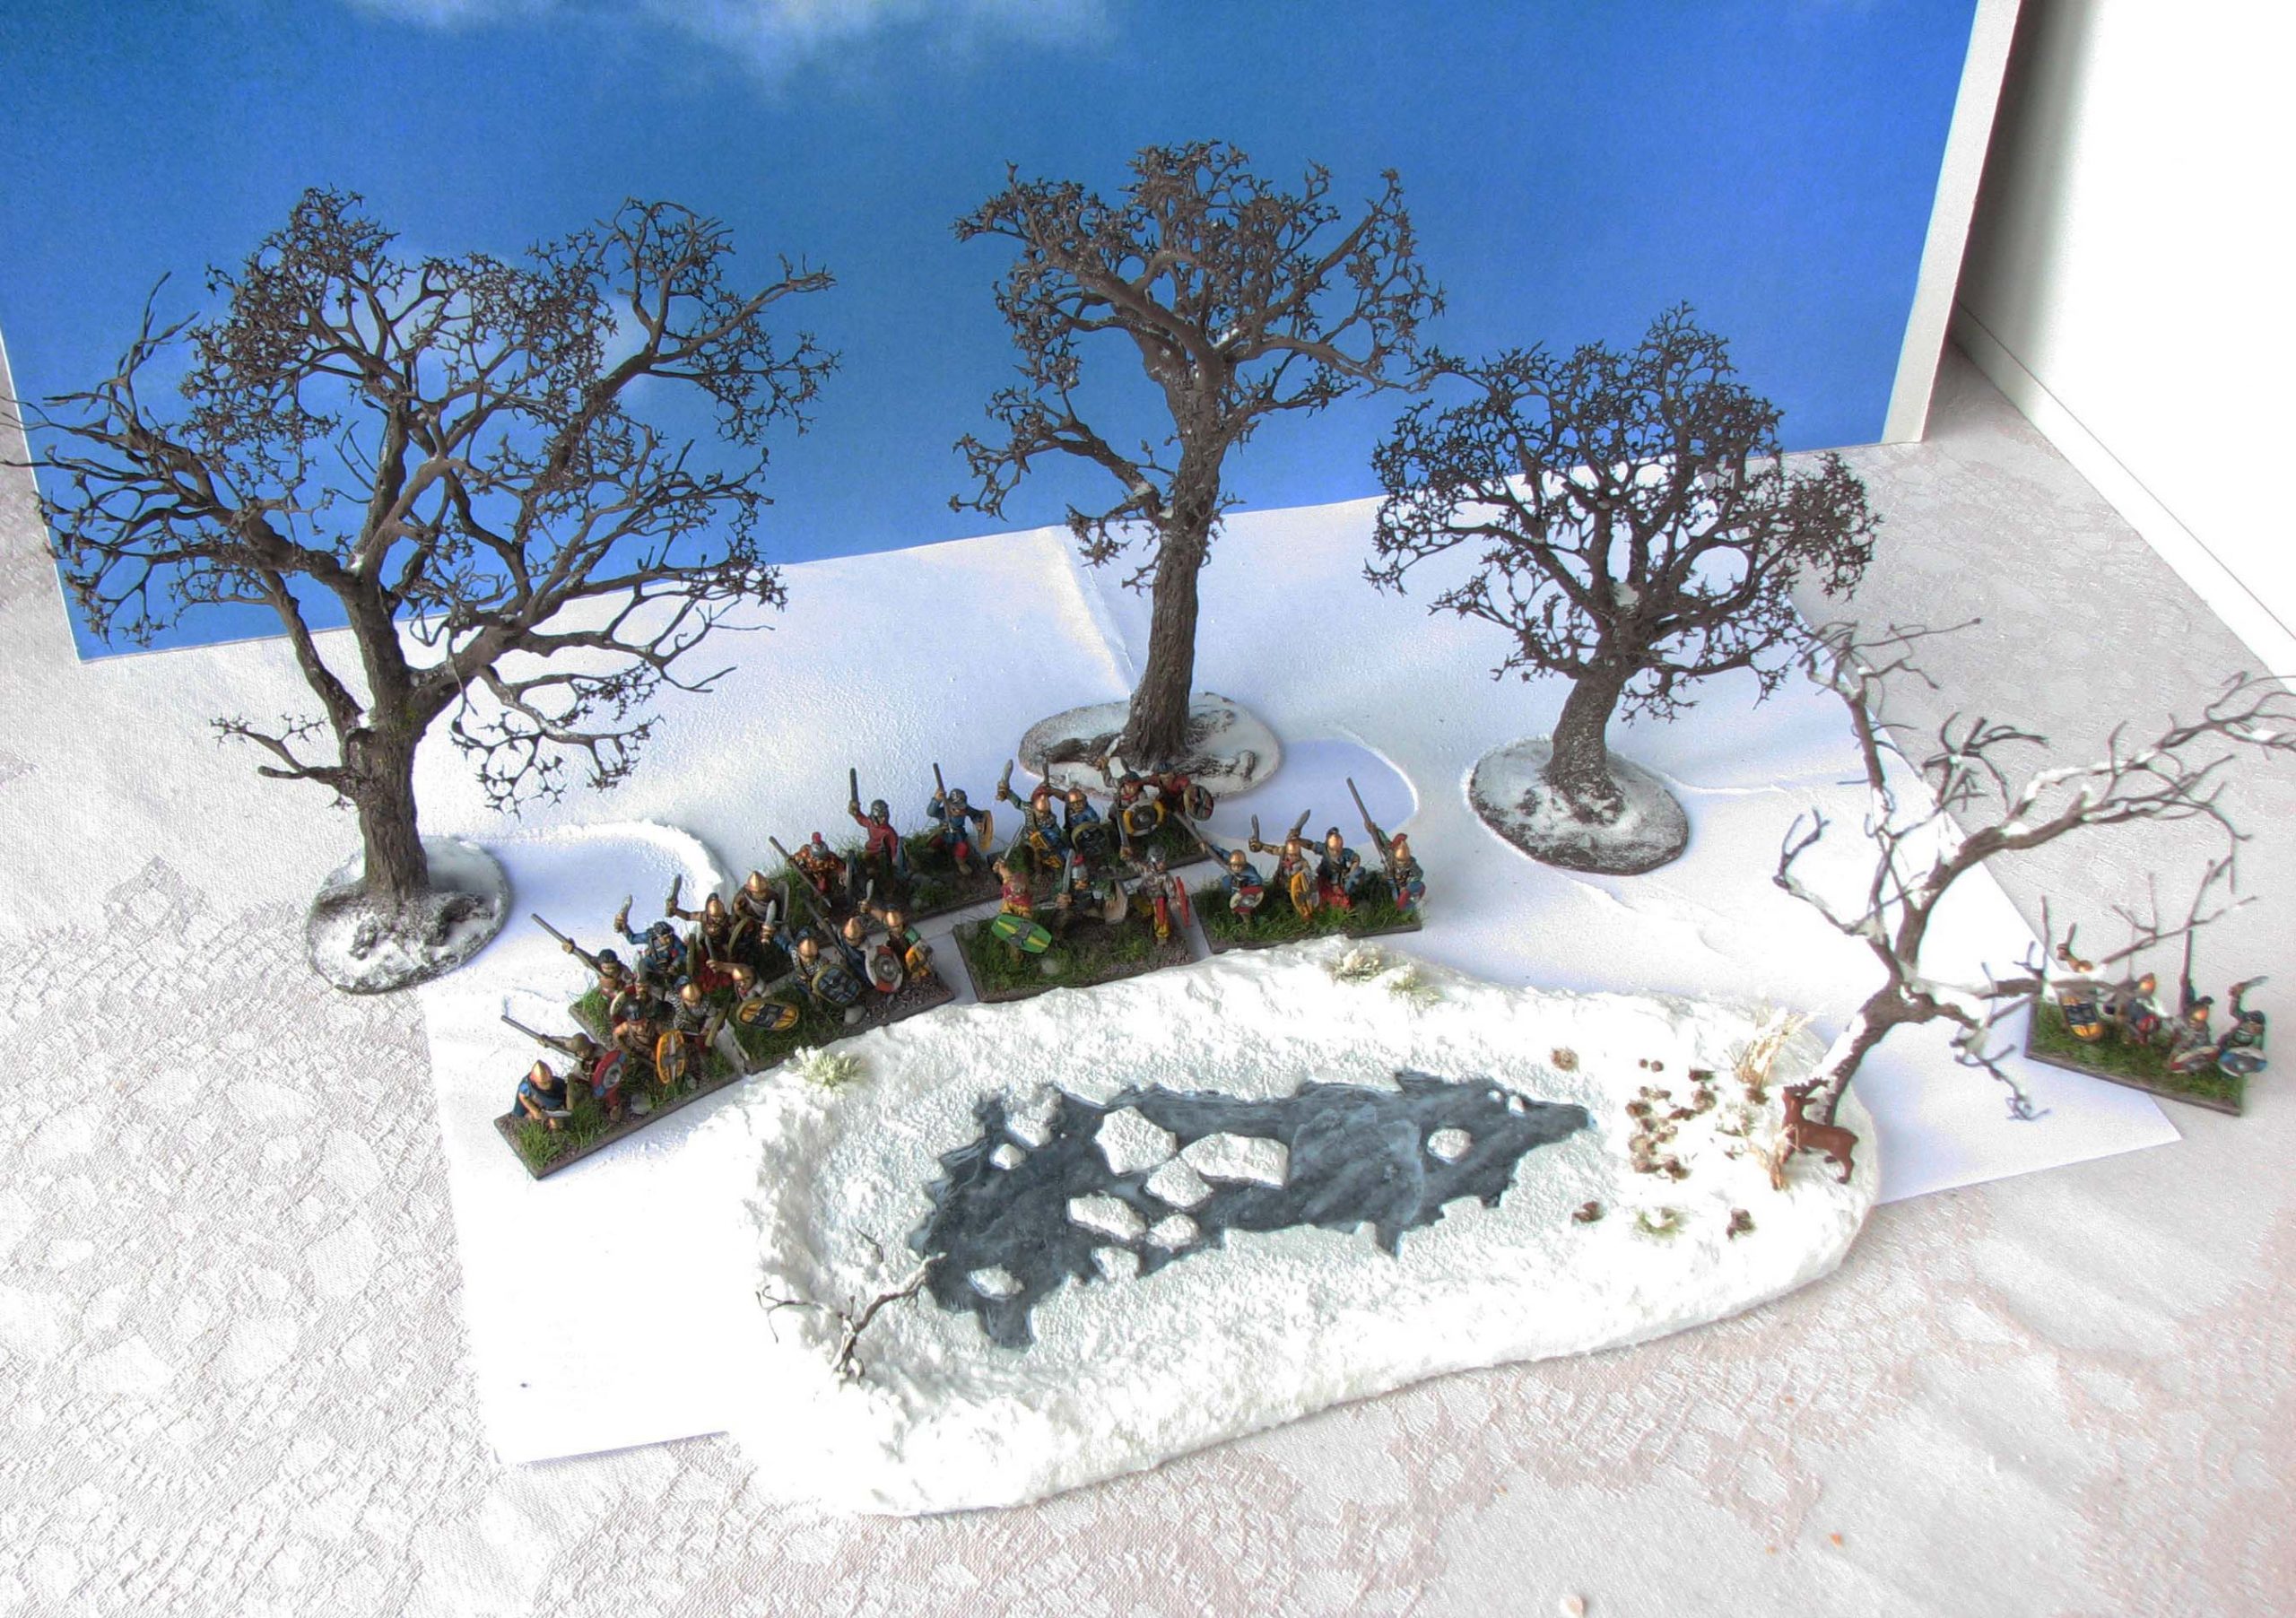
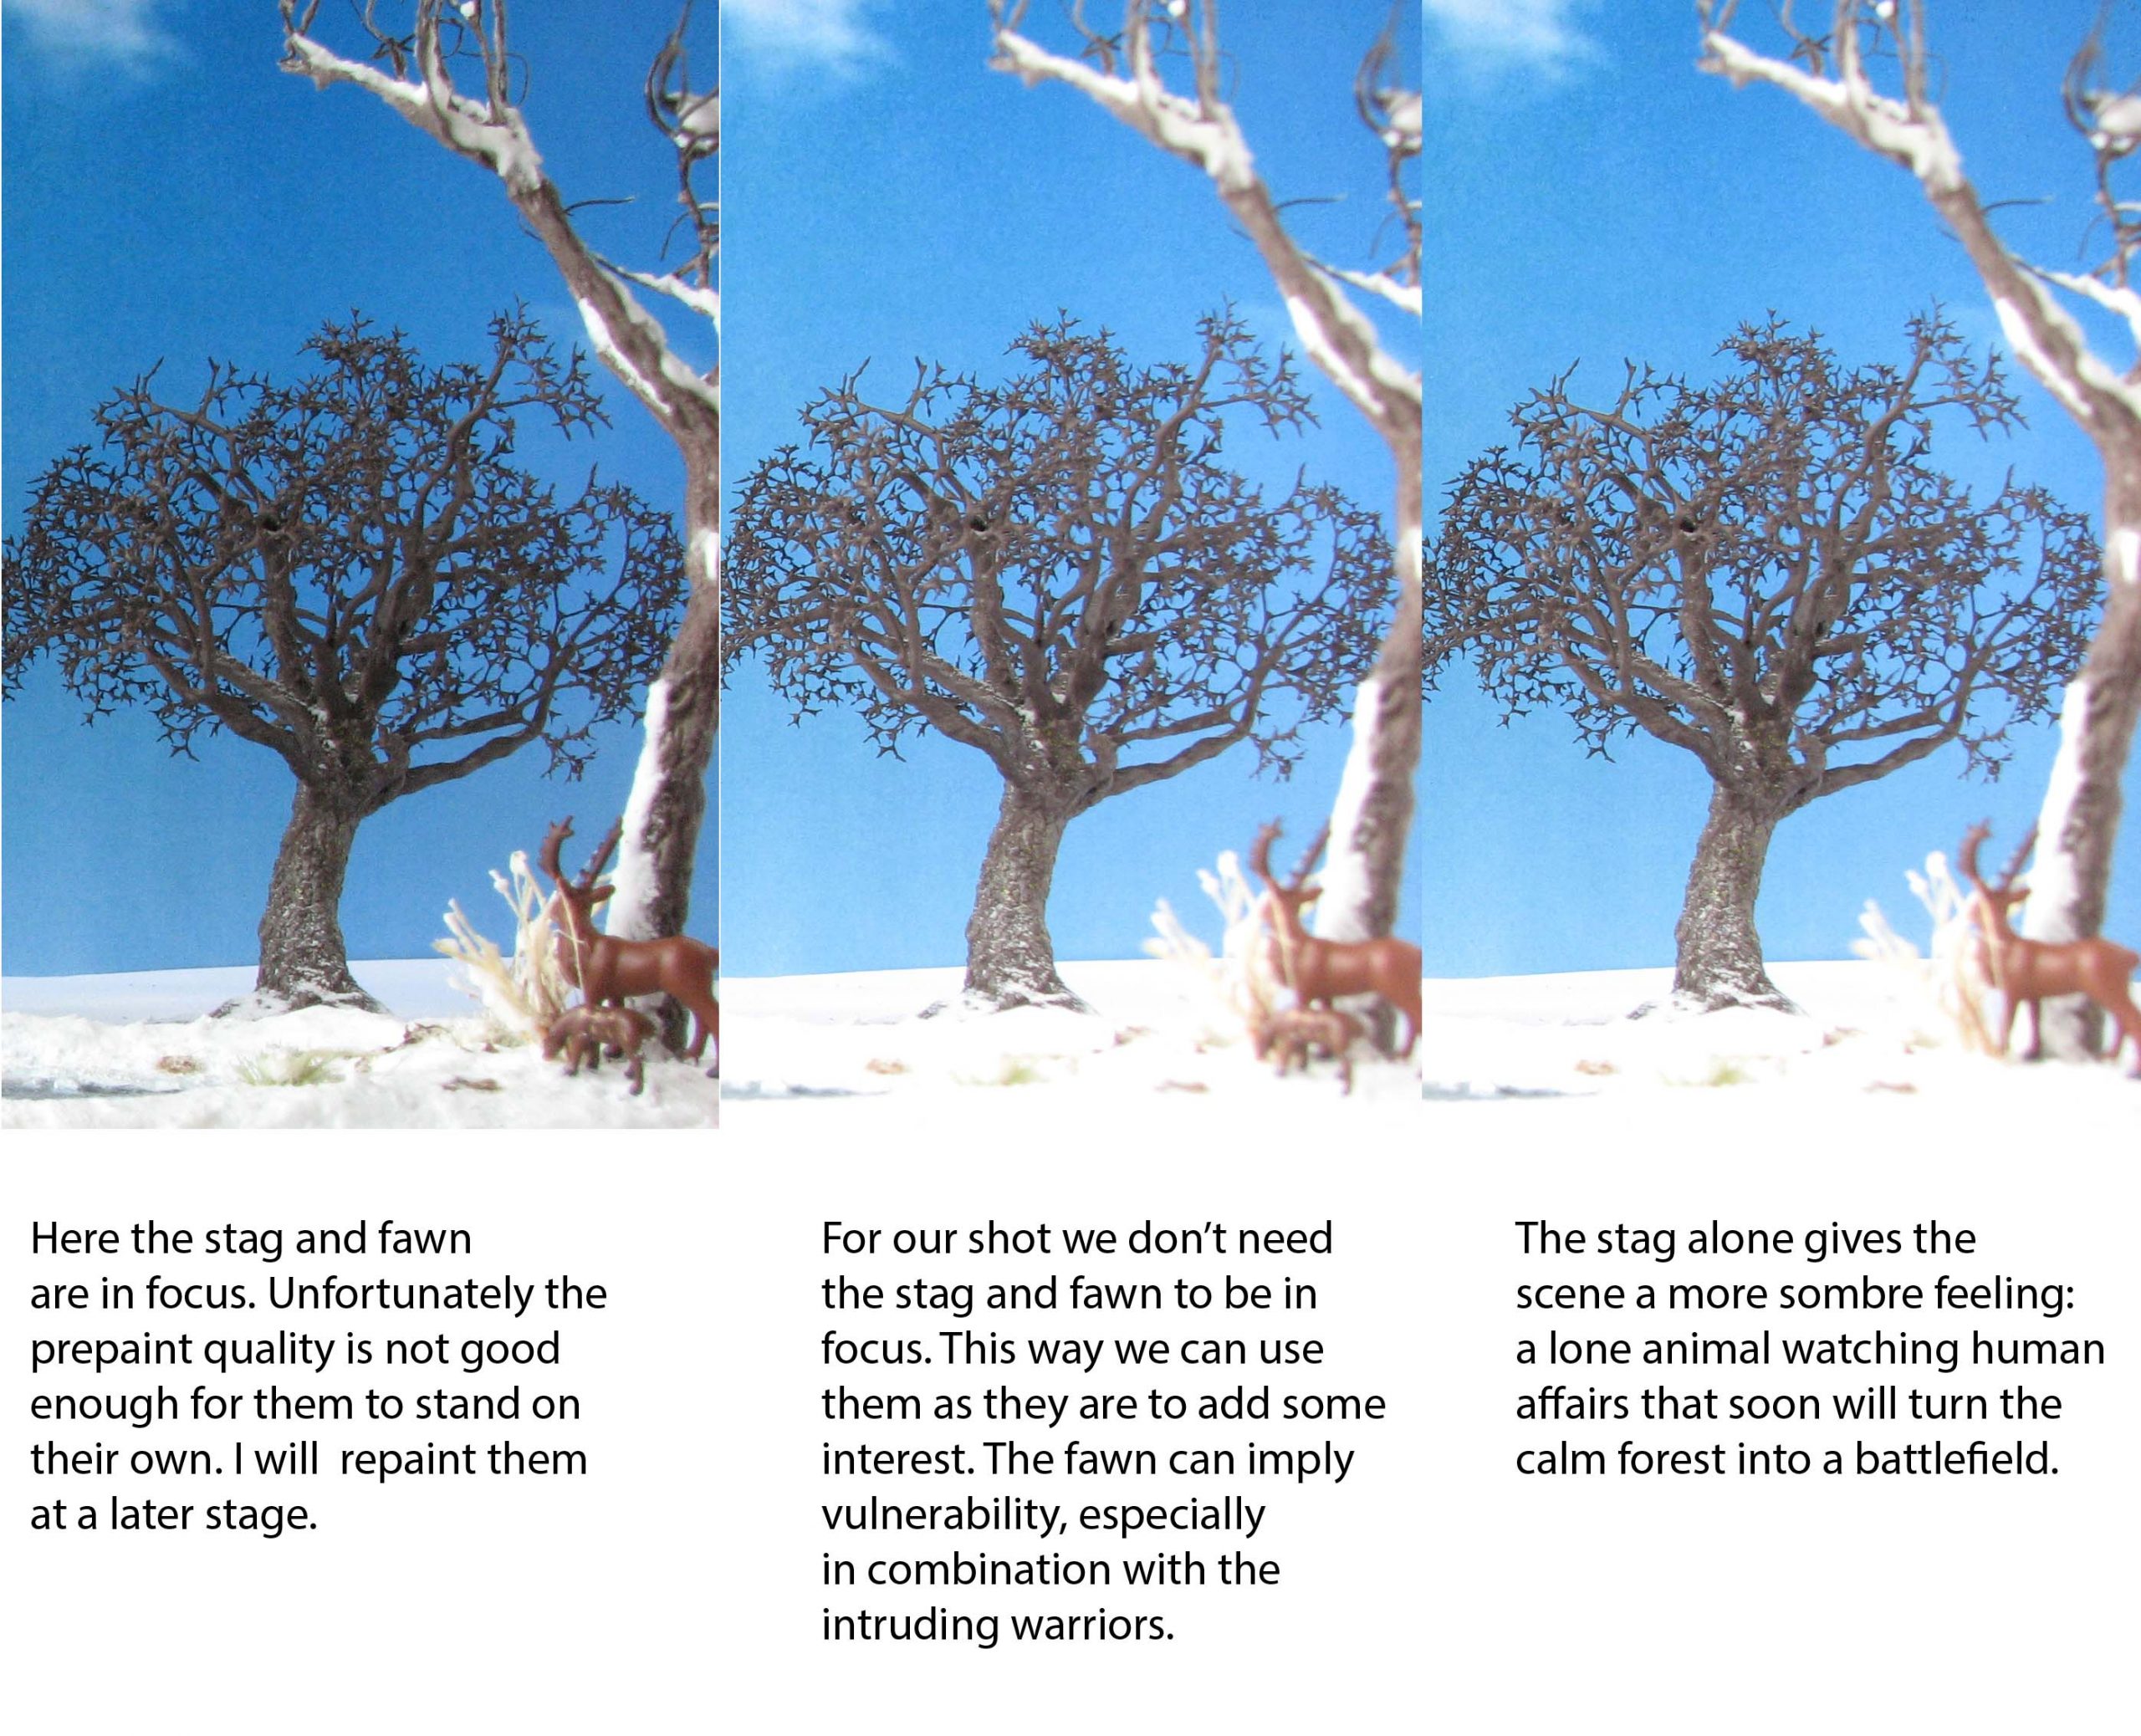
Apart from the snow-covered lake, the trees and the Celtiberians, I also used some prepainted HO Noch deer to spice up my terrain pieces. The idea was to give the eye something of interest in the foreground. HO scale works well with 15mm miniatures.
I also used some baking soda to depict fresh snow on the barren trees. This is an easy and removable way to make any terrain piece into a snow-covered one. Just dust it on and brush it off after you took the photo.
The table-cloth I used is already off-white, but has a pattern. A piece of white paper as ground cover works well to depict a snow-covered landscape if you use it only in the background. It also provides an irregular edge with the blue sky.

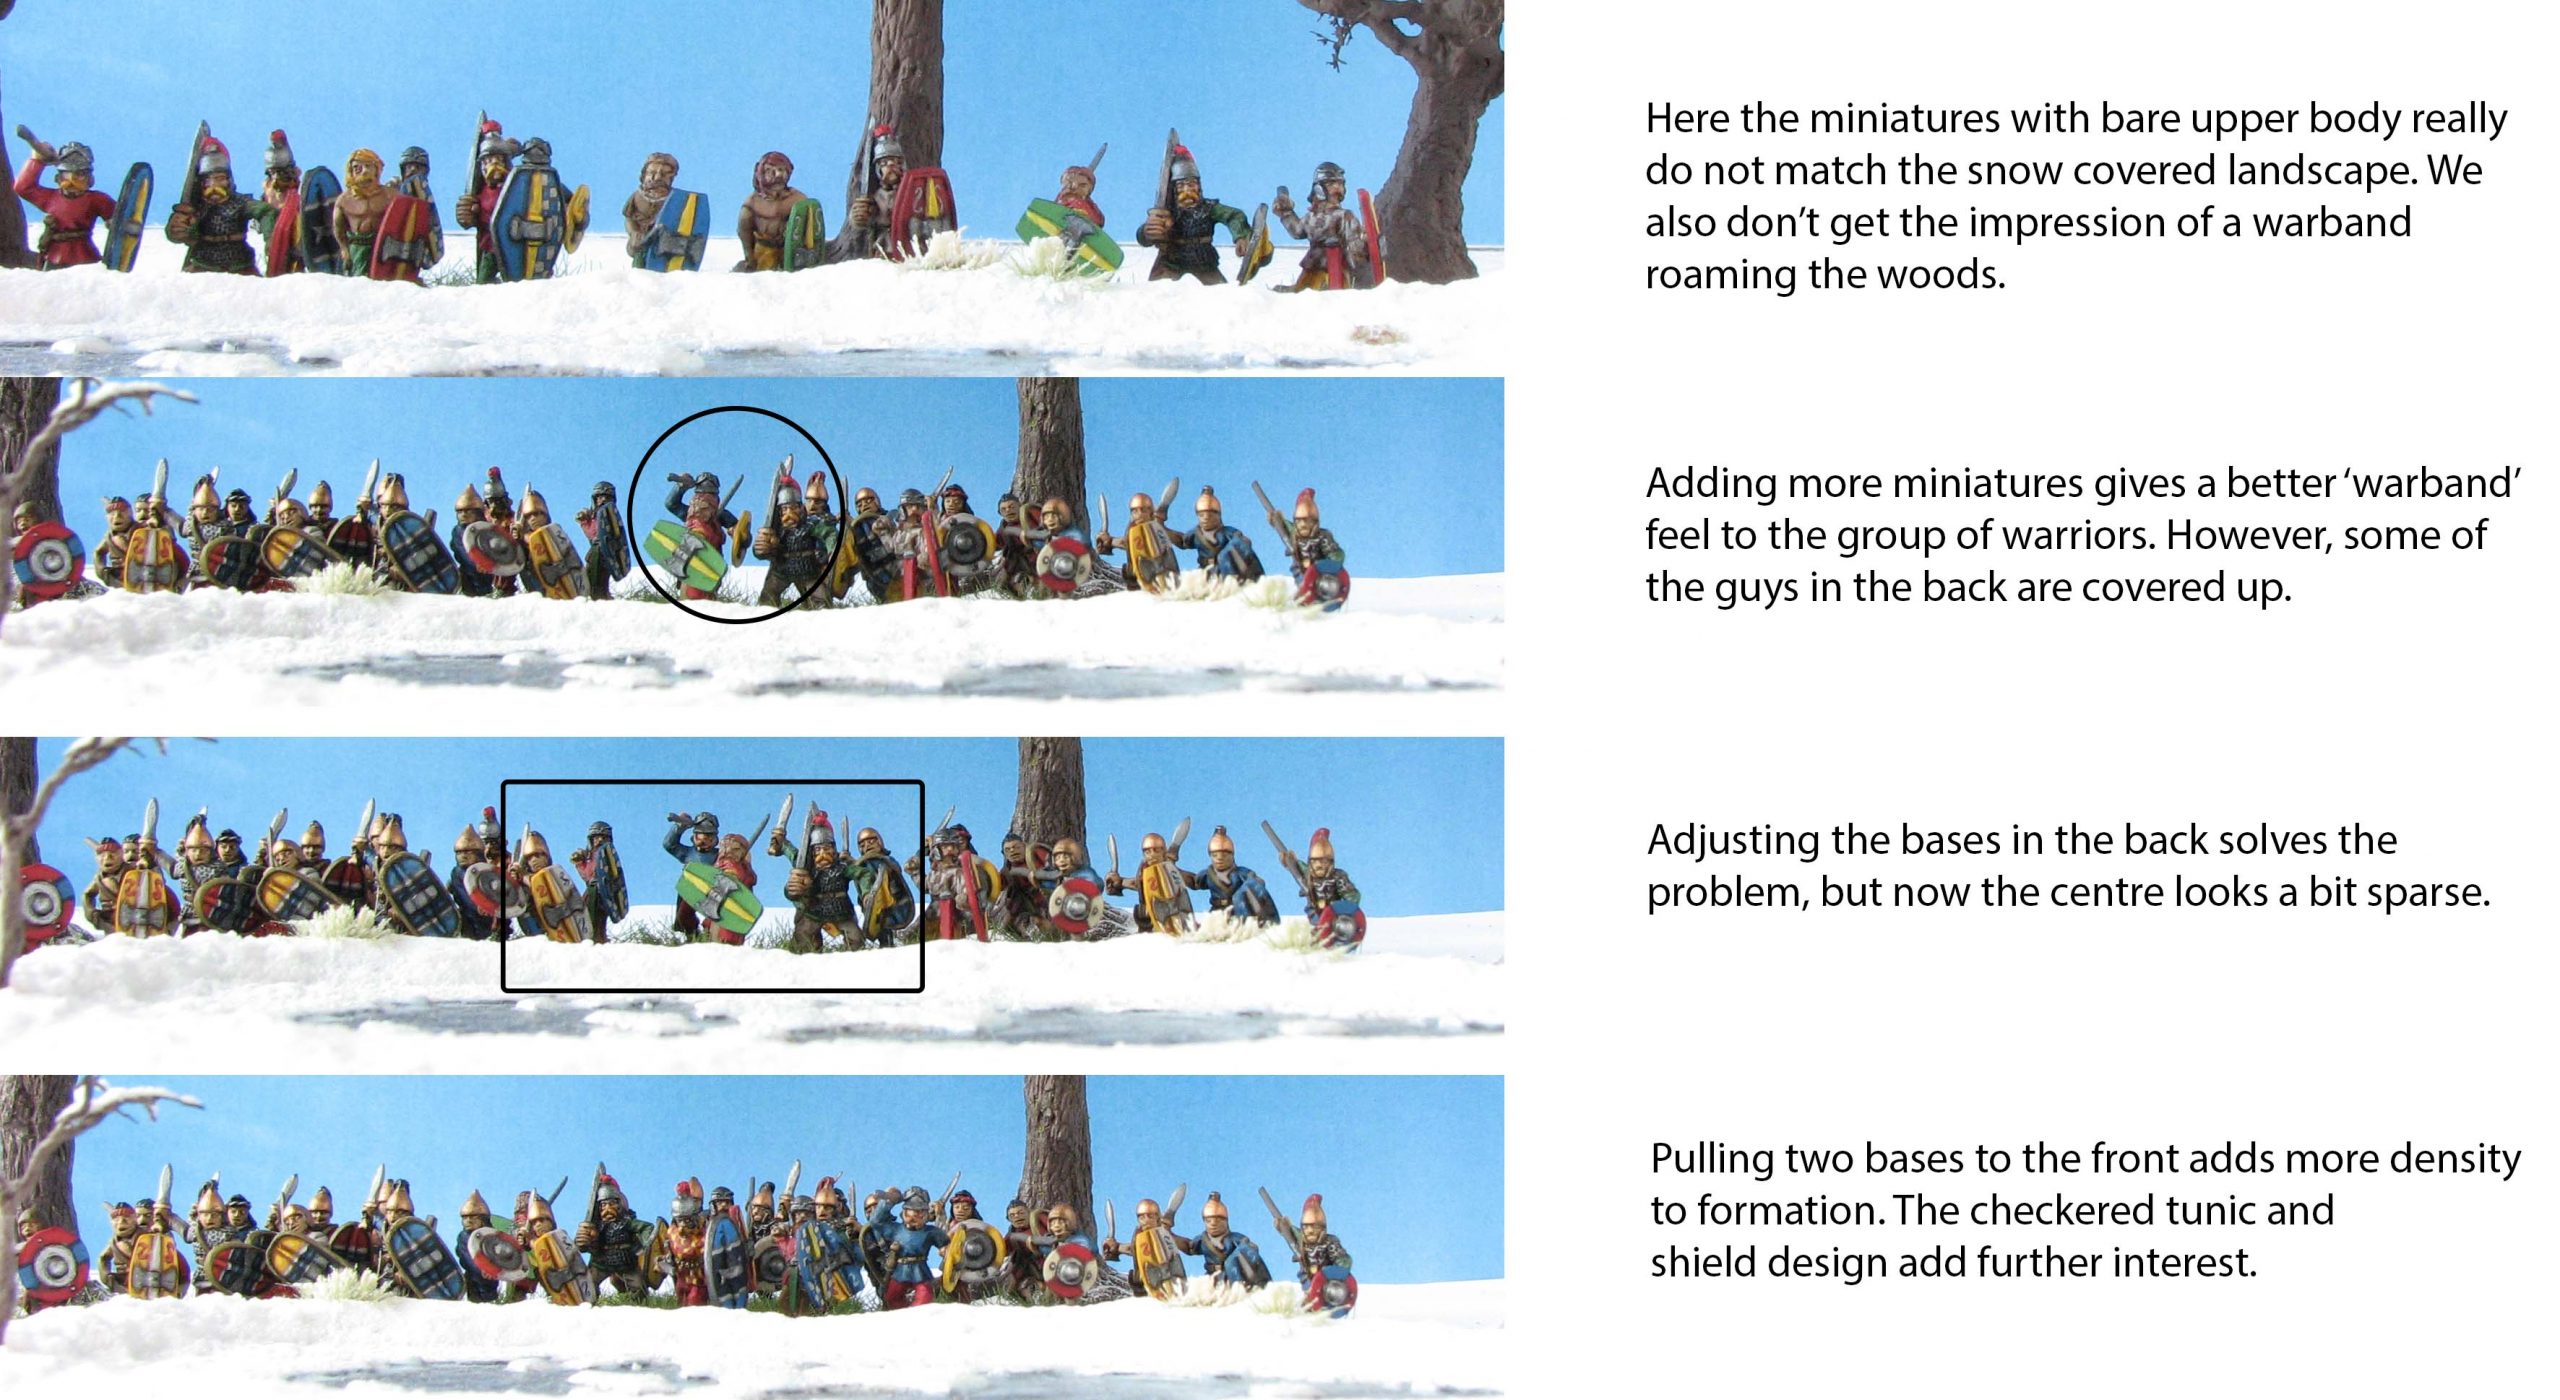
Finally we have to consider the centre piece of our scene: the Celtiberians. How should we arrange them for best effect?
Framing
I prefer my pictures to have clear delineations to at least two sides. Just like a picture frame they give the scene closure and focus the gaze on the scene itself. In this shot we have trees to the right and left, while the surface of the lake adds a horizontal anchor for the eye. With the stag being placed in front of one of the trees, the spectator can also imagine that we perceive this scene from the stag’s view. It is also important to not cut off any miniatures on the edges of the picture.

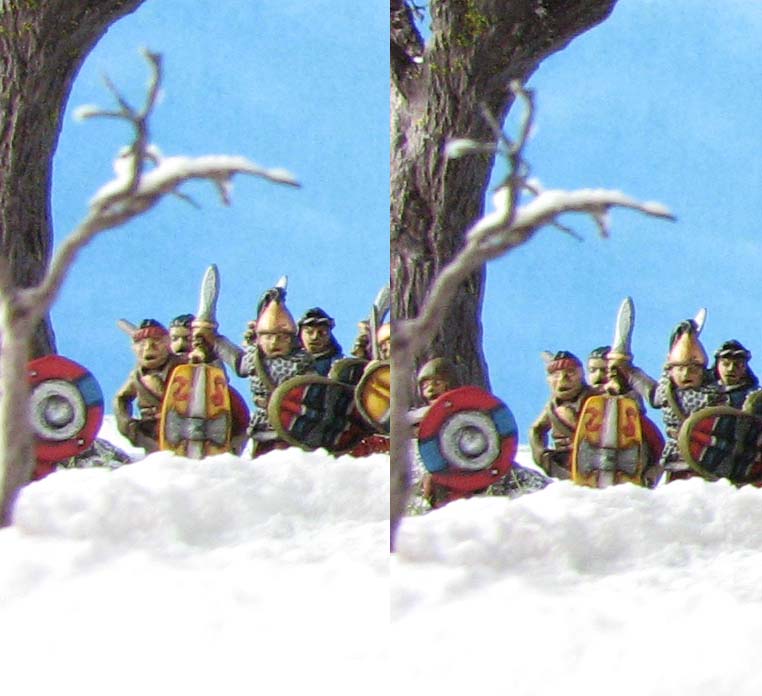
Photo editing
After I was happy setting the scene and took a few shots, it was time to crop the picture. I also made some simple corrections to enhance it further. If you use a photo editing program never change the actual picture directly. Rather use layers and layer masks for any corrections. This way you never lose your original and can keep on editing without any loss of quality. If you shoot RAW this obviously applies, too. After initial adjustments save it as a *.tiff or *.jpeg and apply final effects.
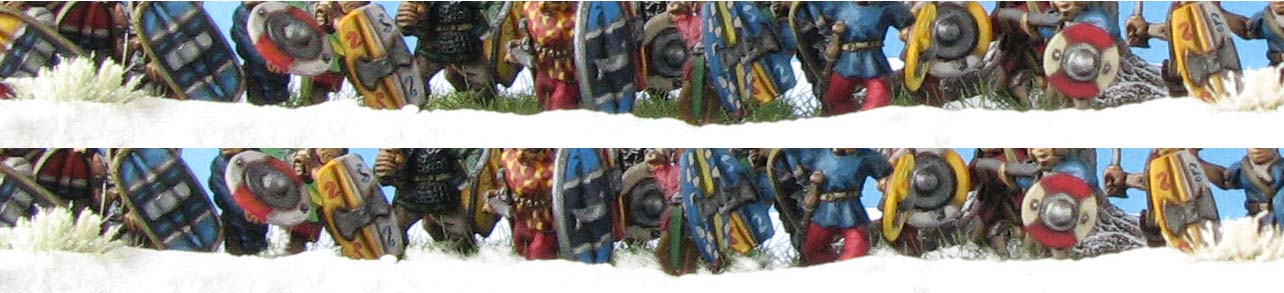
Given my Celtiberians are based with a mediterranean summer landscape in mind, the green grass that shows in some places needs to be hidden. I use a small photoshop ‘chalk’ brush and apply a couple of off-white patches to the grass, to make them look snow-covered.
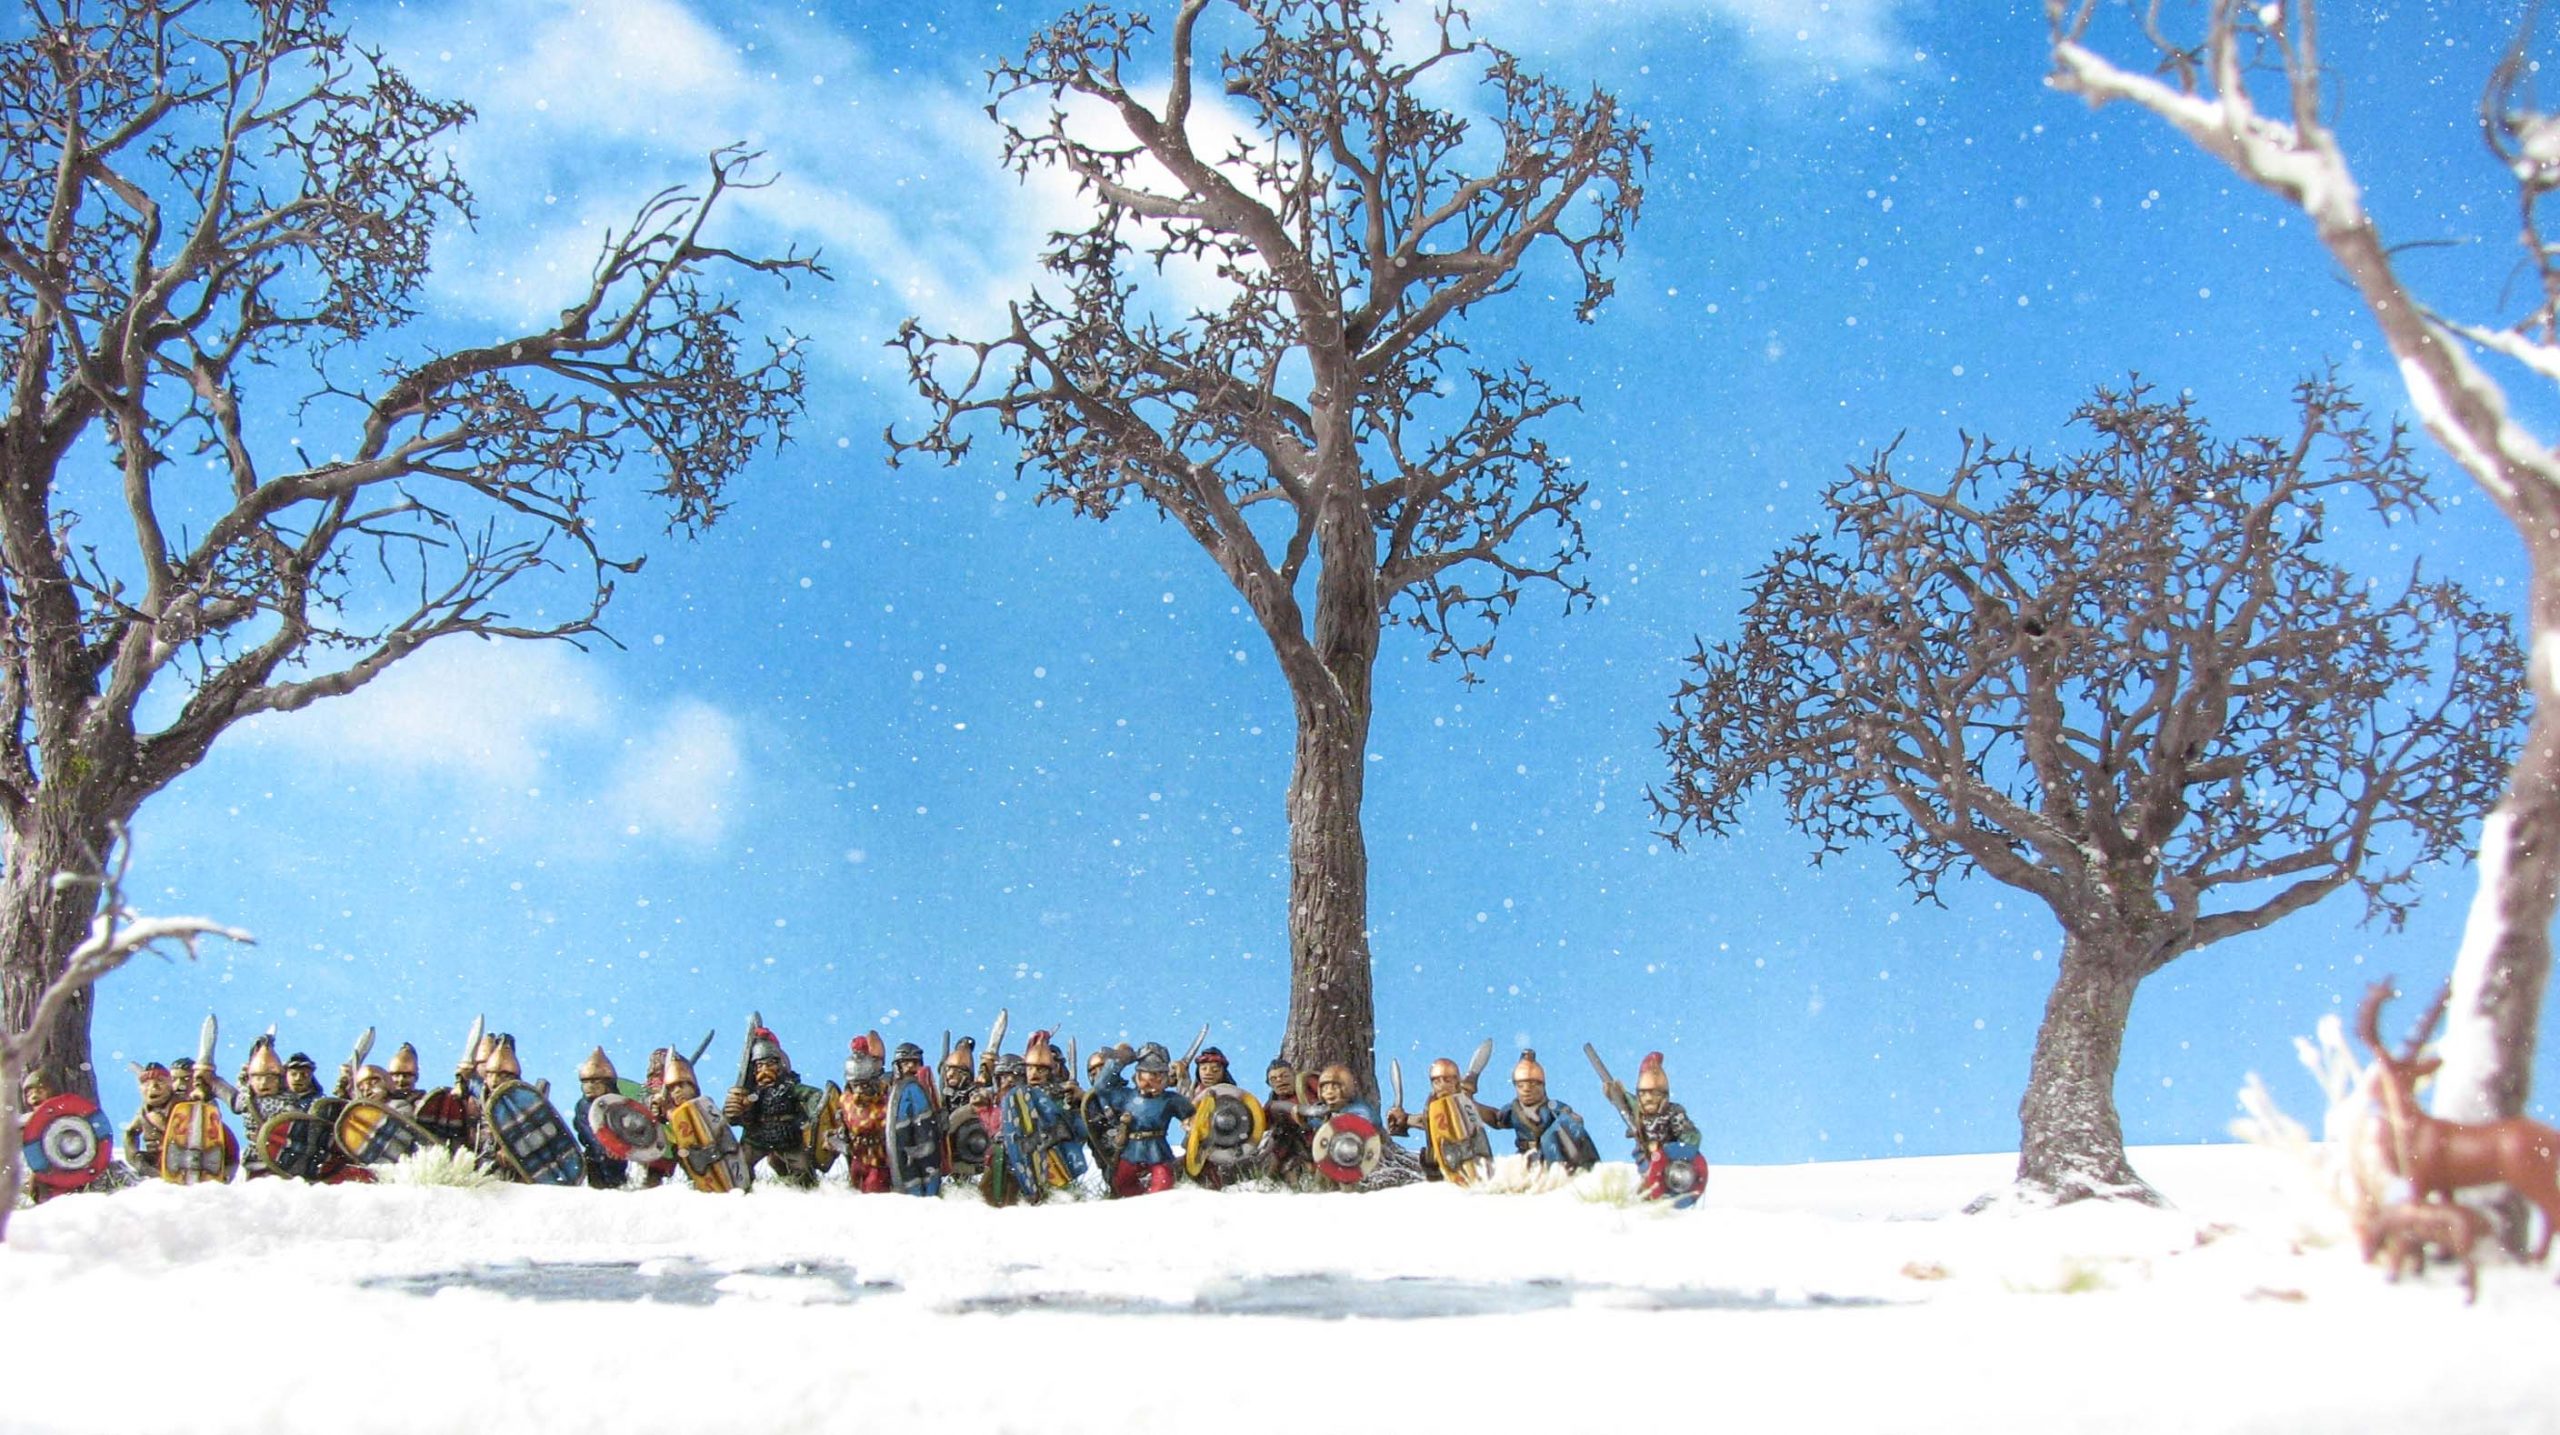
Falling snow effect
I decided to add some falling snow flakes to enhance the overall atmosphere. Falling snow cannot be emulated easily while taking the picture. So, it is much more convenient to use your photo editor to add a layer mask that will provide you with such an effect. I won’t go into too much detail here, as this excellent tutorial by Steve Patterson shows you how to do it. You can also find pre-made layer masks online for your projects. I am aware that this might be a controversial topic, after all it is all about the paintjob and modelling skills in our hobby. However, I think subtle additions to a picture, that do not change the actual paint job and are clearly marked as such, can only benefit it.
Given that a snowfall normally implies a darkend sky we can adjust this in making yet another layer mask that only selects the blue areas in the sky. With a grey photo filter we adjust only these areas and achieve a more realistic appearance.
Ideas for improvement
While I am pleased with the outcome, there are a number of things I would improve on the next time:
- I think the seamoss works great with trees that have foliage, but looks less realistic if one wants to depict barren trees. I think I will experiment more with thin copper wire and see if I can get a similar effect that looks more naturalistic.
- The deer would benefit from a proper paintjob and filling of some gaps etc. This way I could focus more on it or have it on the same plane as the miniatures.
- A dwelling or something similar might be quite good as an additional terrain piece to depict more cultivated sourroundings in winter.
However, I hope you enjoyed this second part of my scenic miniature photography tutorial. In the next part I will cover atmospheric shots in low light conditions. Dungeons ahoy!
Some great tips here, I want to do some photos of larger numbers of models so will have to try something similar.
Thank you for your comment. Glad you found the tips useful. I’ll be looking forward to your creations.
I’m a big fan of your work and love the picture,especially the snow. One small thing or tiny gripe for me is the tree in the middle of the picture,it’s very tall. Almost too tall ? Apart from that tiny tall thing it’s perfect😀
Hi Warrior. Thank you for your comment. The tree in the middle is not taller than the one of the left, but might look like it due to perspective and being very narrow. Let’s call it a rather old an straight oak ;). Glad you like the snow theme.
I love it,just me being over critical lol
Thanks for a very insightful post.
You are very welcome.