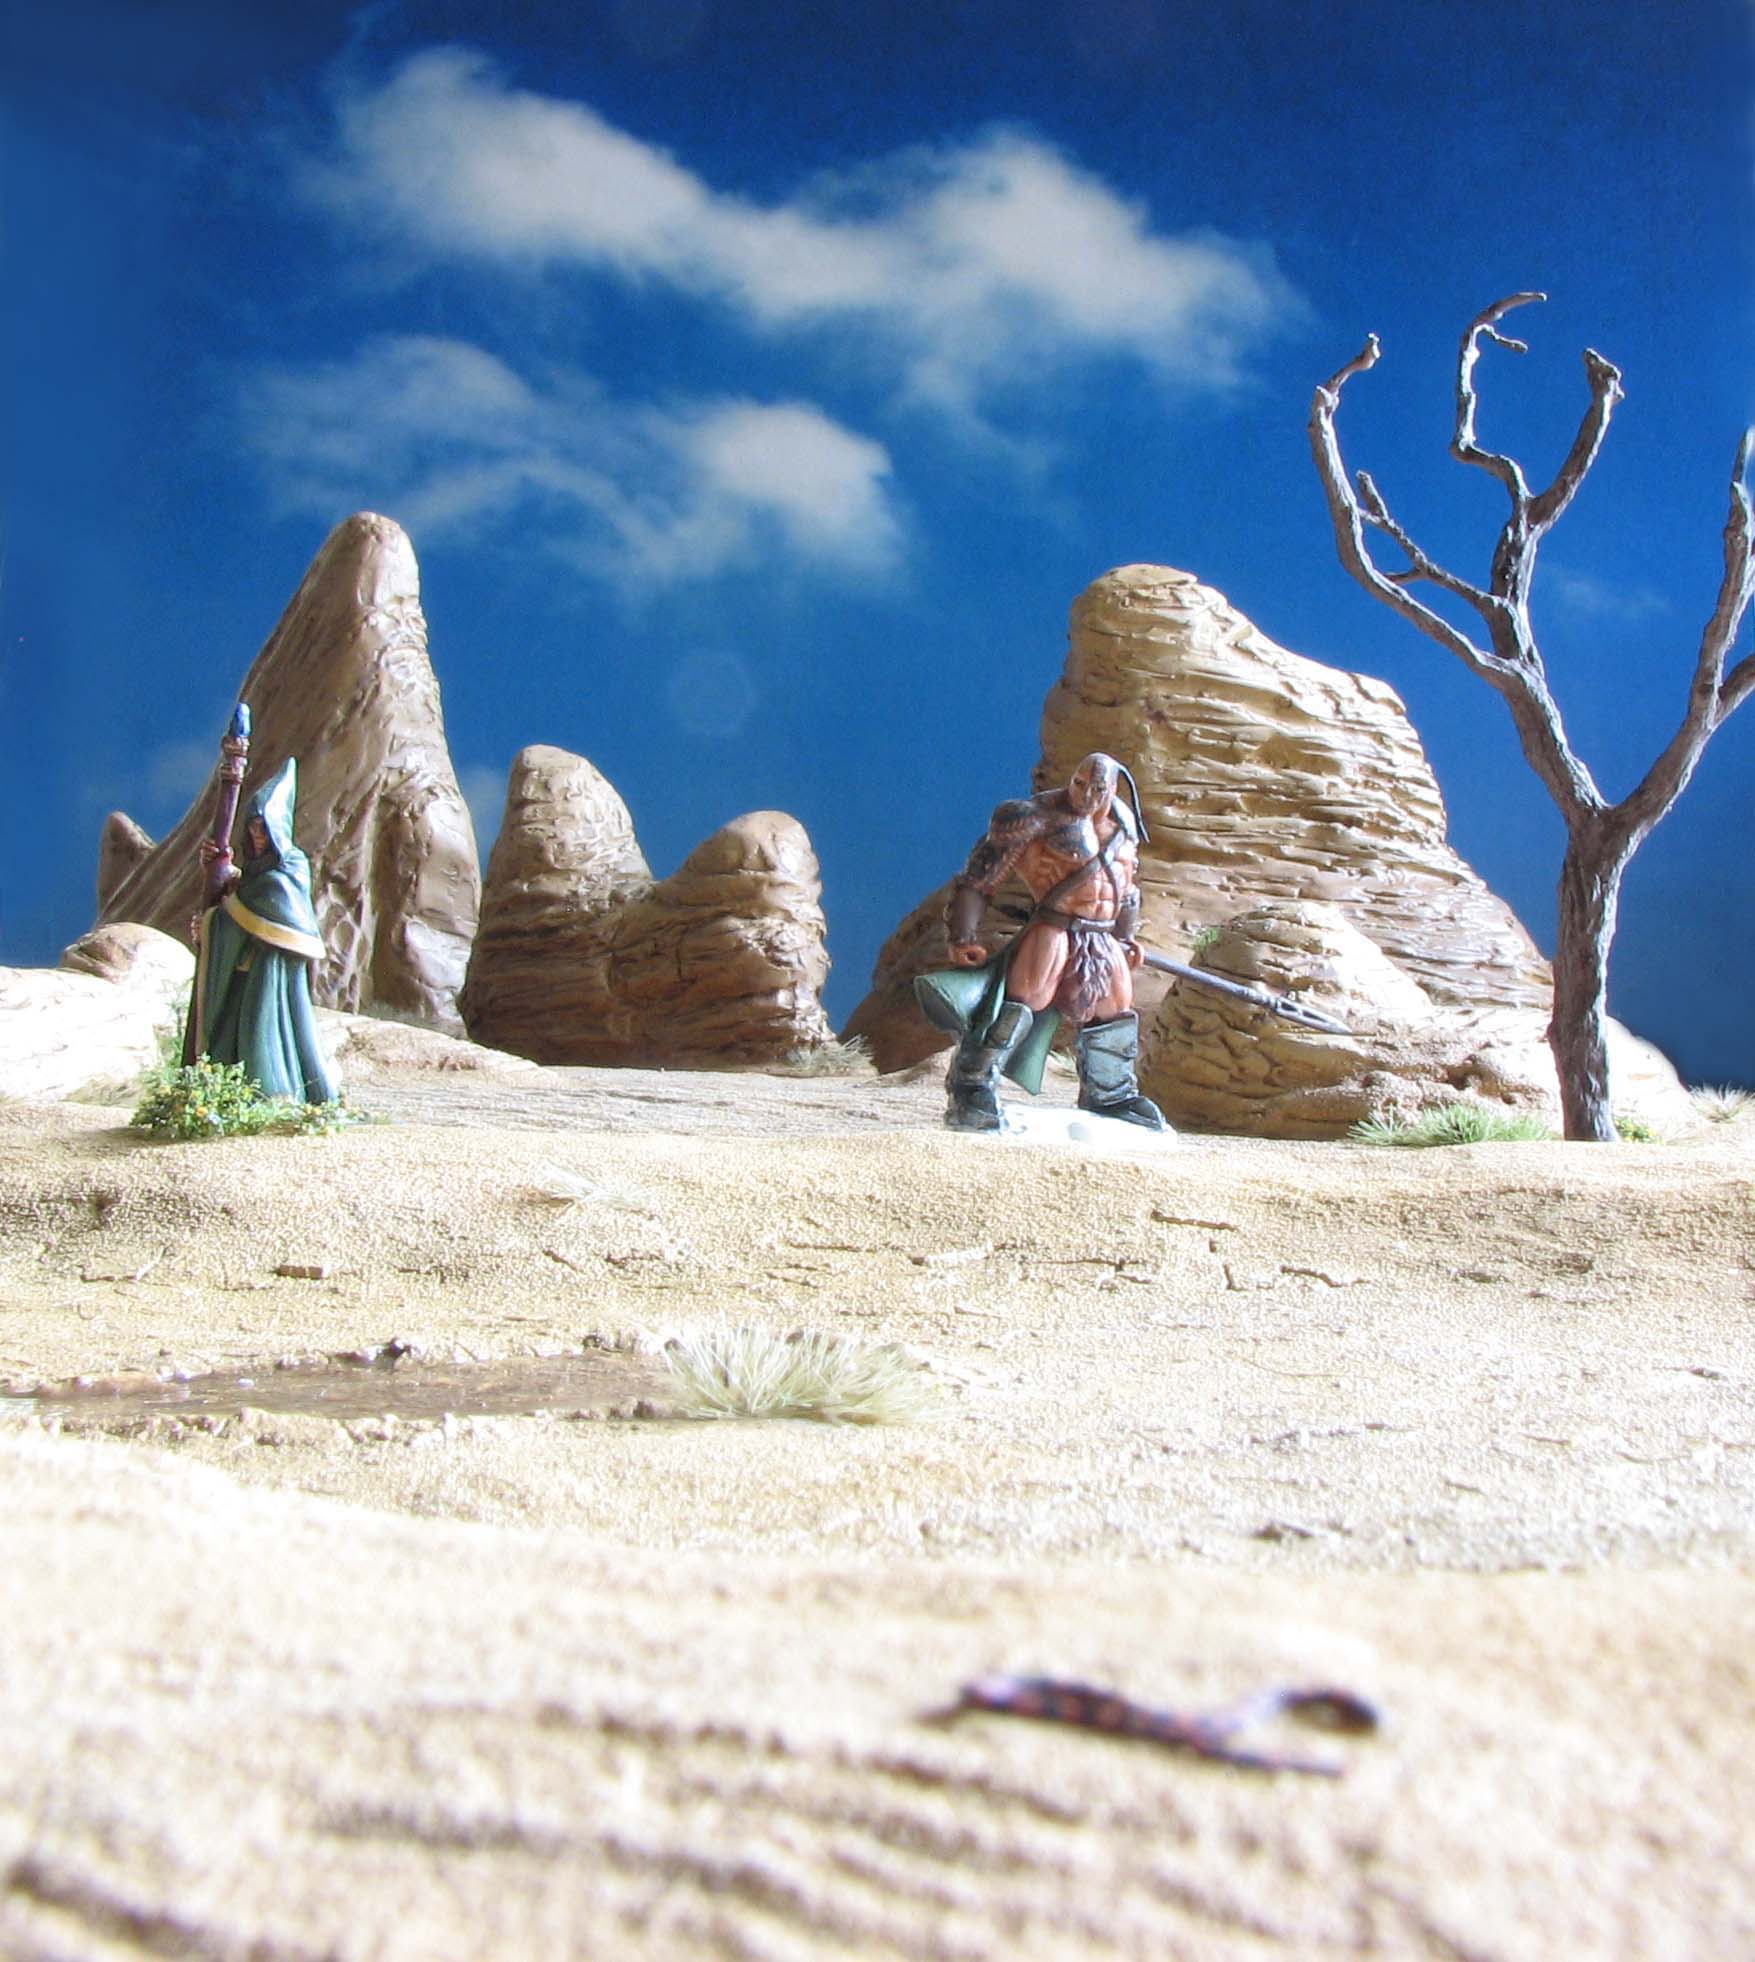
I always found deserts to be fascinating habitats. A cursory look will leave you with the impression that it is hell on earth: sandstorms, unbearable heat during the day and freezing at nighttime. Yet, the desert is not only home to thousands of plant and animal species, it also has a simple beauty to it, dominated by the shapes the wind forms. They are thus a worthy subject for the modeler and can provide an atmospheric backdrop for our games. The exploits of the Crusaders come to mind as well as the cultures inhabiting Northern Africa, for instance the ancient Numidians.
In this first installement of a series on arid terrain I will show you how to make a dry desert lake or an oasis that is slowly drying out. Using a similar technique I will also provide you with some ideas how to model a partially dry river bed, with only a small stream of water remaining. Per usual I will talk about the materials needed and provide you with step-by-step instructions how to make a cracked lake or river bed and scratch-built a dead tree to add further interest.
Provisions for venturing into the desert
Tools needed:
- Sharp implements: A scalpel and a needle tool to carve the foam board, to add animal tracks to the piece and to texture the bark of the barren tree.
- Paint brushes of various sizes to apply paint and glue, but also to drybrush.
- Dremel to bevel the MDF base (optional). If you don’t have one some coarse and fine sanding paper will also do.
- An airbrush or sprayer bottle to apply paint or a fixative (e. g. matte medium) to the finished piece.
- A palette knife to spread out wood filler/acrylic medium and the crackle paste.
Glues needed:
- Wood glue.
- Super glue. I use Insta Cure+ by Avetek.
- AK Interactive Sand and Gravel fixer (optional). Thinned acrylic medium with a bit of flow release will also do.
- Styrofoam glue. Be careful here to choose an appropriate product, as many glues react with styrofoam and dissolve it. I use Selleys Liquid Nails Fast.
For the groundwork:
- A rectangular base. I normally use some 3mm MDF or 3mm HIPS plastic sheet. Alternatively you can use cork or other materials. Just make sure they don’t warp.
- Shellac to seal the MDF, should you use some, and to prevent warping. This especially important given you are using crackle paste which may lead to mechanical stress on the piece.
- Extruded polystyrene (XPS). That is the dense stuff for construction, not the crumbly stuff you use as packaging. You can also use foam board to build the base up.
- Wood filler. Either ready-made or as powder. I use Bostik Fill-and-Fix. We will use this to cover the XPS. Alternatively you can also use acrylic modelling paste. The paste is more flexible than the filler, so this may give you a more resilient finish.
- Finely sieved soil from your garden or backyard. Can be any colour, but a lighter brown works well for an arid environment. You can also buy decorative sand in many one dollar shops. The advantage is here that the sand is very fine indeed and you don’t have to sterilize the soil or sieve out larger pebbles.
- Small cork pieces or pebbles to depict larger rocks.
- Craft paints (light browns, beige, tans or white) to drybrush/paint the piece.
- Tamiya colours if you want to airbrush the piece. Thin with some IPA before use..
- Matte varnish to mix with pigment and water to fashion a brown wash to add contrast to the piece.
- Two rare earth magnets to embed and attach trees to. You can also use steel tacks.
- Crackle paste. I use Golden Crackle Paste, but other pastes work equally good. Interestingly the older the paste the more subtle the cracks.
Water effect:
- Acrylic gloss varnish.
- Brown wash e. g. Agrax Earthshade.
Vegetation: Small barren tree, brushes:
- MiniNatur grass tufts, and foliage nets (optional). I used a selection of autumn grass tufts and summer foliage to depict leafy bushes and dry grass. You can use any tufts you have on hand and also clump foliage.
- Matte spray varnish to reduce the shine of the grass tufts and foliage. I use Testor’s Dull Coat.
- Brown acrylic spray paint to slightly darken the tufts or alternatively a brown wash to dull the shine of the tufts and grass.
- Thin wire to make an armature for the tree.
- Brown-grey craft paint to paint the tree.
- Acrylic caulking as a first layer followed by wood filler to depict the bark.
- A rare earth magnet to embed in the trunk.
Critters (optional):
- Small snake. The Busch Kleintierset is your friend.
The living desert – How to do it
This build is pretty straight forward:
- First we use XPS or foam board to define the lake bed.
- Then we apply the crackle paste.
- After the paste is dry we cover everything with filler or modelling paste
- Now we embed the magnets/steel tacks.
- We add sand and animal tracks.
- Time to apply a basecoat and drybrush.
- Next we add some brushes and a water effect.
- Finally we make the barren tree and add it as a final touch.
Let’s look at it in some more detail:
Groundwork
We start with a quick warm up: Cut your base to size and bevel the edges using sand paper or a Dremel.
Next, use some XPS or foam board to define the lakebed. Use the scalpel to refine the shape and glue it in place using some construction adhesive.
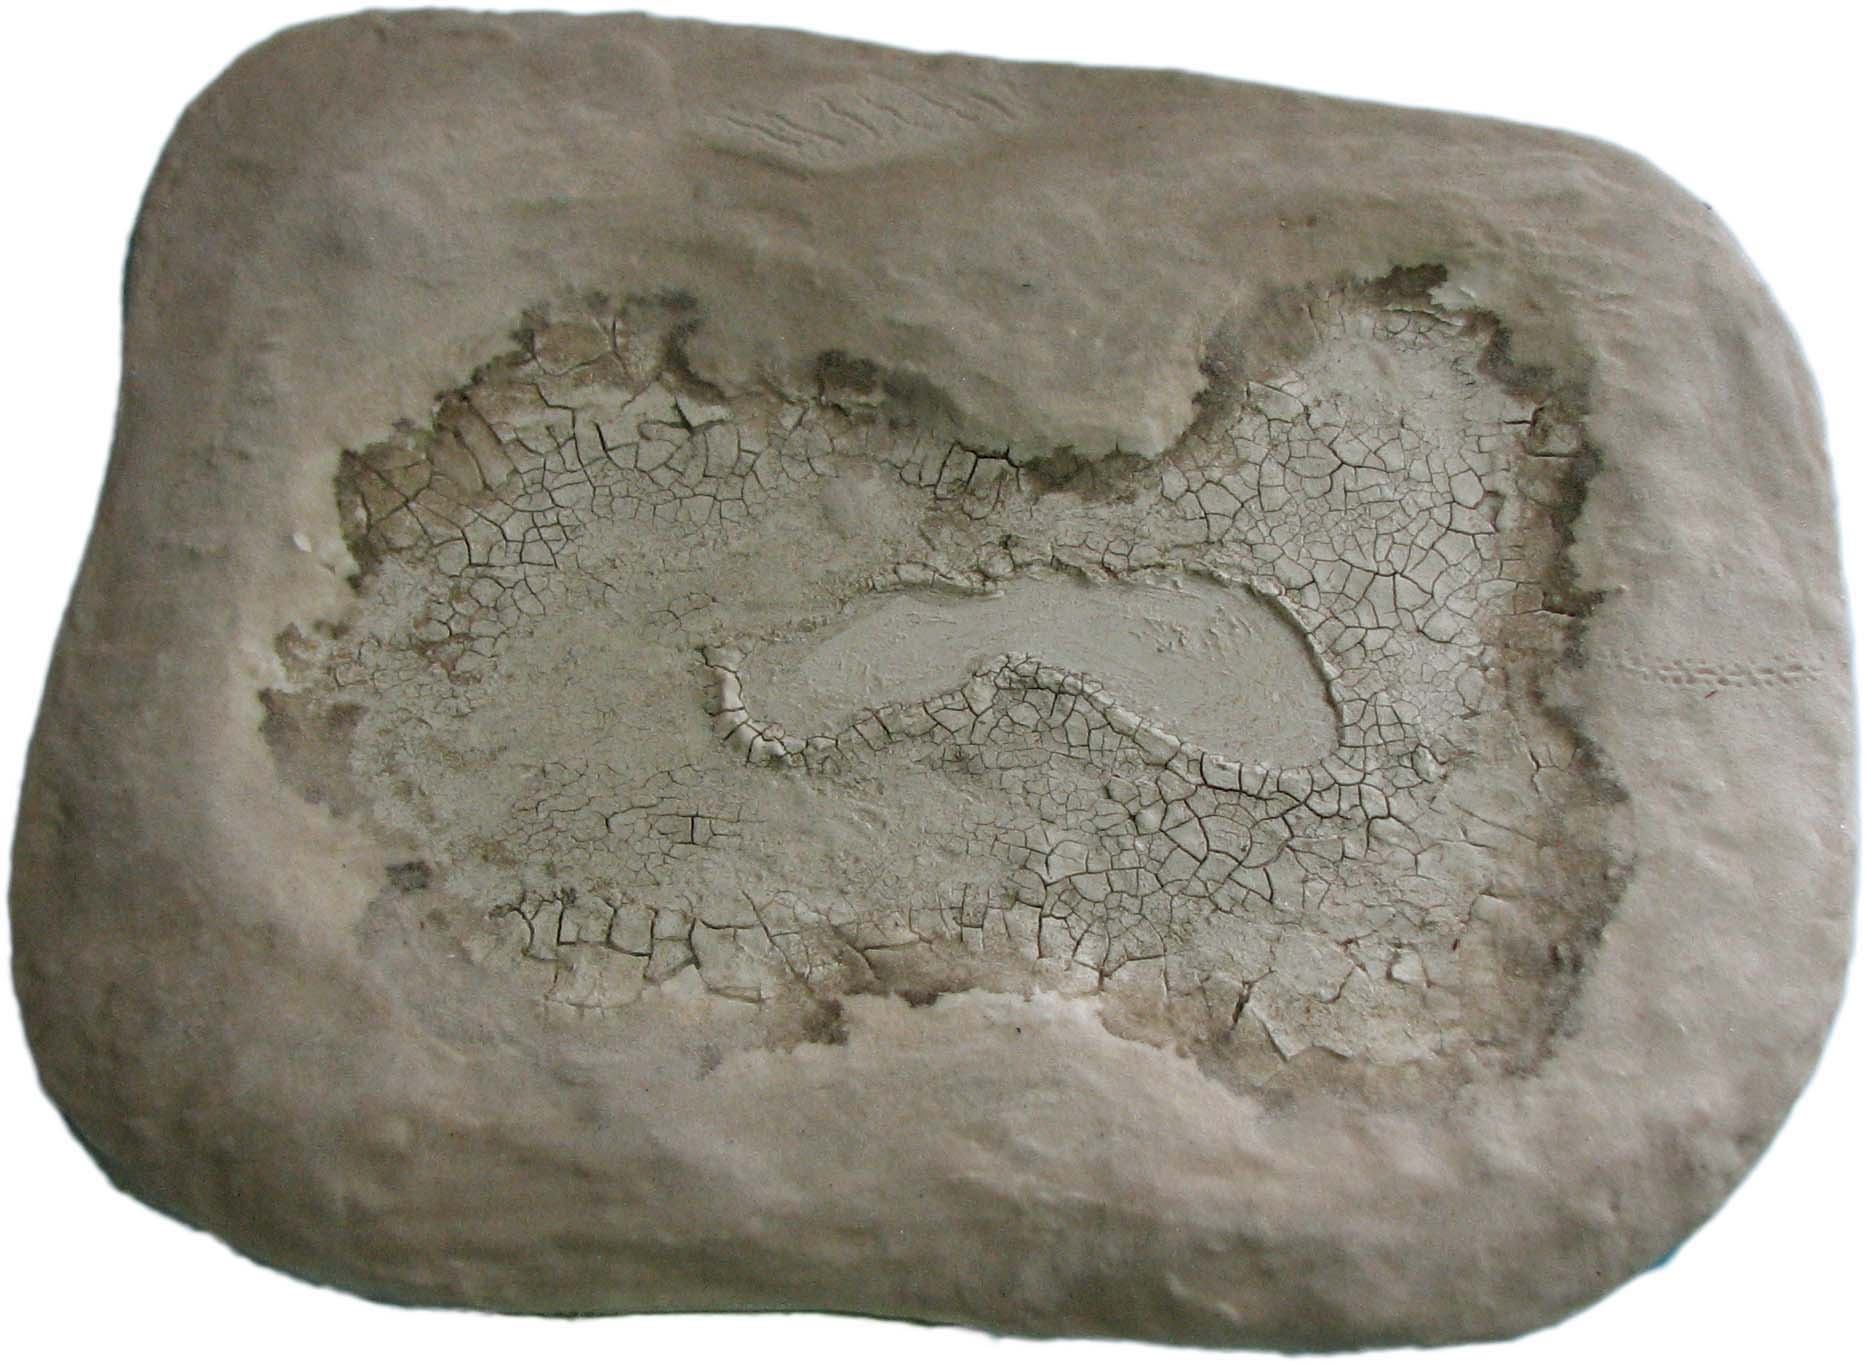
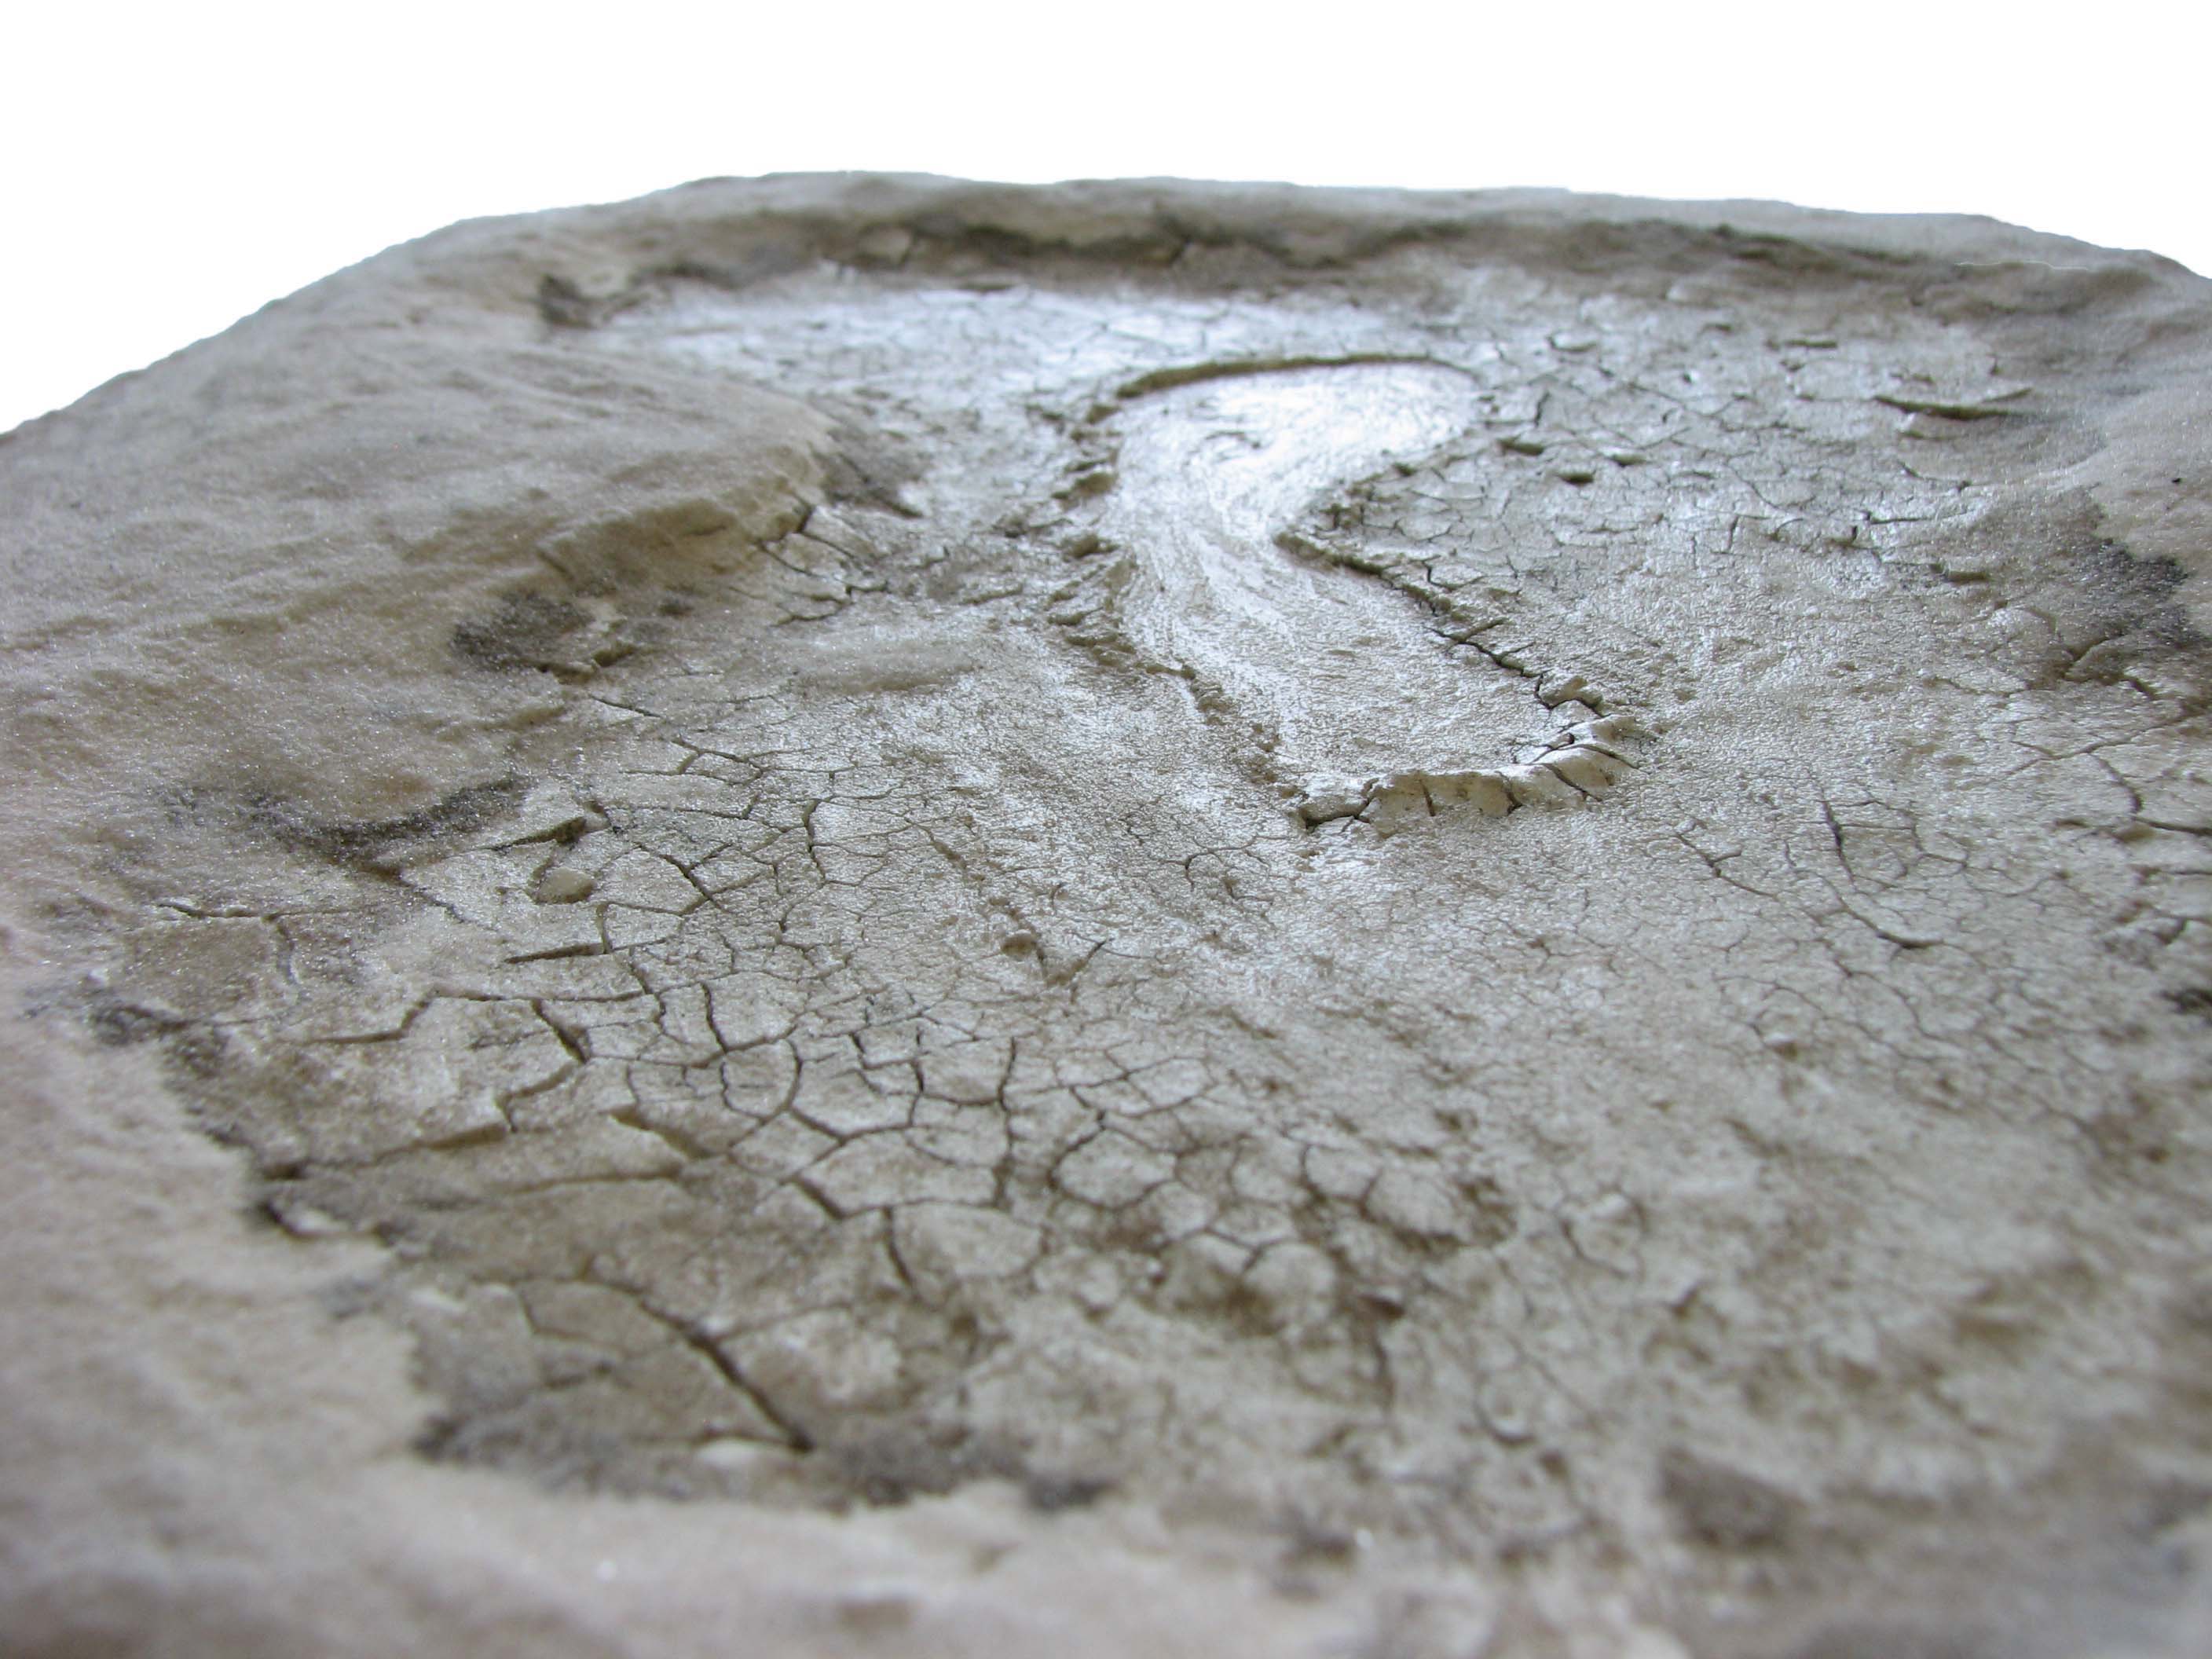
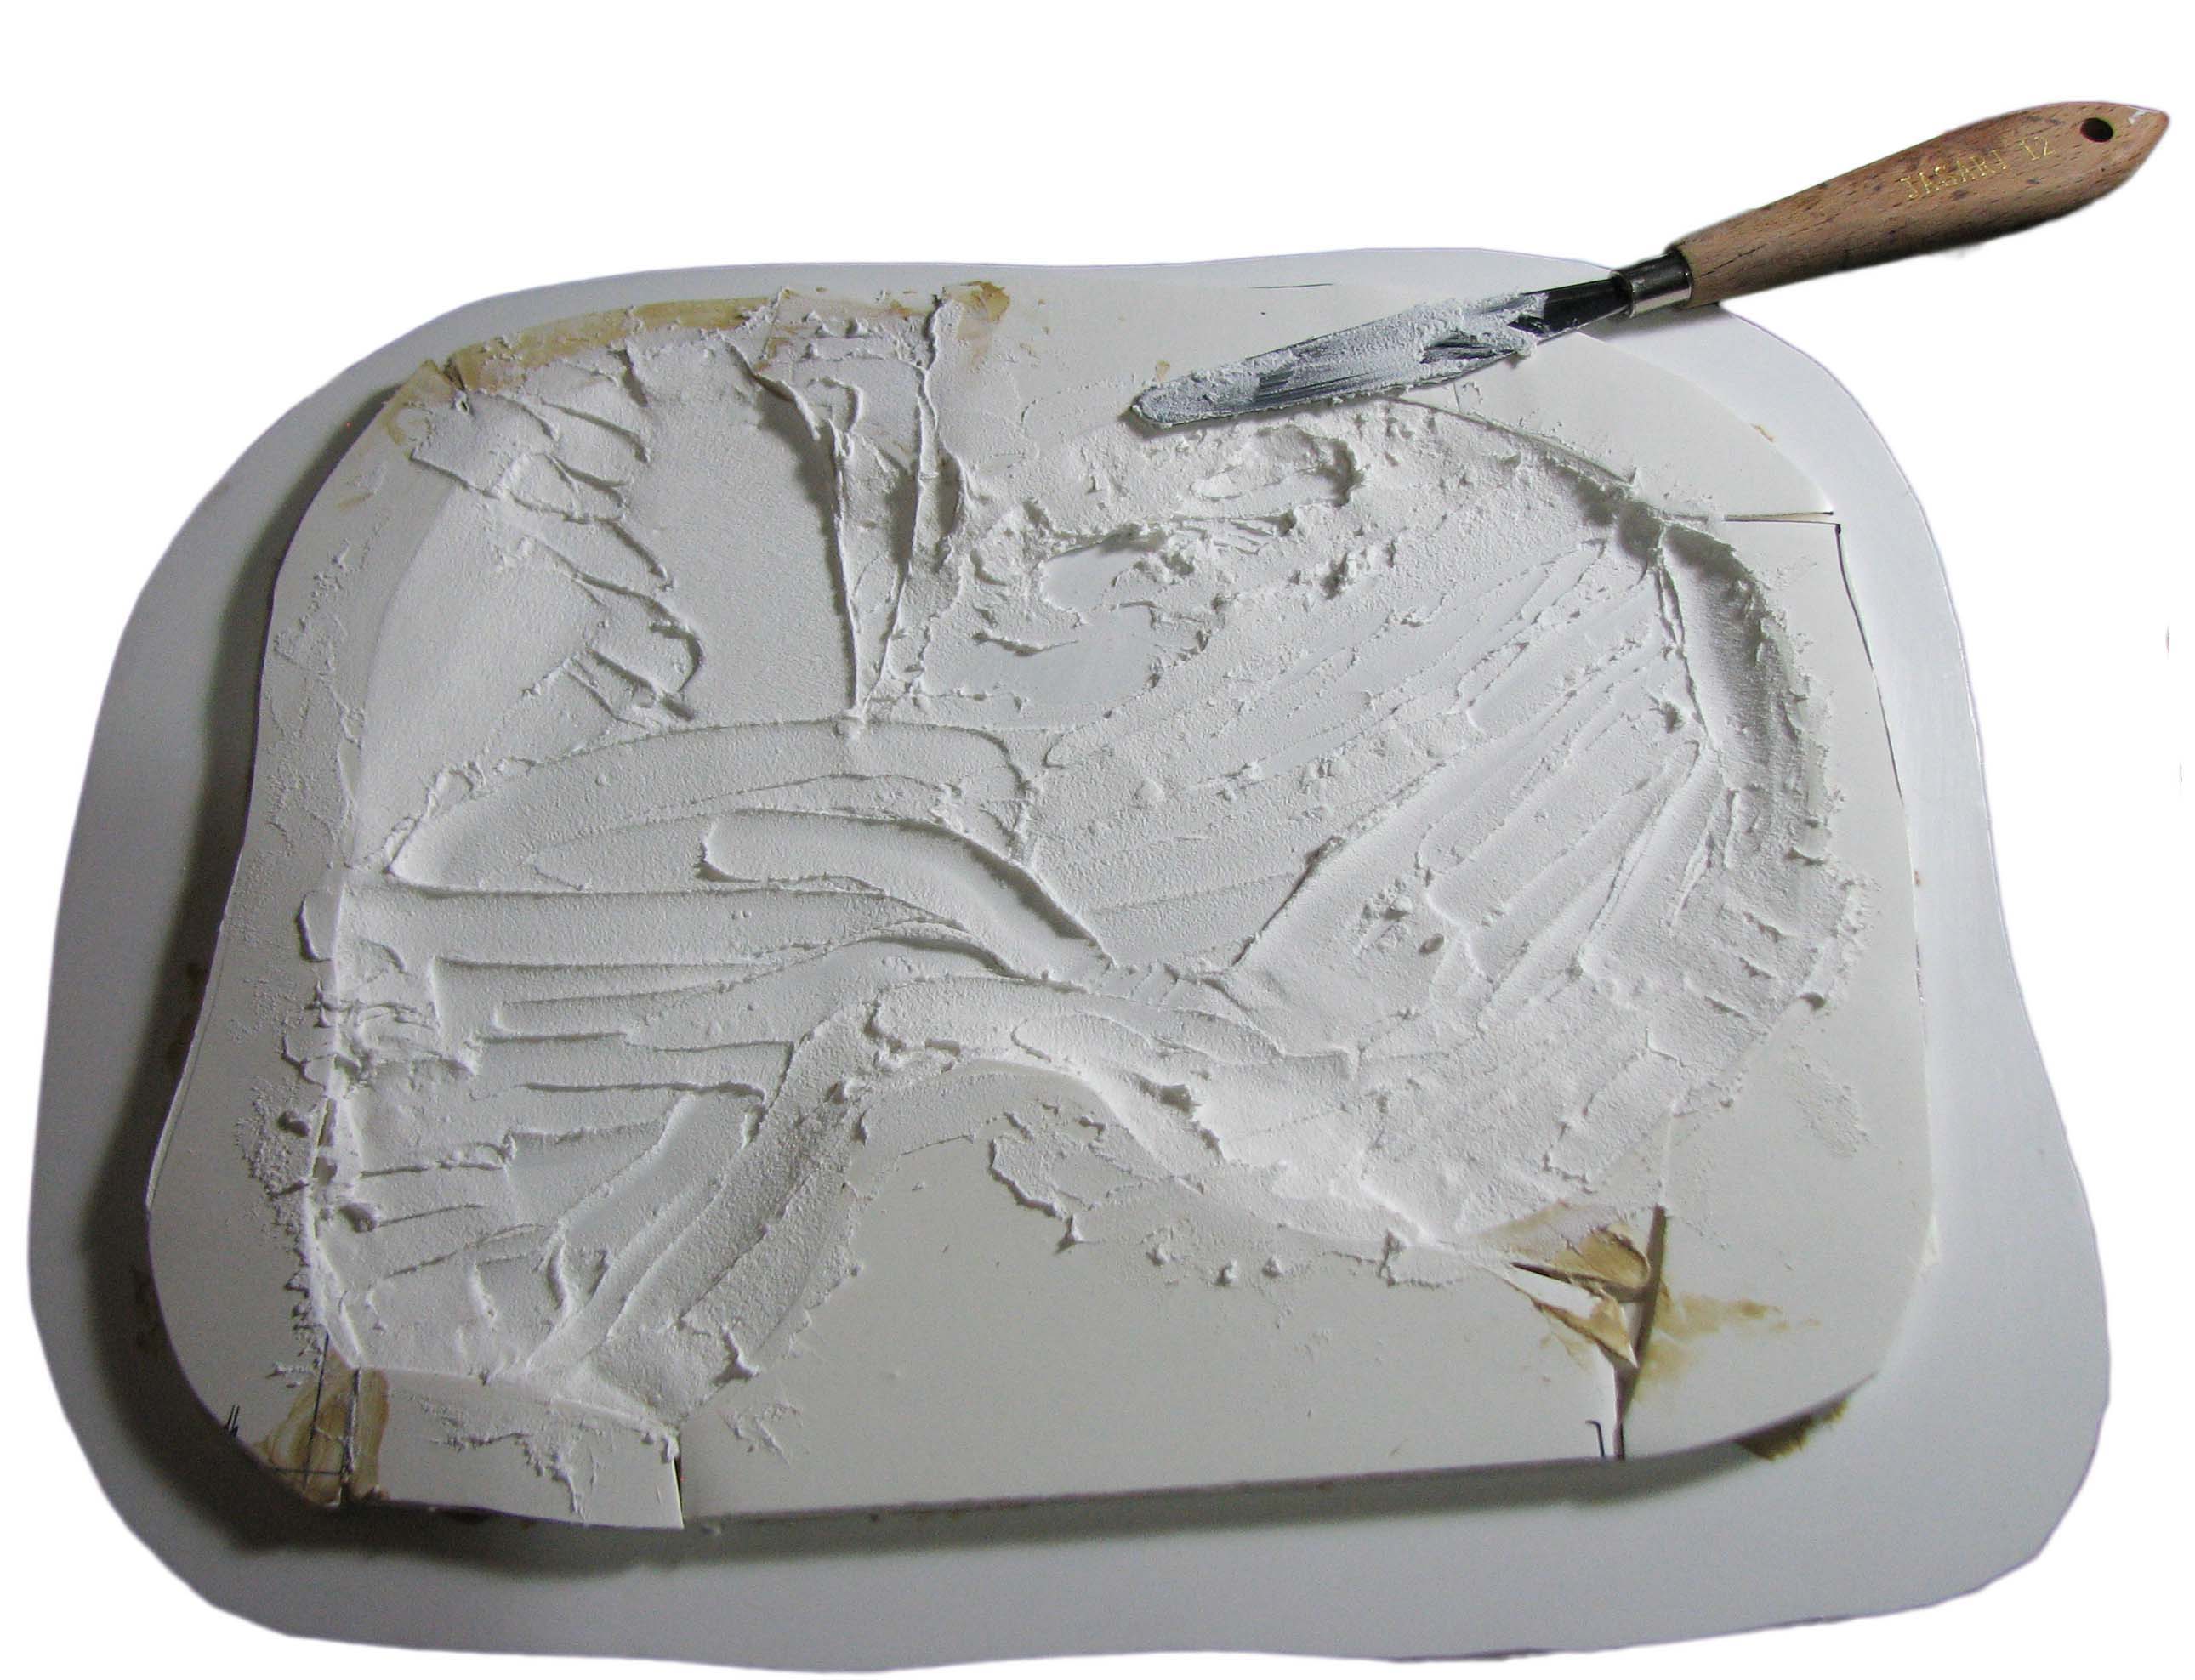
After this is all dry it is time to apply the crackle paste using a palette knife. Make sure that you achieve a reasonably flat surface. Wetting a brush and gently leveling the paste can help with this task. Another option is to apply the paste first and only then add the foam. You will still need to shape the lake shore, but it is easier to achieve a flat finish this way. This is a messy affair, so make sure you wear gloves and put something on your work surface.
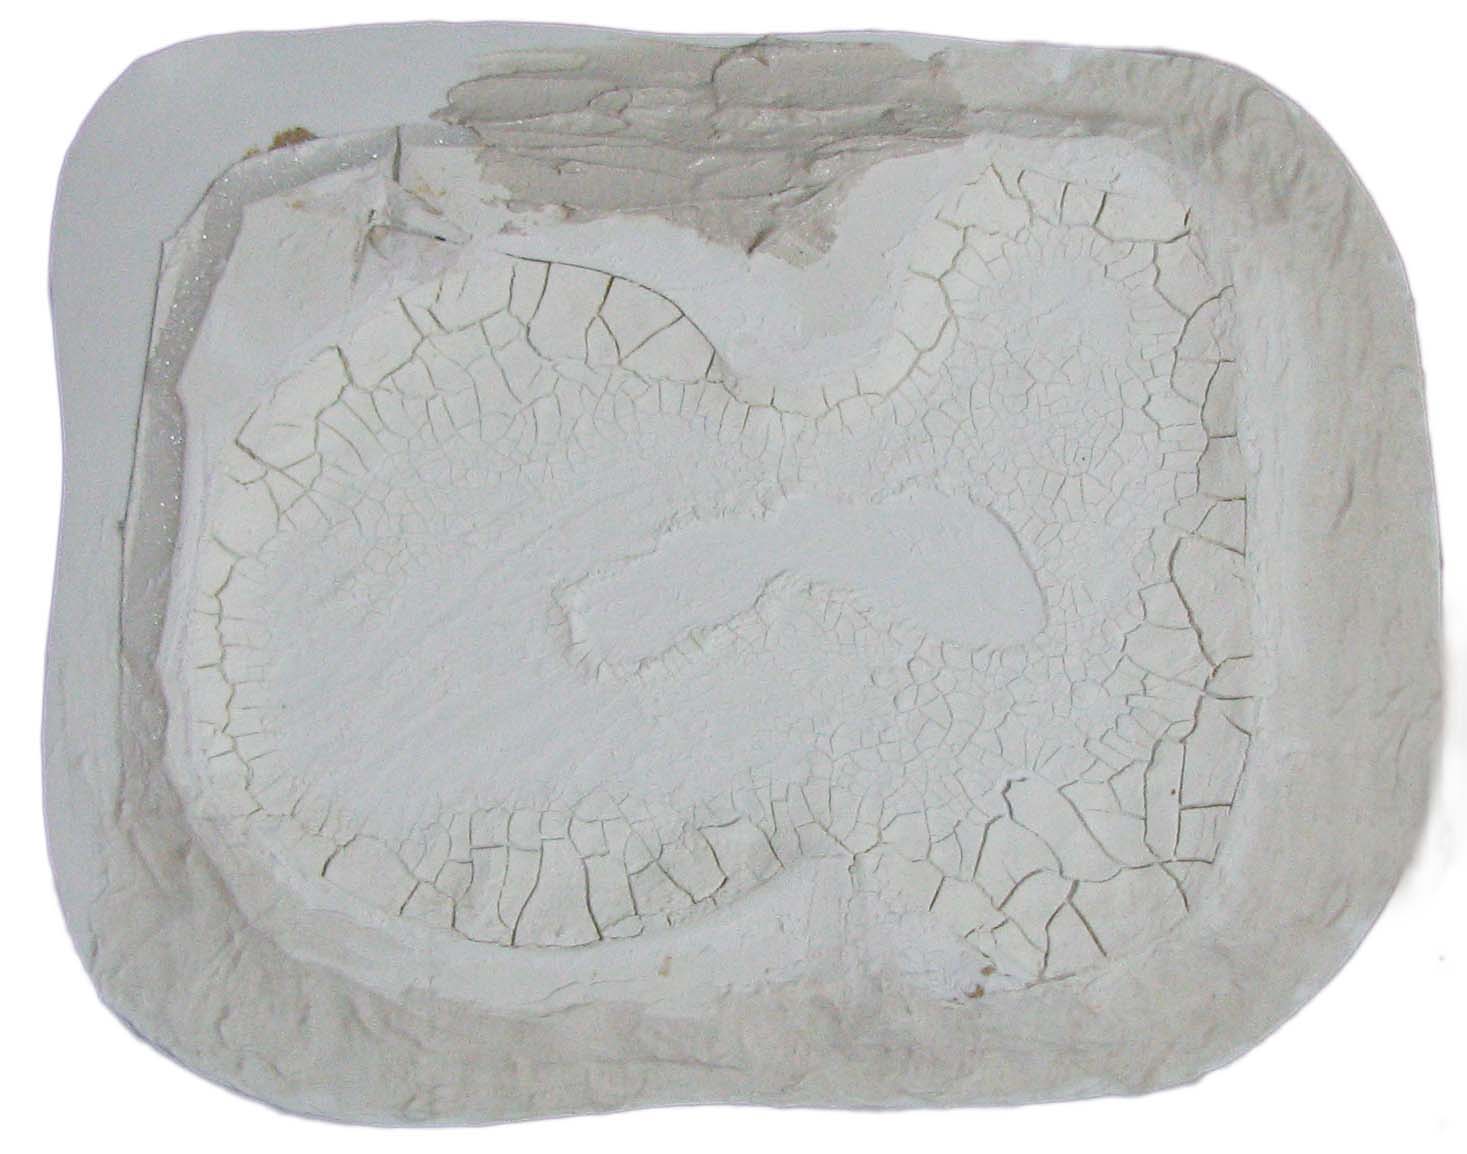
If you want an entirely dry lakebed you can leave it at that. However, if you want some stagnant water you should shape an indentation to represent a water hole. This does not need to be very deep, as the water effect and painting will add depth. Let dry for a few days until the crackle effect fully developed. For the first hours nothing seems to happen, but after a day the first cracks will develop. Cover the fully dried paste with some acrylic matte medium to solidify and strengthen it.
Shaping the shore
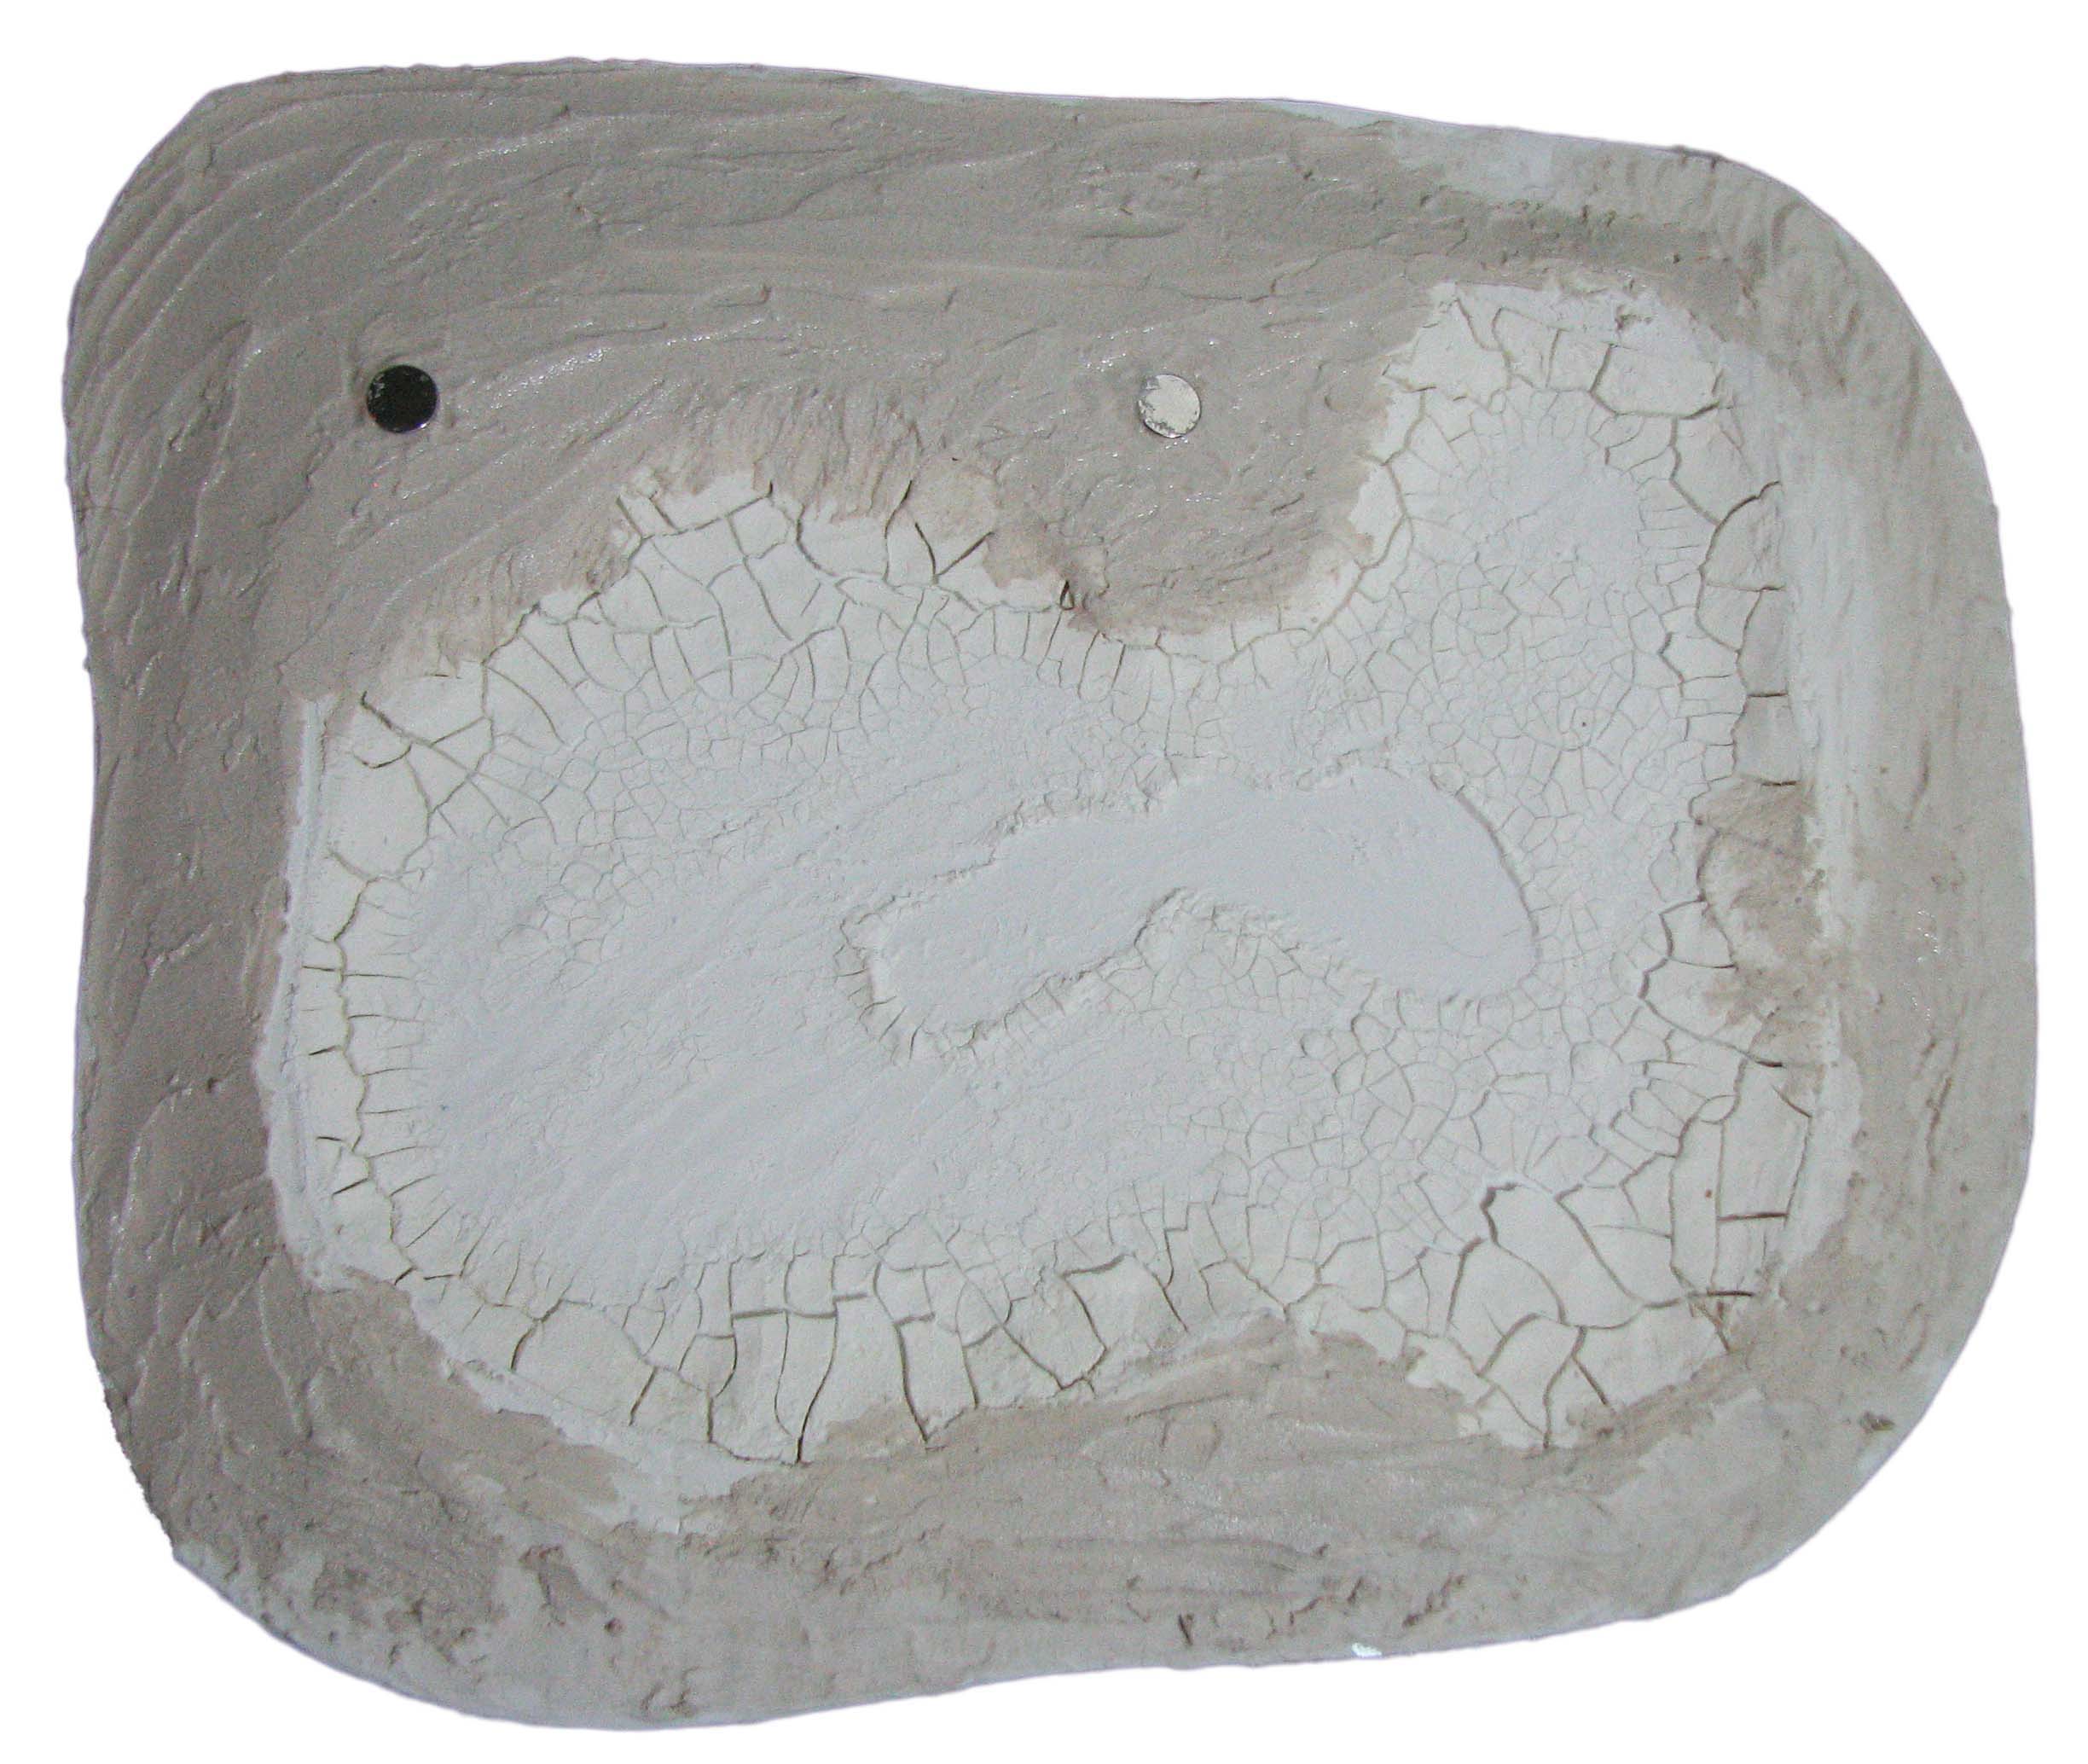
Now we use some wood filler or acrylic modelling paste to shape the lake shore and surrounding groundwork. This does not need to be super even, as a bit of subtle texture will add to the piece and achieve a more naturalistic look. As you see below the cracks are larger where I applied a thicker layer of paste. A light cover of paste will result in smaller, more subtle cracks. It seems the age of the crackle paste also influences the result. The older the paste, the finer the fissures. I attribute it to a diminished water content.
Now it is also time to add and embed the rare earth magnets or steel tacks. I used two to have the option of moving the tree or even adding other elements such as columns etc. Make sure to not cover the surface at this point. You want good adhesion to the trees and not too much material in between. I recommend to use N52 rare earth magnets 10mm by 1mm, but if you want to add large palm trees you may need to get something stronger (so either thicker or a higher N rating).
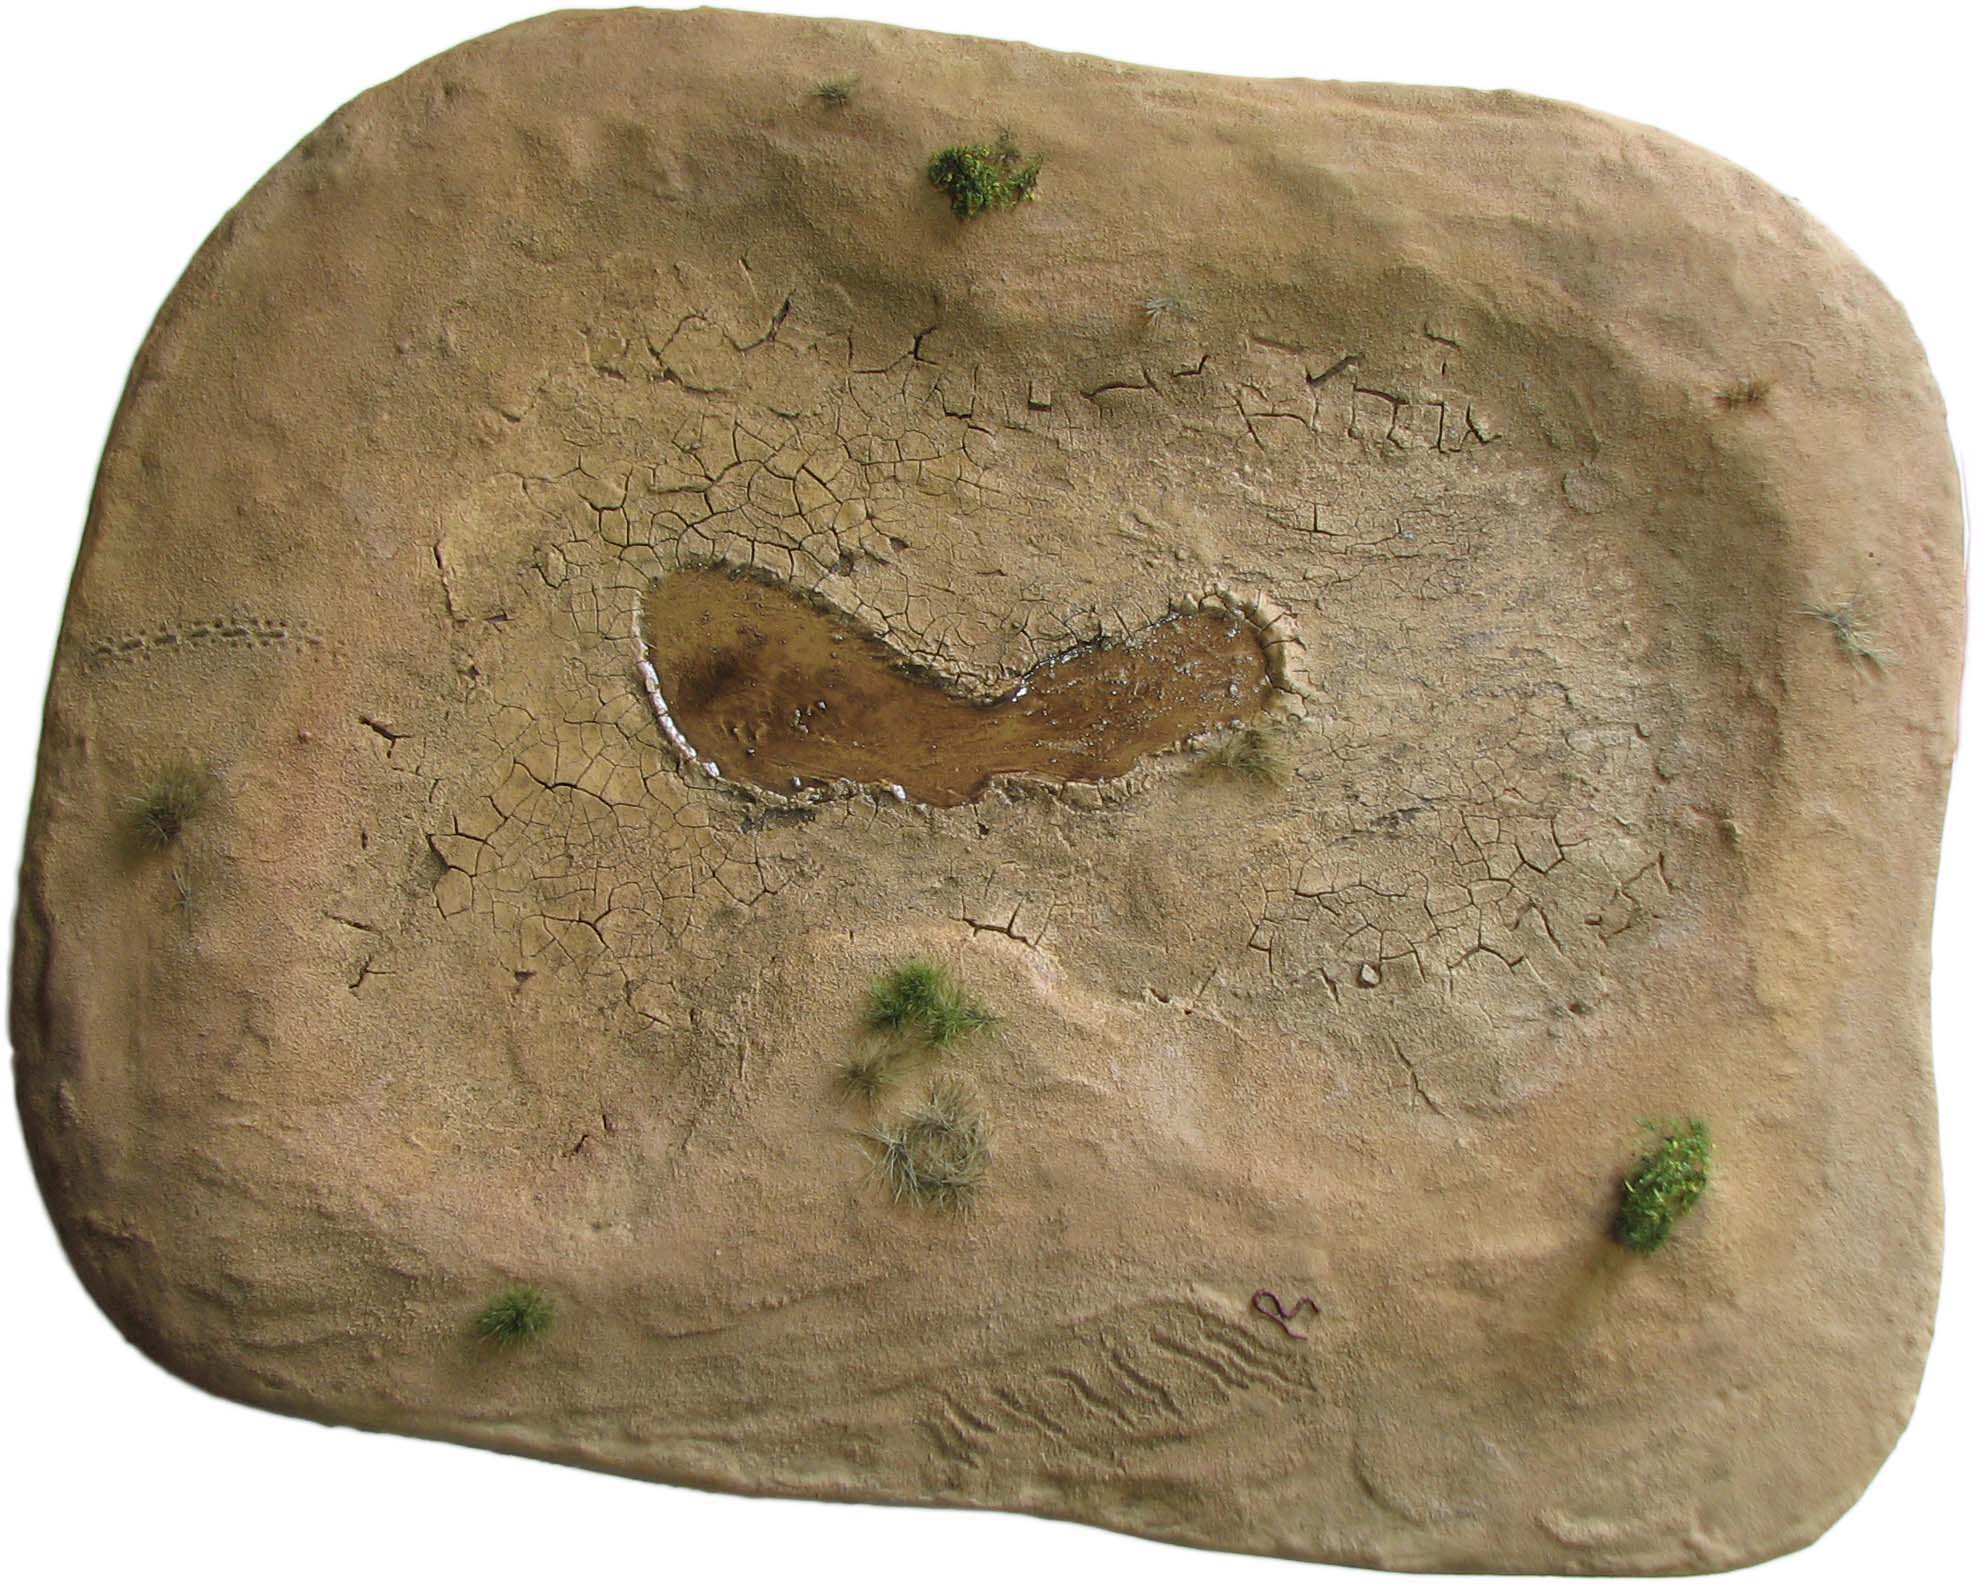
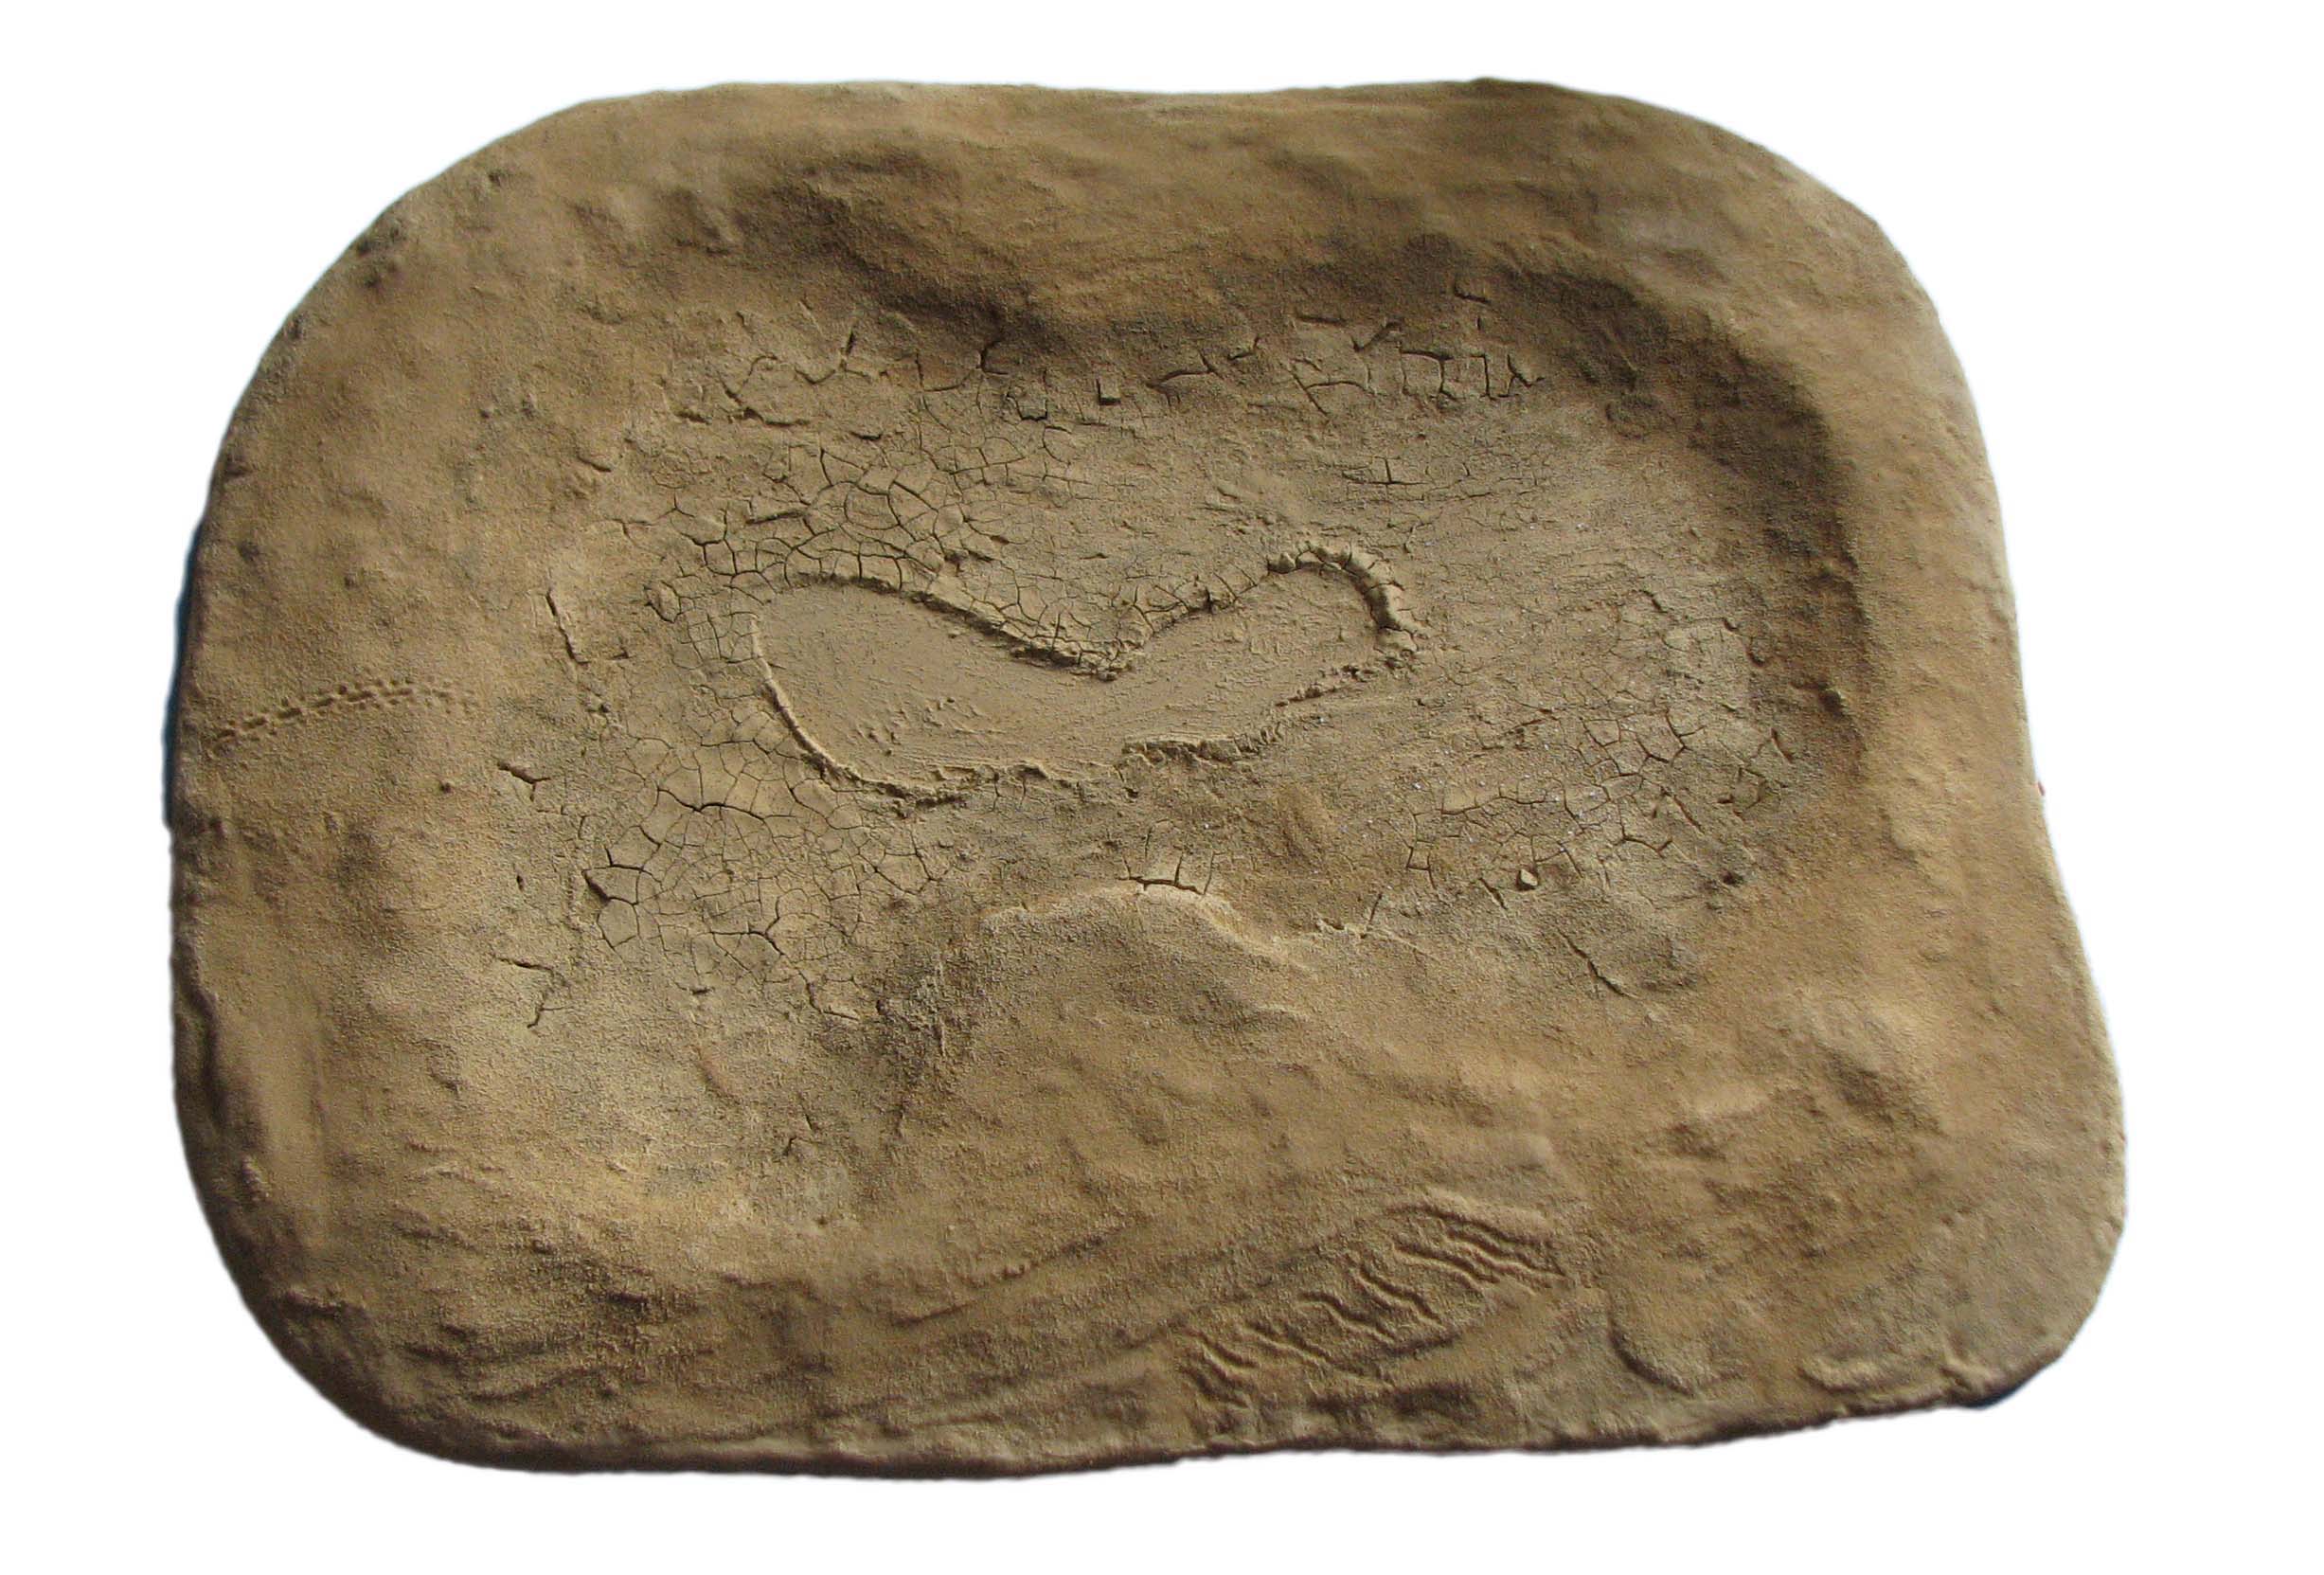
Now we apply some PVA or acrylic medium to the lake shore and sprinkle some sand on it. Let dry and repeat if necessary. Adding a bit of sand to the lakebed adds interest and realism. Cover the magnets, too, but keep the layer thin and even. To give you an idea of the cracks and texture of the piece I applied a brown wash at this stage, but you can wait with this until it is time to apply paint. As you can see the water hole is not deep at all. Just enough to create the illusion of depth when the water effect is applied.
Signs of life
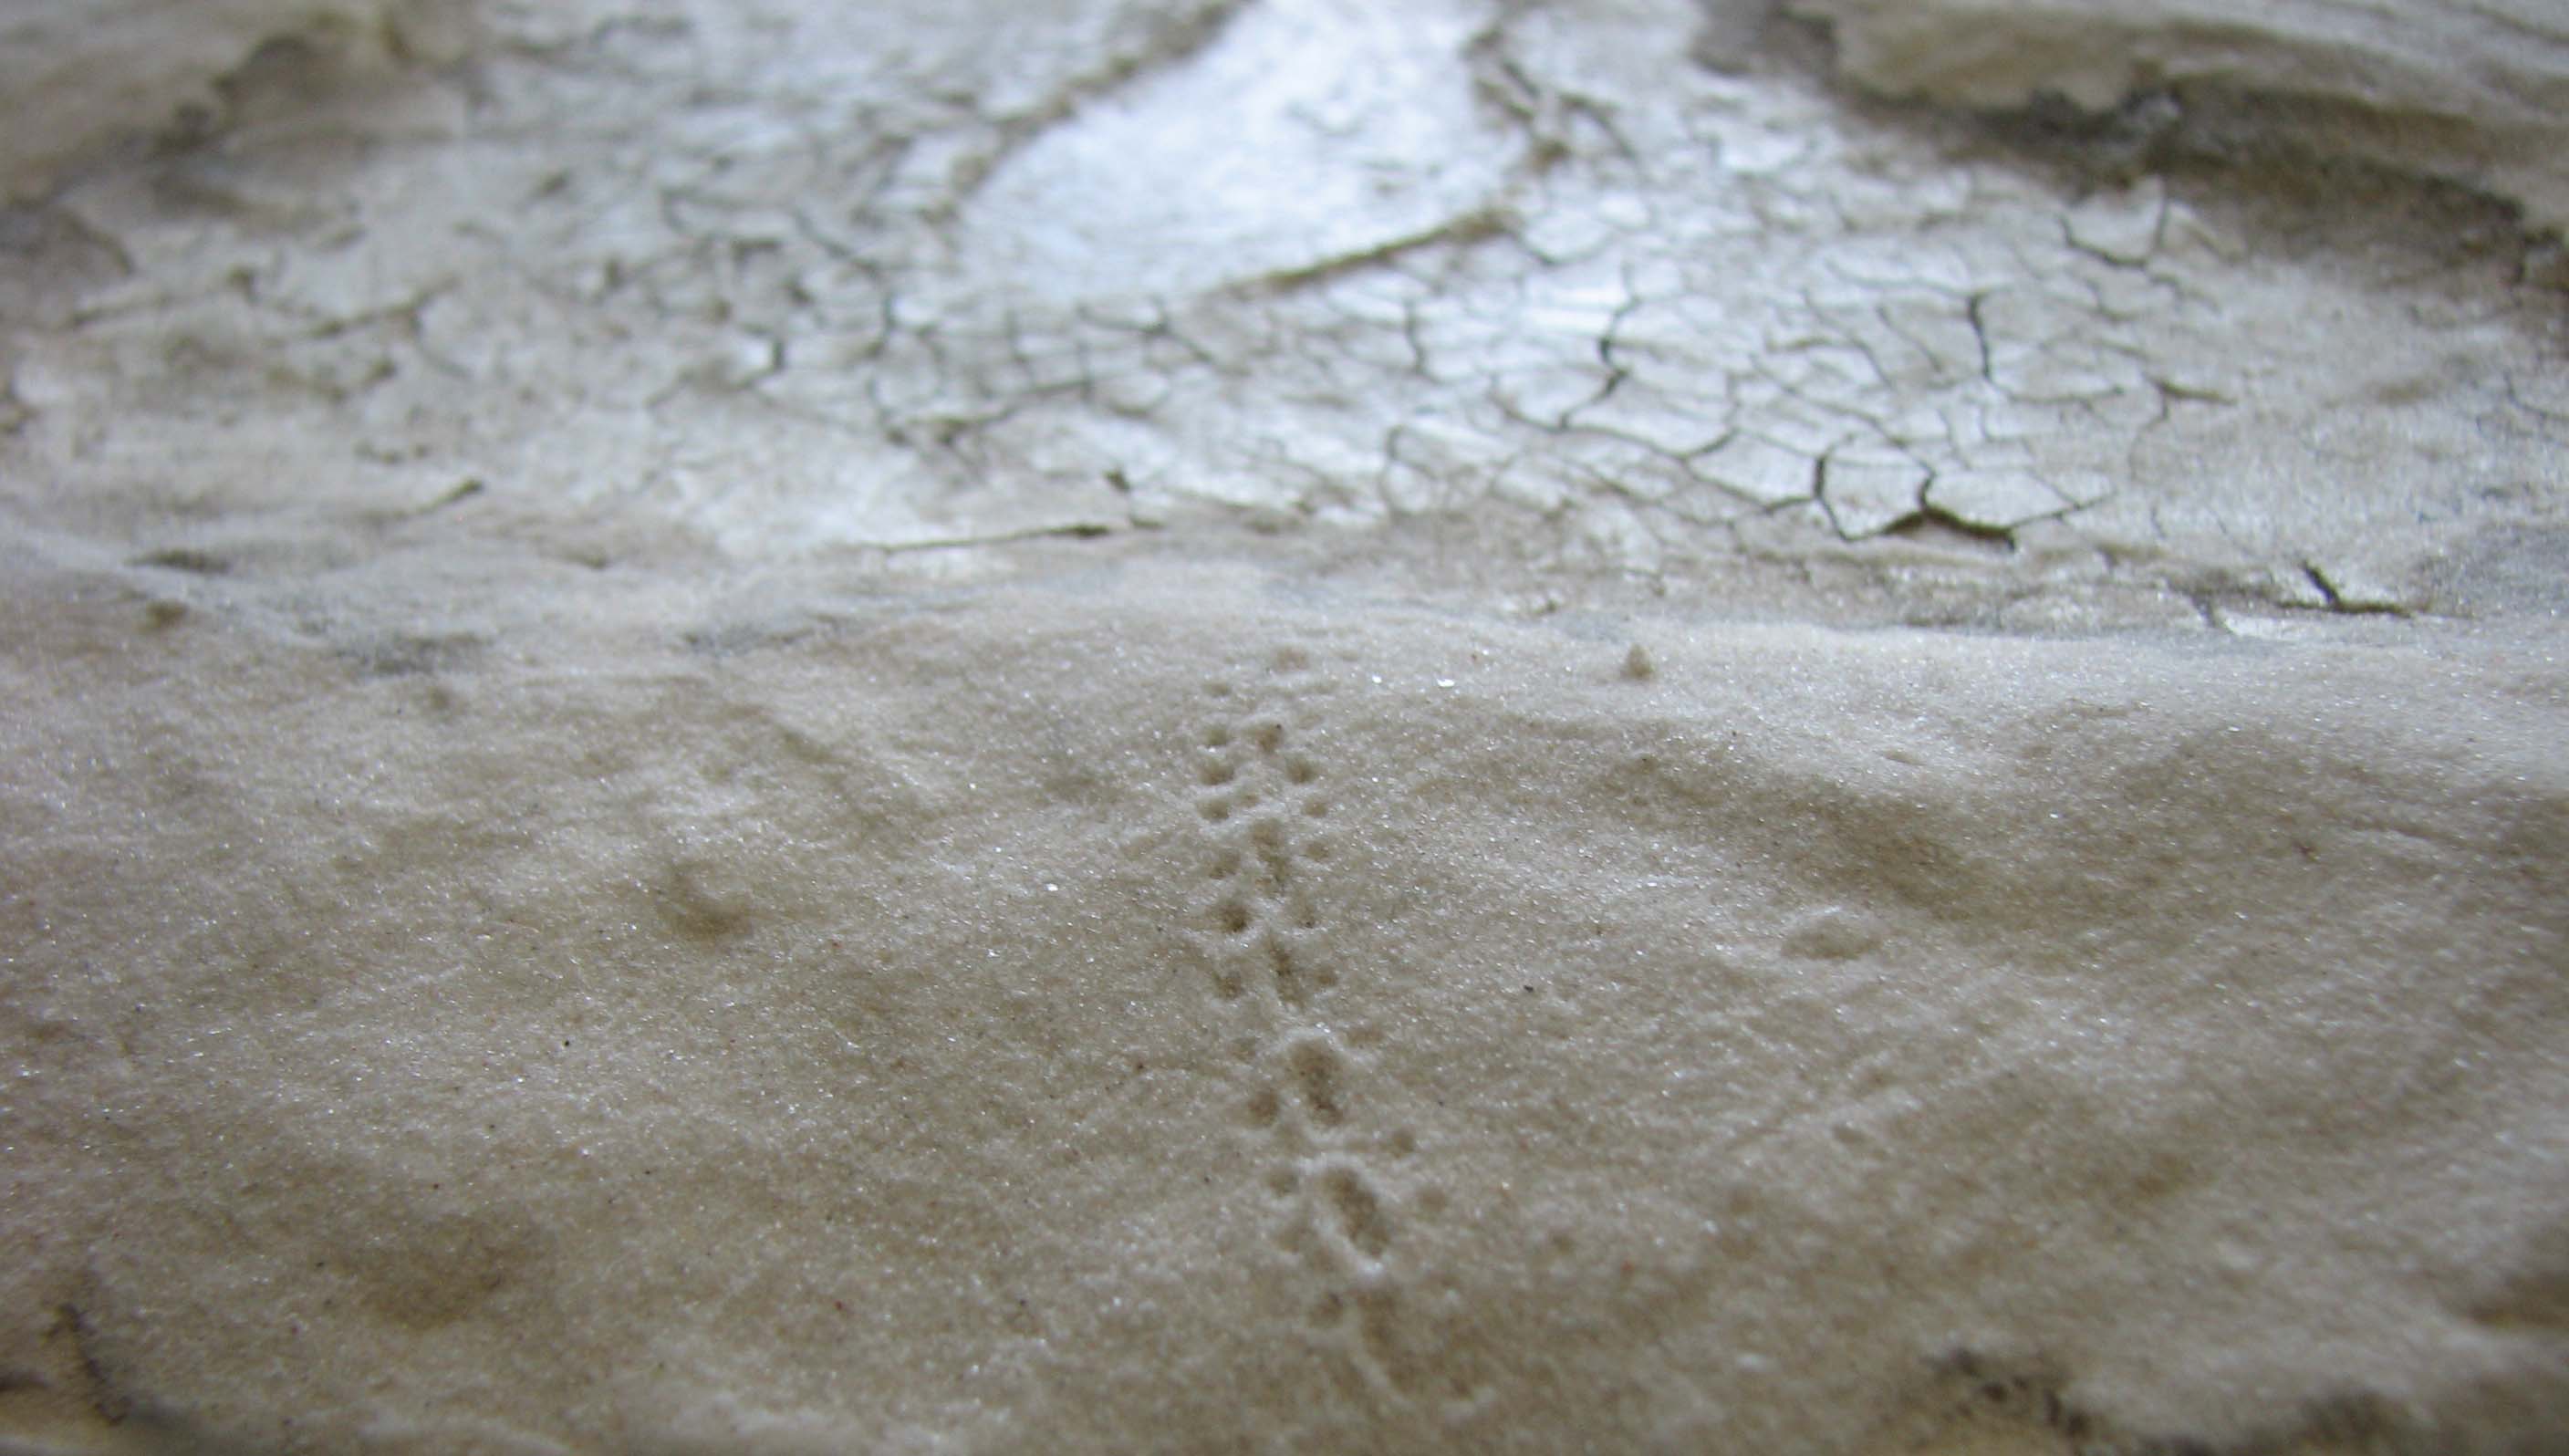
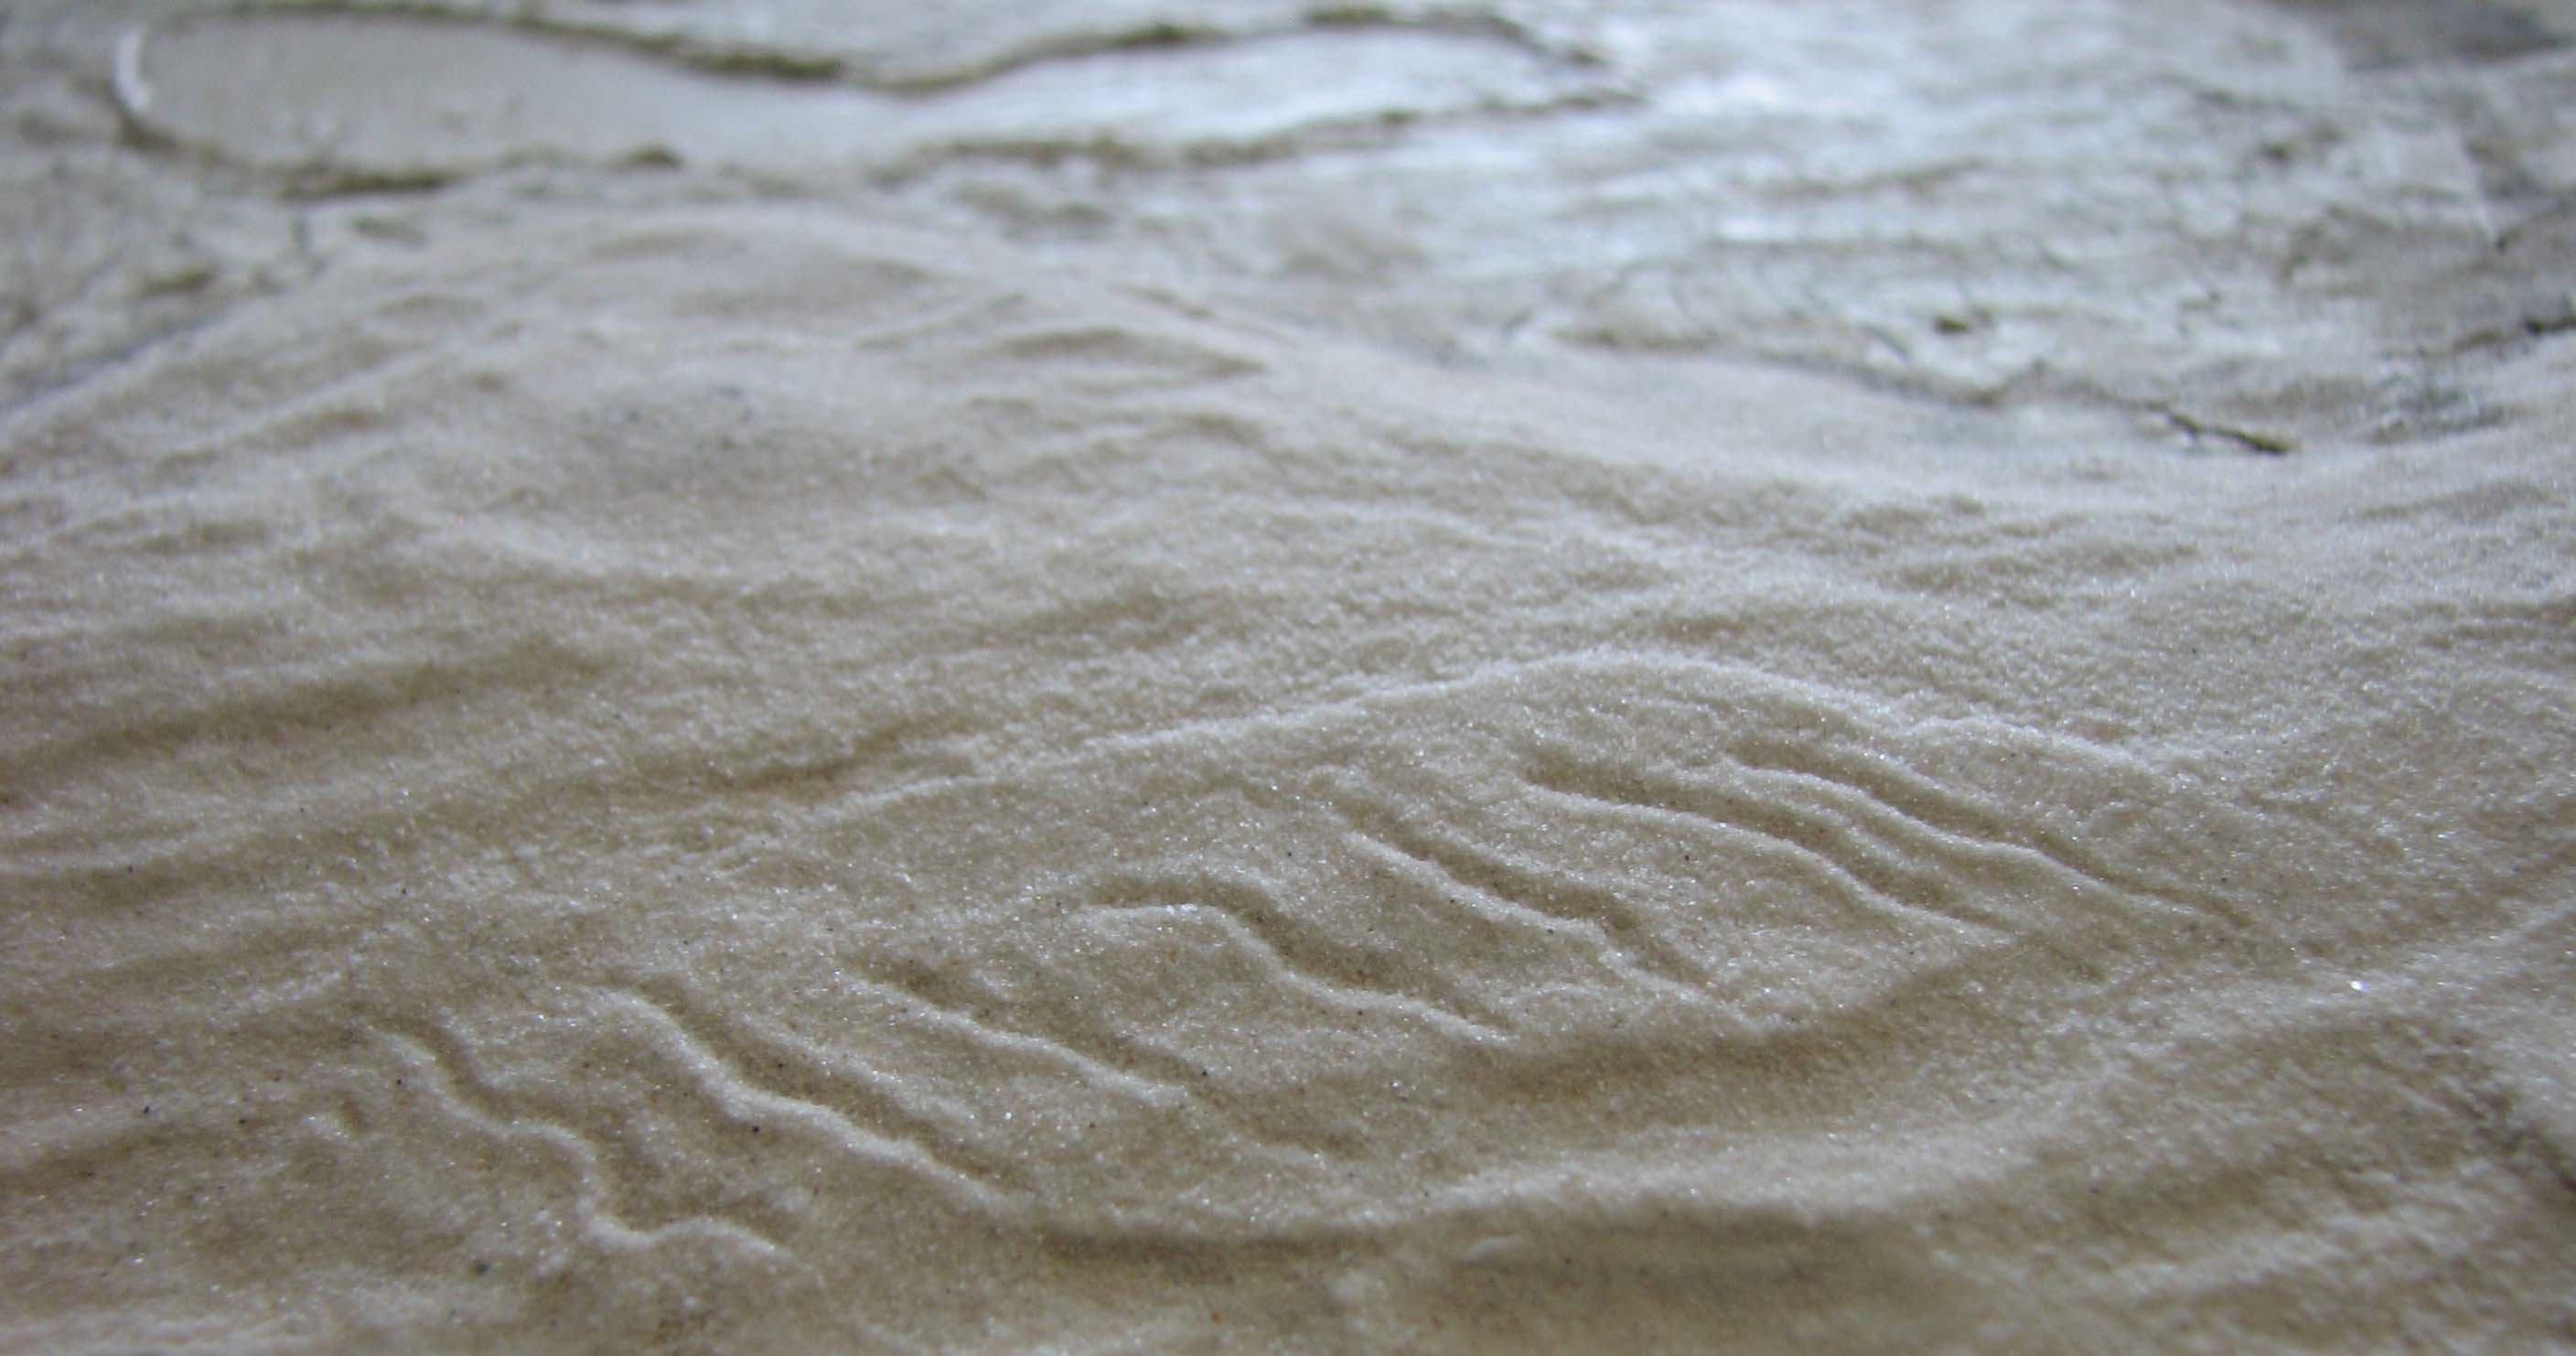
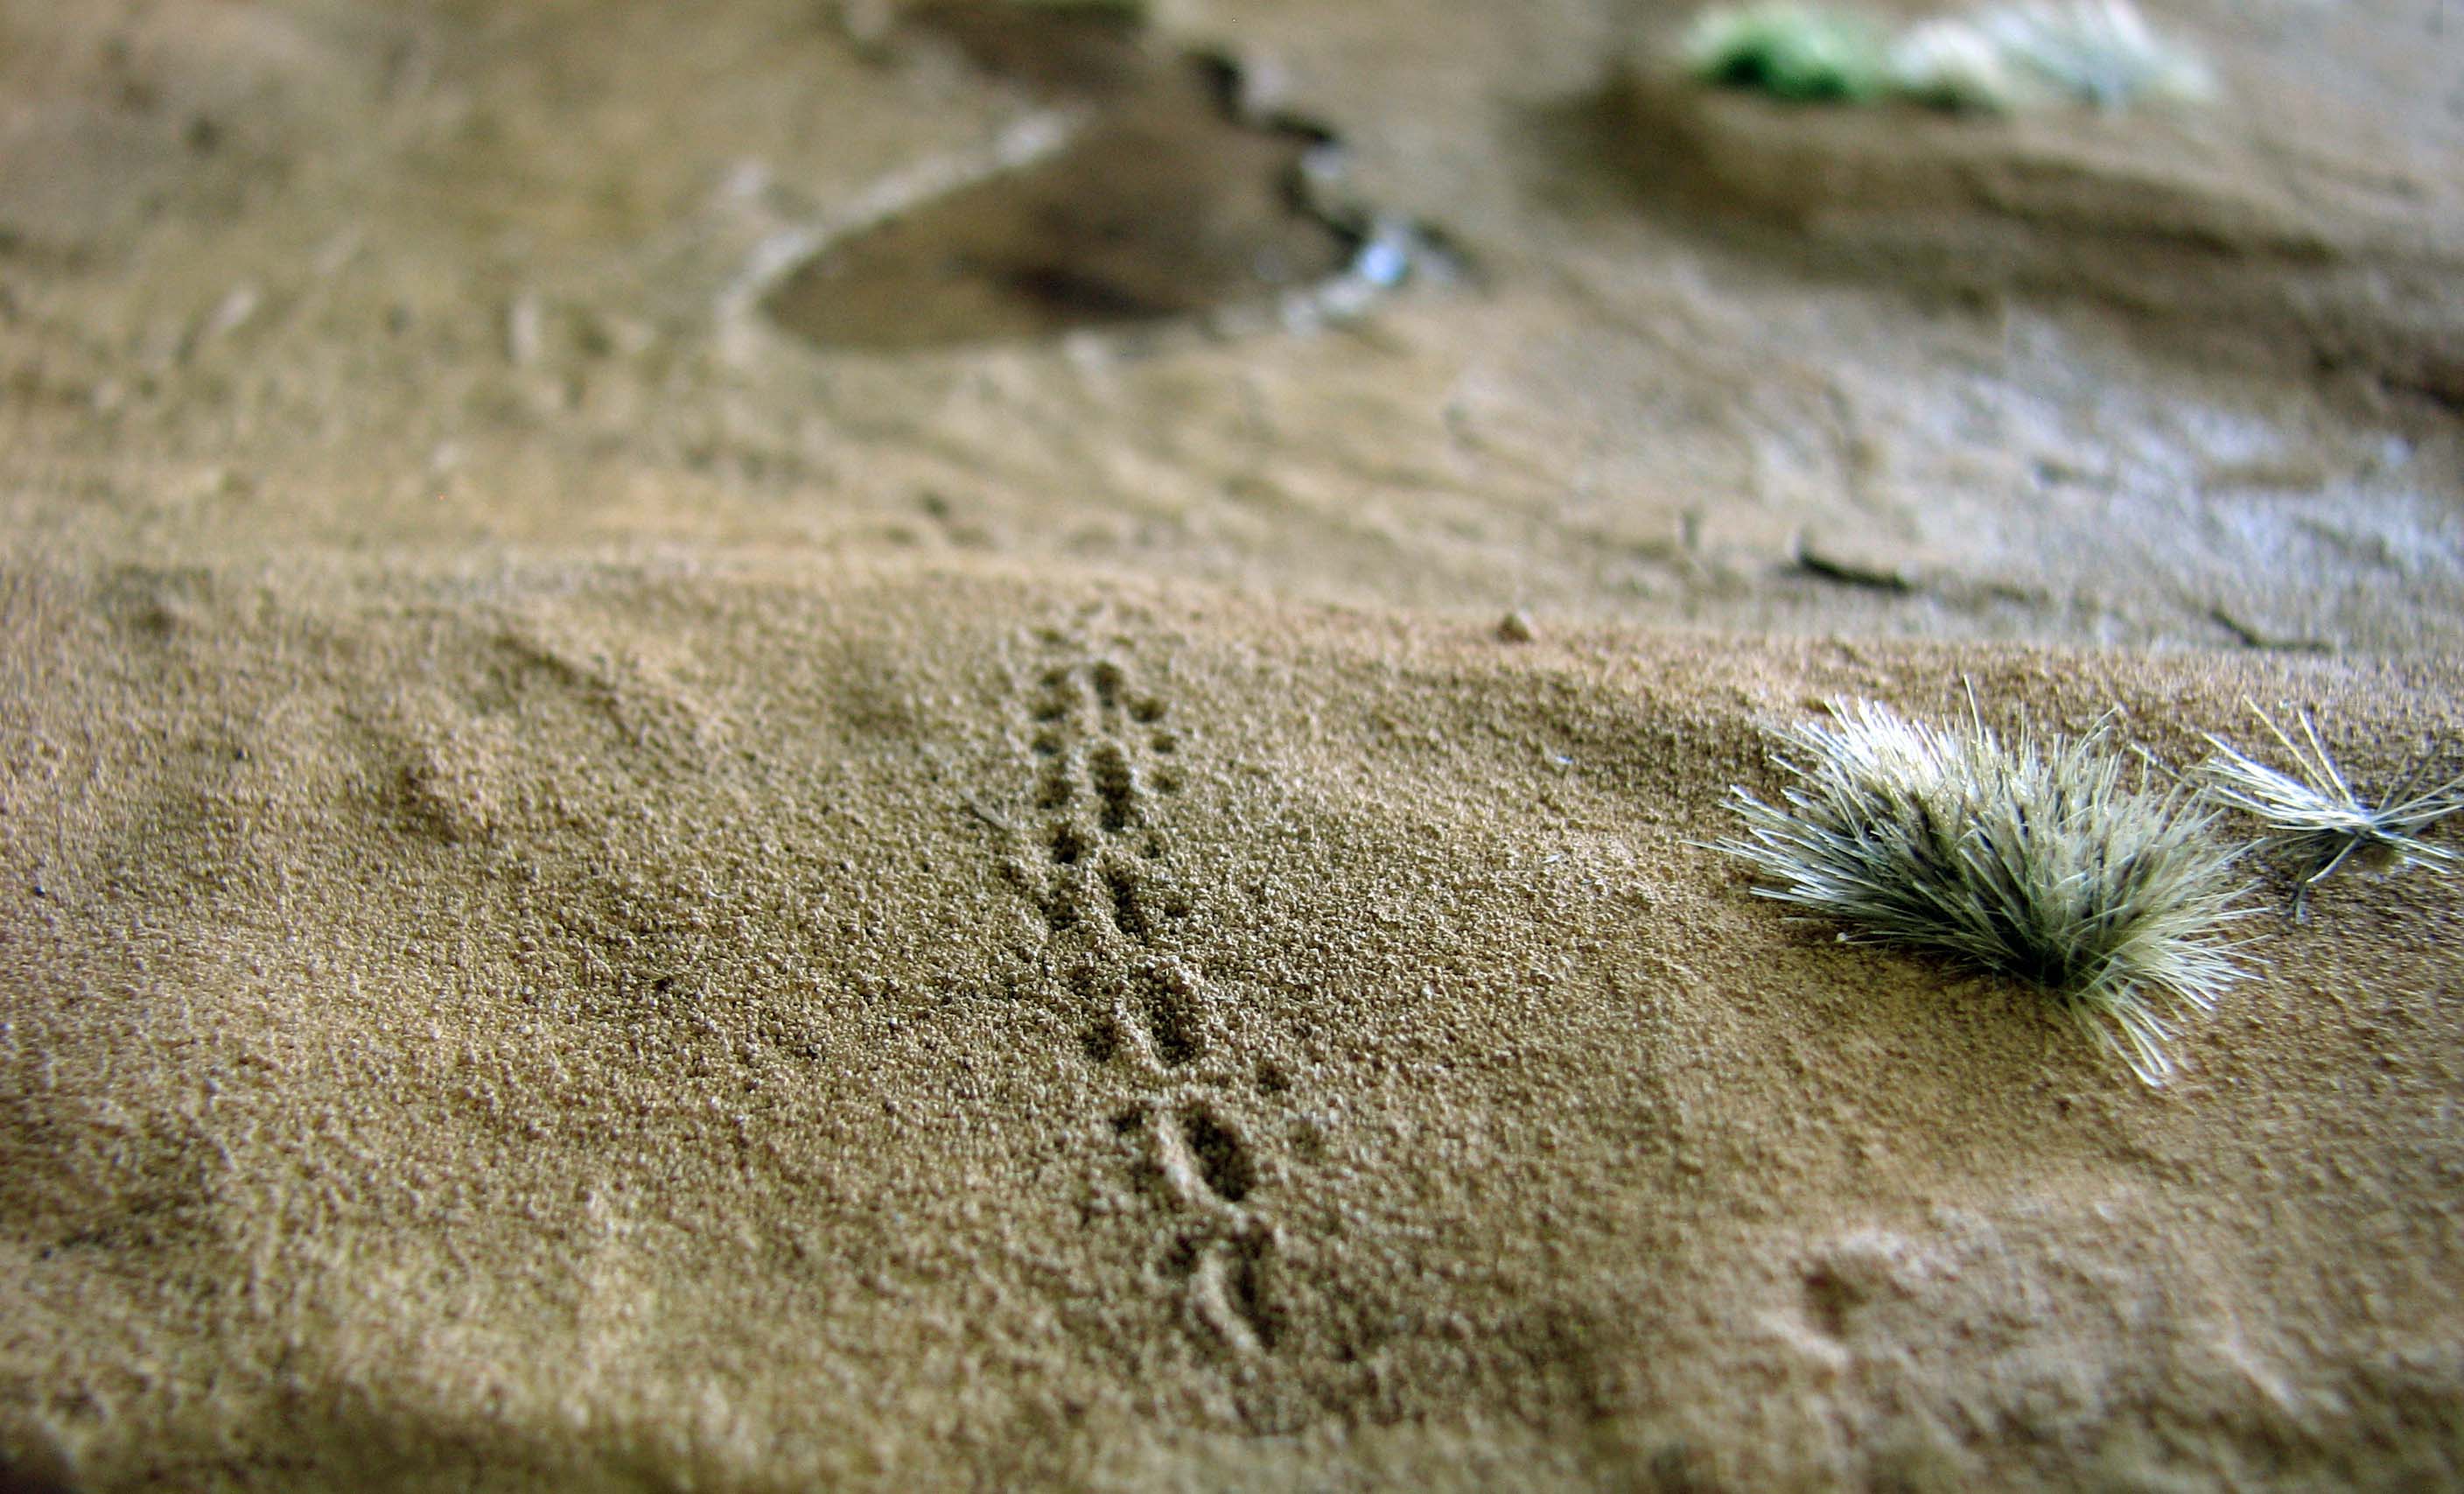
A nice addition are animal tracks in the sand. I added some snake tracks and some lizard tracks. You can draw them in the sand layer with a needle tool and then carefully apply some AK Sand and Gravel Fixer or thinned down acrylic matte medium with a bit of flow release. When the sand is wet refine the tracks and let completely dry. To assure that the sand and cracks do not come off add a final layer of thinned down acrylic medium with a bit of flow release. This should make the surface rock hard and resilient enough for normal wargaming use.
More than just brown
We proceed to the painting stage. Using a brush or an airbrush apply a basecoat of light brown to beige colour, depending what kind of arid environment you would like to represent. I used Tamiya XF-59 Desert Yellow sprayed through an airbrush. Next, lightly drybrush with a lighter colour to add some contrast, but do not overdo it.
Now increase the contrast of the cracks and textures with a very light brown wash. You may have to redo this several times. I would start with a thin mix and build it up, to avoid going too far. You can always add, but taking away is difficult at this stage. The lizard tracks have been drybrushed and then a light brown wash was applied to the indentations.
When you are satisfied you can lightly darken the water hole and when this is dry add some clear acrylic gloss varnish mixed with a bit of brown wash. This achieves a muddy water look and adds depth, given the water effect is now more opaque. Let dry and add several more layers of either plain varnish or more coloured varnish, depending on the look you are going for.
Specks of vegetation
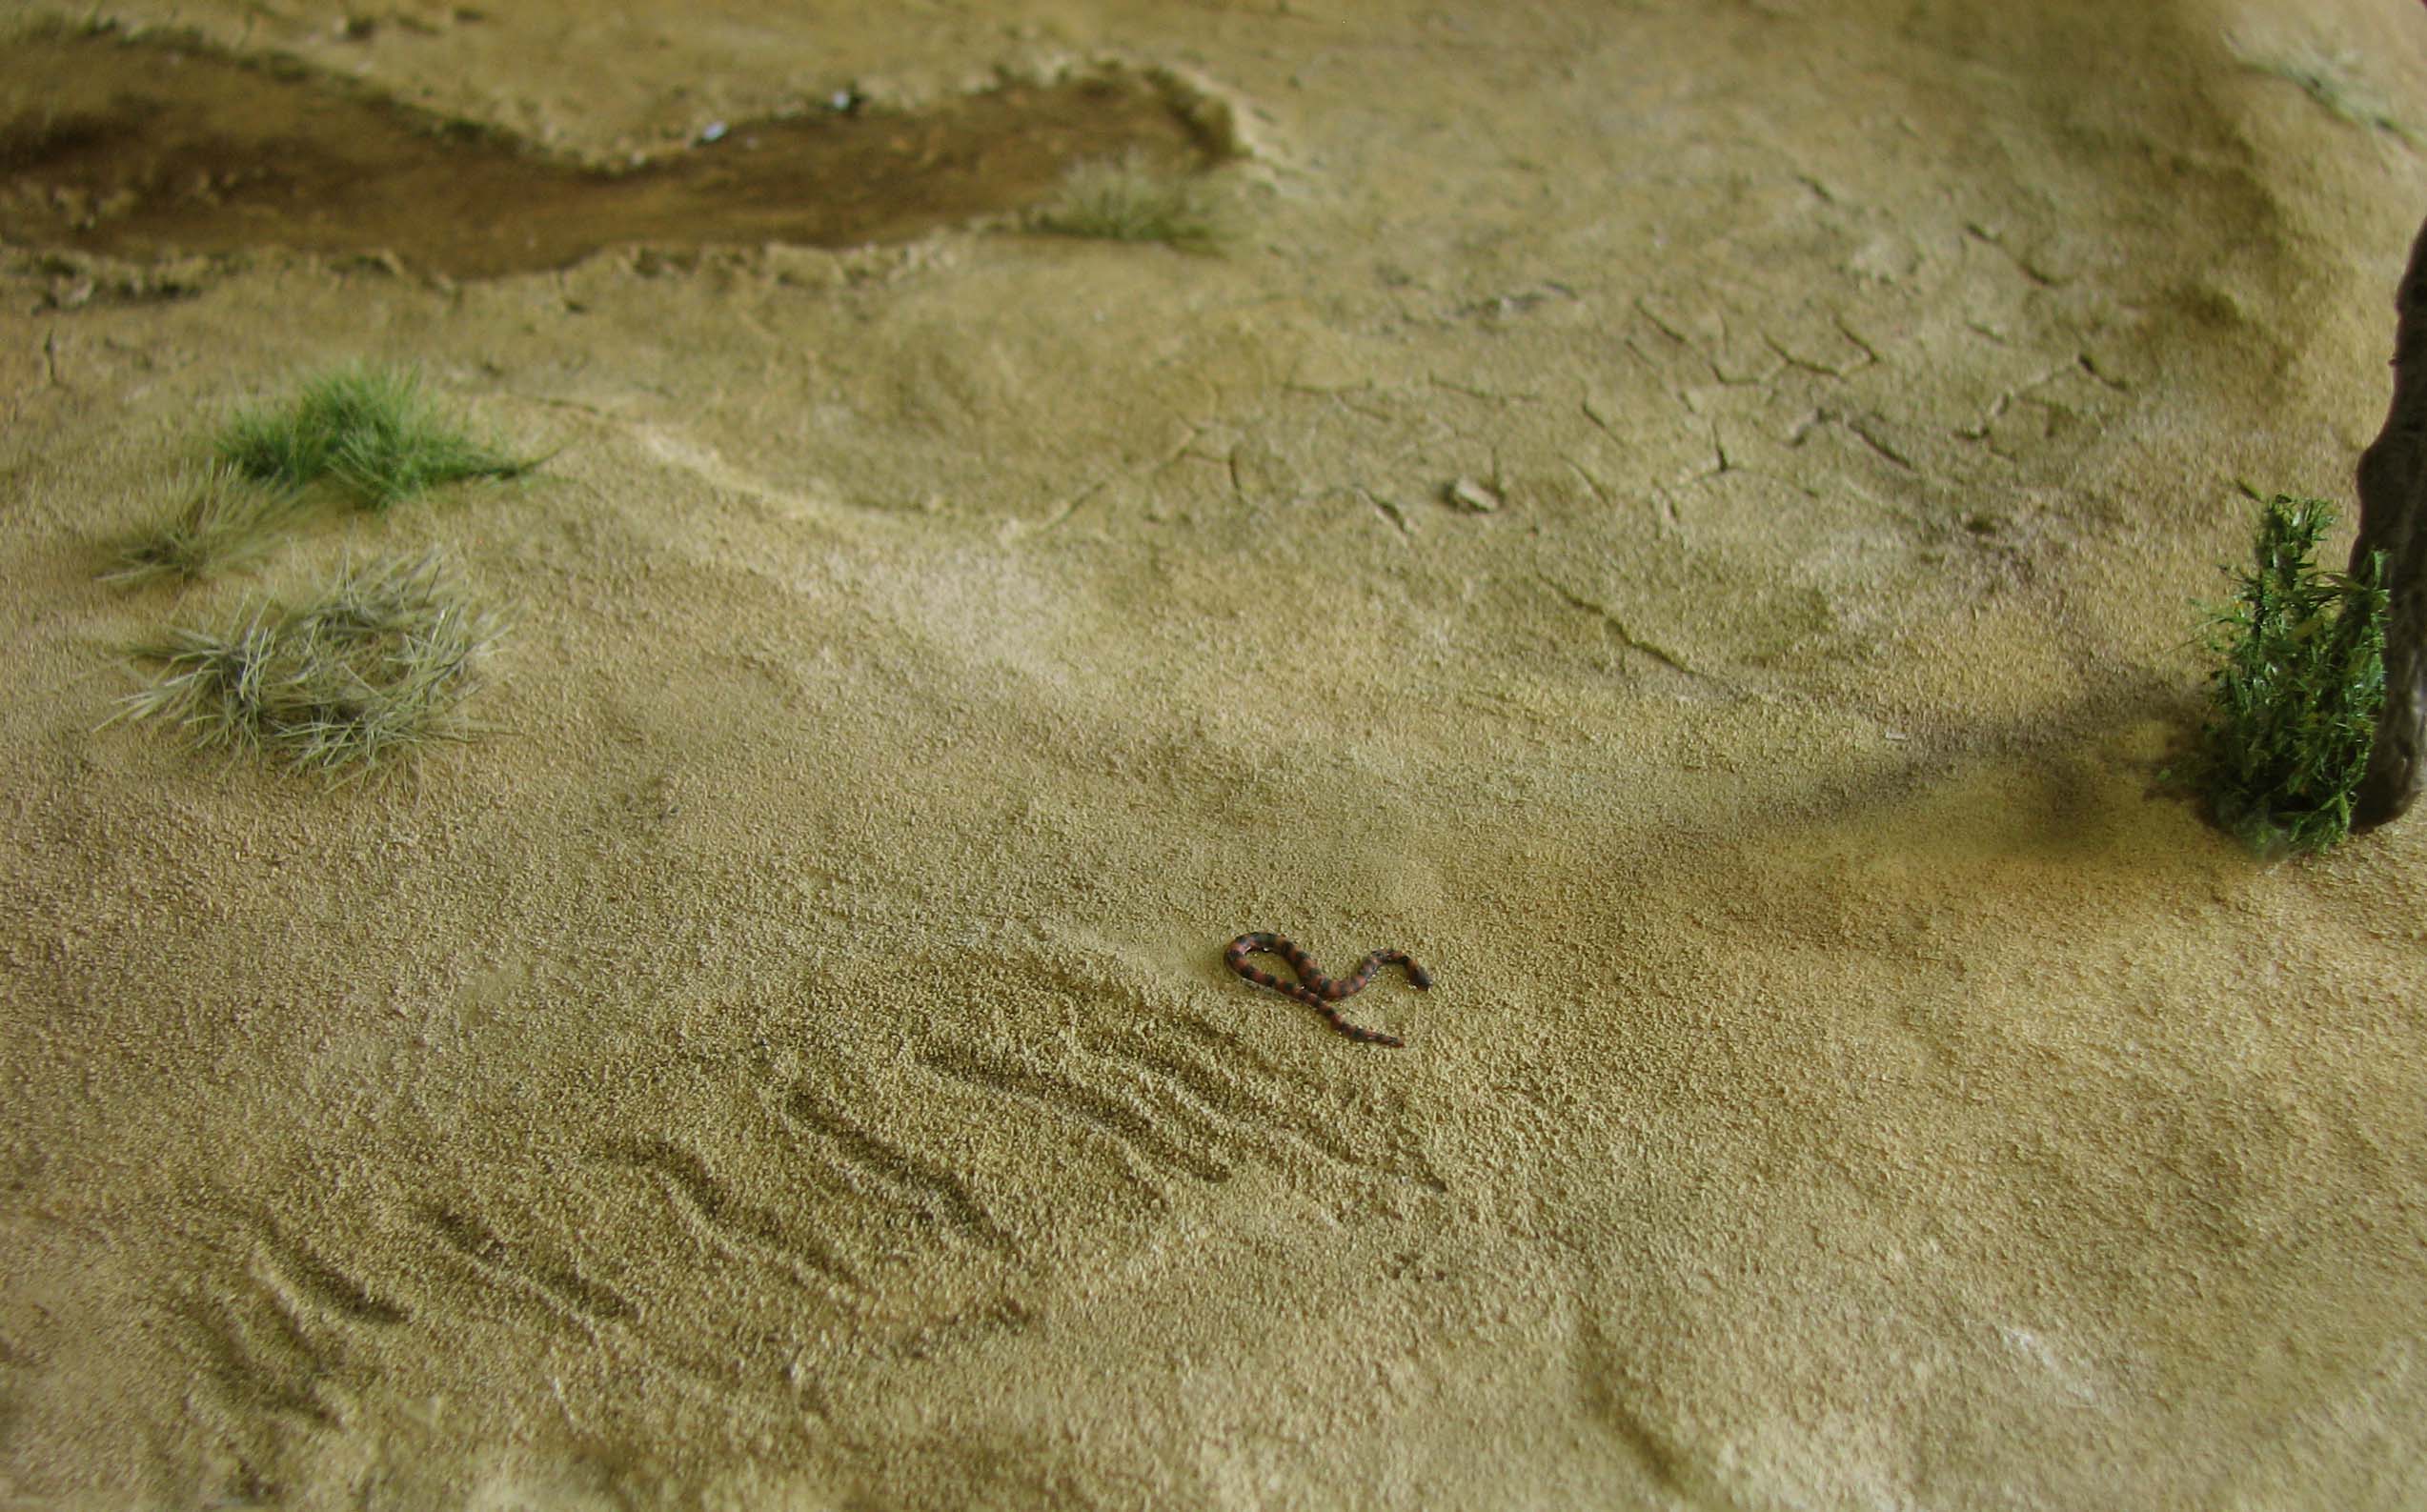
For the final touches you can add some brushes or leafy bushes. As always I apply a brown wash to them to reduce the glare of static grass and to make them look more naturalistic. I als painted a snake and added it to the piece just where the snake tracks end. Adding critters such as a snake is a good way to inject some life in your piece and it will be one of those details that make it really stand out.
The dead tree
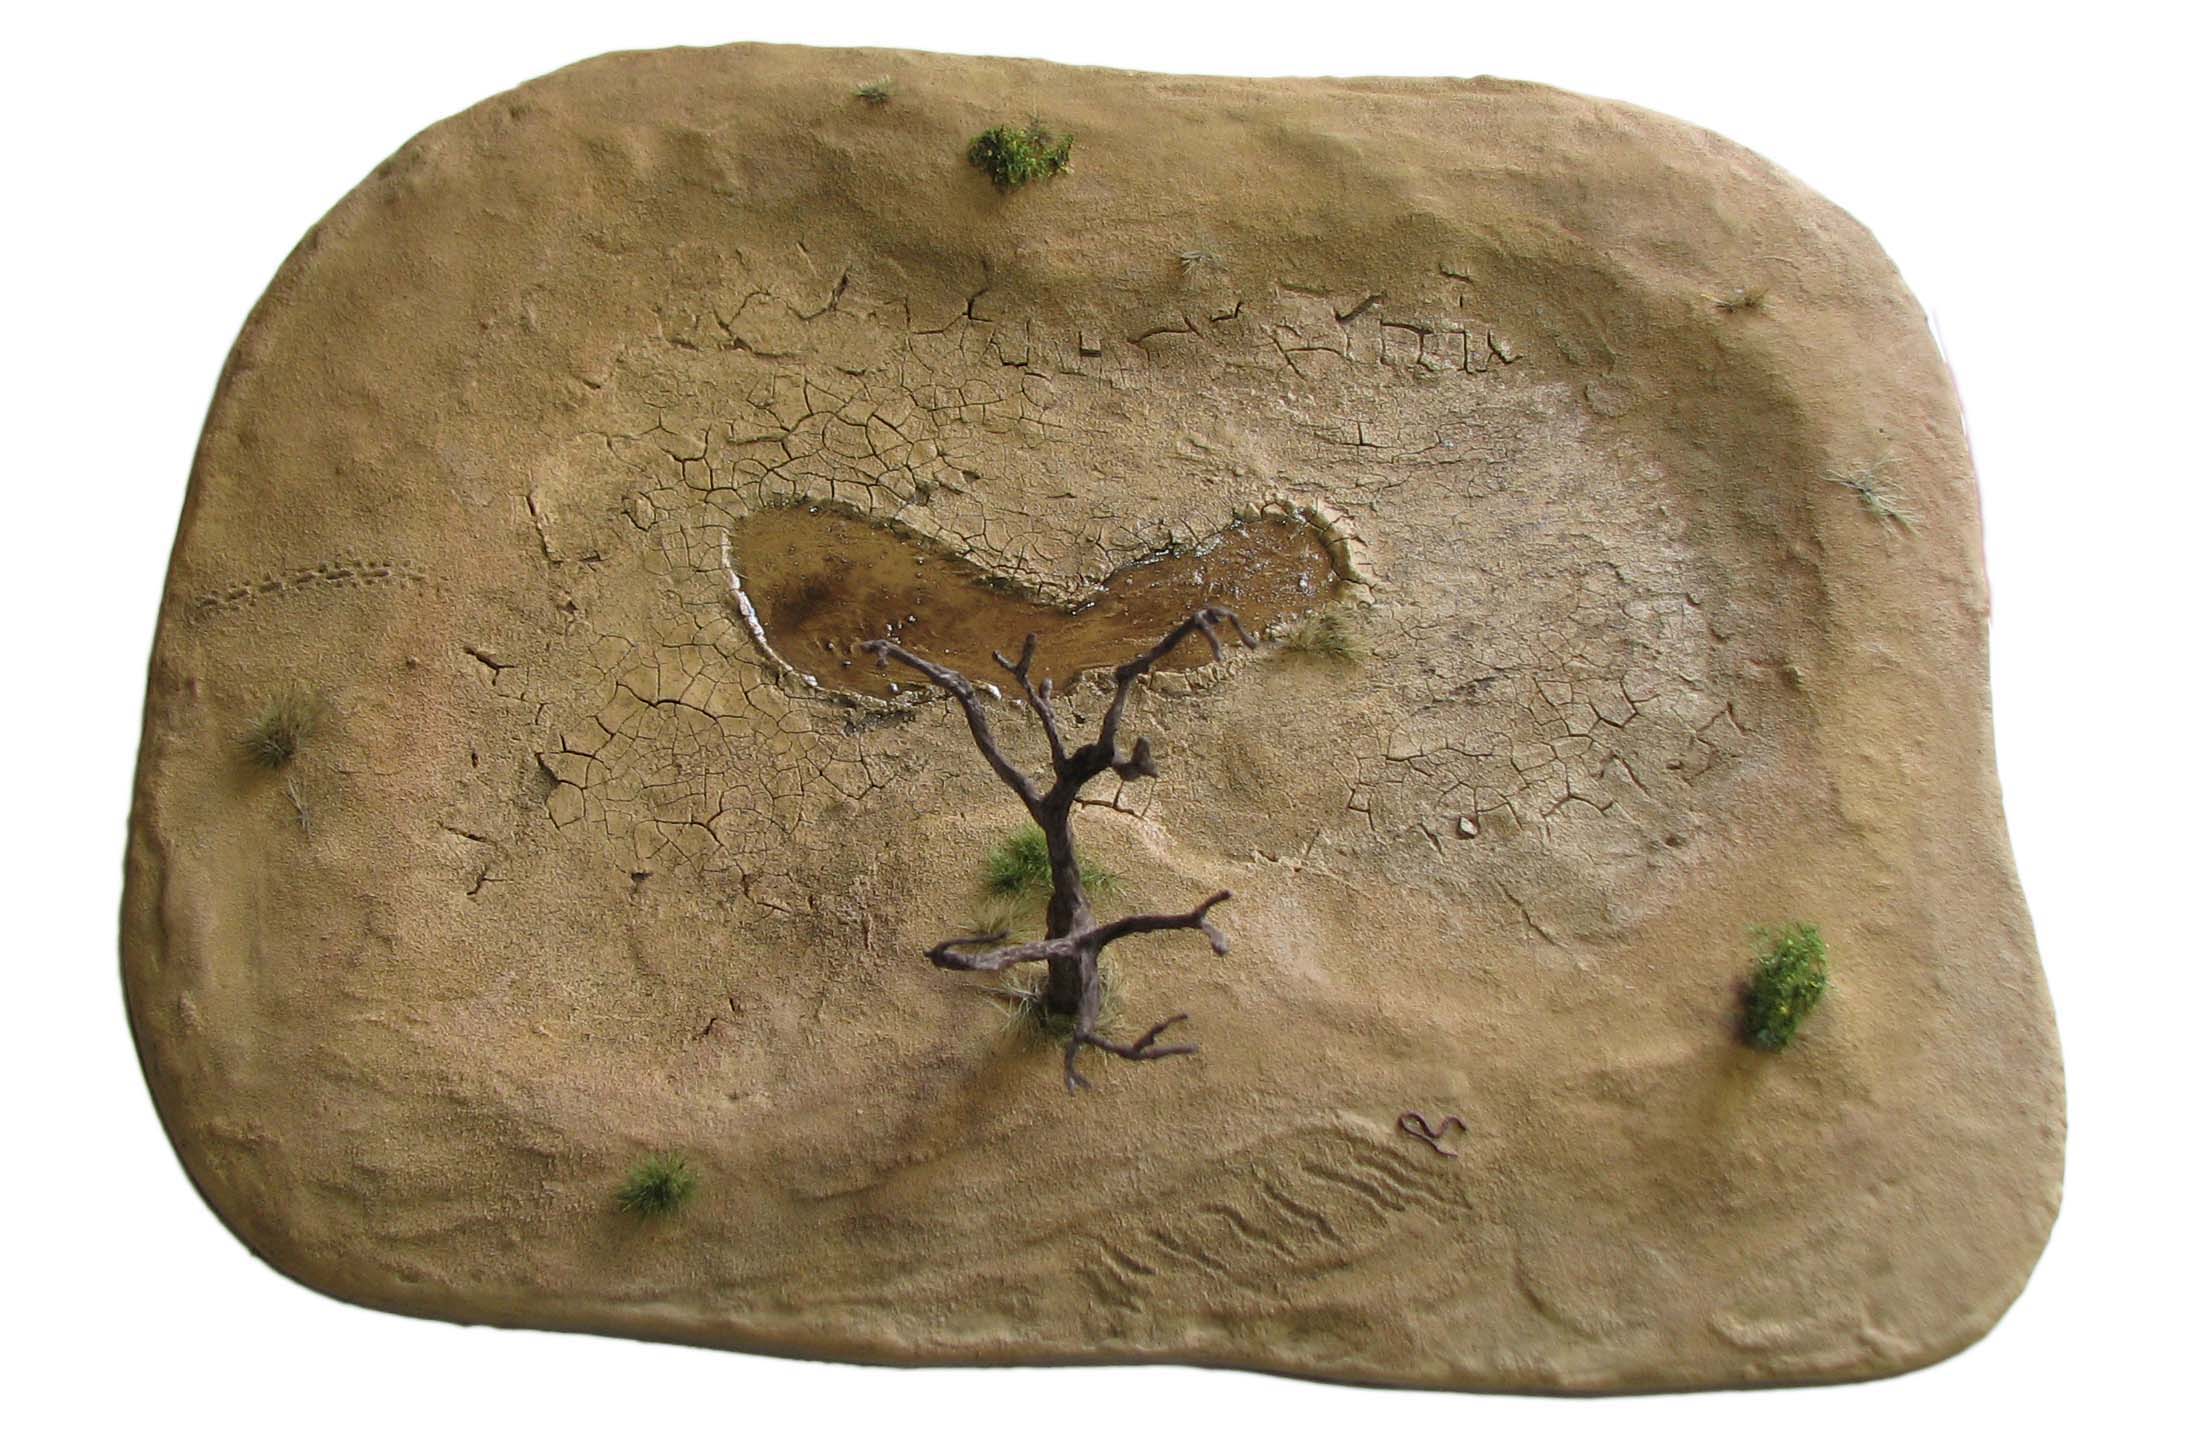
Now we make a tree armature out of wire, add a layer of acrylic caulking or acrylic modelling paste to hide the wire and apply a final layer of wood filler. Then we embed a magnet into the trunk using some greenstuff. With the help of a needle tool carve the dry filler to achieve a bark texture. Given this is a barren tree we don’t need to apply foliage nets, but make sure it features enough ramifications to be visually pleasing. Have a look at my magnetised hills tutorial, too, for some more ideas how to go about magnetised trees.
Add the tree to the dry lake bed and you are finished. Yay!
More fun with dry river beds
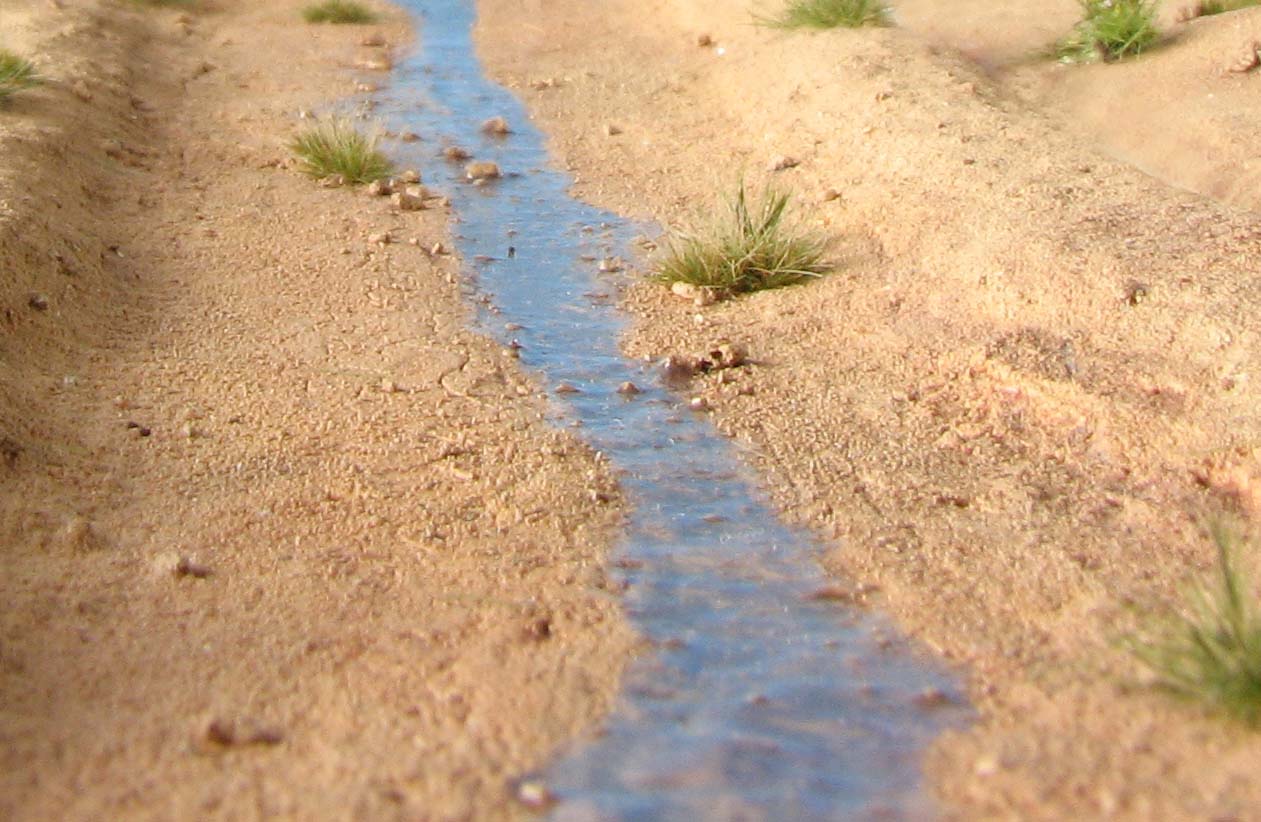
The techniques above can also be used to model a dry river bed. Once again we first build up the river bank and then use filler and crackle paste to cover it. Acrylic varnish can also serve as a faint water stream. The piece shown below is about 30 cm long and you could combine it with other pieces that bend or are straight to cover a table, just as your scenario demands.
I hope you enjoyed this short tutorial and found something to adapt for your own projects. More tutorials on arid terrain will follow, featuring dunes, rough terrain covered in deep sand and desert rocks shaped by the elements.
Until next time and always wield your brush with honor!


I’ll have to have a look at it to tell you that, I’ve glanced but not unpacketed it been no need thus far but, ill get it done.
Thank you. Always hard to tell from the smallish pictures on the website.
dont thank me yet i often forget things or take an age lol
Oh, you know in the last picture how did you do that kinda spikey bush thing the tallest plant on the image?
That is a piece if MiniNatur pine tree foliage netting. I often have off-cuts that make excellent thistle-style plants. I drill a hole and insert them a tad, which assures a good and straight stand.
AH great got some of that, i’d use the cherry blossom in a lusher environment,
Good idea, I think I have some cherry blossom sample somewhere. Is it flock based or more like little leaves that resemble cherry blossoms?
Nice post and tutorial, and I am no bot. Noticed recently that I got a few comments on mine that really were written suspiciously in terrible English. Anyways, nice to read this D&B! Someday I will use this!
Thank you, glad you like the tut and may use it in the future. I had a similar string of bot posts the past days, but with the first one didn’t want to jump to conclusions based on English proficiency. I guess the non specific wording gives it away. Anyhow, hope the bot filter will sort future ones out.
Helpful info. Lucky me I found your site accidentally, and I’m shocked why this coincidence didn’t happened in advance! I bookmarked it.
Always happy to share the love for building terrain. Glad you found my site. You can also subscribe via E-Mail, Twitter or Facebook to get a notification when I publish something new.
In retrospect this could well be spam…no matter I also welcome bots into the fold :P. If you are not a bot excuse my comment, it is just a very unspecific post.
Simply amazing!
Thank you, much obliged. More to come in due course.
This is fantastic! Thanks! I have been interested in getting some quality terrain made for my table at home and this goes great with my desert mat.
Thank you VoltRon for your comment. Glad to read that this is useful for making some terrain for your gaming table. What kind of set up did you have in mind?
I have one of those FAT Mats in desert style, and this would mostly be for Warmachine and/or Malifaux so this style stuff of playable yet good looking is exactly what I’m looking for.
Also I’m a terrain novice so I appreciate all the pictures!
[…] via Mirage – Making a dry desert lake or Oasis — Dagger and Brush, Daggerandbrush, dagger brush […]
Thank you for the shout out! Much appreciated!
is there any chance you could go a bit into detail about the vegetation and shrubs in the next tutorial? i bought some of these for tufts and tiny bushes https://www.ebay.co.uk/itm/x117-sheet-Self-adhesive-static-grass-tufts-Model-scenery-flock-wargames/271786927542?ssPageName=STRK%3AMEBIDX%3AIT&var=570956045523&_trksid=p2057872.m2749.l2649 also have some seafoam for arid plants, but i kind of want to go abit further than that. i am sure all of those extra bits i got from mininatur will have something amongst them that i can use here. p.s you know when you put some wash on the tufts and such, do you just drip it from a brush?
Ahoi. Have a look at step 14. in this tutorial for a visual reference:
https://daggerandbrush.wordpress.com/2015/06/21/built-on-shaky-ground-flexible-wargaming-terrain/
I thin the wash down about 1:1 with water. With a brush I apply a brush load worth of wash and try to cover the bush evenly. I actually brush against the tuft. When it sets it will collect at the bottom of the brush. Repeat if you want more colour variation. Brown works with green and brown brushes. I basically used whatever I have lying around from MiniNatur. I could make a showcase for the MiniNatur products I have, but that needs to wait till February, as I don’t have access to my hobby stuff at the moment.
Seamoss is a good idea to depict arid plants. I recommend to soak it in some thinned down acrylic medium to strengthen it. Plasti Dip is also a good way to reinforce it.
oh I never read that tutorial, I think when I looked all the way back through what you have done, I wasn’t that interested in making usable terrain and just doing display stuff.
oh and yeh good idea with seamoss as i can tell by looking how fragile it will be given how dry it is, i wonder if vegetable glycerin would keep it more supple, though given it is native to a desert its probably never that moist.
Agreed, a very interesting and well-done tutorial.
Thank you Ann, much obliged. I am glad this is of use to you and a good read.
Awesome, I appreciate our tutorials as I always learn something new.
Dear Daniel, in turn you comment is appreciated, too, as all the feedback I get really motivates me to finish projects. I hope you can use some of the techniques in your own work.
Perfectly timed tutorial, as I’m doing a project with just such an environment though all I knew for certain was I was going to use the very paste you are using as I have some. Now to read the tutorial in full as i only skimmed.
That is indeed excellent timing. Looking forward to see your take on the paste.
Fantastic! As always, a superb tutorial with great tips!
Thank you Crittersmasher. I am glad the tips will be of use for your own work. I really hope – work permitting – that I can release content posts more regularly again.