
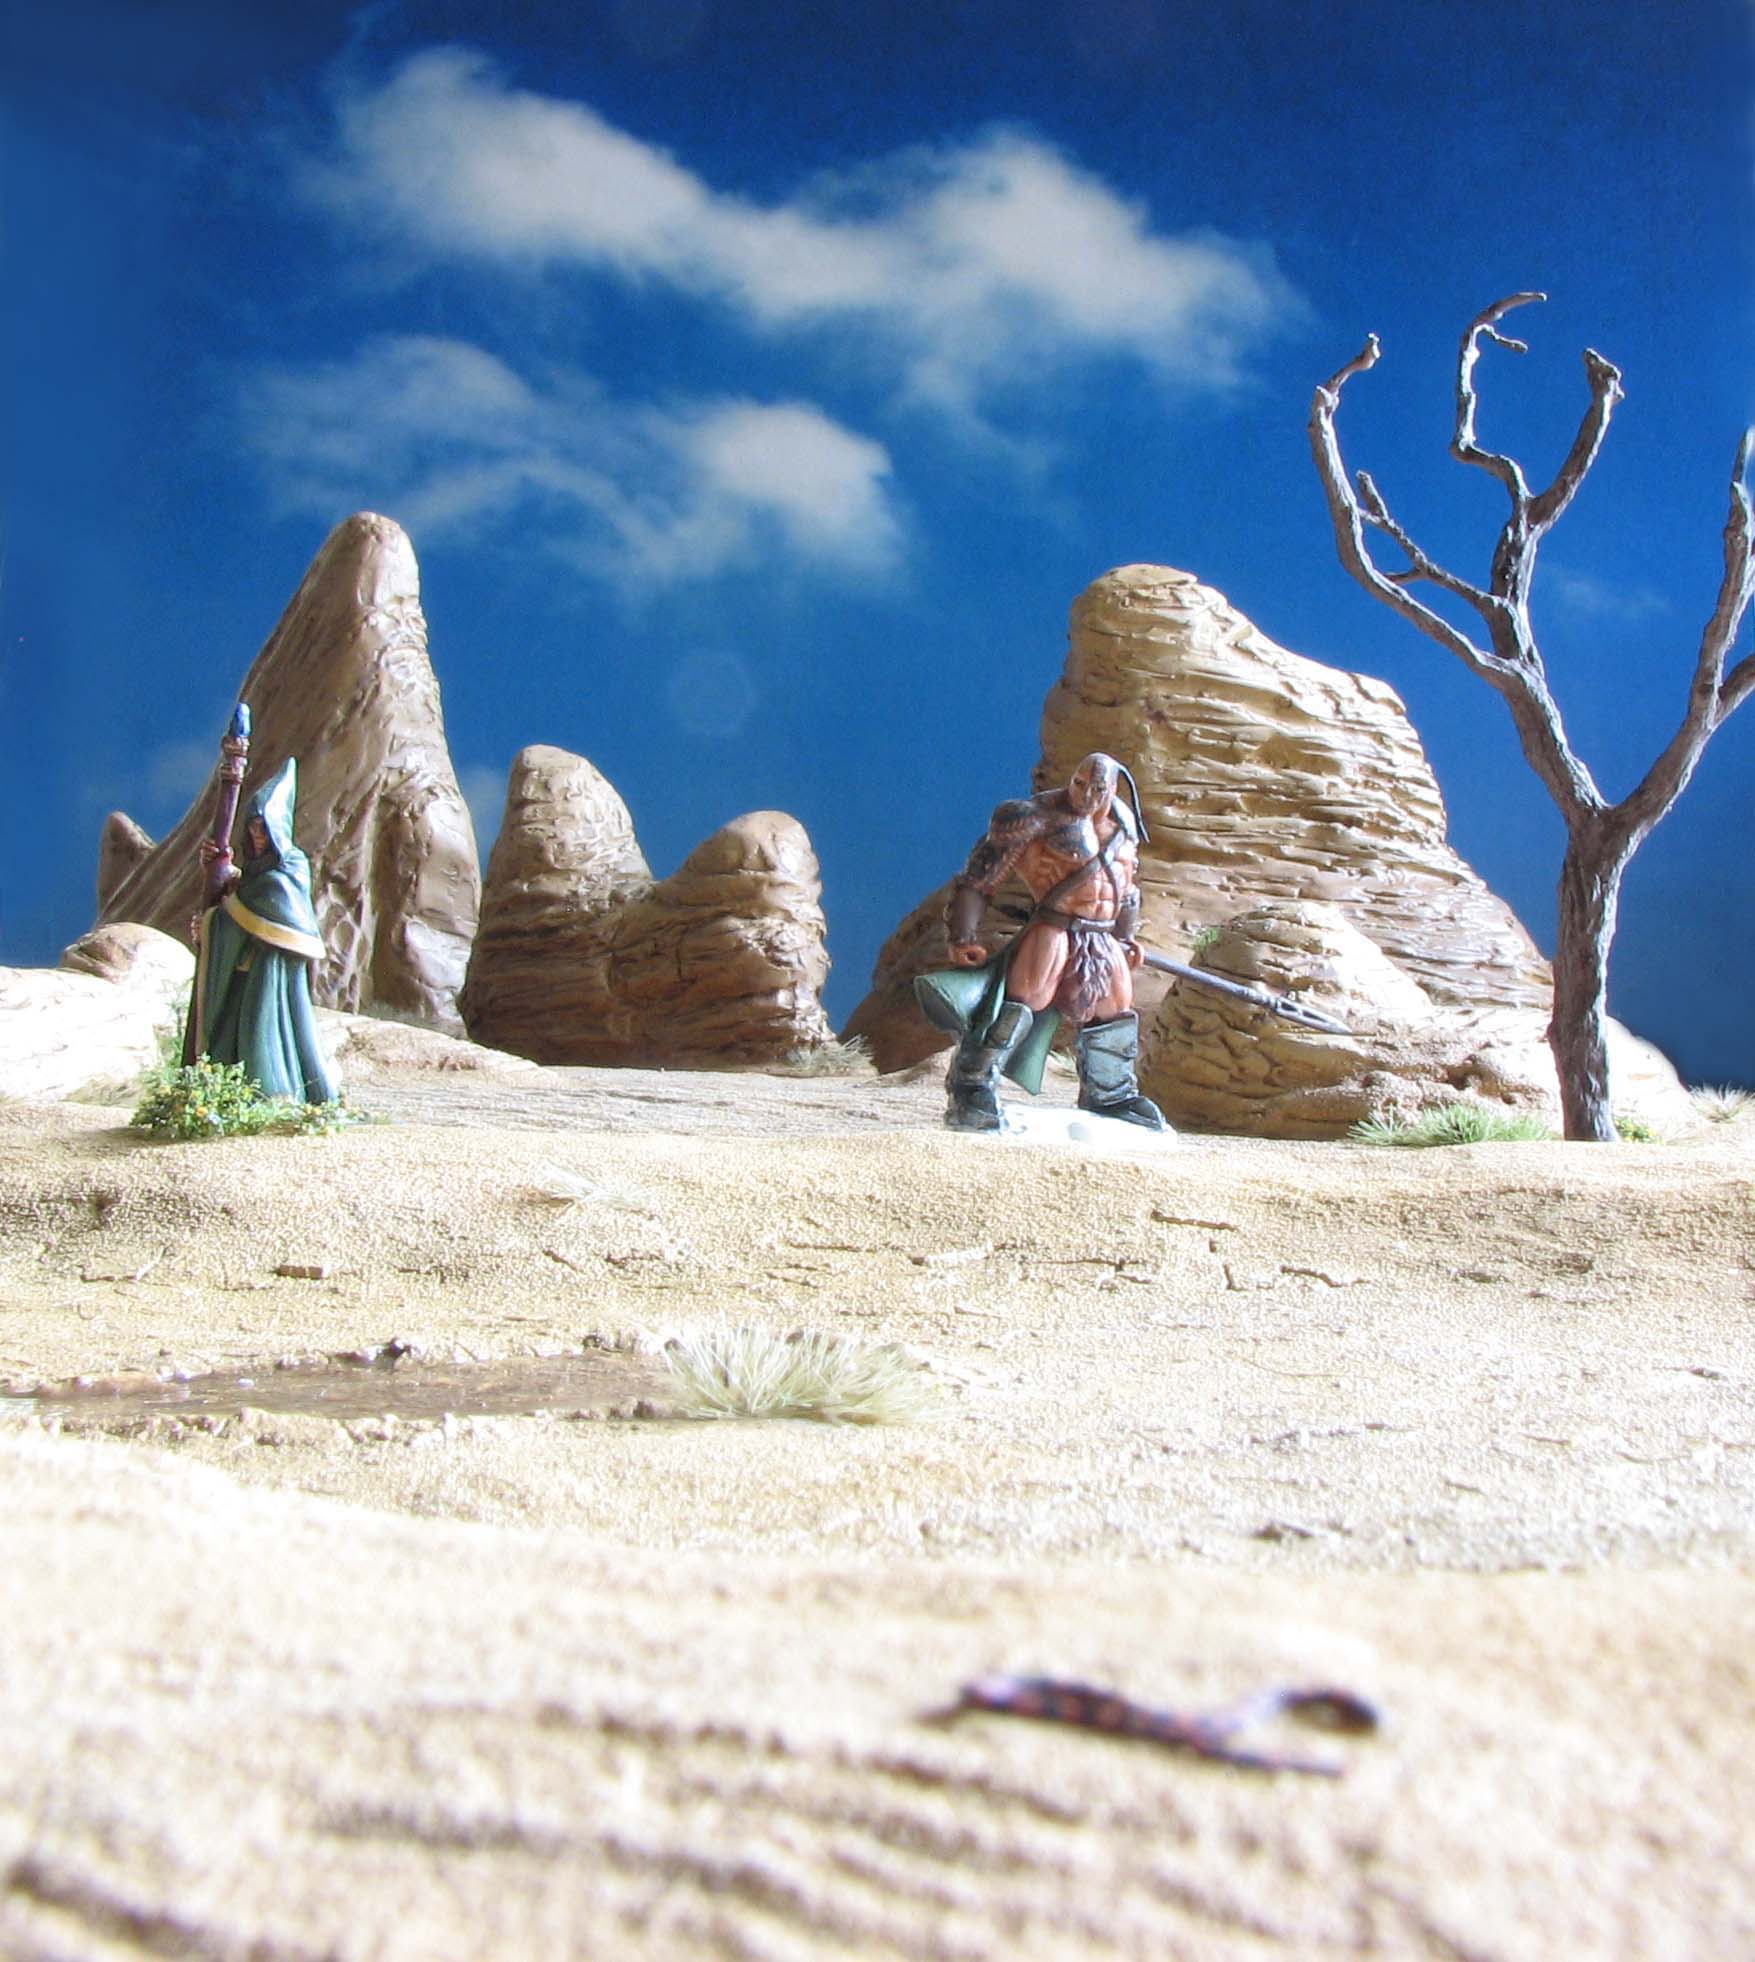
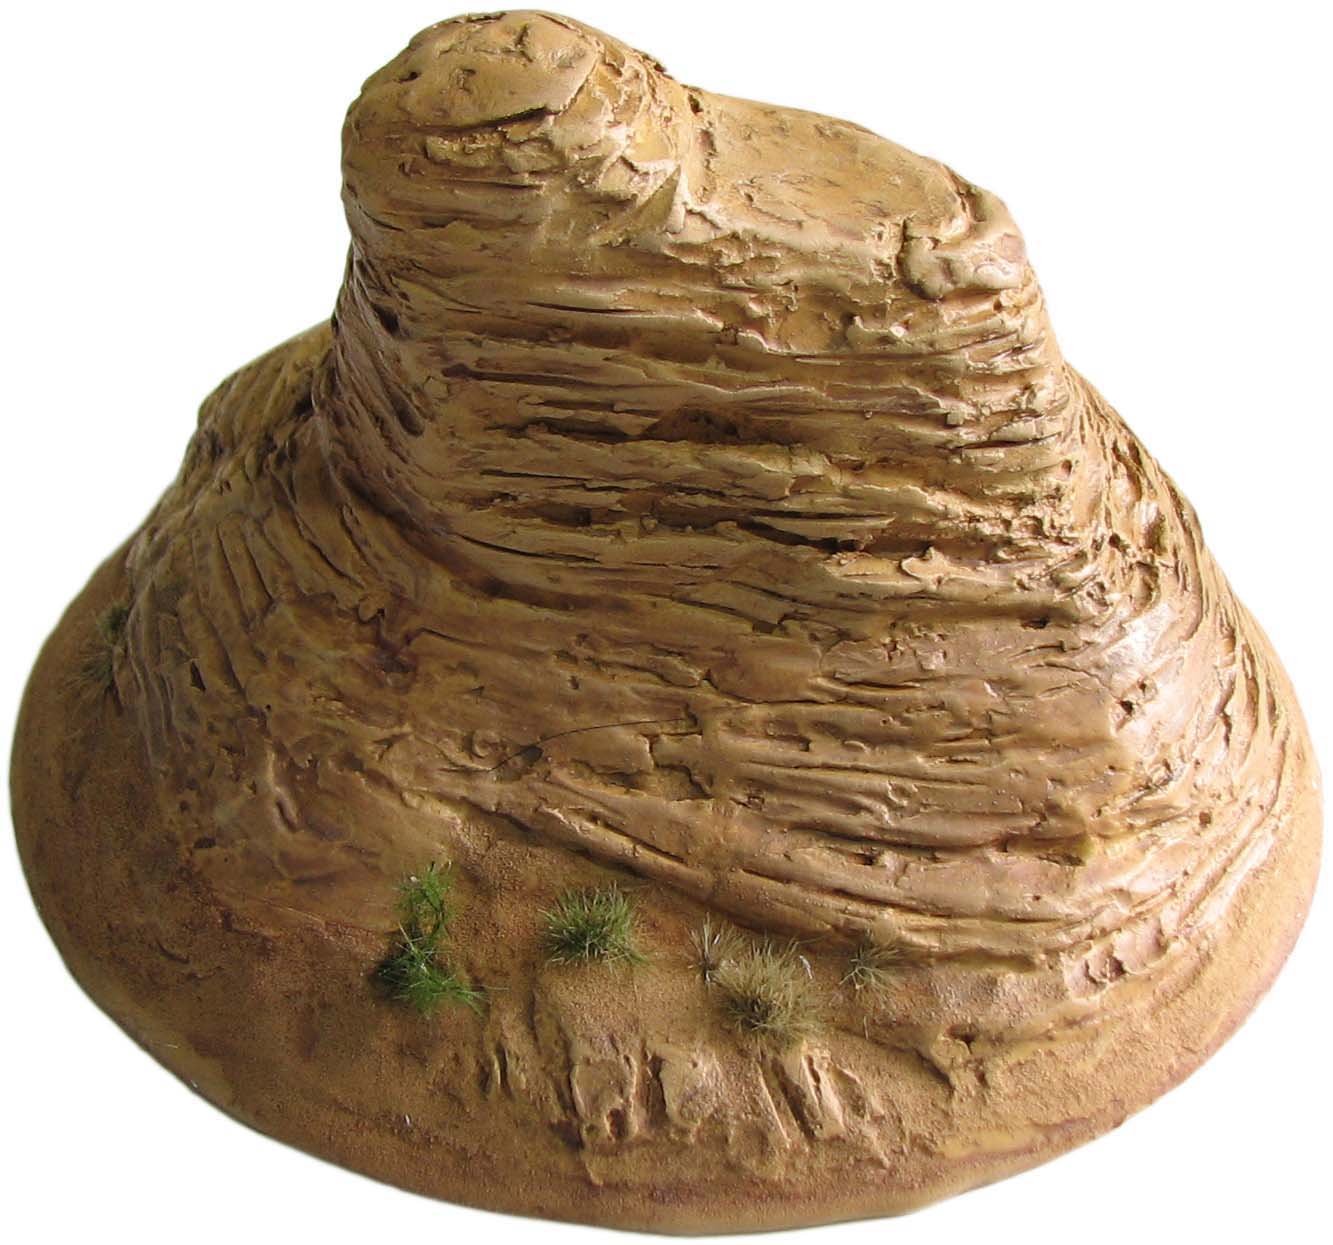
Your desert themed gaming table features dry lake beds and areas of deeper sand. So far so good, but this time we go vertical. Just as promised we will focus on large wind-swept rocks in this installation of the arid terrain series. The rocks are suitable as stand-alone pieces and can be freely placed on the gaming table. Depending on your design choices they can serve as inaccessible line-of-sight blocking terrain or be climbed by miniatures to give them an advantage. Naturally integrating the rocks into a larger structure or modular gaming board is a possibility, too.
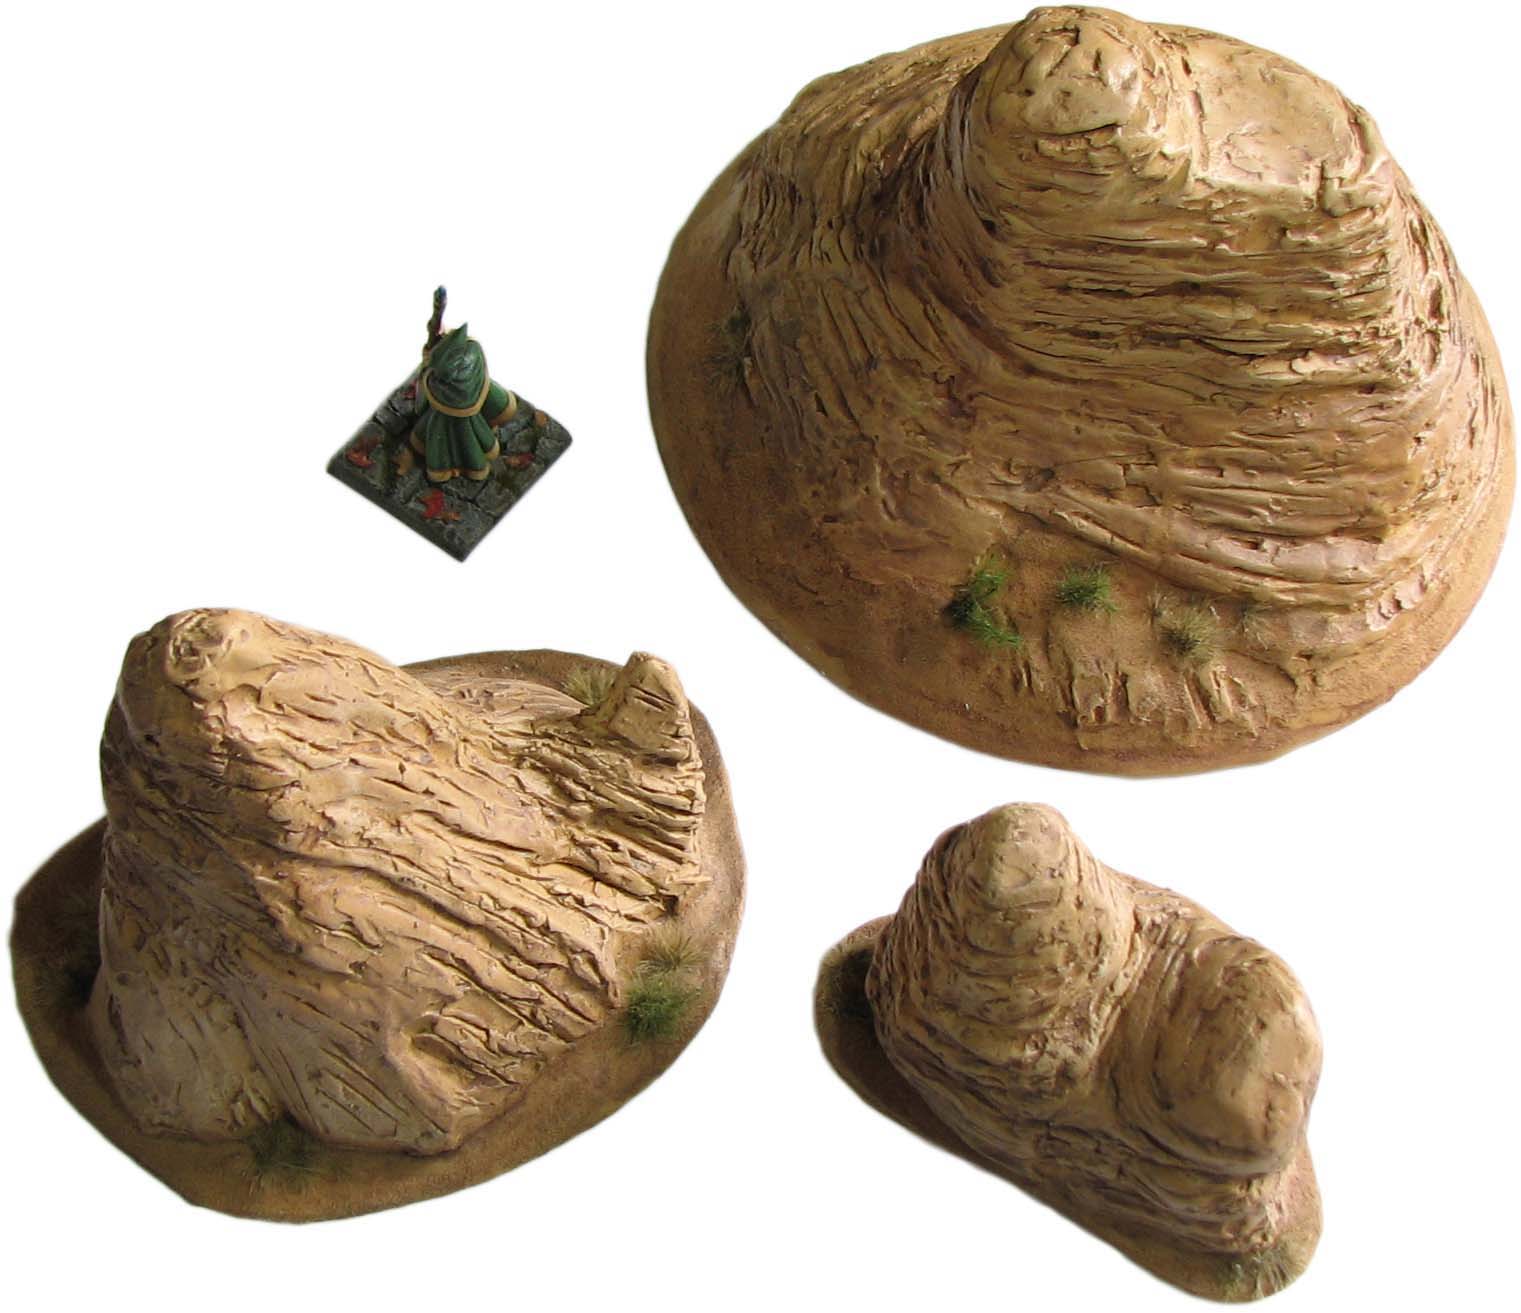
Per usual illustrated step-by-step instruction will guide you through the process and scenic photographs will provide examples of how these rocks can liven up the gaming table in combination with the other pieces we built in this series. So take a pick and chisel and come along, but mind your step.
Provisions to build wind-swept rocks
Tools needed:
- Sharp implements: A scalpel and a needle tool to carve styrofoam and filler.
- Paint brushes of various sizes to apply paint and glue, but also to drybrush.
- A Dremel to bevel the MDF base (optional) and to shape the XPS. If you don’t have one some coarse and fine sanding paper will also do.
- An airbrush or sprayer bottle to apply paint or a fixative (e. g. matte medium).
- A palette knife to spread out wood filler/acrylic medium.
Glues needed:
- Super glue. I use Insta Cure+ by Avetek.
- Styrofoam glue. Be careful here to choose an appropriate product, as many glues react with styrofoam and dissolve it. I use Selleys Liquid Nails Fast.
For the groundwork and the rock:
- A round base. I normally use some 3mm MDF or 3mm HIPS plastic sheet. Alternatively you can use cork or other materials. Just make sure they don’t warp.
- Shellac to seal the MDF, should you use some, and to prevent warping.
- Extruded polystyrene (XPS). That is the dense stuff for construction, not the crumbly stuff you use as packaging. We will use it for the rock outcroppings.
- Wood filler. Either ready-made or as powder. I use Bostik Fill-and-Fix. We will use this to cover the XPS.
- Acrylic matte medium. We will use this to seal the piece and also use it as a glue to attach sand.
- Finely sieved soil from your garden or backyard. Can be any colour, but a lighter brown works well for an arid environment. You can also buy decorative sand in many one dollar shops. The advantage is here that the sand is very fine indeed and you don’t have to sterilize the soil or sieve out larger pebbles.
- Small cork pieces or pebbles to depict small rocks (optional).
- Craft paints (light browns, beige, tans or white) to drybrush/paint the piece.
- Tamiya colours if you want to airbrush the piece. Thin with some IPA before use.
- Matte varnish to mix with pigment and water to fashion a brown wash to add contrast to the rock outcroppings.
Vegetation: Thorny brushes and dry grass:
- MiniNatur grass tufts (optional). I used a selection of autumn grass tufts to depict thorny bushes and dry grass. Naturally you can use any tufts you have on hand and also clump foliage.
- Matte spray varnish to reduce the shine of the grass tufts. I use Testor’s Dull Coat.
- Brown acrylic spray paint to slightly darken the tufts or alternatively a brown wash to dull the shine of the tufts and grass.
From the ground up – building the rocks
Building the wind-swept rocks is quick and easy. Usually I go to great length to make my pieces as naturalistic as possible. However, this time I focus more on making scatter terrain to fill a table. You can knock out a few hills in an afternoon following this technique, but naturally nobody stops you to invest more time for an even better result.
We start with a classic: Glue some XPS on a base made of MDF or styrene and shape the XPS with a cutter, hot knife or scalpel. As we want wind-swept rocks, smoothed by wind and weather, the XPS substructure doesn’t need to feature undercuts or protruding parts. You can also smooth it with a Dremel sanding bit.

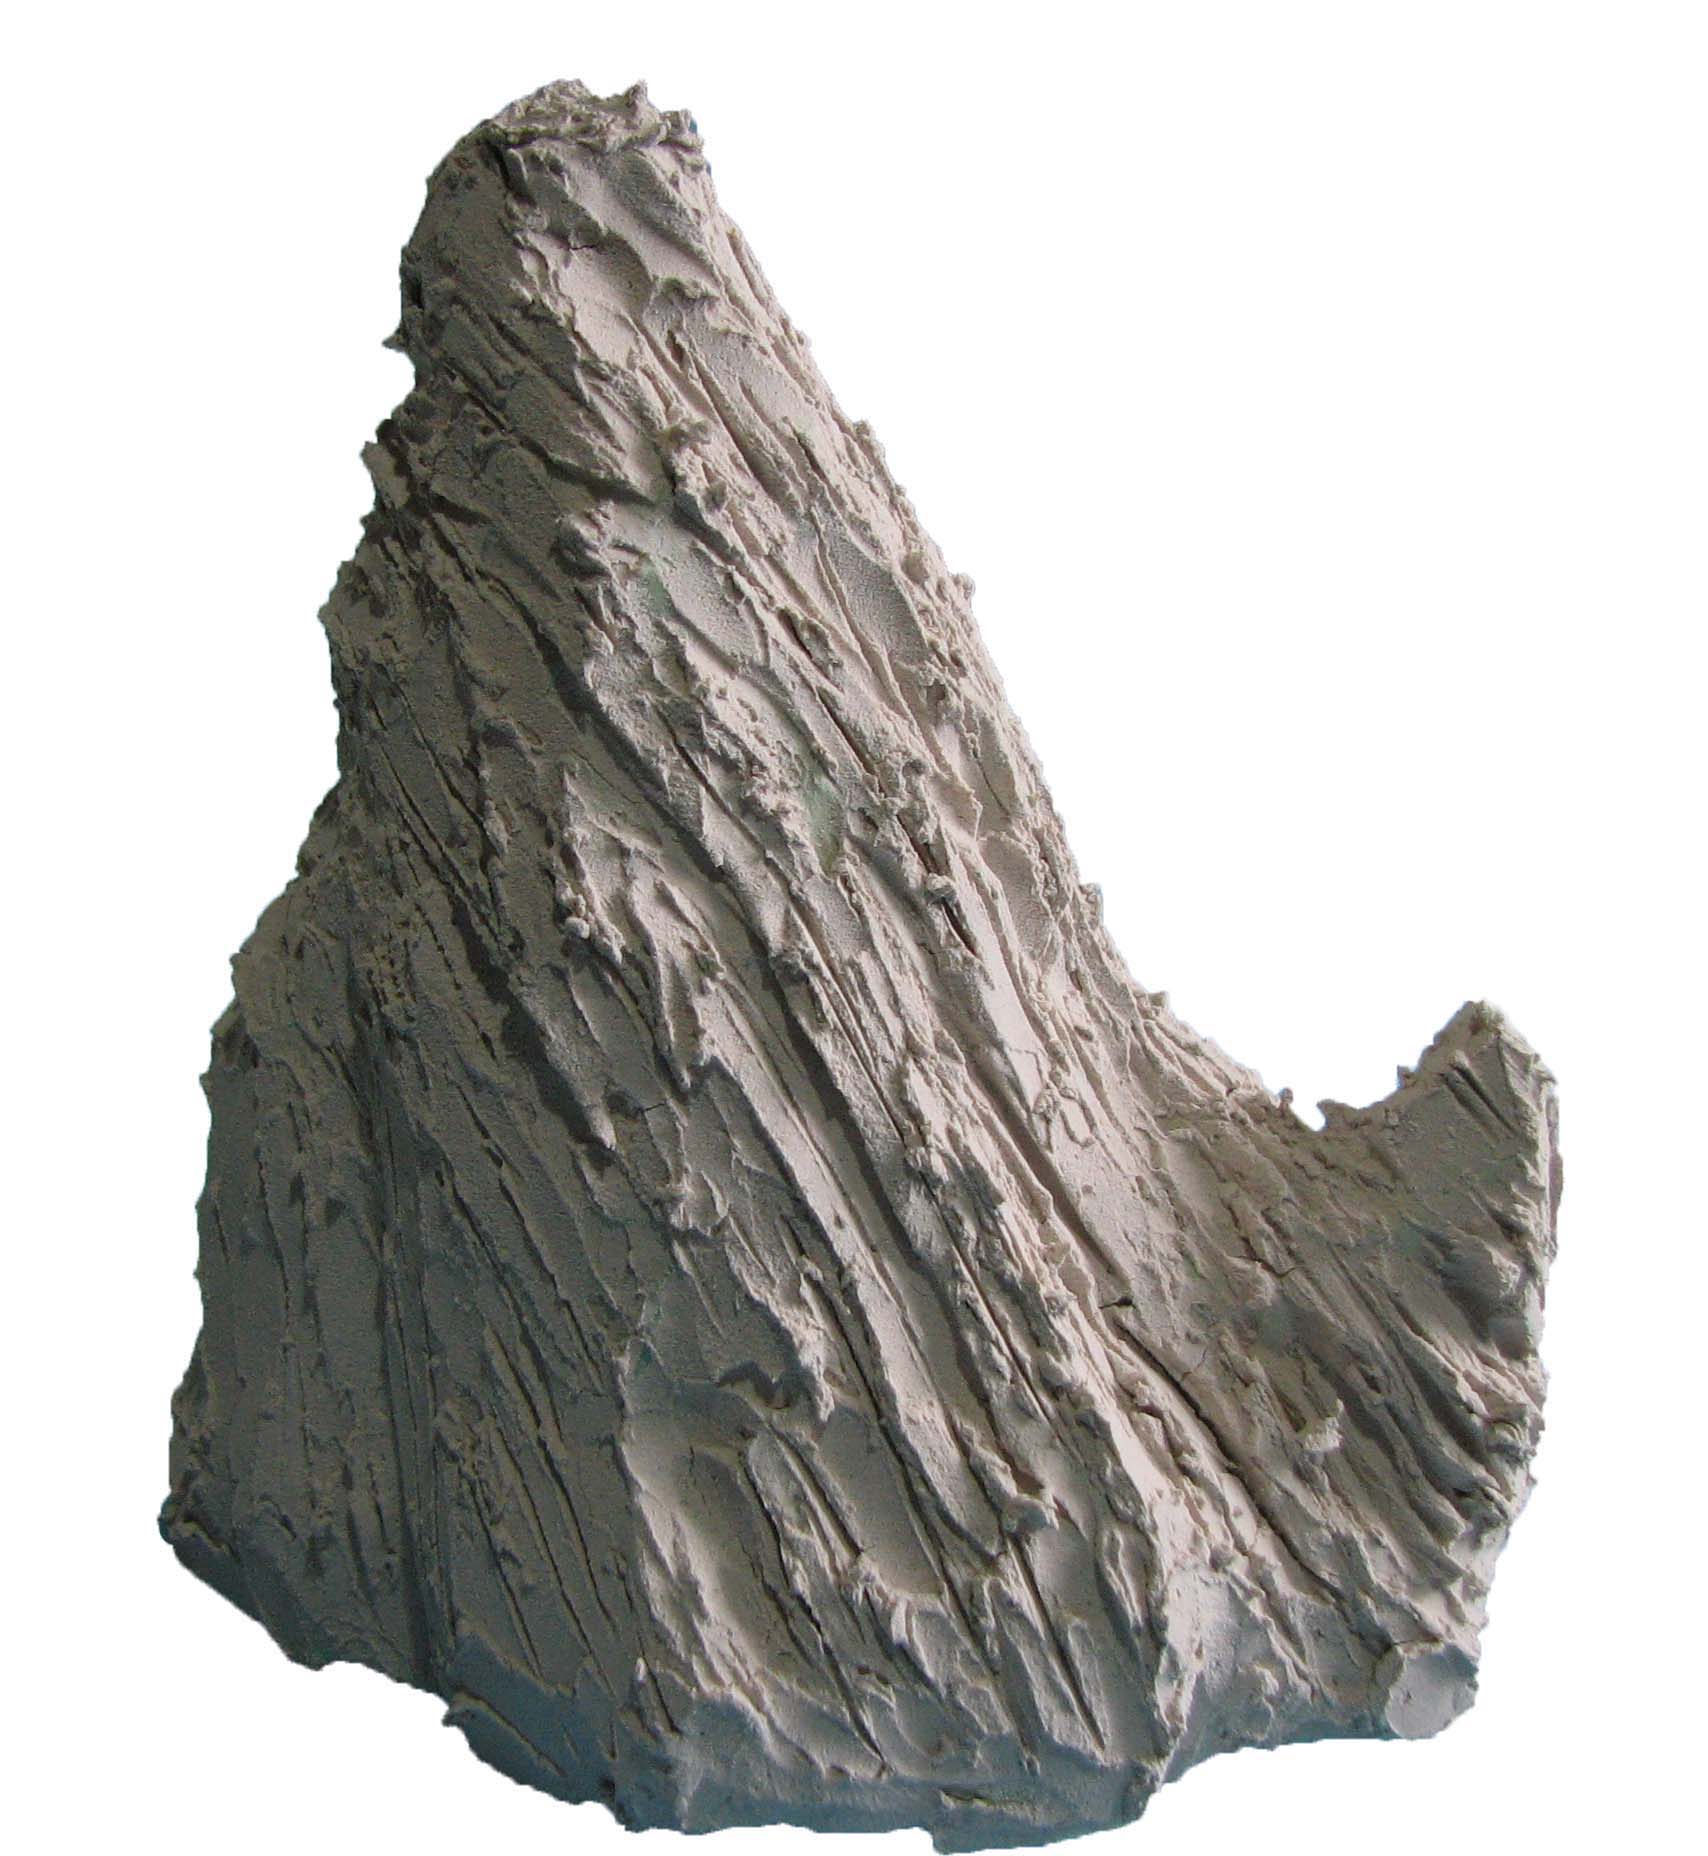
Texturing the outcrops
Next cover the XPS with some woodfiller. Mix some PVA into the filler and a few drops of water. You are aiming for something resembling porridge. While the filler is still wet take a needle tool or a palette knife and start adding strata. I used a reference picture and went quite deep with some of the lines. Let everything dry overnight. Any cracks forming are a welcome addition.
To smooth the woodfiller take a bit of coarse sandpaper and start removing any rough parts. Another pass with fine sandpaper follows, going right into the crevices to smooth them out. In some places you may need to use a steel brush.
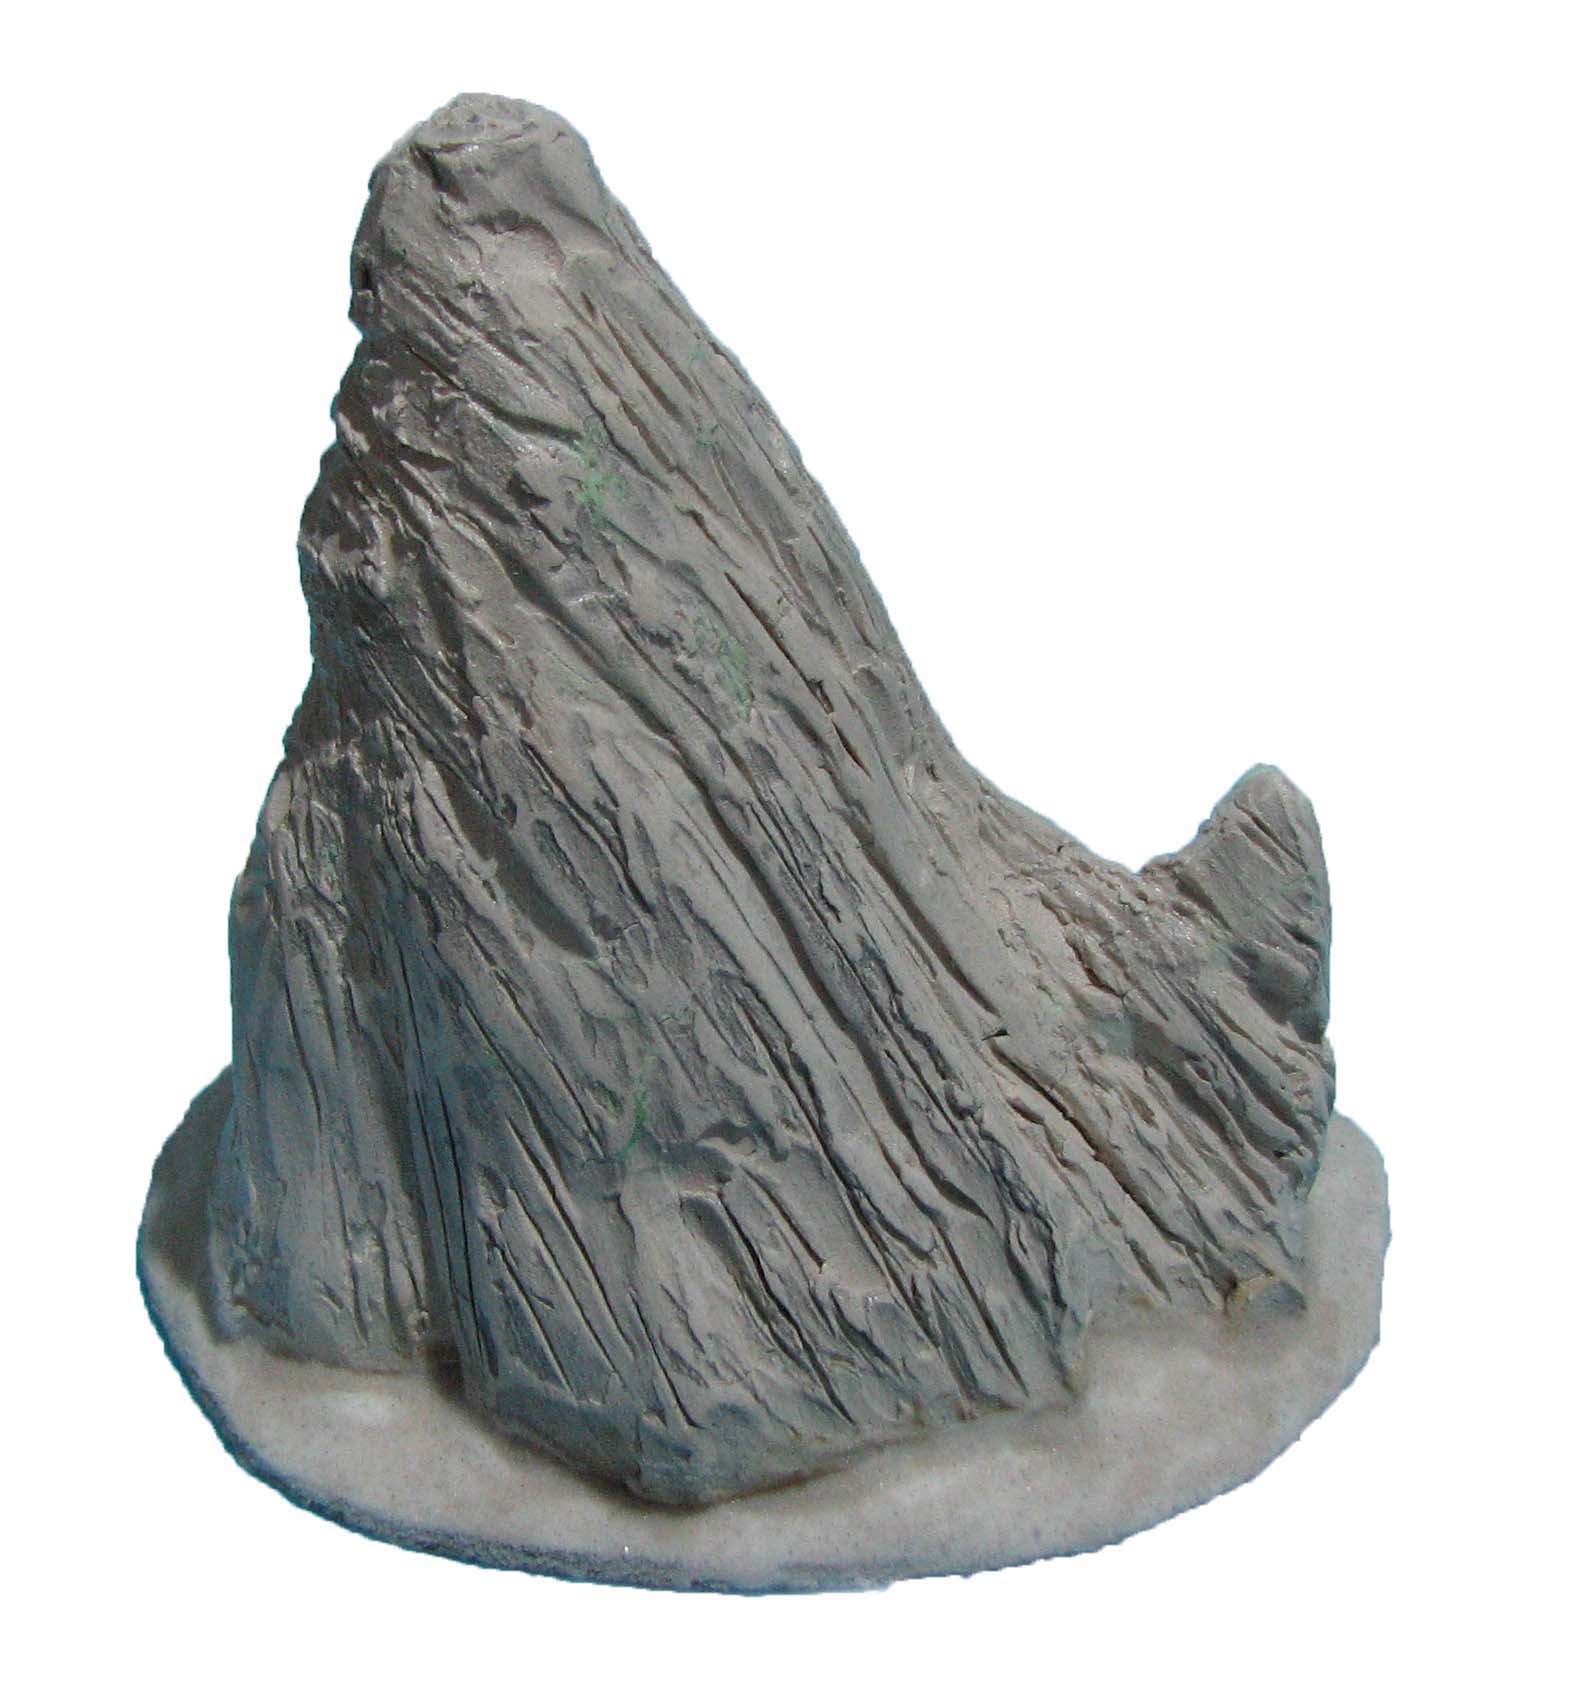
When you are satisfied remove any sanding dust with a large brush. You can also apply a coat of thinned down acrylic medium (about three parts water and one part medium) to consolidate and protect the surface.
It is now also time to add sand to the base. Mix some sand into unthinned acrylic medium and apply this paste to the base. Smooth it out with a wet brush to achieve an even surface, resembling desert sand. Sprinkle some additional sand on top and let the base dry. We can now proceed to the painting stage! Yay!
Painting the rocks
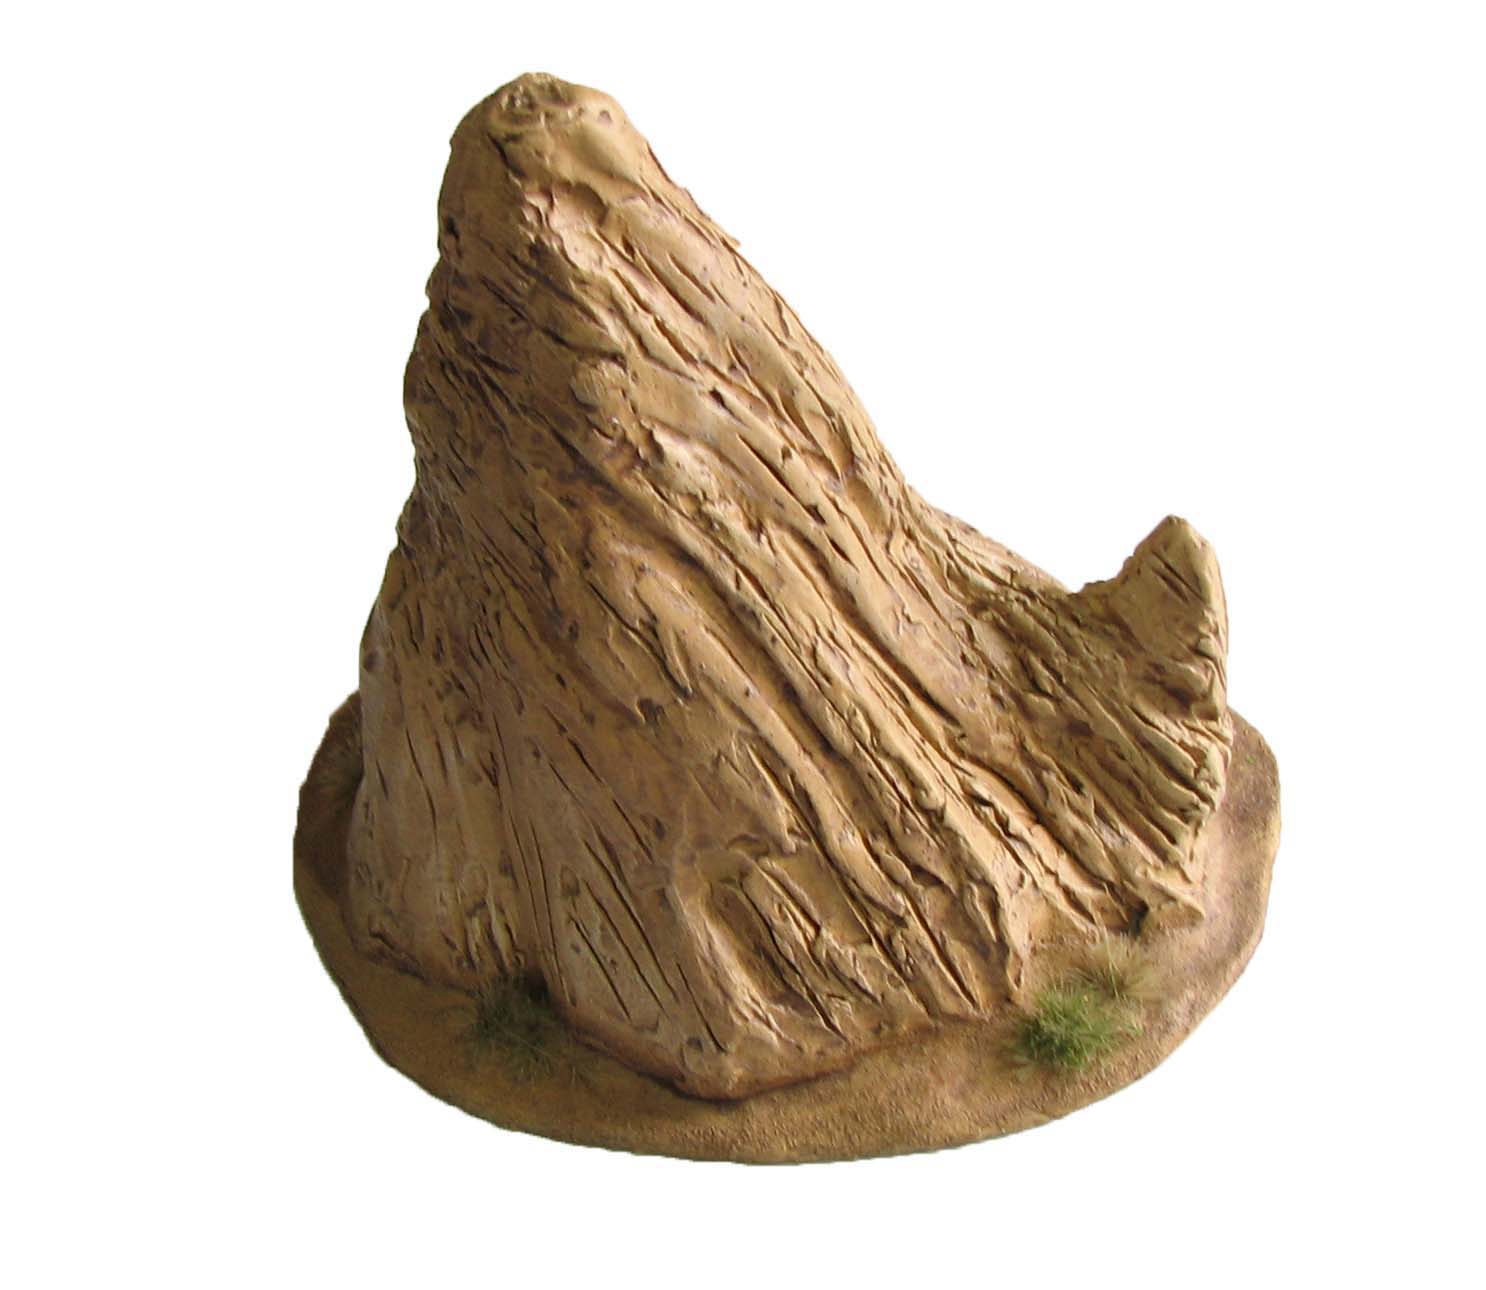
A basecoat of beige or sand is best applied by airbrush, but naturally a brush works, too. This is followed by a drybrush with succeedingly lighter versions of the basecoat. You can use the same colour to paint and drybrush the base.
To finish mix one part acrylic matte medium with one part water and a pinch of dry powdered pigment. Usually I use AK Interactive Dark Earth, but here I mixed some rust colours into the wash, too, and applied it sparingly. All we want is a bit of depth, but we don’t want to darken the rock too much. The wash also adds a bit of red to the stone colour. This works well with the green of the bushes.
Vegetation
Finally add some bushes and tufts to add interest and to introduce a second colour. Usually I fix them down with super glue. When the glue is dry I apply some brown wash (e. g. Agrax Earthshade) to the bushes to kill any shine and make them look more naturalistic. You can also add a final coat of matte varnish to remove any remaining lustre.
Aaaaand your wind-swept rocks are finished! Naturally you can make them bigger or smaller, flat on top to place miniatures or add critters, bones etc. Whatever floats your boat!

Feel free to comment below if you have suggestions, questions or just want to share your own techniques creating desert terrain. No matter what you do, always wield your brush with honor!
Nice tutorial! Great results as well, going to think about these for future projects. Is XPS the expandable foam used for insulation?
Hi, yes it is the denser variety used for insulation.
Superb tuto. add in my favorite !
Much obliged, glad you like the desert rocks.