
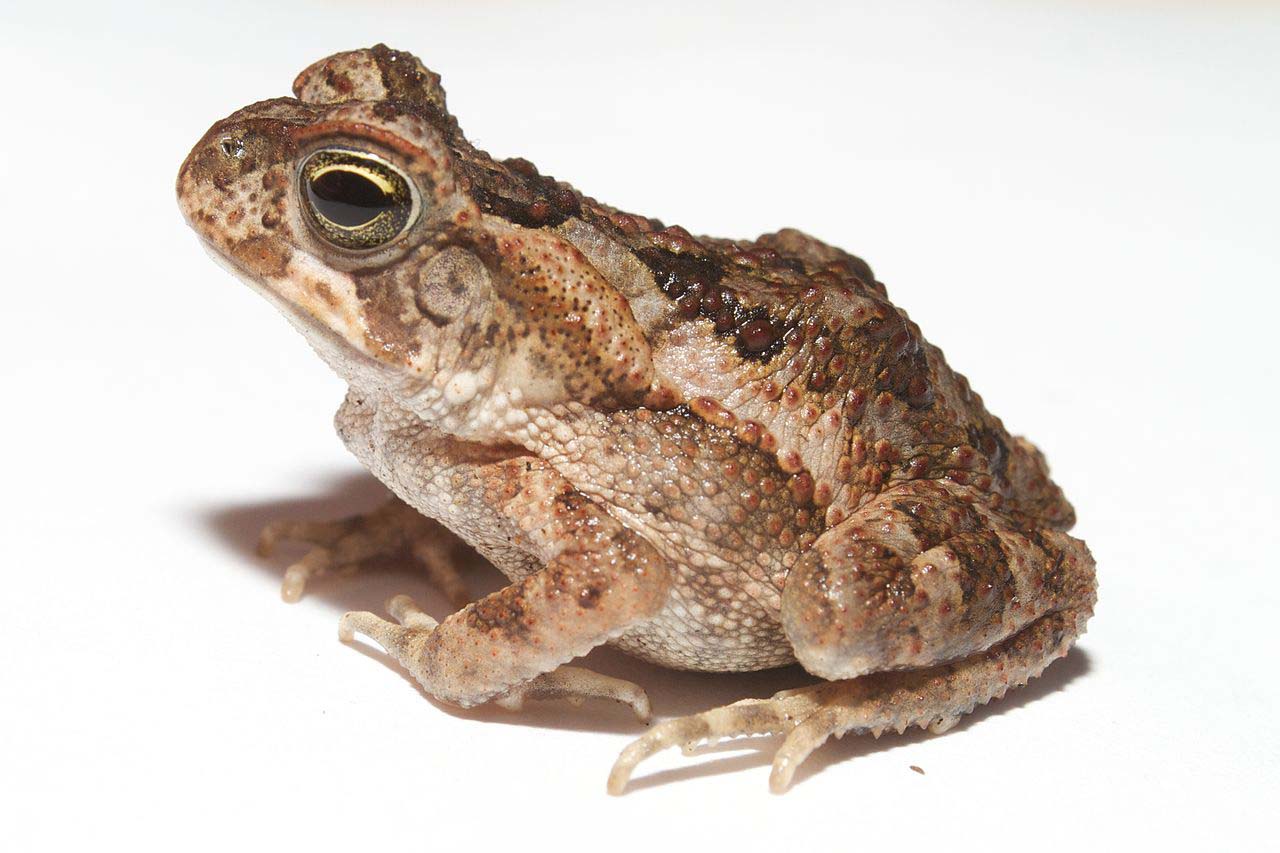
As you know I dabbled in converting and sculpting for a few years now, but I never took the plunge and sculpted my very own miniature from scratch. It all starts with a good idea or concept. In my case: an anthropomorphic toad, ready to crush its enemies, see them driven before it and hear the lamentations of their tadpoles. If you have the skills to make a sketch or concept art you can fixate your vision and refer to it later. The same goes for existing artwork on the interwebs. Search around and get inspired, but come up with something original. If you sculpt something based on an animal you should obviously look at some reference pictures. The cane toad Rhinella marina seemed like a good match, as it is large, poisonous and wondrously gnarly.
Wind in the Willows
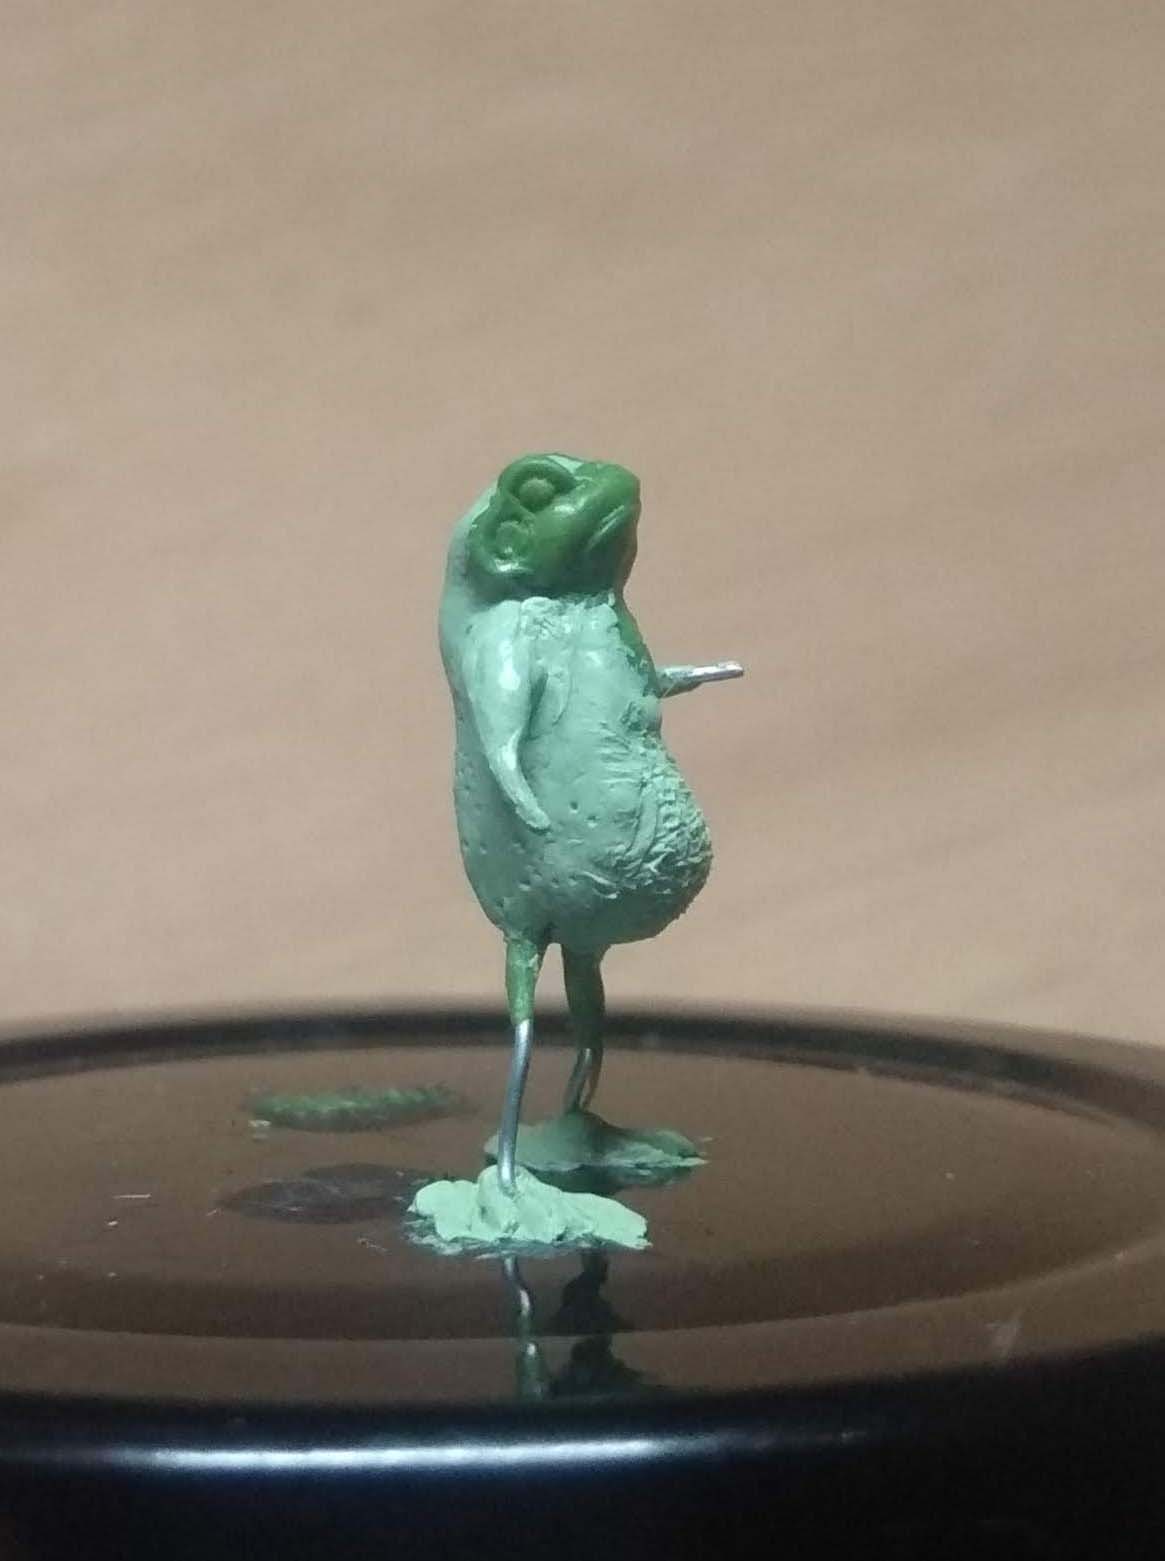
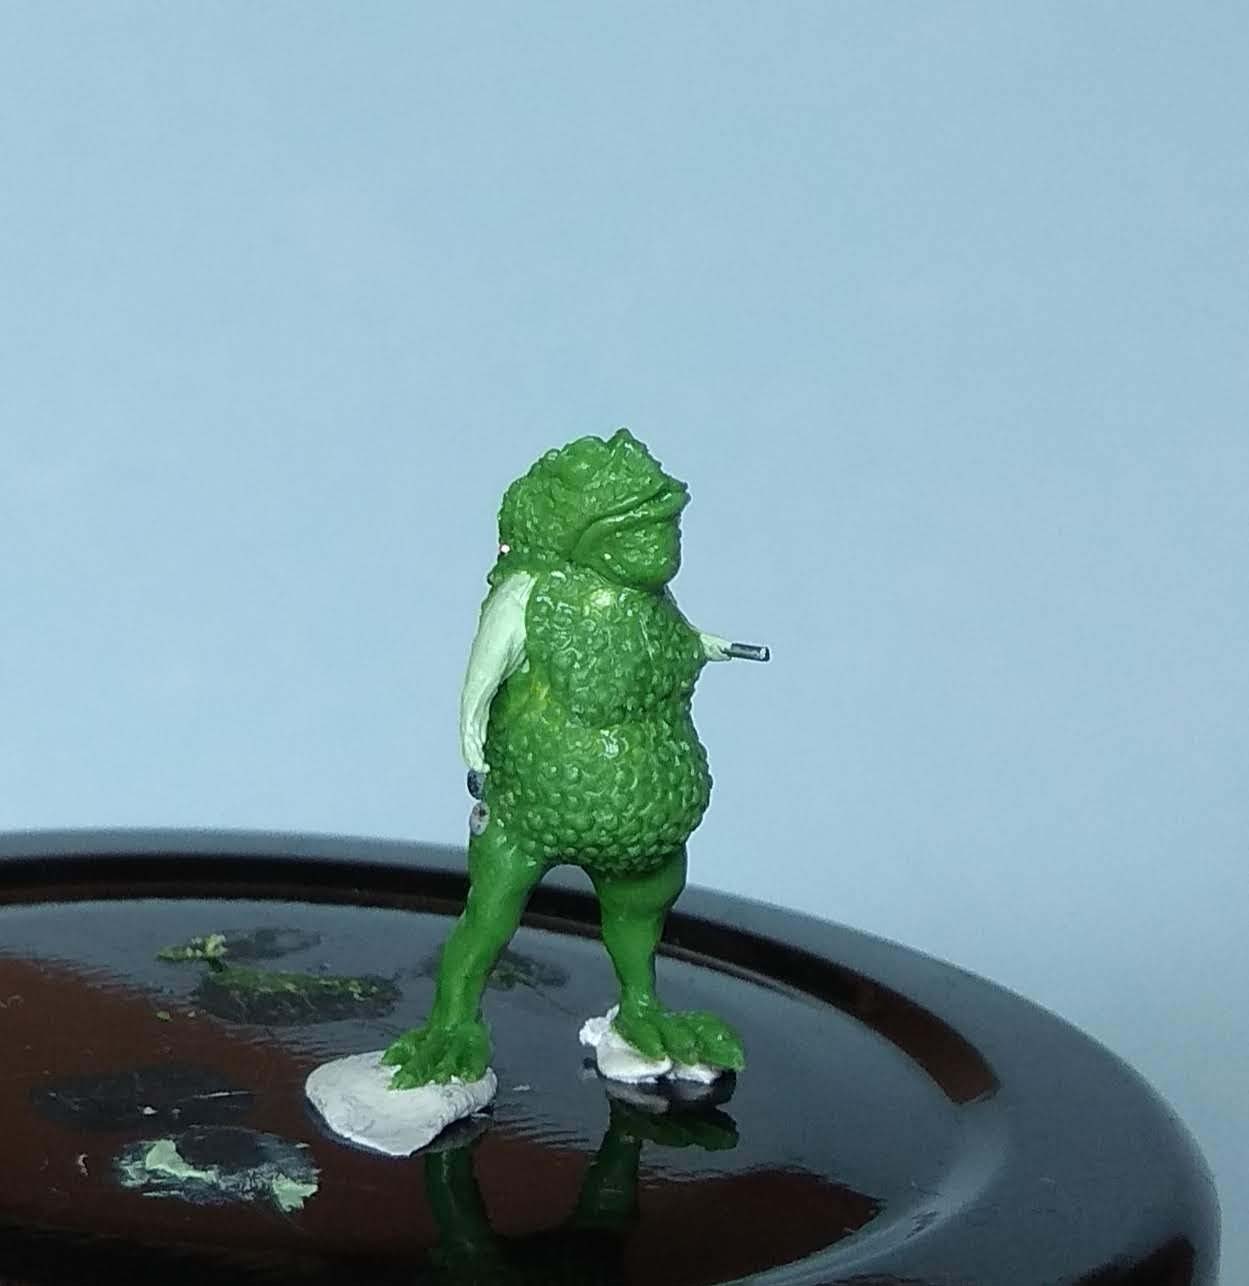
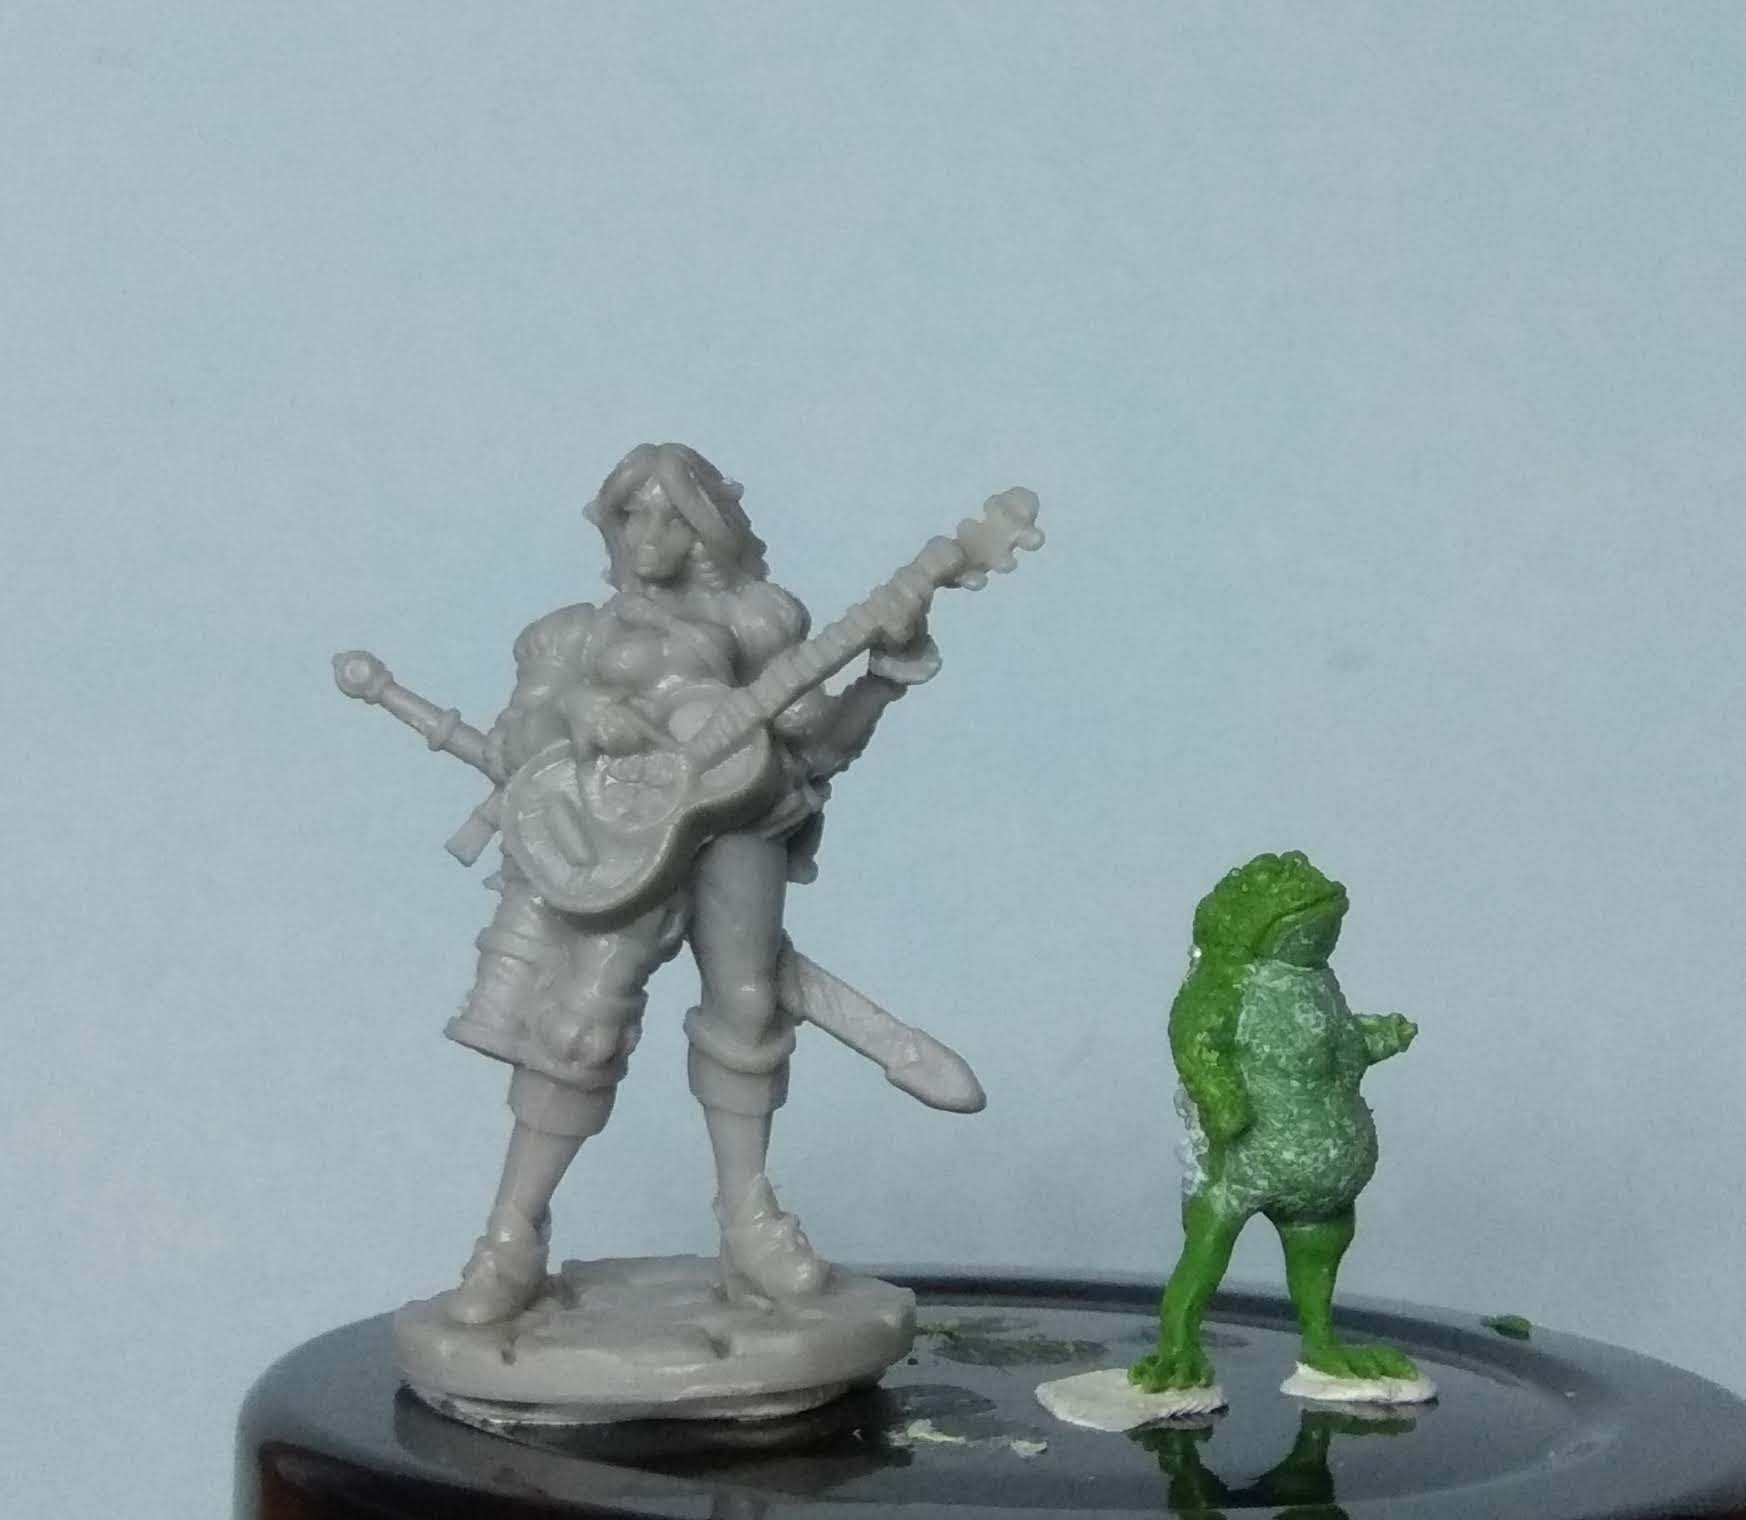
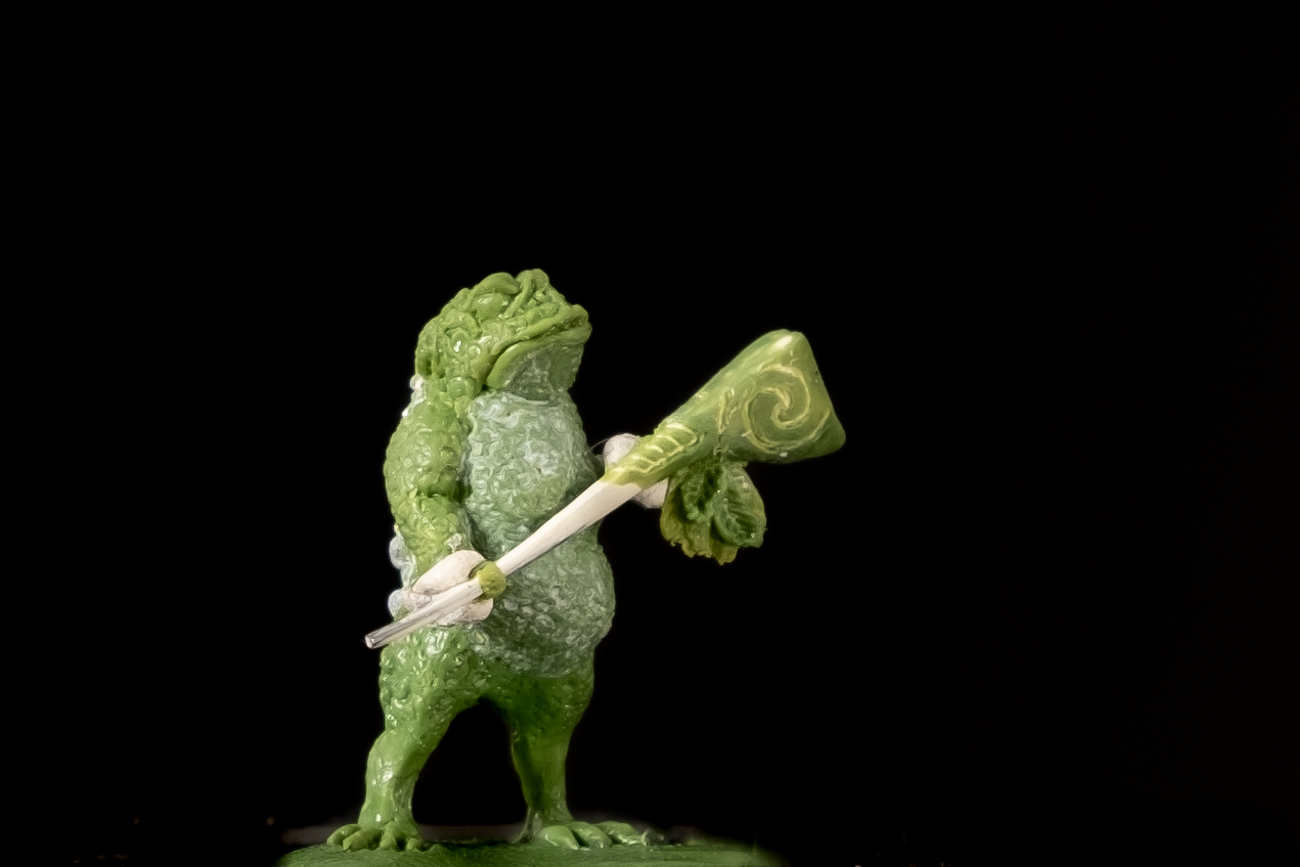
There are plenty of anthropomorphic toad or frog miniatures available. However, they are either sculpted in a comicesque style or wear full clothing or armour. I wanted something a bit more naturalistic and distinct from ‘toads playing humans’ or ‘toads vs garden gnomes’. So I decided to make the toad warrior bipedal, but a bit smaller in stature compared to a human. I kept the head proportionate to the body to avoid a cute ‘bobble head’ look. Instead of armour or loin cloth I wanted a heavily textured skin. Toads excrete an antibiotic and moisturizing substance through their warts. Accordingly clothing would be impractical for such a creature. I decided to still add weapons made of natural materials. While some toads are poisonous, I think this would not be enough offensive capability in a fight.
The wire armature
When you decided on the direction, it is time to fashion a wire armature. You can use any thin and pliable wire. I use 1mm coated and uncoated wire from the gardening/construction section and 0.6 and 0.8mm brass wire. The brass wire is just soft enough to easily twist, but strong enough to keep its final shape. In addition I bought some brass tubes with an inner diameter of 0.6/0.9mm and an outer diameter of 1.0 /1.3mm respectively. Accordingly both wires will fit in the tubes. This will come in handy for pole arms, but also to attach details/extend the original armature.
The coated gardening wire is fine for starters with great adhesion. However, if you think about spin casting in vulcanized molds (and don’t want to make masters using resin first) this wire might cause problems as the coating will not withstand high temperatures. Same goes for super glue to attach details or to fixate the wire. High temperatures cause it to release a noxious gas that might rupture the sculpt (or worse harm the mold maker)
Adding basic volumes and shapes
The idea is now to add the basic volumes and shapes to this armature. I used three wires, twisted them in the middle and thus had pieces for arms, legs, head, torso and a piece between the legs for a tail. As is the case with any sculpting endeavor: Only work on one section/detail at a time. I started with a blob for the body and the head and smoothed it out. Ridges and more bulk on the front and arms followed.
My Greenstuff ratio for this was either 70:30 yellow to blue, or a mix of 75% Greenstuff (same ratio) and 25% Milliput. As Greenstuff is expensive using pure Milliput or a mixture to bulk out the body is a good idea. You can also smooth the mixture with water before it cures and sand it after curing. In addition it is much harder than Greenstuff alone. So a nice base to work from. Some sculptors work exclusively with such a mixture, but I still have to master it and reverted back to Greenstuff.
Trial and error – finicky head detail
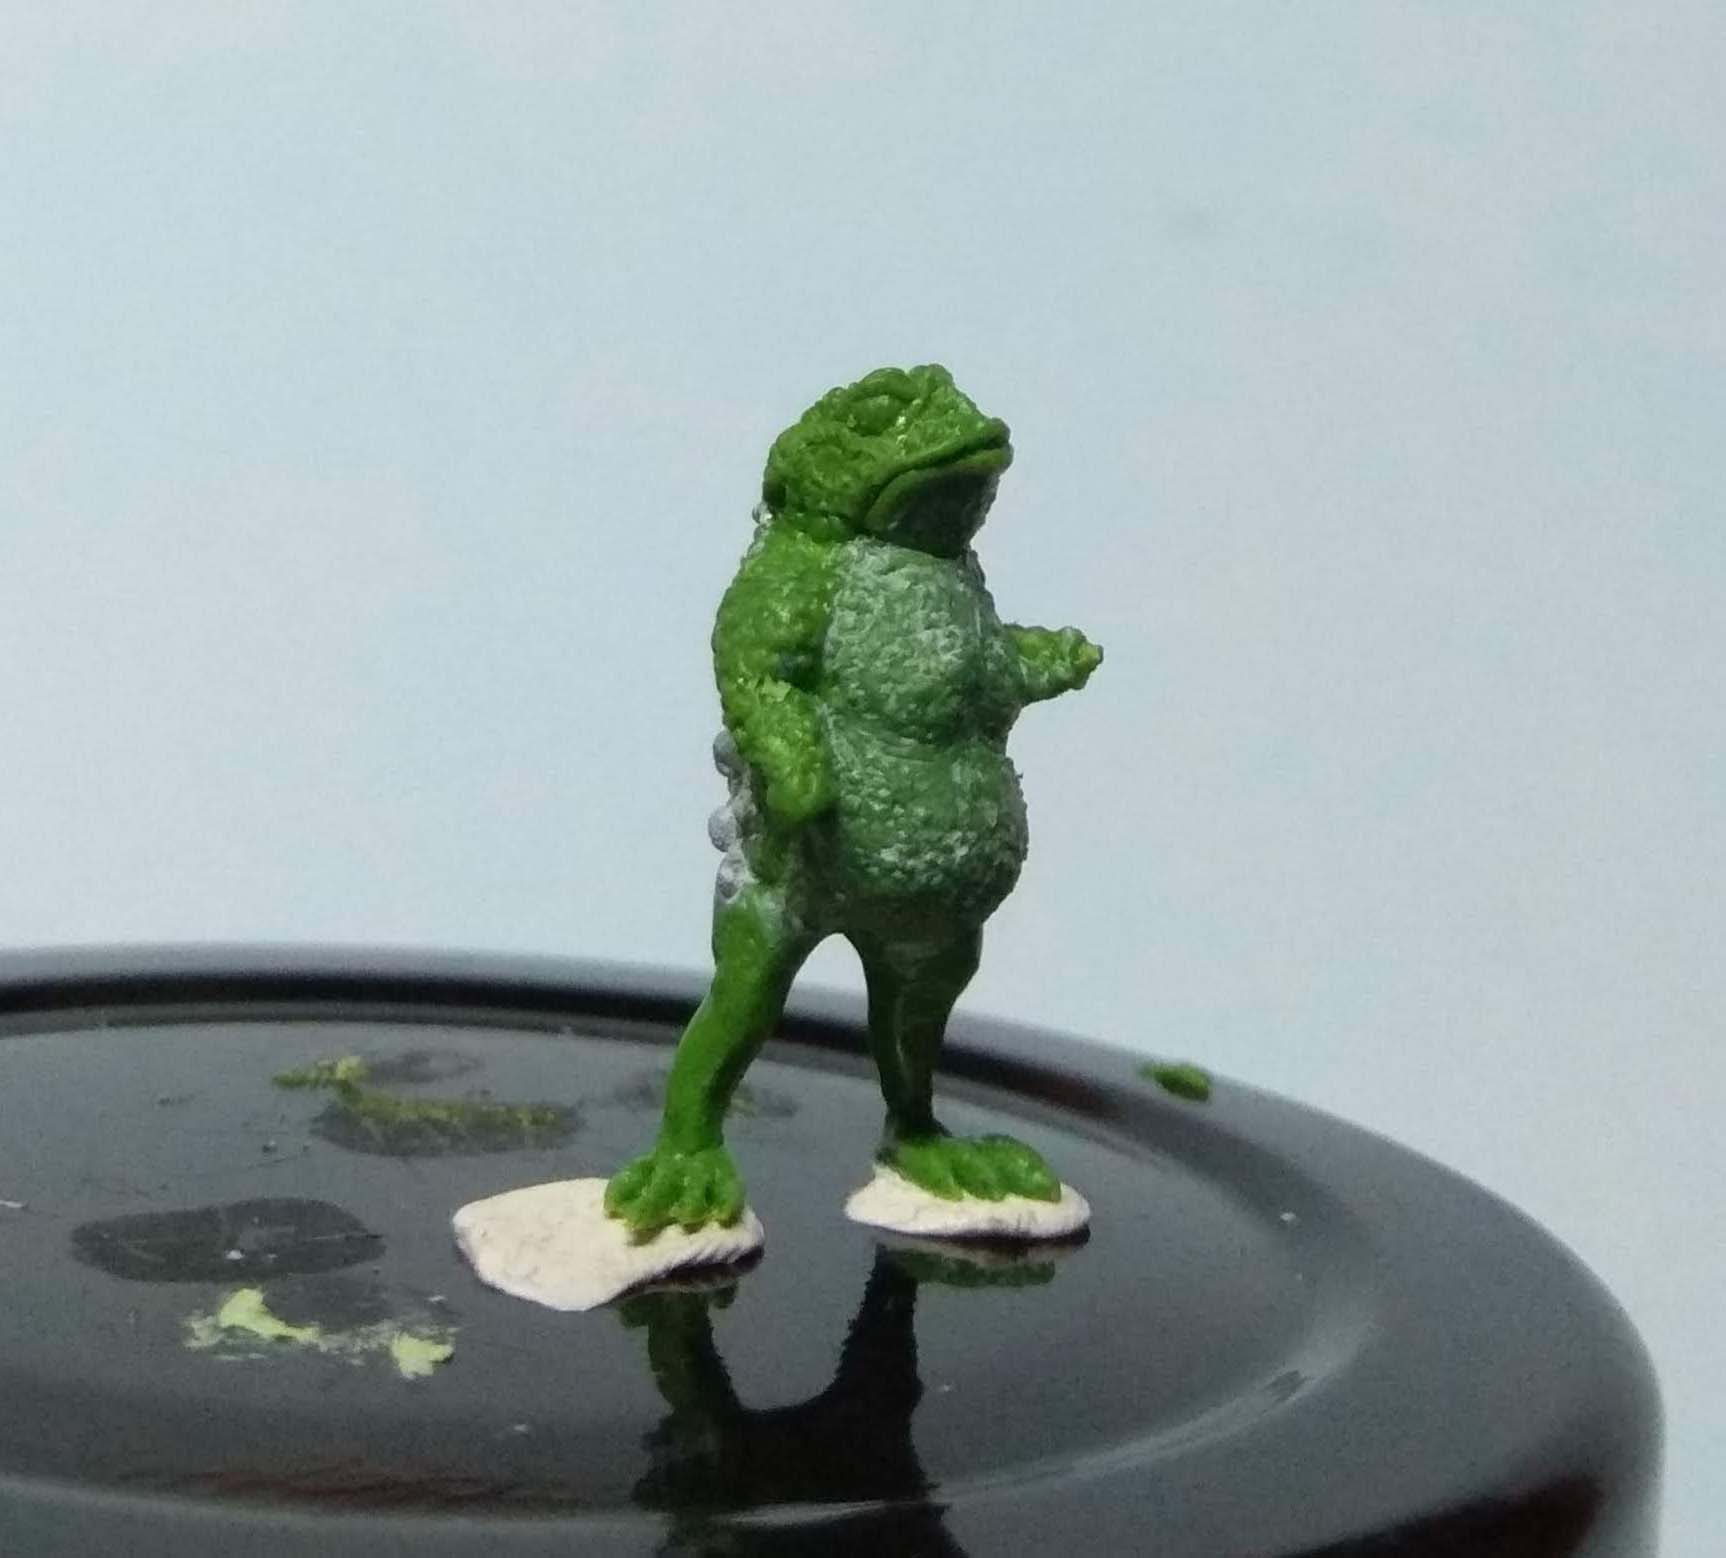
The head was extremely fiddly, as the miniature only measures 20mm from feet to top of the head. Again, work in stages. First the eye balls, then the ridges on the eyes. Then the characteristic nose ridges. Finally the poison glands behind the ears and – naturally – the warty skin texture. If you don’t like something don’t be afraid to cut it off and try again. For example, I did so with the skin sack on the chin.
Given toads are not equipped to mimic human expressions I tried my best to make him look tough and grumpy, without going down the road of overtly anthropomorphic features.
Warty skin
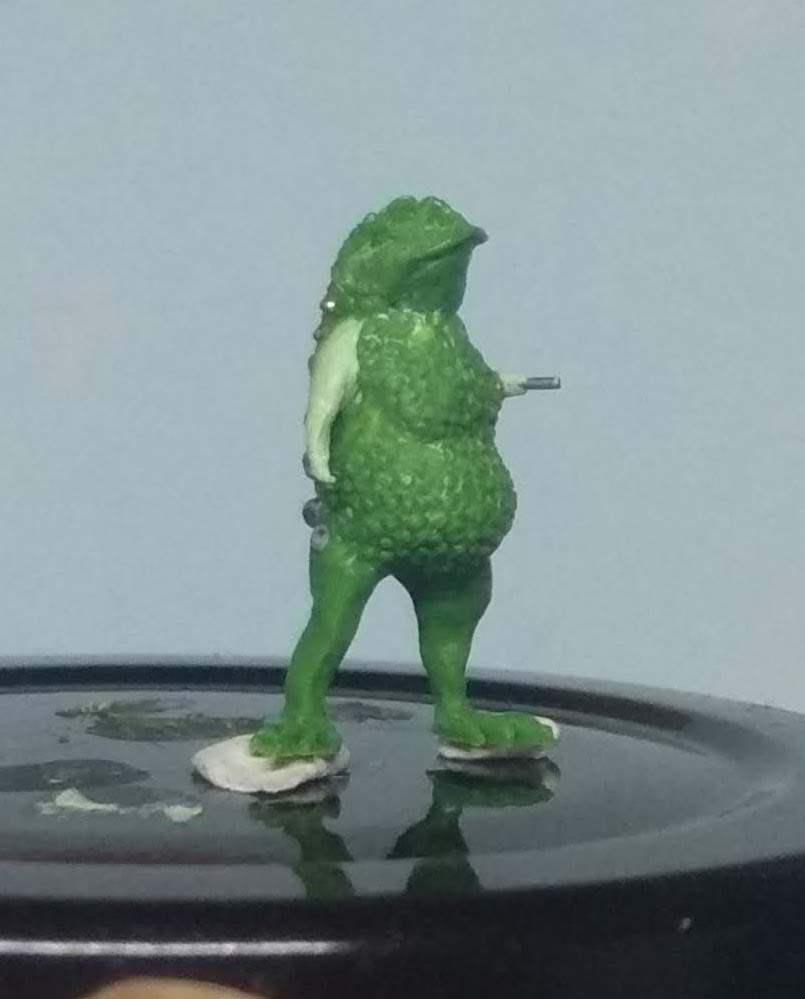
The warty skin texture was achieved with an old applicator needle from a bottle of super glue. You could also use a hypodermic needle. I also added some metal micro beads and poppy seeds to the back. The latter is obviously a no go for pressure casting, but gave a good texture. Initially I added warts to the belly, but decided against it in the final version. Instead I went for an uneven, but smoother texture with singular warts.
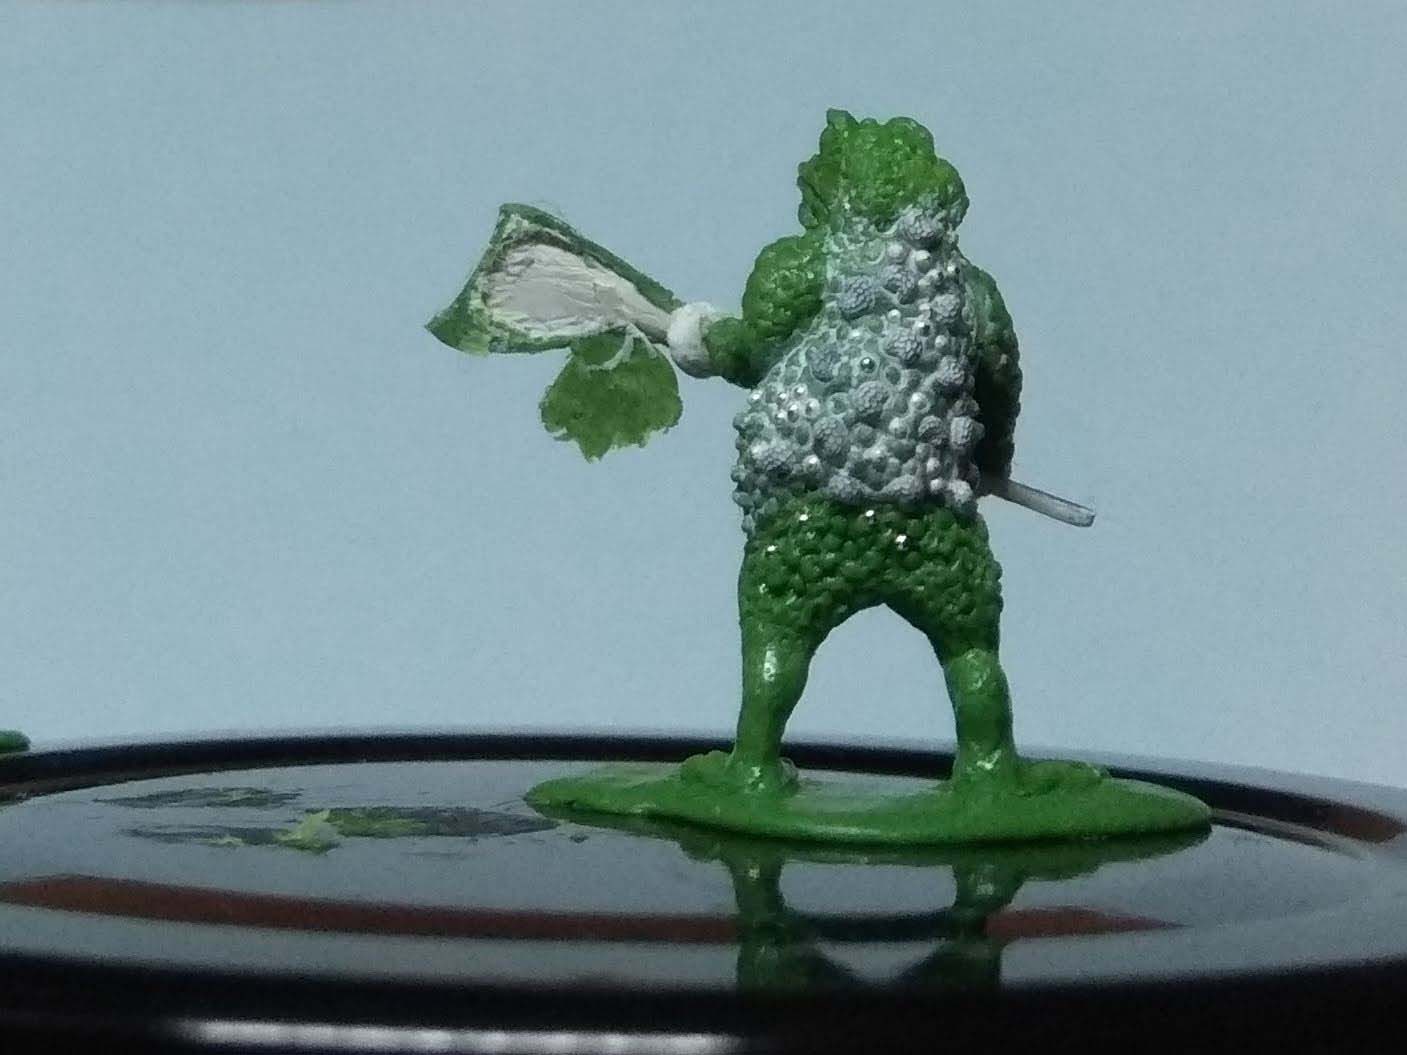
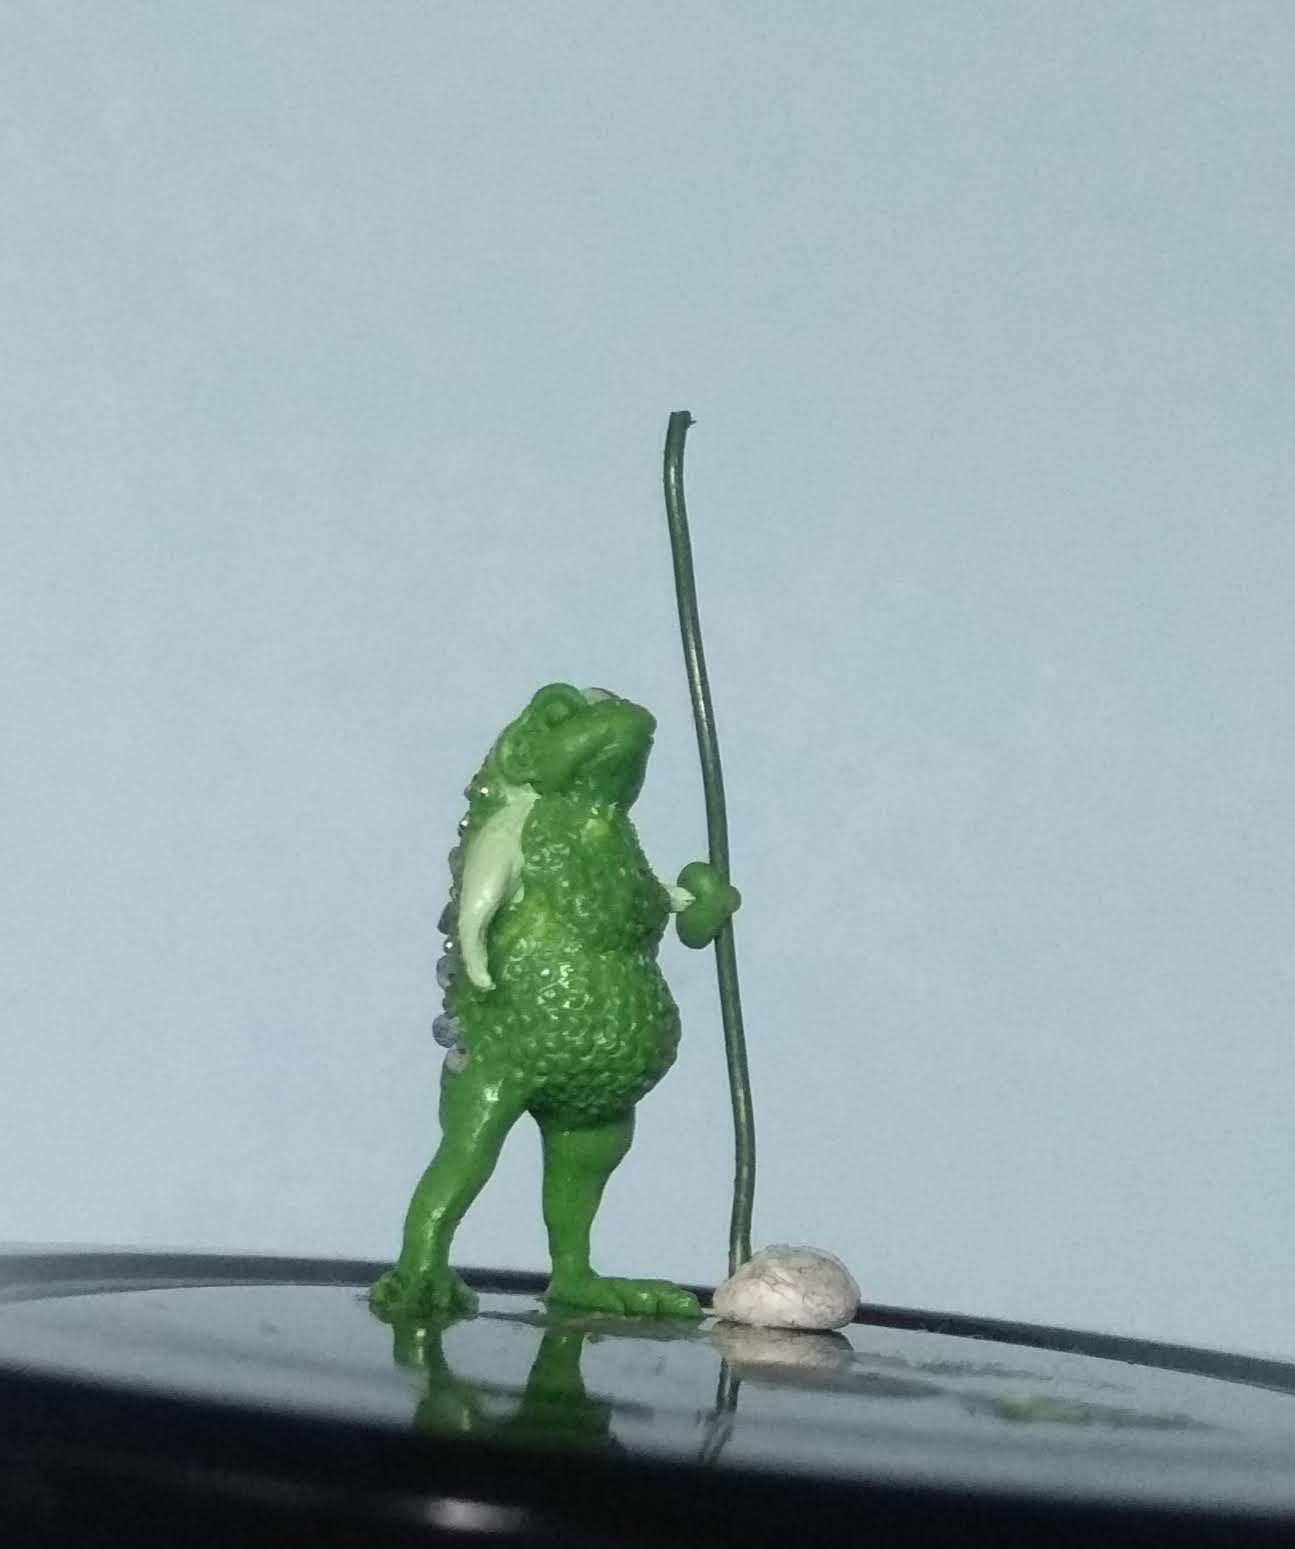
The weapon of choice
To add variety I envisioned two weapon choices for the toad warrior. Accordingly hands and weapons would need to be sculpted and cast separately. If you like a challenge, sculpt everything as one piece and remove the hands or arms later with a jewelers saw.
The weapons of choice were a Tewhatewha (a Maori club with a head that resembles an axe) and a rare two-handed version of an Aztec Macuahuitl (a wooden club with embedded obsidian shards). Both are still unfinished, but they are getting there.
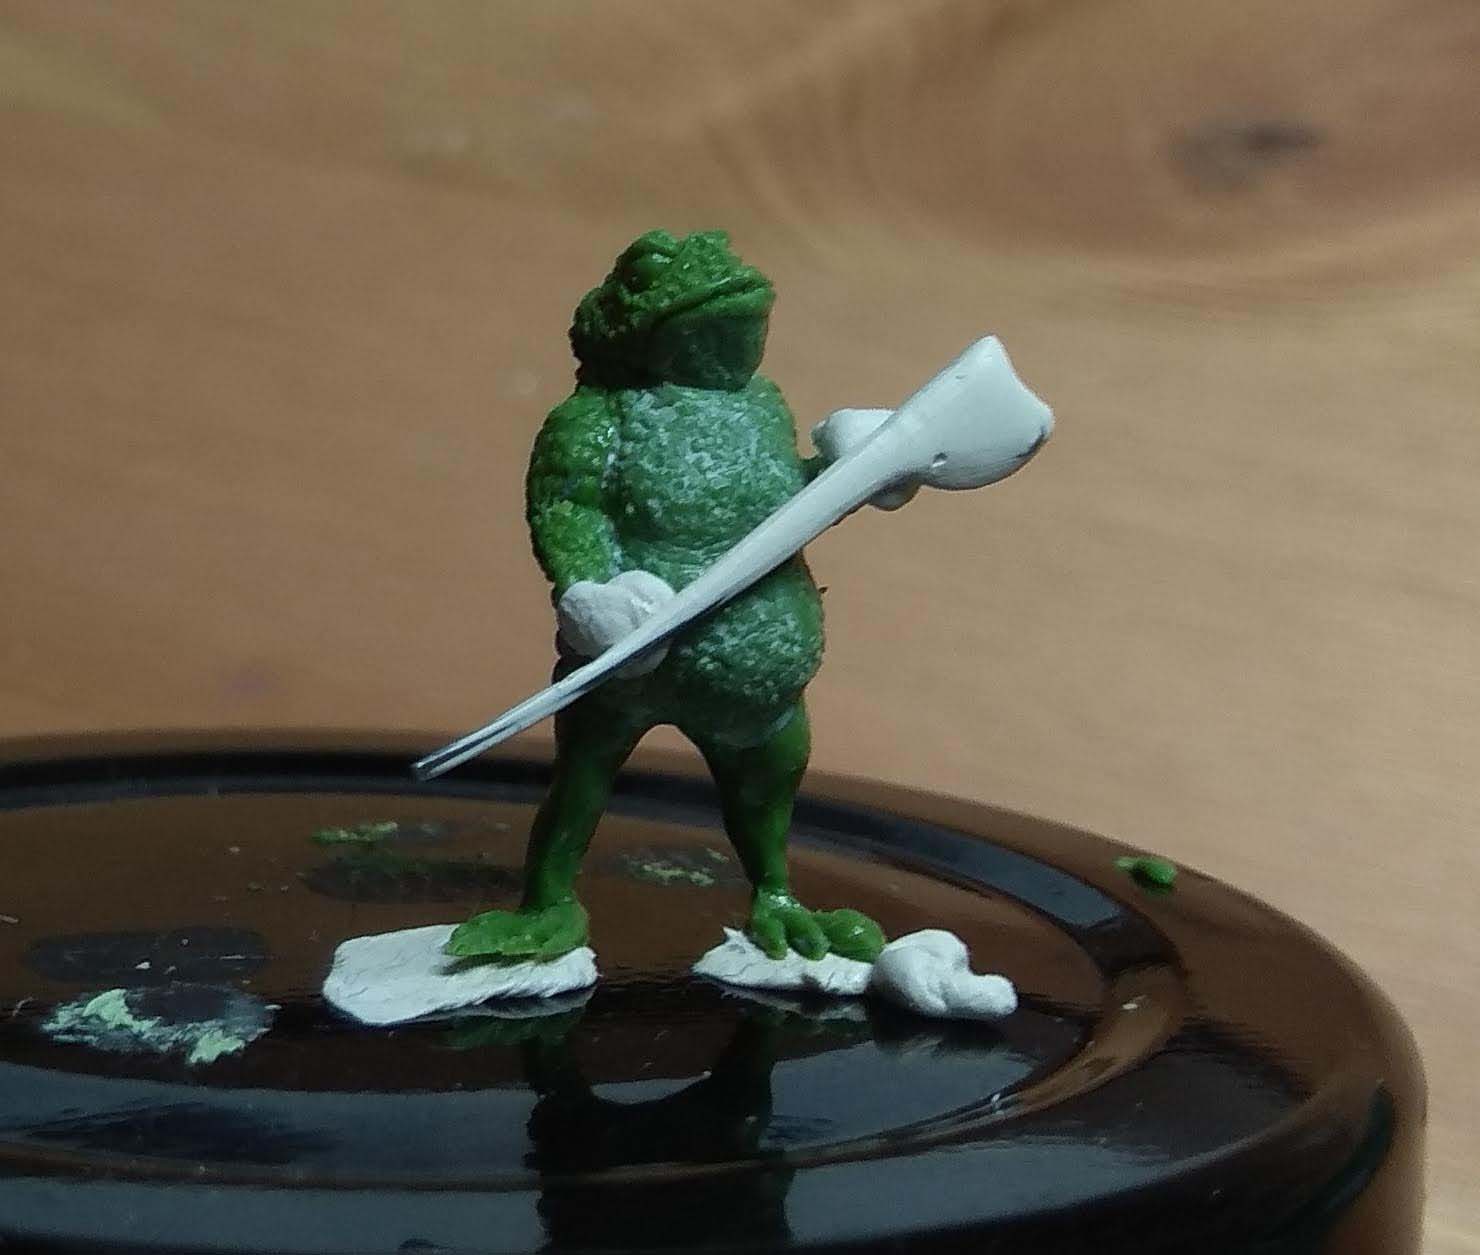

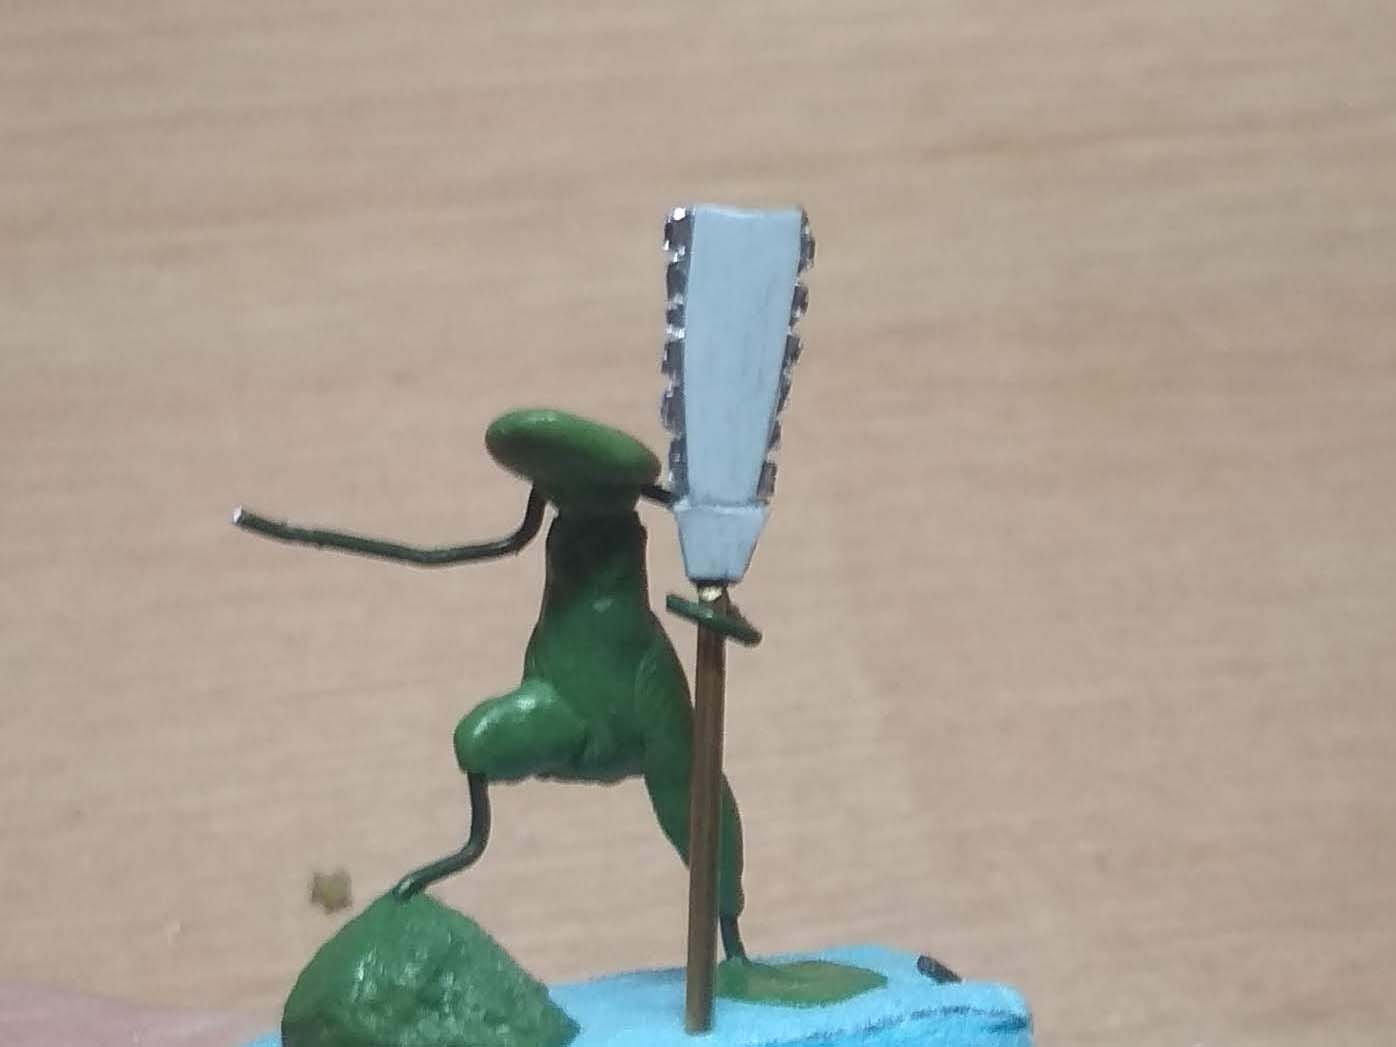
For the Tewhatewha a thin piece of wire was covered in Milliput and sanded smooth. The decoration on the head and feathers were then added with greenstuff.
What’s next?
I have eight more bufos in the pipeline, but I feel it will take me most of 2021 to finish them all. I will definitely focus on some more dynamic poses, a good example is my Tree Frog Monk. The plan is to get them cast (maybe with the help of a Kickstarter) and sell them to interested Fantasy enthusiasts. A Kickstarter would be good to figure out if there is demand, as I don’t want to sit on hundreds of casts. I’ll keep you updated on the progress. In any case, Greenstuff, Milliput or both, no matter, always wield your brush with honour.
Wow I know I do not have the skills todo this.impressive stuff
Thank you, but all a question of practice. I hope if I put some good hobby time in the warband that I can also advance to human sculpts that do not lool too horrible in tje beginning.
Amazing!
Great watching it take shape – you have a super talent there.
Thank you and high praise indeed. I hope to get faster with less corrections needed. The next challenge will be human sculpts. For now I practice with the frogs and toads.
Frogs and Toads, we’ve all got to start somewhere. It’s not something I could do, I’m not creative at all in that way, but I love seeing the process and how it all comes together in the end.
Then you will enjoy the Shaolin Tree Frog I am working on, too. 😎 If the Toads are grunts and the tree frogs nimble, what shall the frogs are? Maybe a shaman.
Looking forward to seeing them.
A Shaolin Tree Frog? Surely a master of martial arts, so maybe a monk? Would have one hell of a kick!
My thoughts exactly and the concept behind the sculpt.
Really cool. Though technically I do think you mean a macuahuitl as a cuauhololli has only a blunted ball and no blades. https://www.mexicolore.co.uk/aztecs/home/mexica-weaponry. Had you considered using RTV as a casting medium? No explosion there, just need a proper form. https://www.amazon.com/CASTALDO-QUICK-SIL-PART-SILICON-COMPOUND/dp/B01J642GVG
I am actually not sure if the weapon I am referring to was that common among Aztec warriors, as it seems it was mostly used by levies (correct me if that is wrong, read it in an Osprey). I saw this reference art which apparently comes from a conquistador context:
https://images.app.goo.gl/FRm39LqW3JgSoTFM7
Given you are more versed in this: Is this a Cuauhololli or just a longer Macuahuitl?
I think I will get the masters done in resin and then cast from those in metal. So yes, super glue would not be a problem. I still try to adhere to best practice.
This would have been a longer macuahuitl , and not very common. The macuahuitl (normal length) was far more common. The cuauhololli was a round-headed and usually wooden club – here is an image of Huaxtecs armed with them being ambushed by Aztec Shorn Ones. &imgrefurl=https://www.pinterest.com/pin/322077810832525534/&tbnid=Mwund6az0-HgLM&vet=1&docid=tk0Ot1zAcfmUwM&w=1200&h=918&hl=en&source=sh/x/im Peasant levies would most often have slings, but also carried macuahuitl, tepoztopilli, or cuauhololli, bows, or atlatl.
Thank you Mark. I got the feeling that some of the weapons I found online were mislabeled. I will change the post accordingly. Gladly we are talking about toadmen, so it doesn’t necessarily matter how common those weapons were. That said the weapon itself should be accurate and obviously get its proper name.
No worries and of course the toadmen’s history has yet to be written (or is lost to antiquity- either way you could obviously call them anything you wanted!). During research for my current project, I found a lot of “fanciful” interpretations/images of Aztec garb and weapons, most less suited for historical accuracy than for making a cool painting, which I get. The “standard” macuahuitl was pretty heavy as it was solid hardwood embedded with obsidian blades. It was used in an overhead manner as you would use a club more than how you would use a sword. The longer versions to me would have needed a huge dude to swing them, or maybe a huge toad man. 😄. Given that you’ve created the weapon and the toad man, I’d humbly suggest that the naming rights should be all yours.
I think a smaller version on another sculpt would be cool, too. Do you know of any clips that show a proper replica in action? I am interested in fighting stances and movements.
In terms of naming my creation I shall think of something toad related. 😈
There’s a video link on the end this post., though the pronunciation is totally wrong, it’s interesting https://markamorin.com/2020/10/30/18-aztec-novice-warriors-for-feudal-patrol-walk-into-a-bar/
That clip inspired me in the first place. I was hoping for some reenactment type clip. I will have a search online and share any interesting results here.
Excellent work and a cool subject for this sculpt! There are several miniature lines featuring animal fantasy characters as I’m sure you know but very few feature animals without clothing or armor and I prefer your approach here, especially with a creature like a frog or toad that is full of great textures as it is. This guy looks like a blast to paint and I’ll be looking forward to seeing what else you sculpt. I’ve never done Kickstarter but I’d consider trying it to get a few more blokes like this 🙂
Thank you. That was indeed the reason why I sculpted my own. Given toads excrete antibacterial substances all the time via the warts it seemed questionable if they would wear dress or armour.
What I will do is changing up the species and weapons to keep it interesting.
At my current speed I should be finished with the warband third quarter of 2021. So realistically speaking a Kickstarter for Christmas may be an option.
Bloody well done mate. I really admire sculptors and hope to go down that path one day. I’ll definitely use this post as a reference guide. You nailed the tough and grumpy look on the toads face hehe. Well done man.
Much appreciated. I still have lots to learn. Another conversion project I am working on right now requires some human feet in sandals. Really hard to get it look right. It always comes down to experience and trial and error.
Wow, that sounds a whole lot more challenging.
Very cool. Hard to tell this is your first attempt. Looks great already!
Thank you. It is only the first one I sculpted from scratch. I converted quite a bit the past years to get more control with the tools and understand the properties of the epoxy better. Still a long way to even crouch in the shadow of masters like Boris Woloszyn or Tom Meier, but starting with a creature was a good idea. There is no reference how an anthropomorphic toad face should look like, but with a human face any oddity is immediately apparent.
Its instantly recognizable, so I would say you are successful. I dont habeca real need for Toadmen,
(Oops, hit send before I was done) I don’t NEED Toadmen, but is probably support a kickstarter cuz they look cool.
When do we ever truly need a miniature 😁. I think if I get around 100 supporters or even less, it should be feasible to fund the production molds. Looking at other campaigns this might work.
Truth. Sometimes a cool mini is worth it just to paint as a break from other projects.
Yes, I also rarely play these days, so I just paint what takes my fancy.
Really great results! Especially in such a small size.
Much obliged. Indeed. I may increase the size a tad with future sculpts, but they will be smaller than humans. I think that would make them easier to paint.
Spectacular 😀
Thank you, glad you like the toad!
Always nice seeing a mini come together. Wish I had the skills!
Thank you! Start small with conversions: gap filling, then advance to simple details: sacks, straps etc. Each time you get the Greenstuff out try something new. Hair, a belt buckle, hands, feet etc.
If you make an armature have a clear vision what you want to achieve and pose it accordingly. A good armature will reduce the amount of reworking you might need to do.
Another tip master sculptor Boris Woloszyn gave: Start in a larger scale (busts) to get a feel for facial anatomy and proportions. Then apply this to smaller miniatures.
That’s some nice tips. So far I’ve been doing gaps, sometimes some fur for those. I did just make an ‘okay’ strap. A lot of it is a matter of time. Do I want to sculpt or paint some minis so I can play games?! I do find Sculpey pretty fun for making boardgame tokens.
I rarely game these days, so for me it is between painting, sculpting, blogging and aquarell. I try to rotate to keep it interesting.
I had to look up aquarelle, haha! Sounds like you have quite the art hobbies! Painting is my late night hobby, once the little one is heading to bed.
Same here. The few hours at night are precious with a toddler in the house. I think Aquarelle is used in Germany, I presume it is just water colours in English.
Mine is out of the toddler stage now, but still requires loads of attention!
Brilliant work!