
Trolls are – not surprisingly – a Fantasy staple. They are mean spirited, gross, unkempt and dwell in all sorts of dank, dark places. So basically the template for the modern internet troll and a perfect encounter for your unsuspecting DnD gaming group. The common bridge troll jumps unwary adventurers, a well known trope equipes them with corrosive excreta and even The Hobbit features them – only to be turned to stone by dawn. Reaper Miniatures feature quite a few trolls in their range, no matter if we talk about marsh, stone, rock or cave trolls. It is the latter cave troll sculpt by Bobby Jackson, that I painted up for the Quarterly Reaper Painting Contest.
Is something amiss?
There are in fact two versions of the cave troll, one Bones, one metal. The metal version features penis and scrotum, while the plastic version has apparently been castrated. Poor plastic Troll. In any case, as I do enjoy monster sculpts that put some thought in the anatomy and ecology of a creature, I decided to go for the metal version. Clearly a mammal, this chap is neither lizard nor spore sprout. The sculpt is very nice indeed, detailed, dynamic and details are crisp. There was minimal flash and mold lines were easy to remove. The miniature comes in three parts, so either you have to pin it or use some epoxy glue to assemble it.
Painting and basing Goals
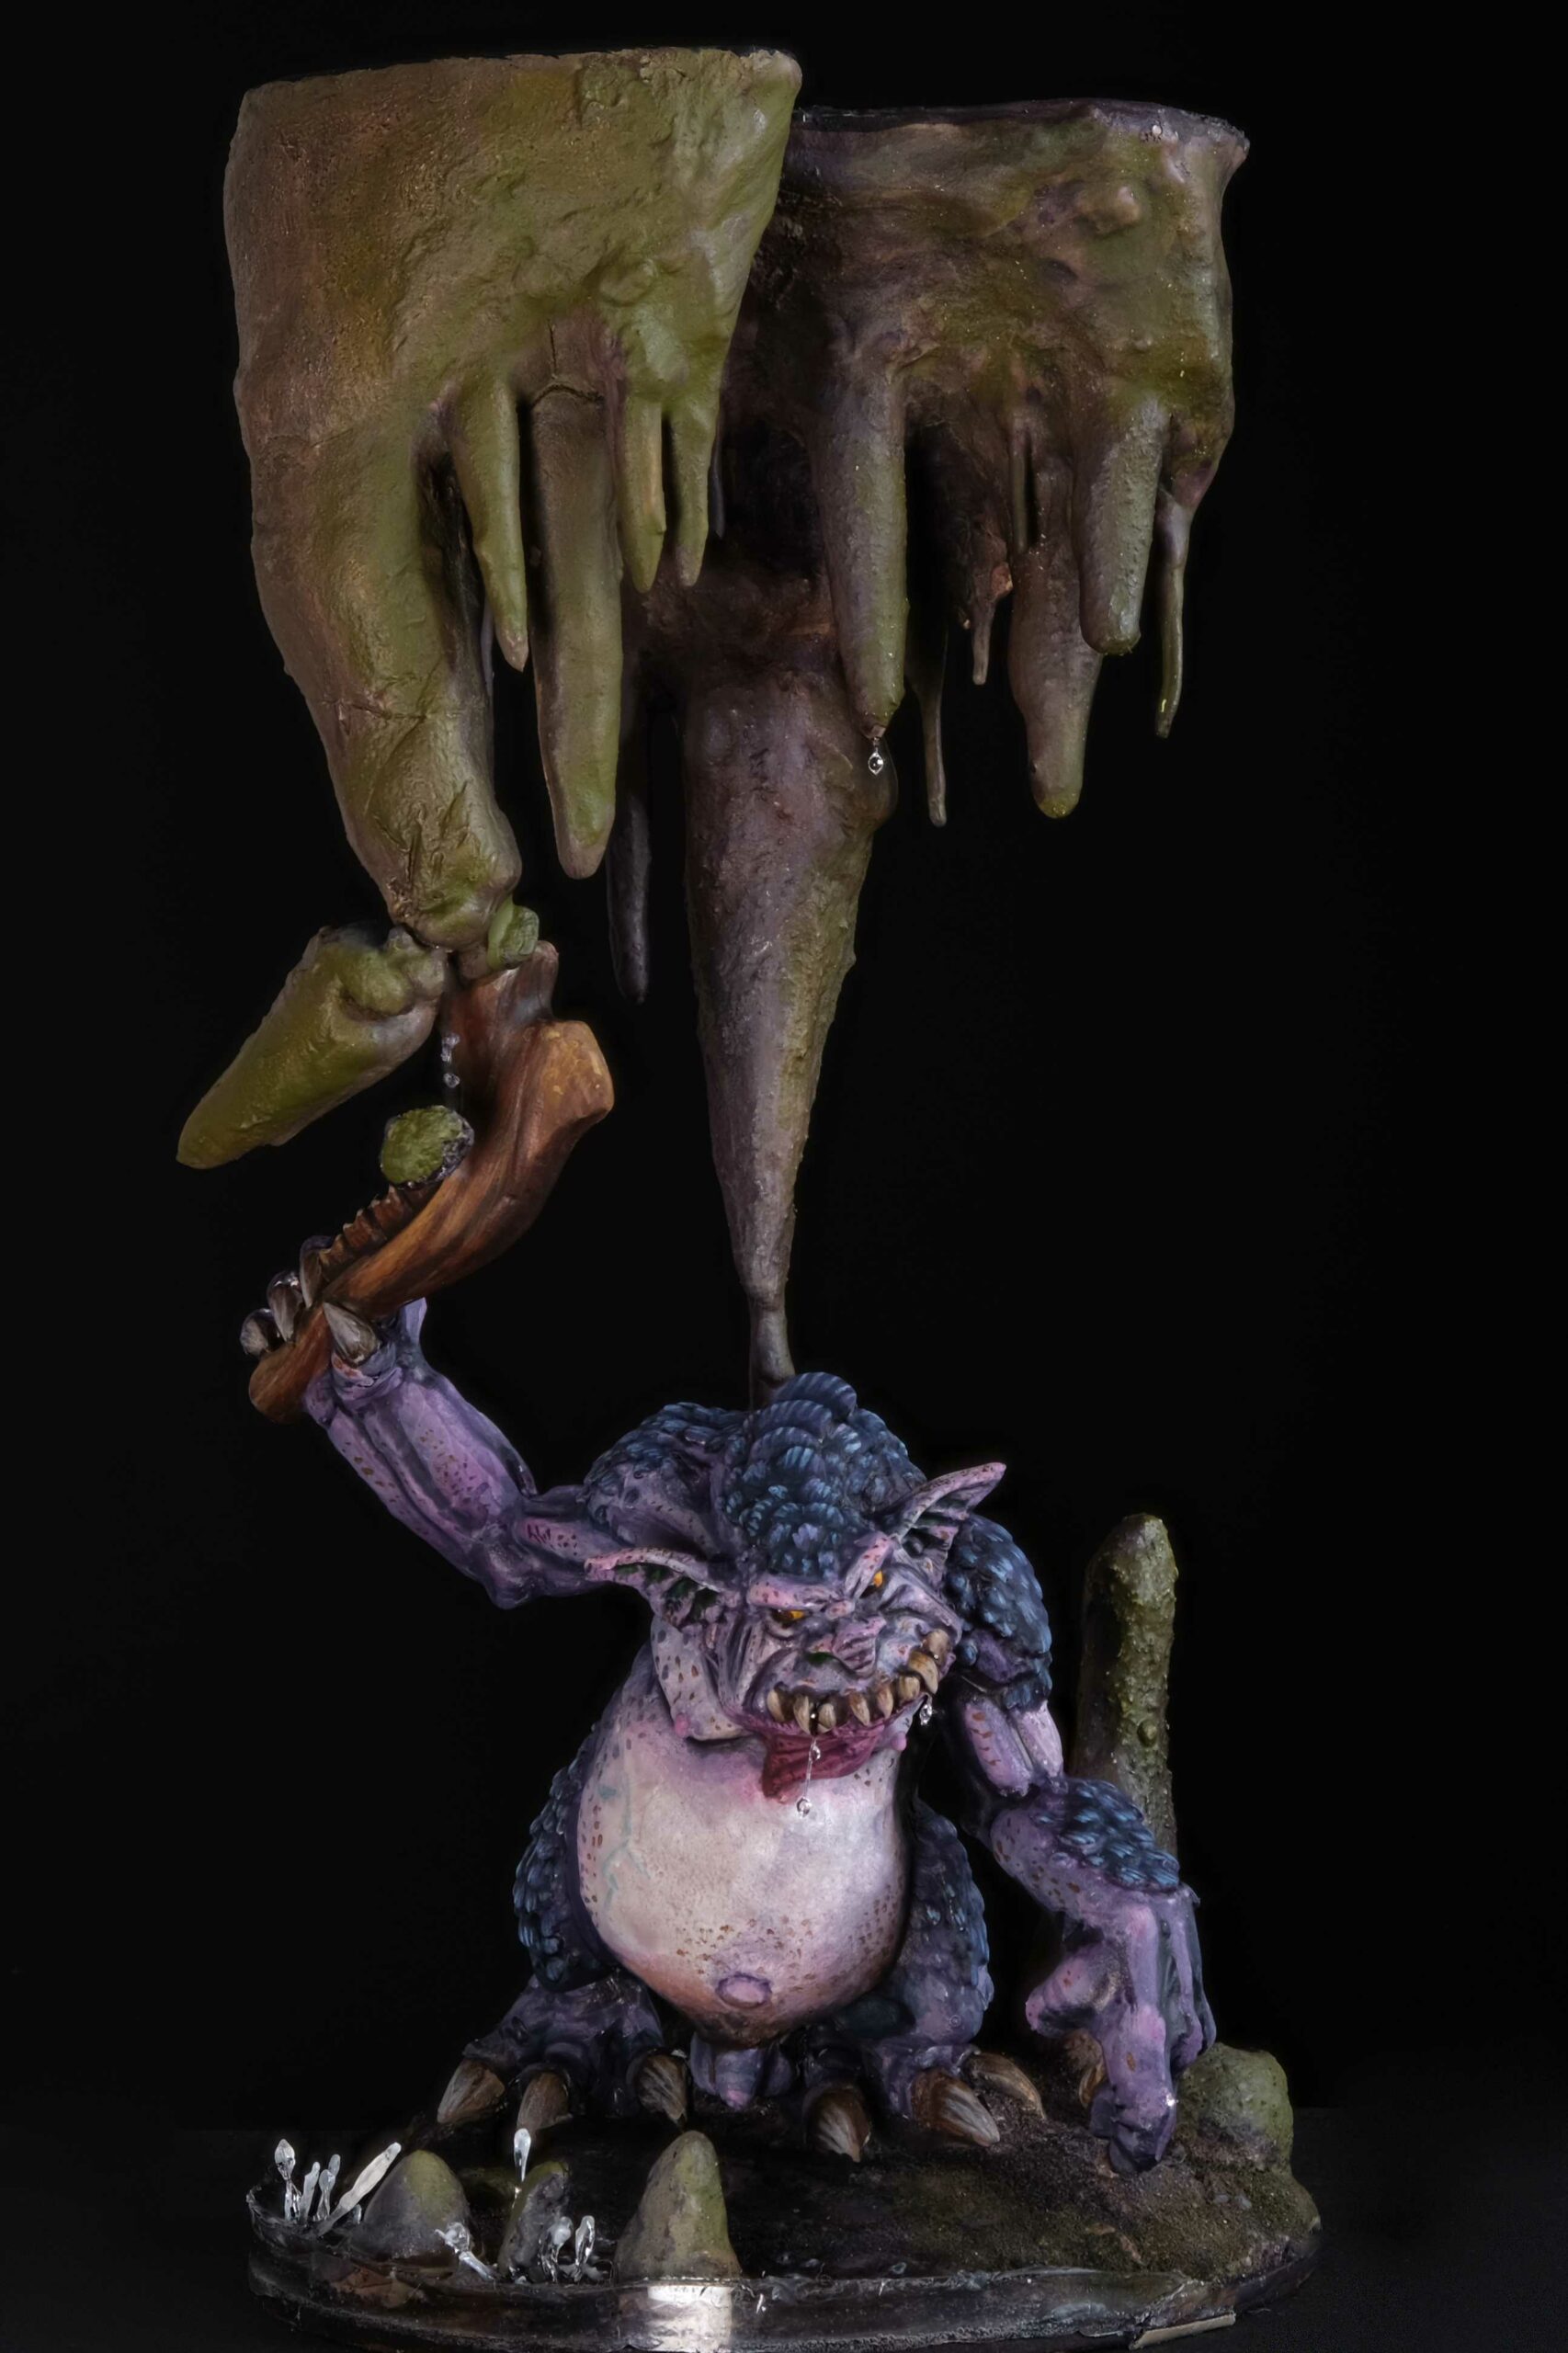
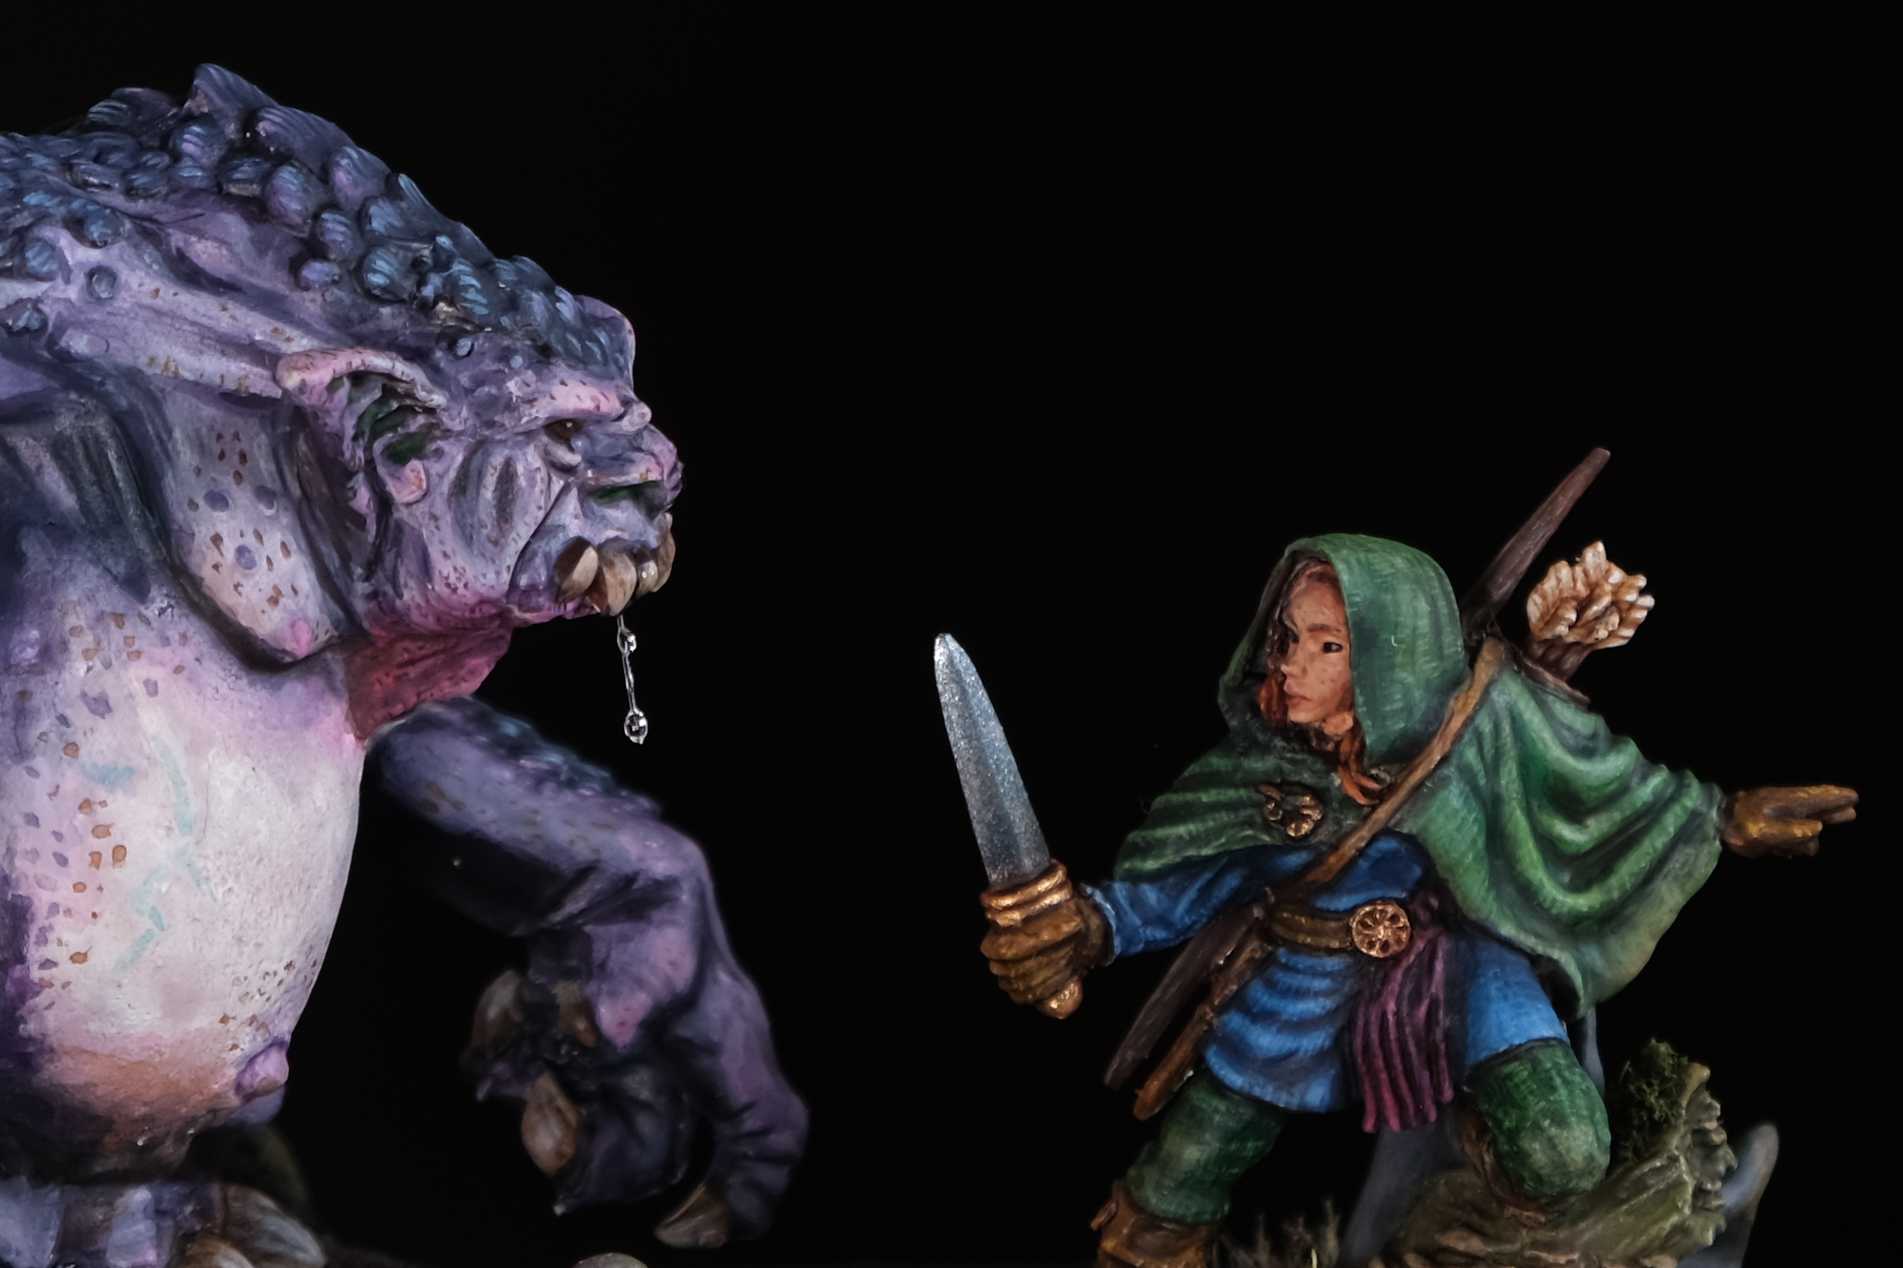
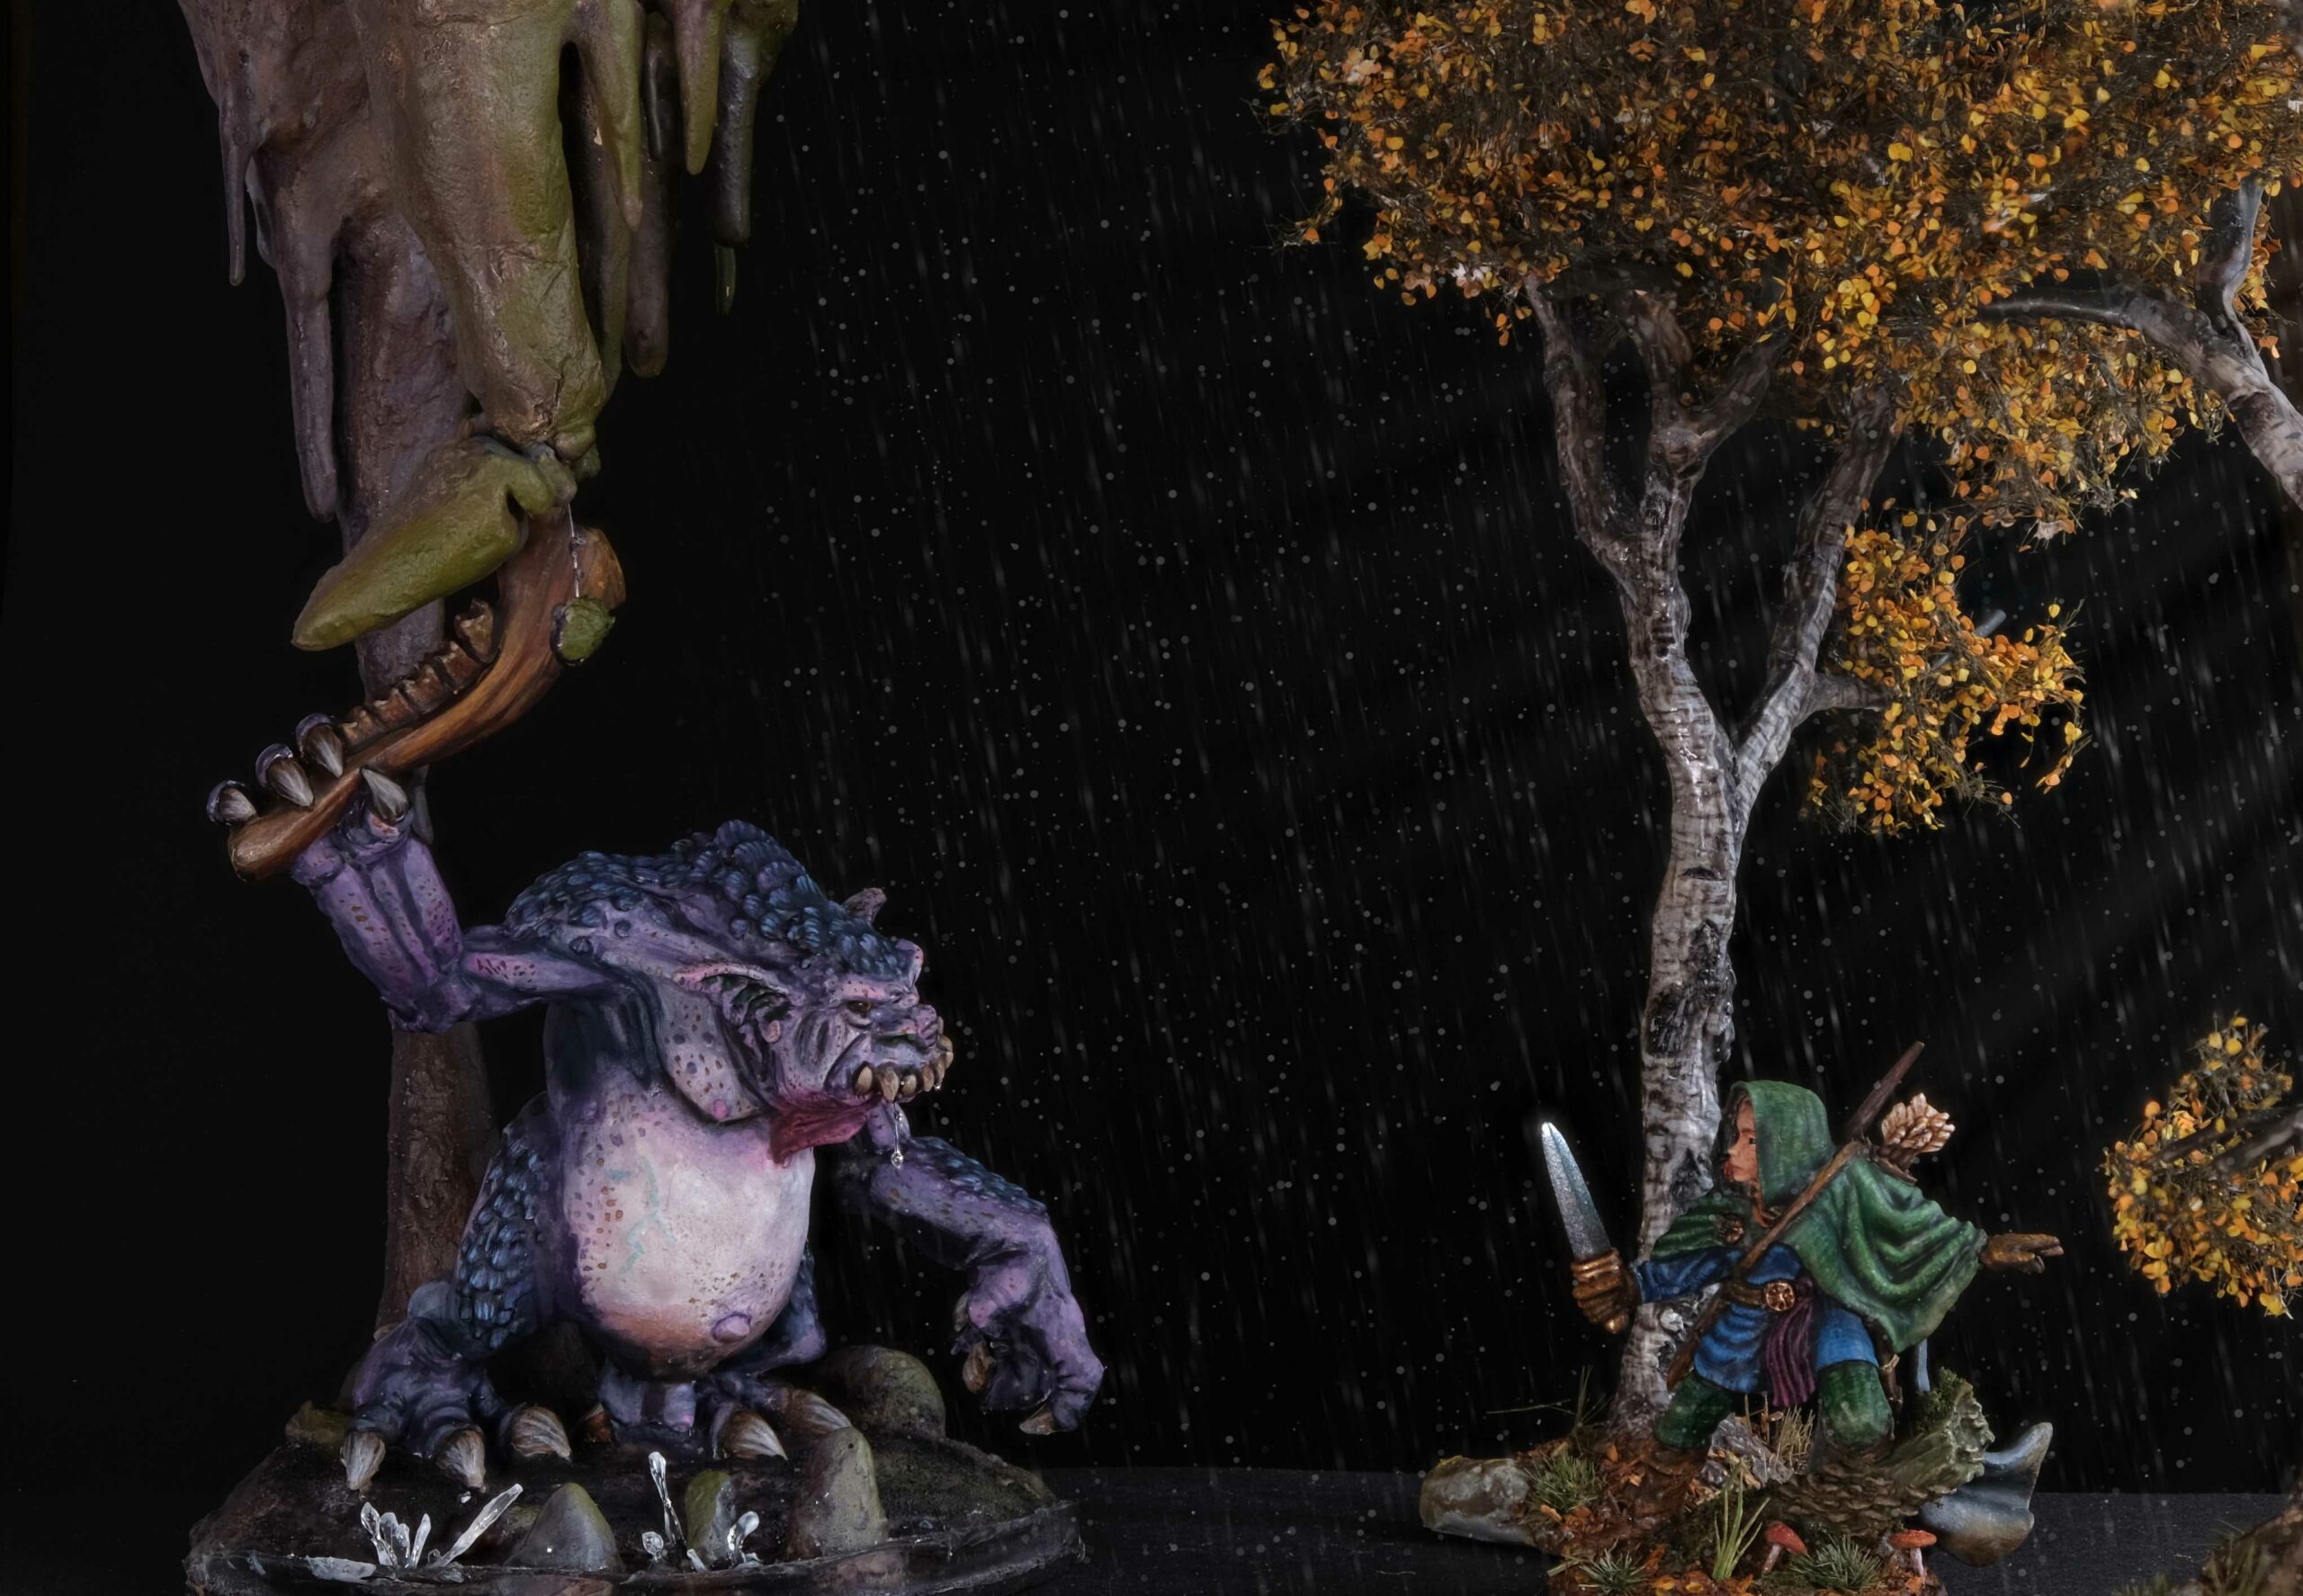
My focus with this uncouth cave dweller was first and foremost to establish a nice contrast using complimentary colours, value, texture and warm and cold colours. My second goal was to add some interest to the skin with freckles or spotting. Finally, I tried my hand at drool effects using UV resin and nylon thread. The base was another experiment. For some time now I try to emulate cave environs on bases, featuring stalagmites and stalagtites. To add even more interest, I added an underground lake and splash effects from falling debris. After all the cave troll swings his mighty mandible in a confined space.
Contrast is everything
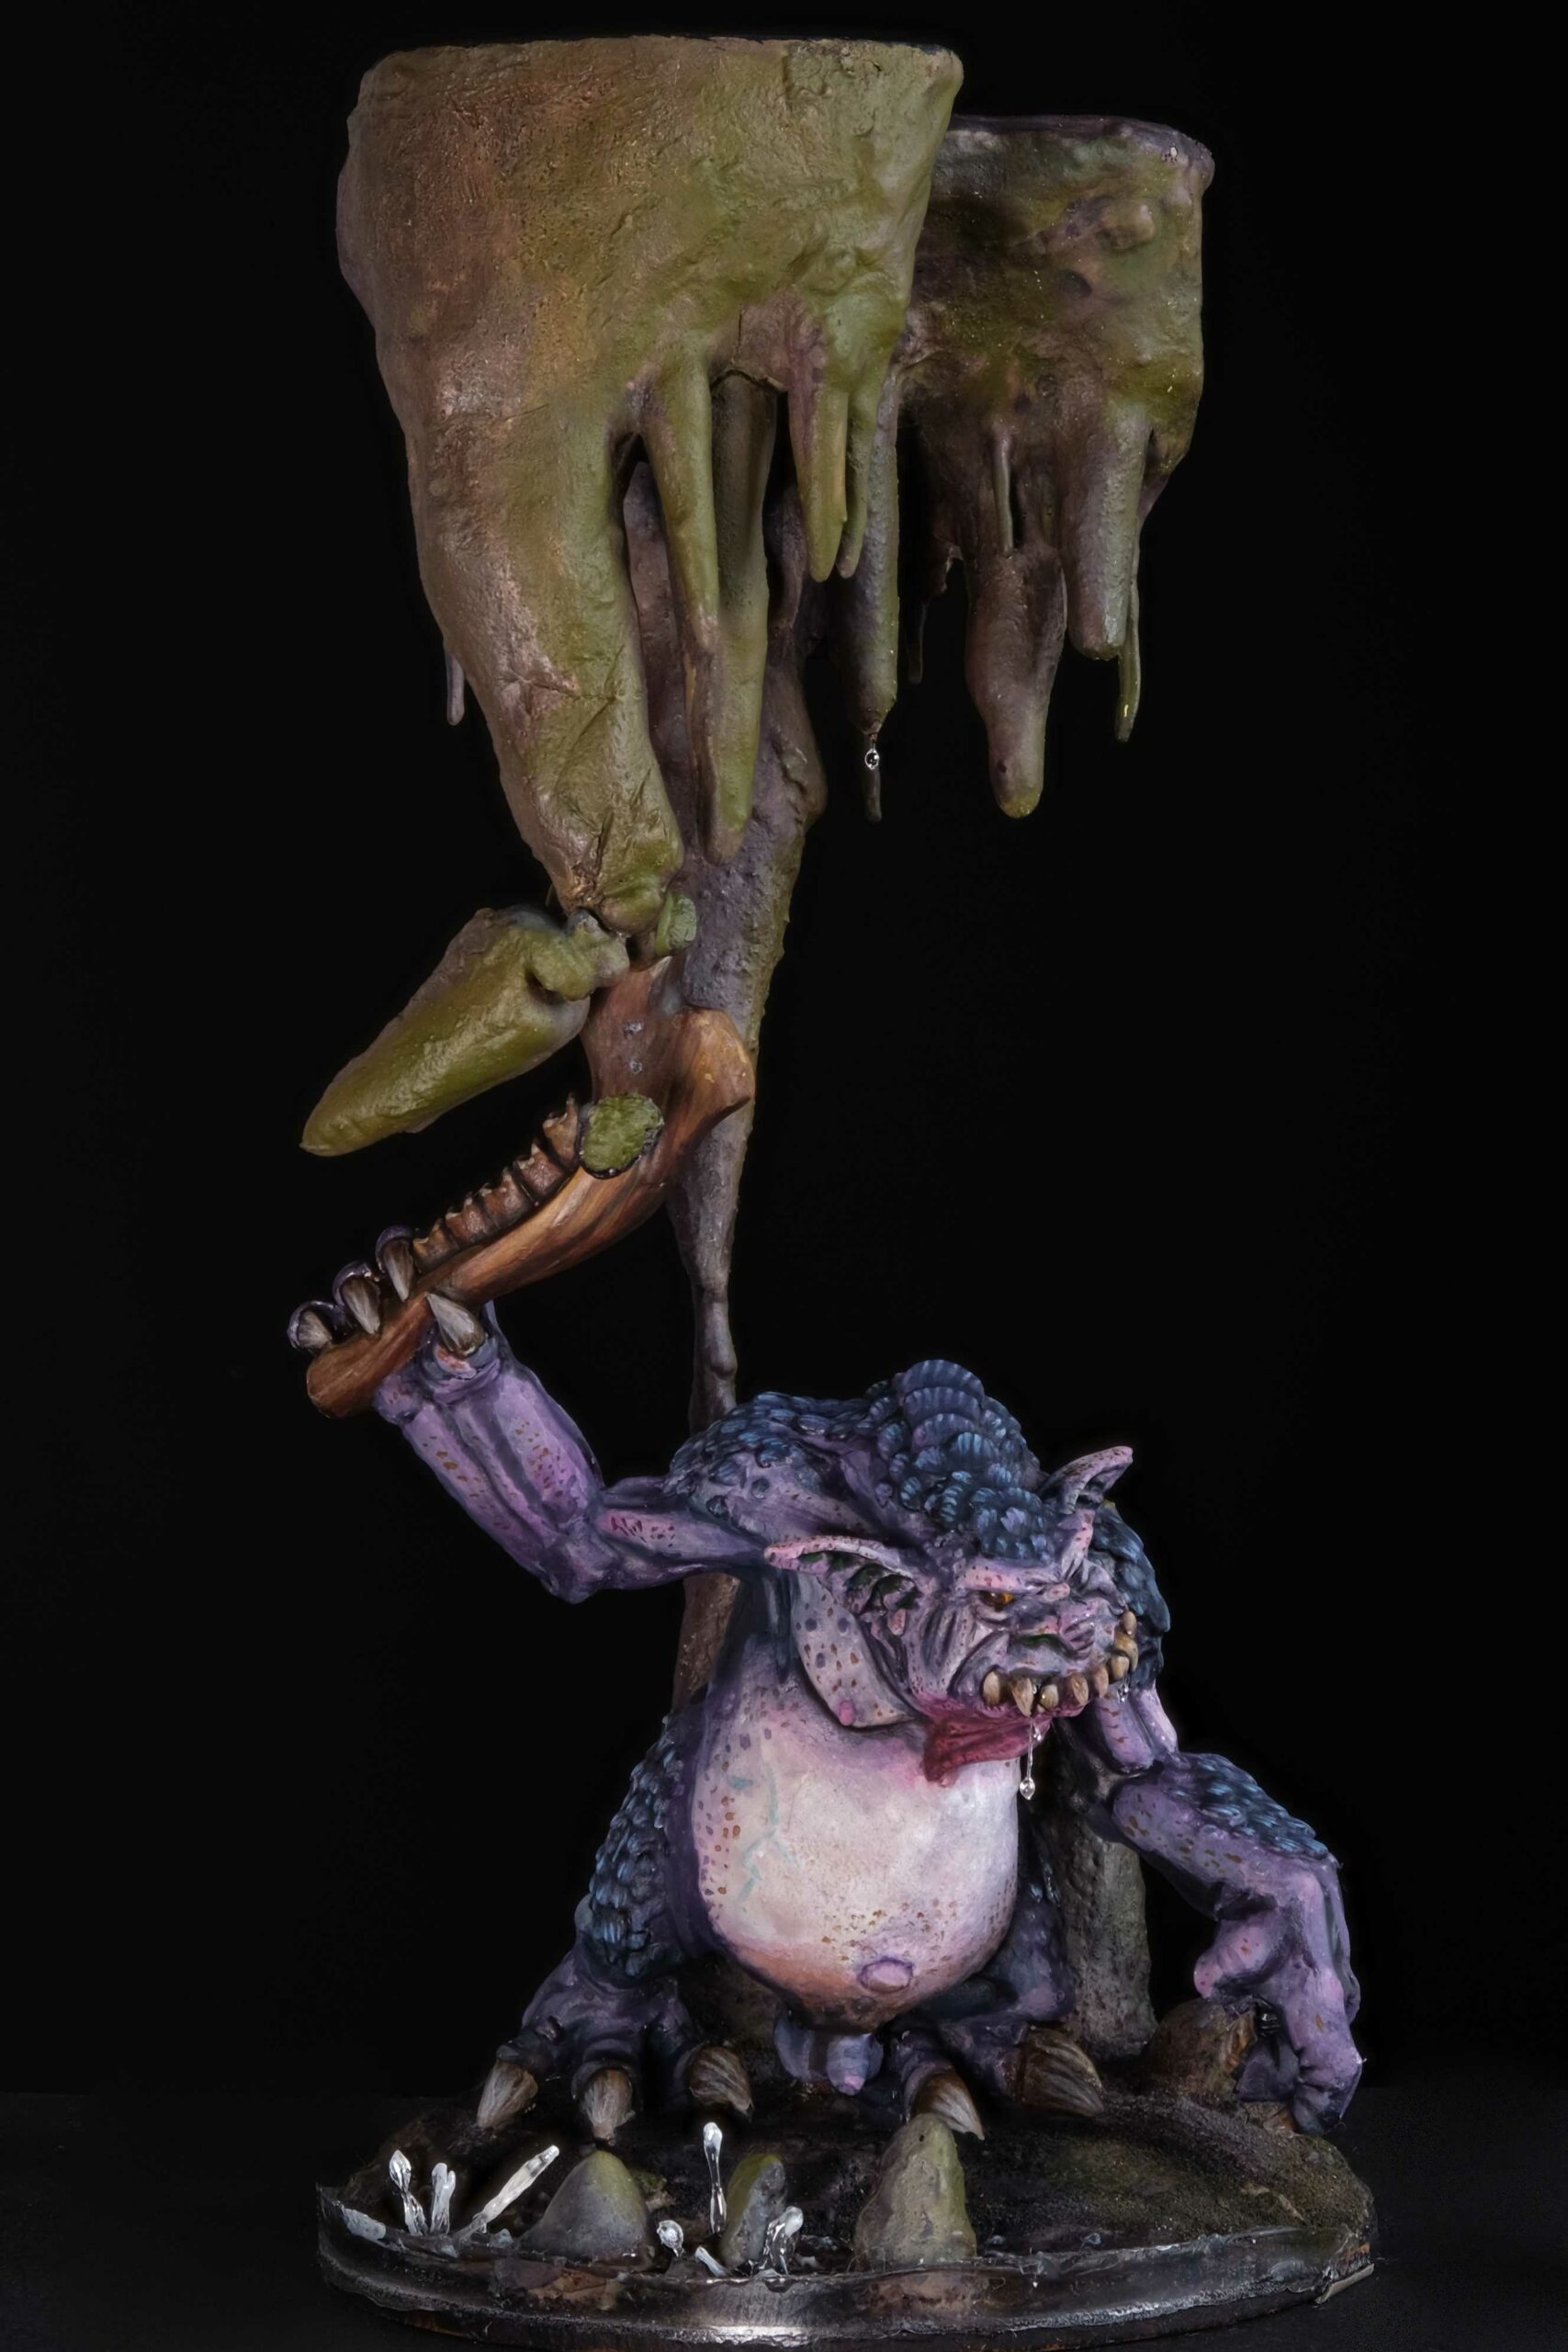
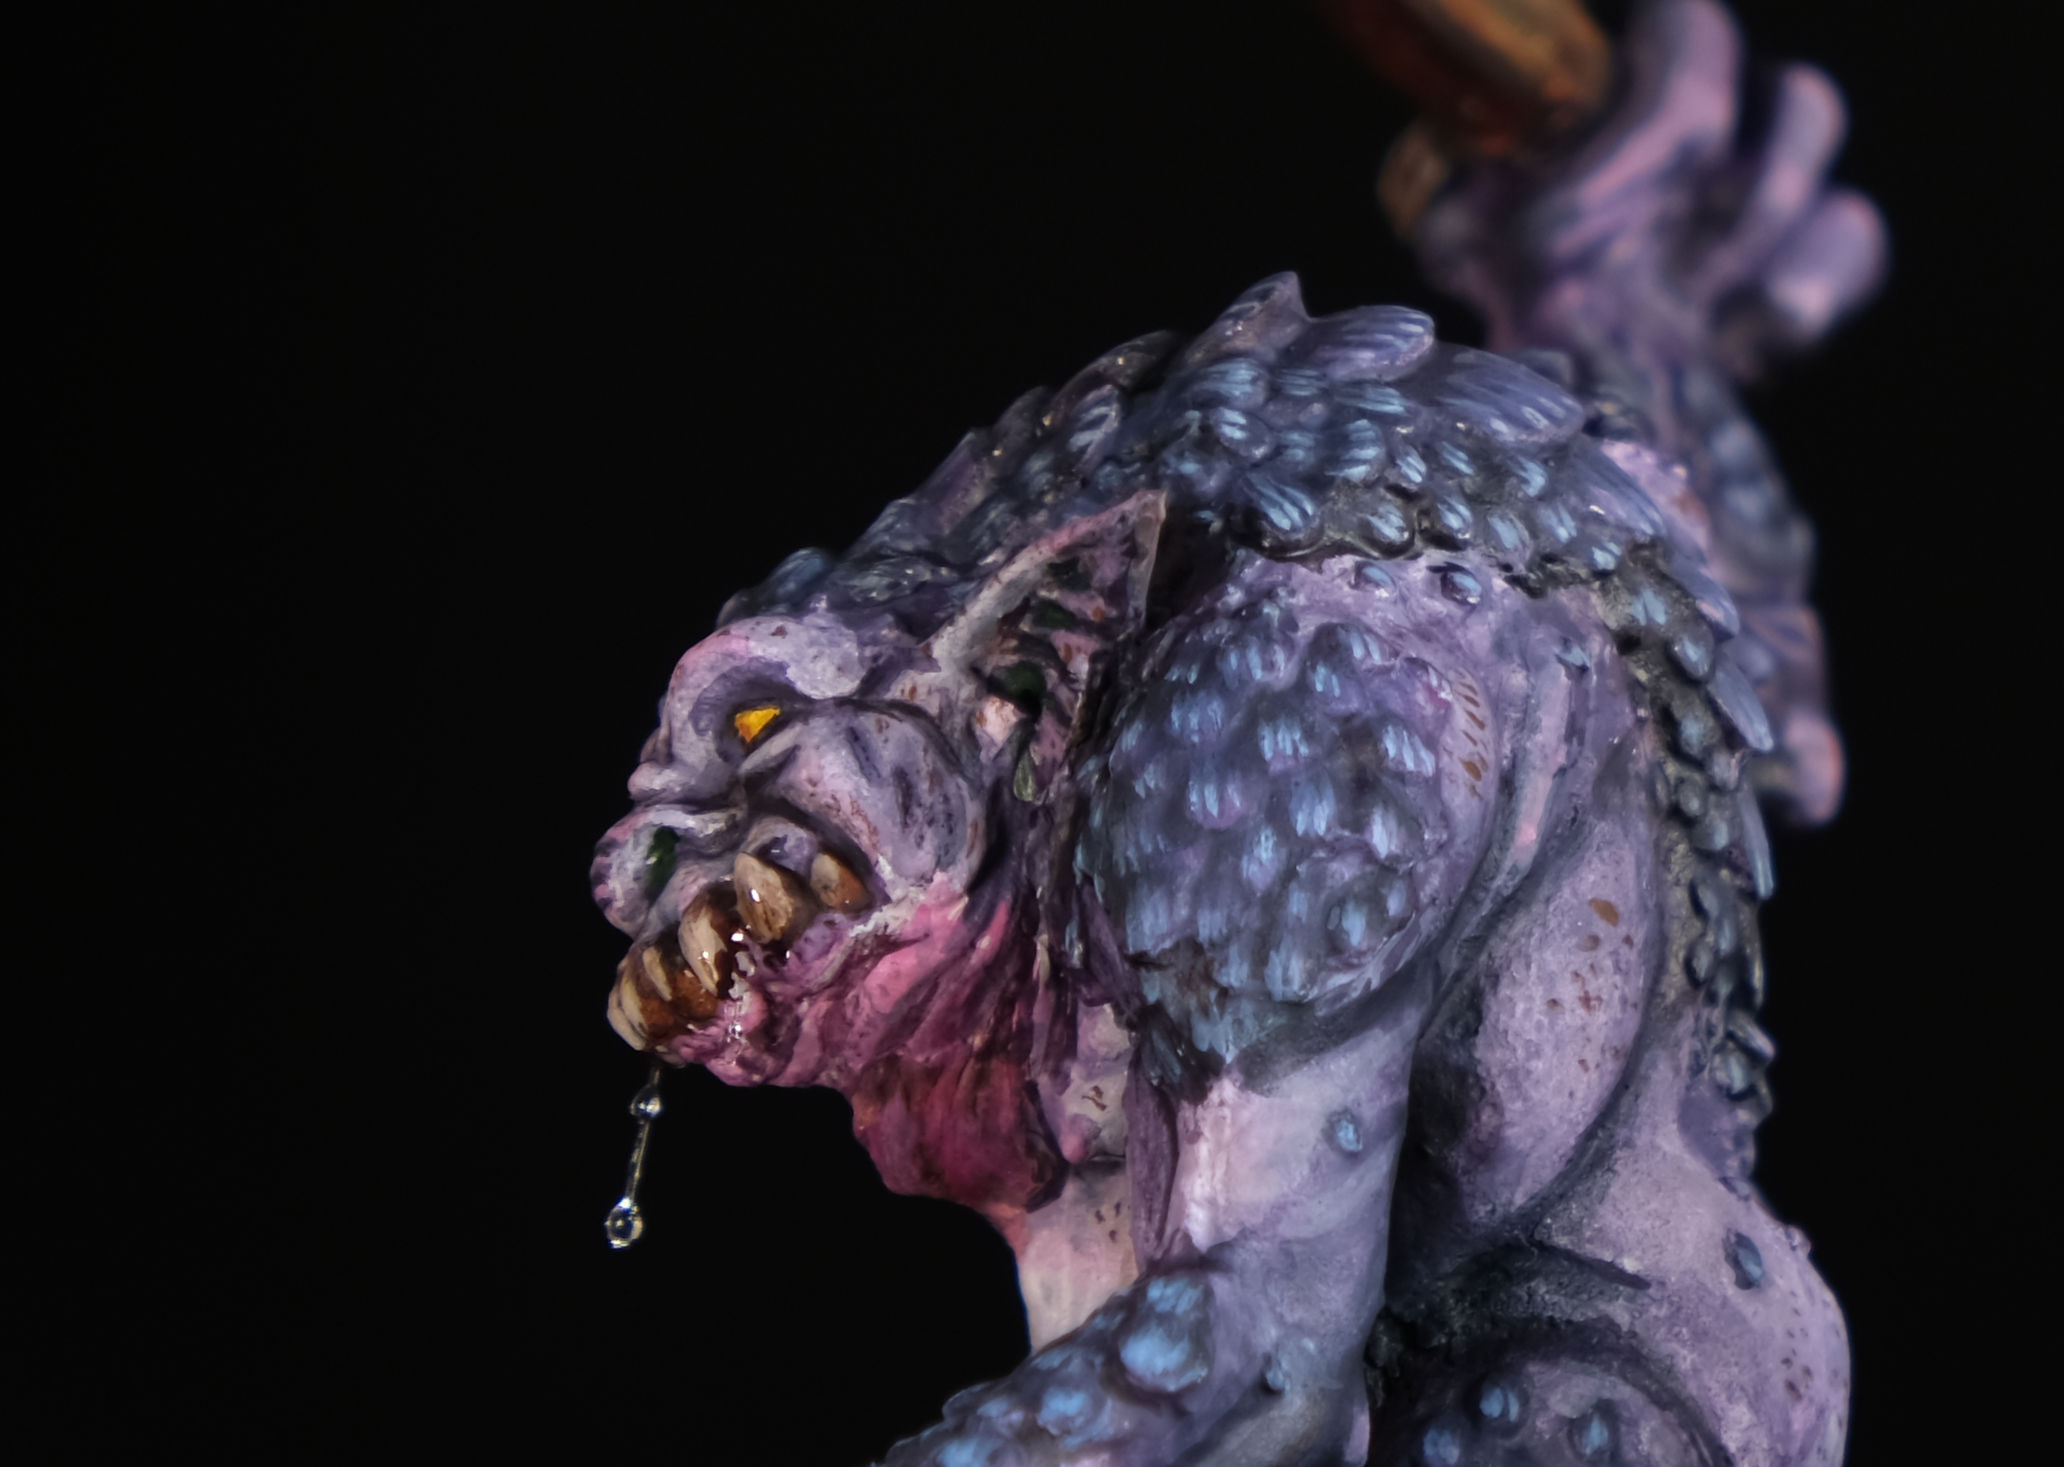
With most miniatures, if you want to establish a strong contrast, the first thing that comes to mind is using complimentary colours. That is, colours that are on opposite sides of the colour wheel. For instance red and green or in our case violet and yellow. Hold on a second, you may ask, there is no yellow anywhere on that cave troll skin? True, but I just used a warm yellow for the eyes. They are rather deeply set, so the contrast helps to distinguish them from the rest of the body.
Otherwise I was working more with value that is how light or dark the colours are. Dark purple for the shadows and Scalecolour Artist Light Skin tone for the highlights worked well to establish very different values between face, belly and arms/legs. Naturally, there are more ways to establish contrast, for instance using warm and cold colours or colours with a warm or cold bias (say Phatlo Blue Red Shade or Green Shade). I also like to use texture to give the eye something to latch on and make out shapes or materials.
I used a vibrant magenta to add accents to the arms, facial features and skinsack around the chin. The scales started with a mix of violet and carbon black. The highlights were done with a warm tone blue mixed with white and were applied as small lines, to simulate a ceratinous texture.
Cave troll skin care
As mentioned, I like to add some texture to my miniatures. I didn’t stop with the scales, but also painted some spotting on the troll’s skin. My focus were the face, highlight areas on the back and the sides of the belly, just to add some interest. I used a darker version of the light skintone, mixing some red oxide in it and a bit of glaze medium, You don’t want the spotting to be too stark, but can always apply a midtone glaze afterwards to fuse it with the skintone. Some variation in the coloration of the spots is recommended. Either add a bit of warm yellow or just work with translucency.
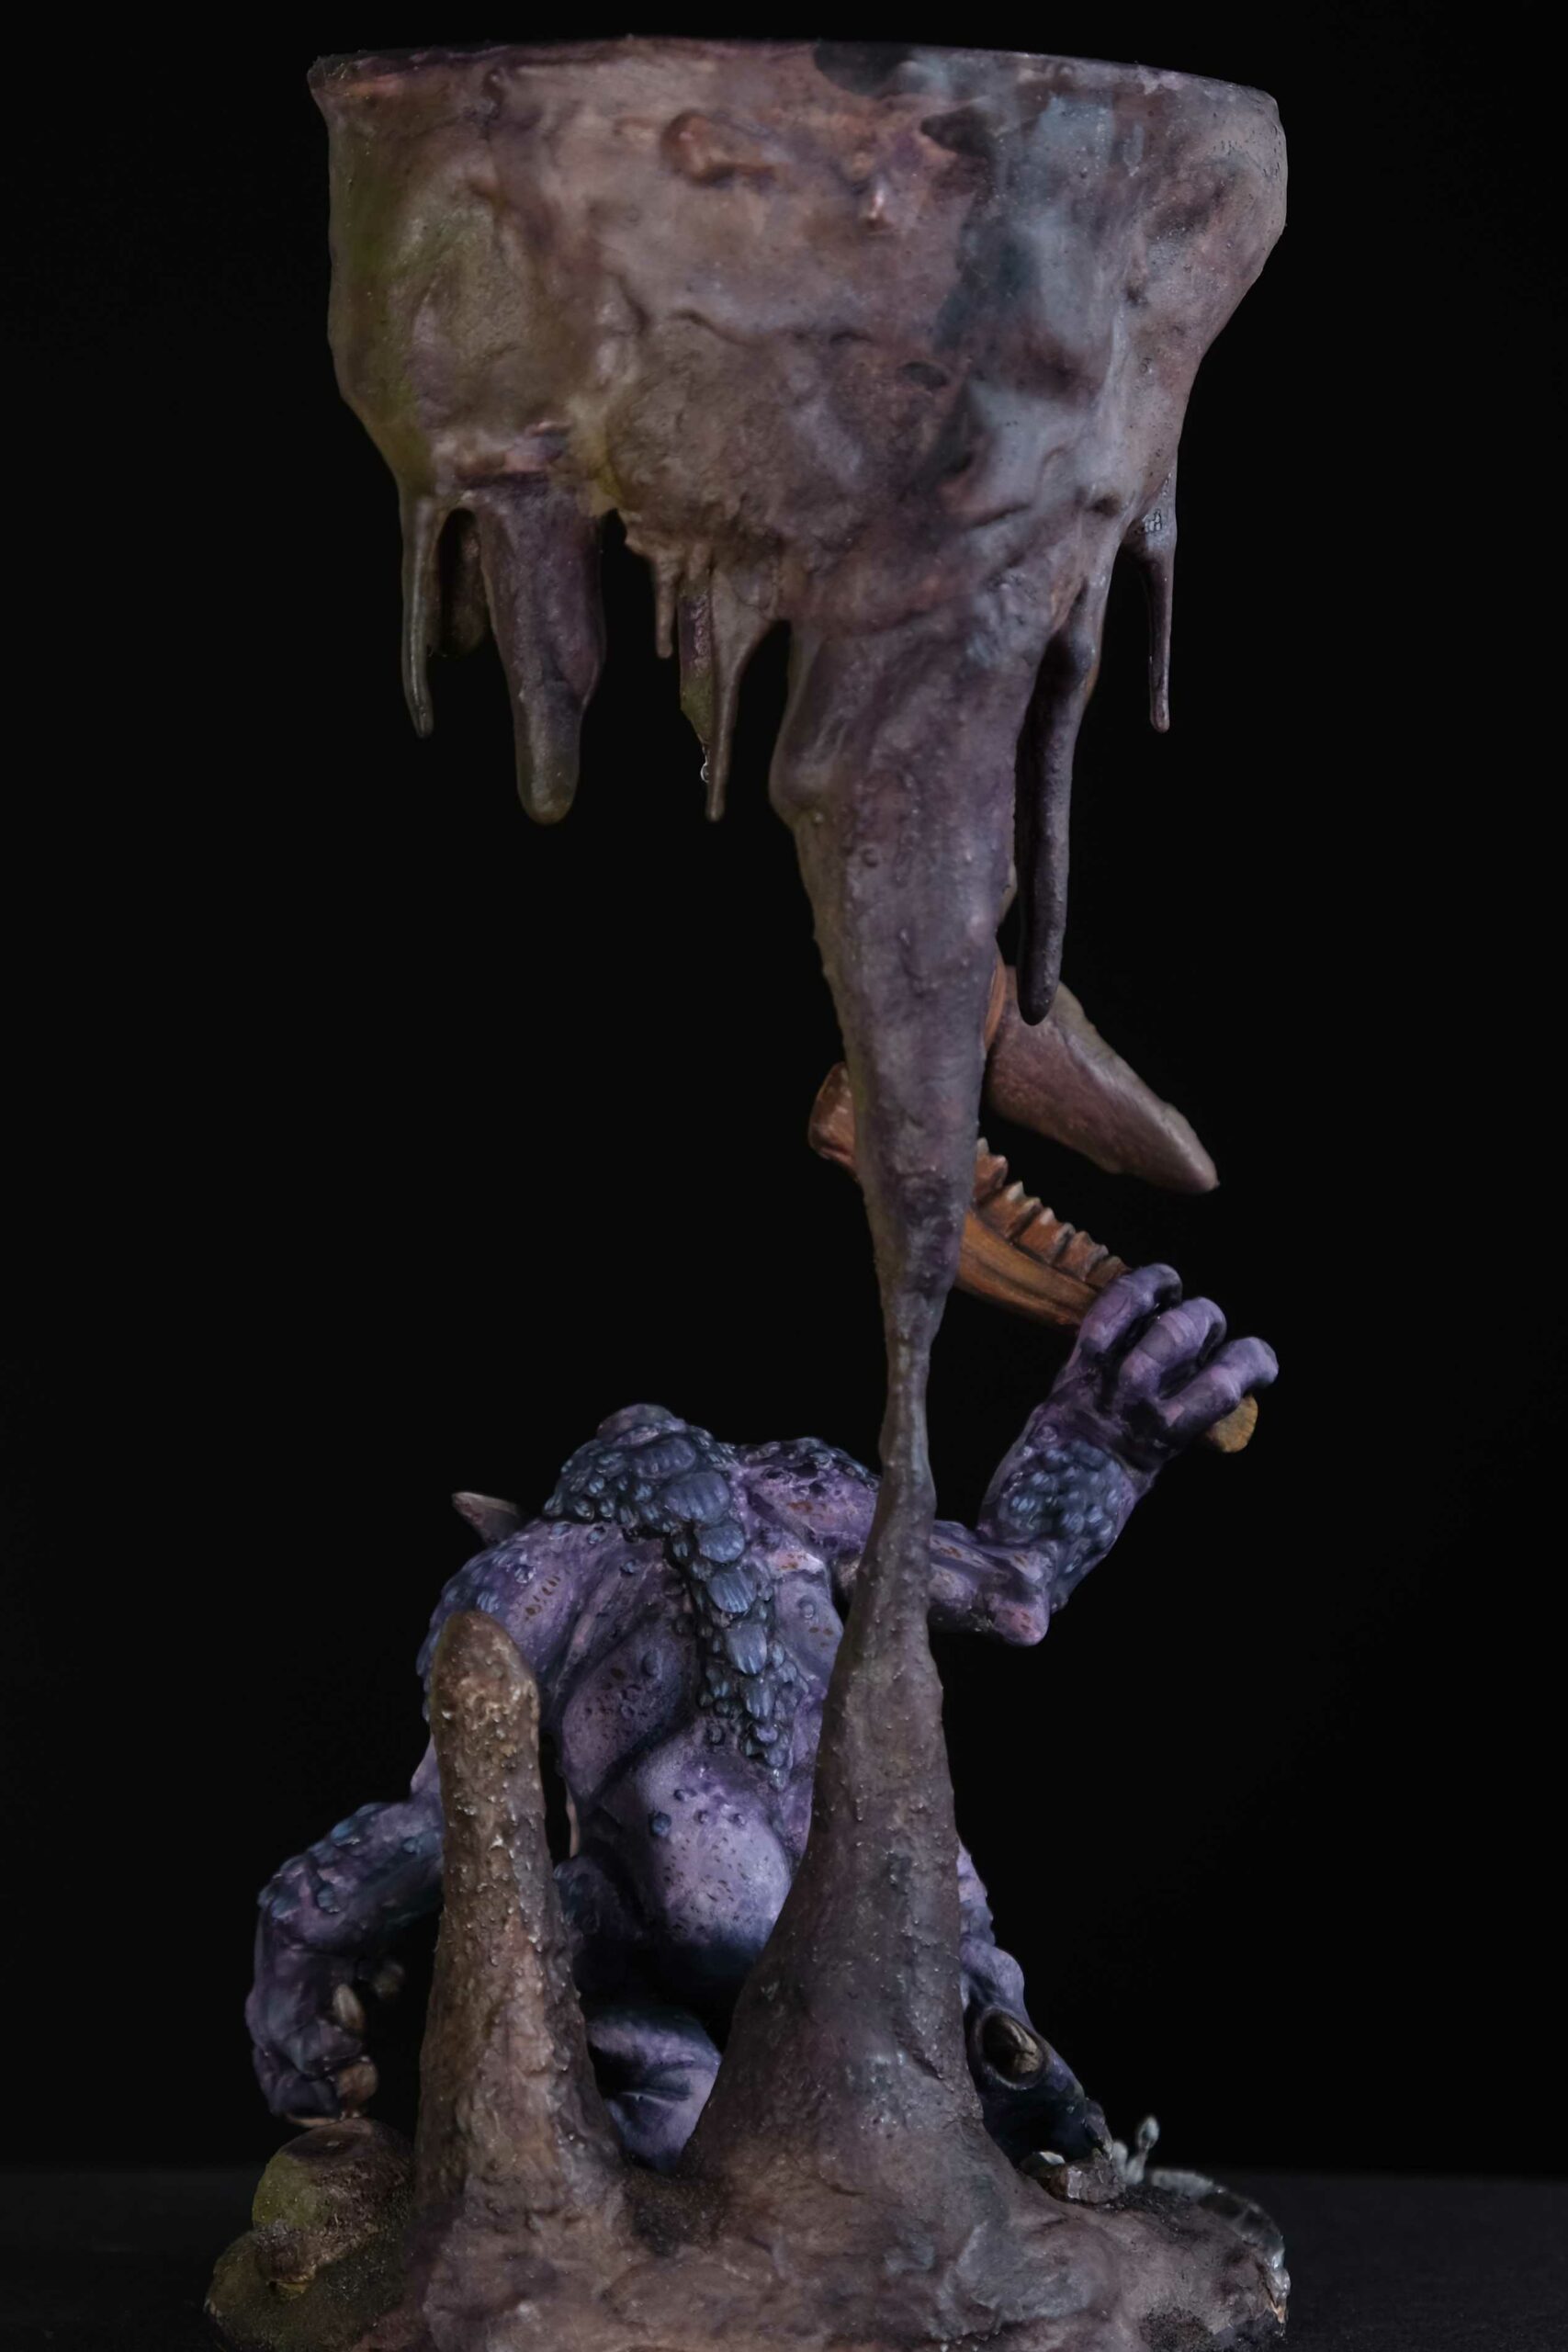
Drool is cool
The go to method on the interwebs to depict drool or bodily fluids in general is the time honoured UHU method. Basically, you put the stuff on some scrap piece of palastic, let it set for a few seconds and then use a tooth pick to draw out some strings and apply them to the model in question. I think this method is great for saliva strings inside maws, however, the strings are fairly fragile and thus won’t stand up to clumpsy hands coated in cheeto dust. You also have a work time of a minute at best.
I wanted clearly defined drool droplets on a string of saliva – very difficult to achieve with the UHU method, if not impossible or at least frustrating to the point of your forehead hitting the desk. So instead I used some Greenstuff World UV resin (sold as water effect) and a very thin nylon thread (just 0,16mm thick).

Now, in a room without any daylight, you can apply the UV resin to a piece of nylon string. This works best, if you apply it to some scrap plastic and then use a toothpick to apply the resin. Resin on skin is nasty business and can cause allergic reactions or worse. So wear disposable gloves for this one. With artifical lighting you can take as long as you need to get the perfect droplets forming. You can also work in stages and add to the string after the first round of UV resin is cured.
The curing is done using a UV torch, also sold by Greenstuff World. Again, better be safe than sorry. Wear protective eye gear and make sure the room is well ventilated. The chemical reaction will release some fumes, that are surely not healthy to breath in. If you want to be super careful use a respirator.
I think the results are very nice and much easier to control than UHU. Given that nylon has great tensile strength, the effect should stay put. I attached it to the troll’s teeth using again the UV resin, which assures – in combination with the flexibility of the nylon – good adhesion. Bonus points for adding some gloss to the gum and teeth of the cave troll.
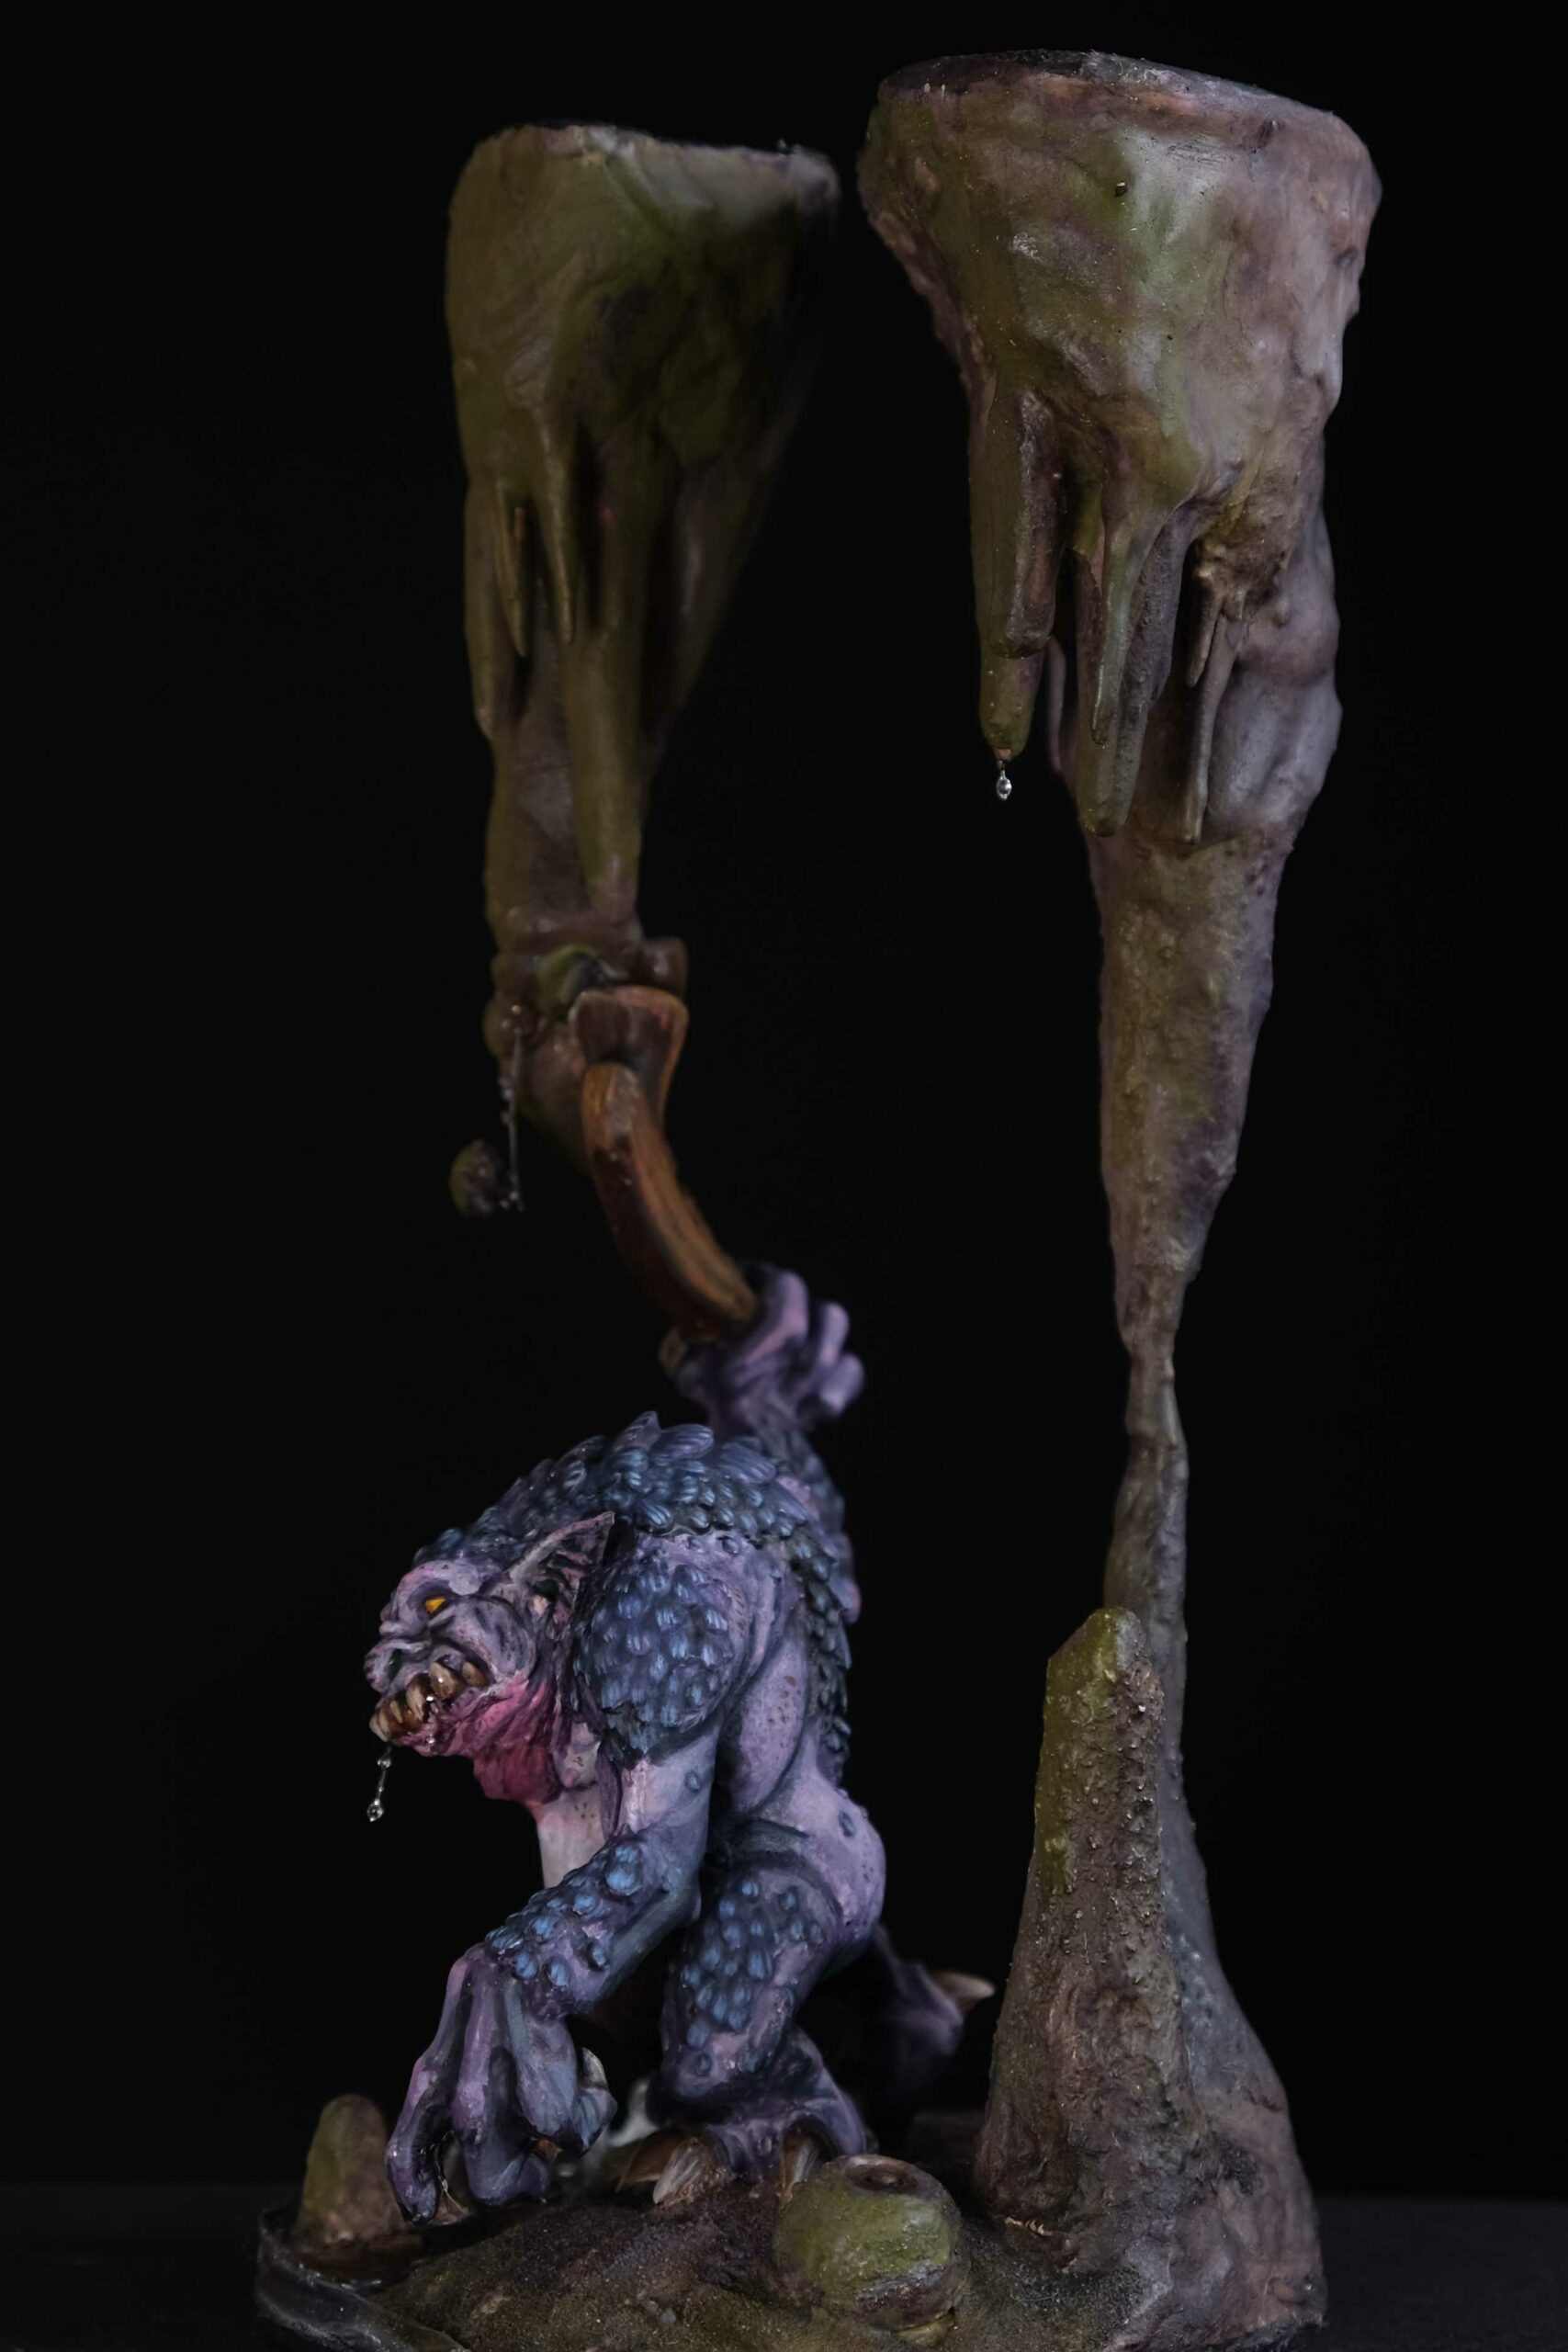
‘Tites and ‘Mites – cavernous basing
Cavernous environs are fascinating, especially if they feature stalactites and stalagmites. Modelling these structures is also very straightforward and forgiving.
I use various gauges of brass rod to give both stalagtites and stalagmites some strength and covered the brass rod with greenstuff for the smaller ones or Milliput for the larger ones, that need to support the ceiling. Naturally, the ceiling is not a solid chunk of Milliput. Rather the core is XPS, covered in Milliput and Greenstuff. When the epoxy putty is cured, it is time to add some more texture and close gaps with a woodfiller and PVA mix. An old brush can be used to intend the surface and give it an irregular surface texture.

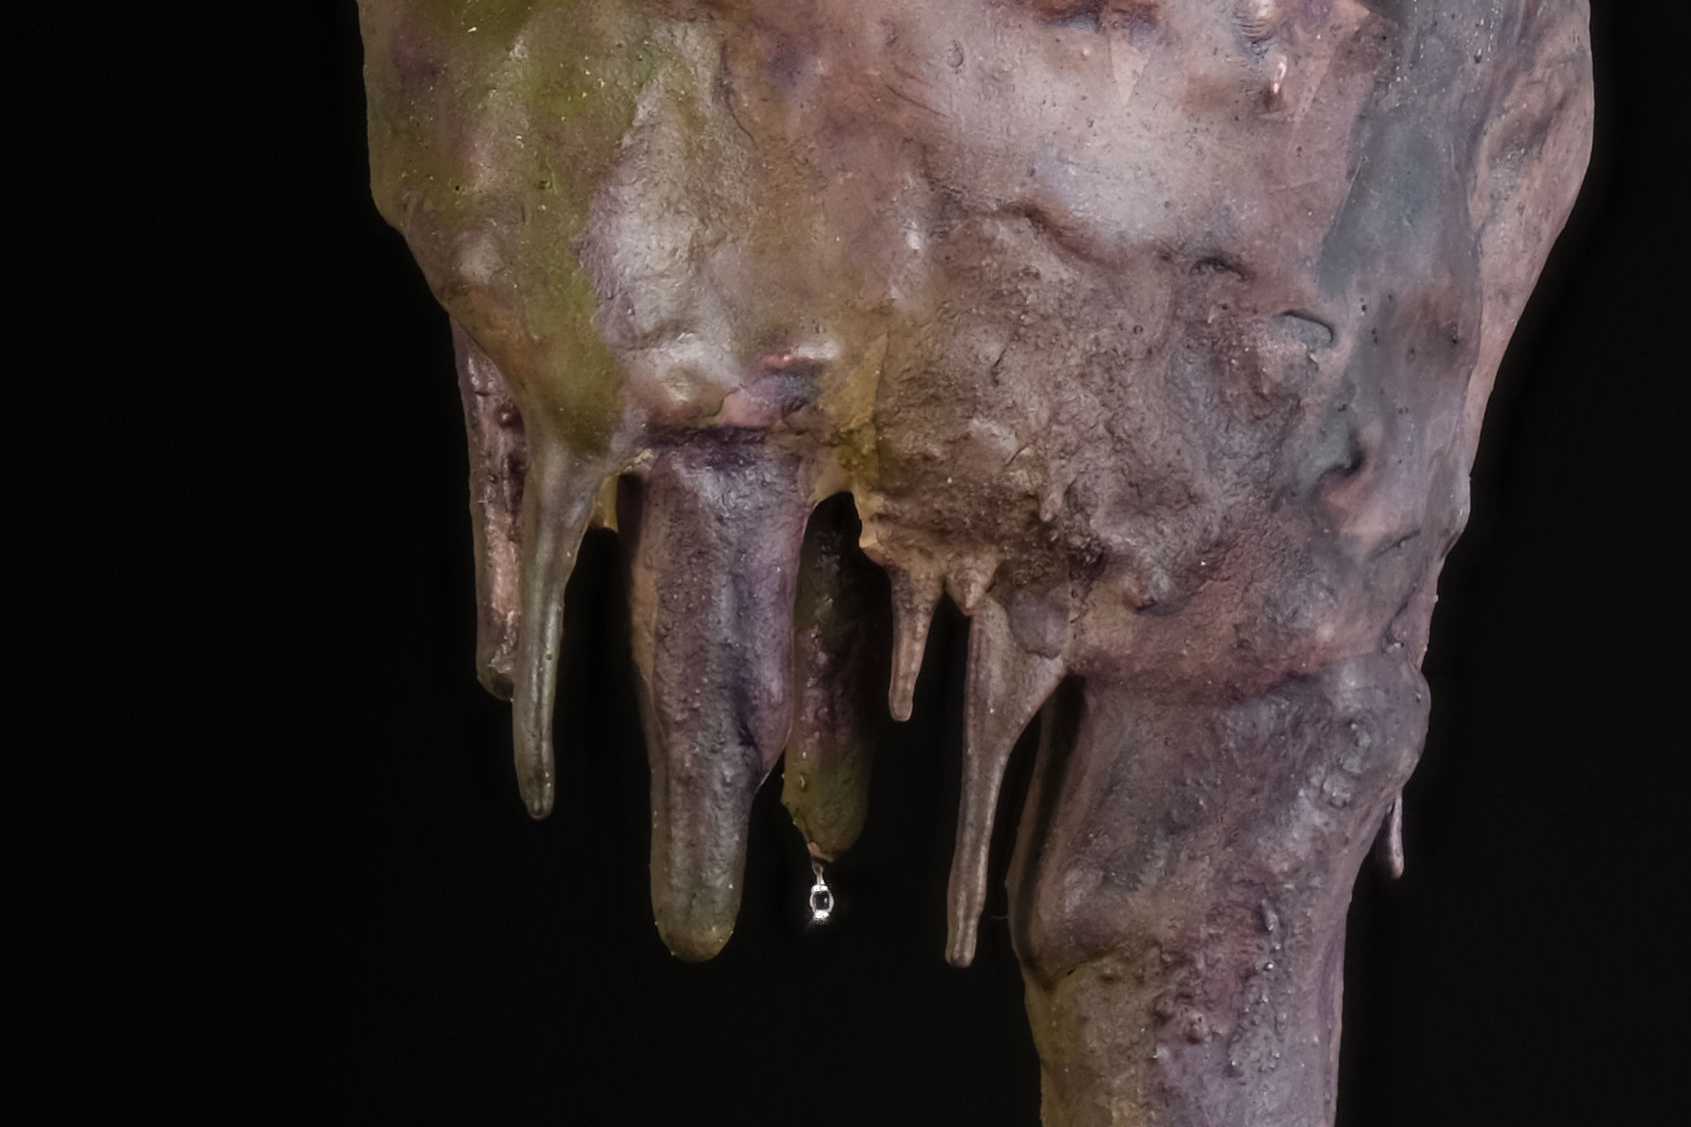
Painting the cavern is easy, too. I started with a light brown, followed by a darker brown with a bit of violet mixed in. A basic gradient was established makign the back of the structure a darker violet, as if they cast in shadows. This works best if you work wet-in-wet. Some enamel effect paint by AK Interactive (Light Slime) adds more interest and suggests the openign of the cave being close-by.
All the water and splash effects were done using the Greenstuff World UV resin. This stuff is very versatile. First I poured the shallow underground lake, followed by short strings of nylon that got the drool treatment. Only this time I wanted to achieve a splash and droplet effect. To bulk out the splashes acrylic gloss medium came in handy, as it keeps its shape. The UV resin has the consistency of water, so doesn’t really work for peaks or ripples.
I am quite pleased how the cave troll came out, but naturally there is room for improvement. I think I need to push contrast even further and improve my blends. Brush control for the smallest details is also an area I want to improve in. Let’s see how the next contest goes.
I hope you found something of value for your own modelling endevours. If you have any questions, suggestions or want tot discuss the ecology of trolls, feel free to comment below. Internet troll or not, always wield your brush with honour.
Looks absolutely brilliant! Love all the little detail you put in there, like the Stalagtite breaking off, the drool, the vein on the belly or the water droplets. I do have to agree with Kuribo in that the face isn’t the focus on this figure, yet I quite like that here.
Thank you Moiterei. Much obliged. The base is definitly more than an afterthought with this one. I didn’t want it to overwhelm the troll, so I kept the colours simple. I am glad to read that you appreciated all the small details on the base. More emphasis on the face is something I have to repeat like a mantra with each new paint job. Pushing the contrast is always on my mind, but value needs to be another focus.
Its great to read about your process on making this piece. As I said on Instagram, it is really nice work and something to be proud of. One thing I thought of that might have improved this piece is to have brighter highlights on the face of the troll. One of my mates who is a better painter than I has drilled that into me and I think he’s right, especially on this model. My eye is drawn to his belly (which looks great generally speaking) because it is the lightest part on the model but I think the Trolls fierce and feral expression should be what I’m looking at first as you did a great job with the drool and the teeth. I’m looking forward to seeing what you do next as it looks like you put quite a bit of time into this project and I bet you’ll surprise me with what you work on next!
Thank you Kuribo! Yes, I think your critique is spot on. I was struggling with establishing contrast in the facial area, but in the end had to call it a day, as the contest deadline loomed and the base needed some finishing touches. I think the main issue is, that the value of the belly is higher than the value of the face. I think with the next mini I will be more conscious of this and try to chase contrast even more. I have a few scenic pieces on the workbench right now. Could be more cave dwellers or maybe something undead.