
Object Source Lighting (OSL) – when done well – is one of the most baffling techniques we can apply to our little adventurers, futuristic warriors and even terrain pieces. Think of a spelunker carrying a lamp in his hand, illuminating part of his face and body or even the odem of a red dragon turning its surroundings in a spectacular display of glowing reds. However, there is one catch: To achieve such a dazzling display you have to first create the illusion of a light source illuminating your miniature from a specific direction and distance. So far, so difficult. Now add a secondary or even tertiary light source, and you are faced with even more challenges.
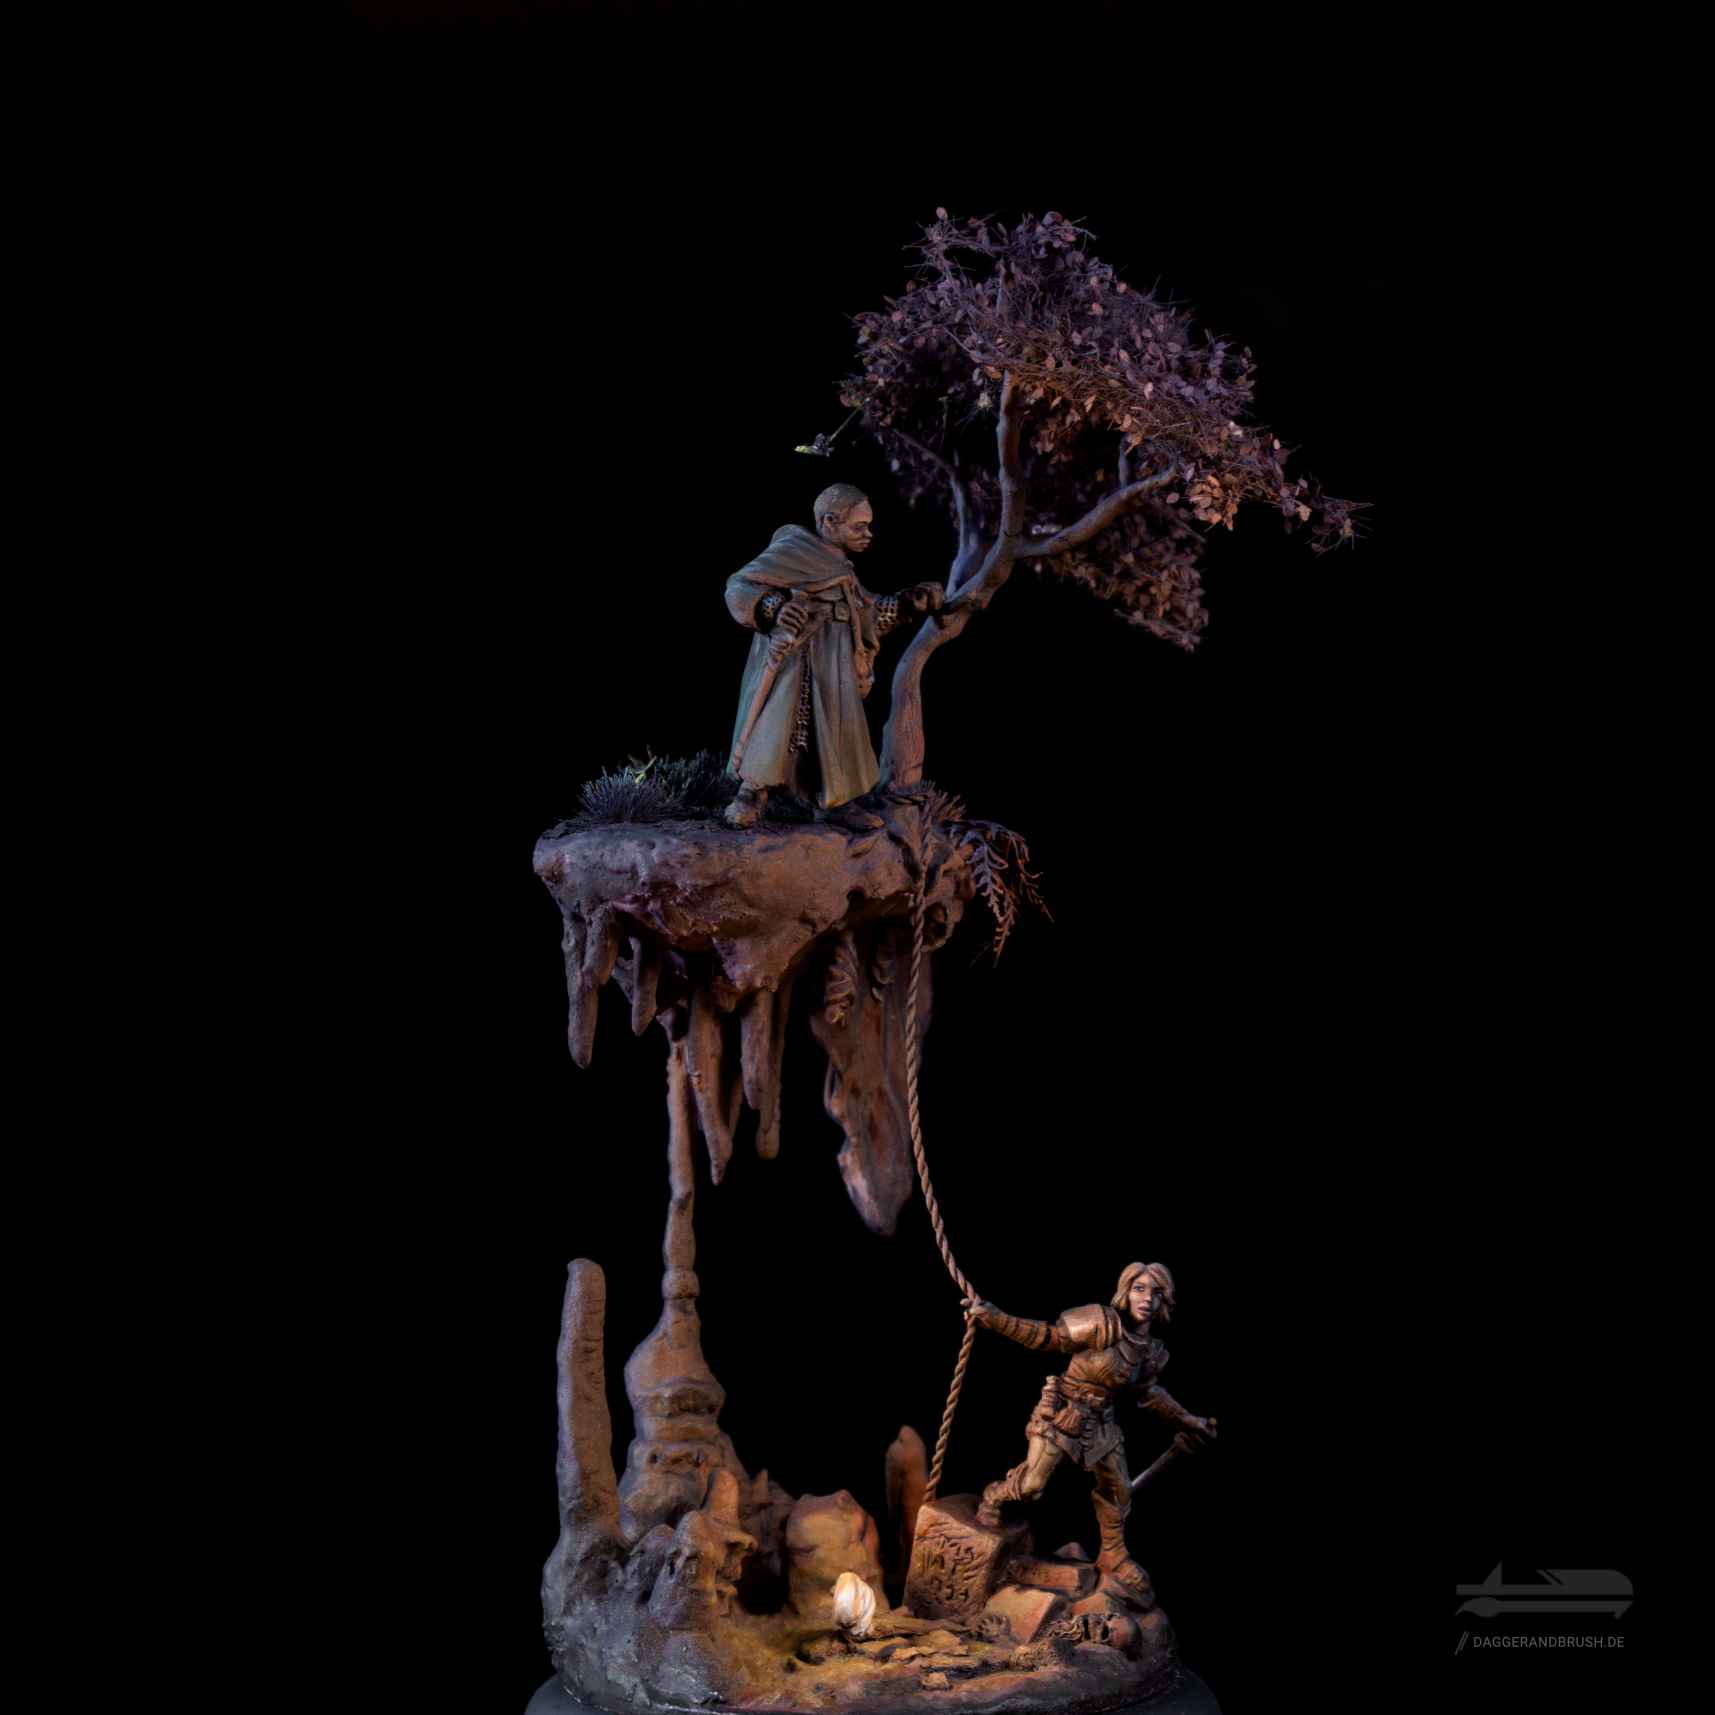
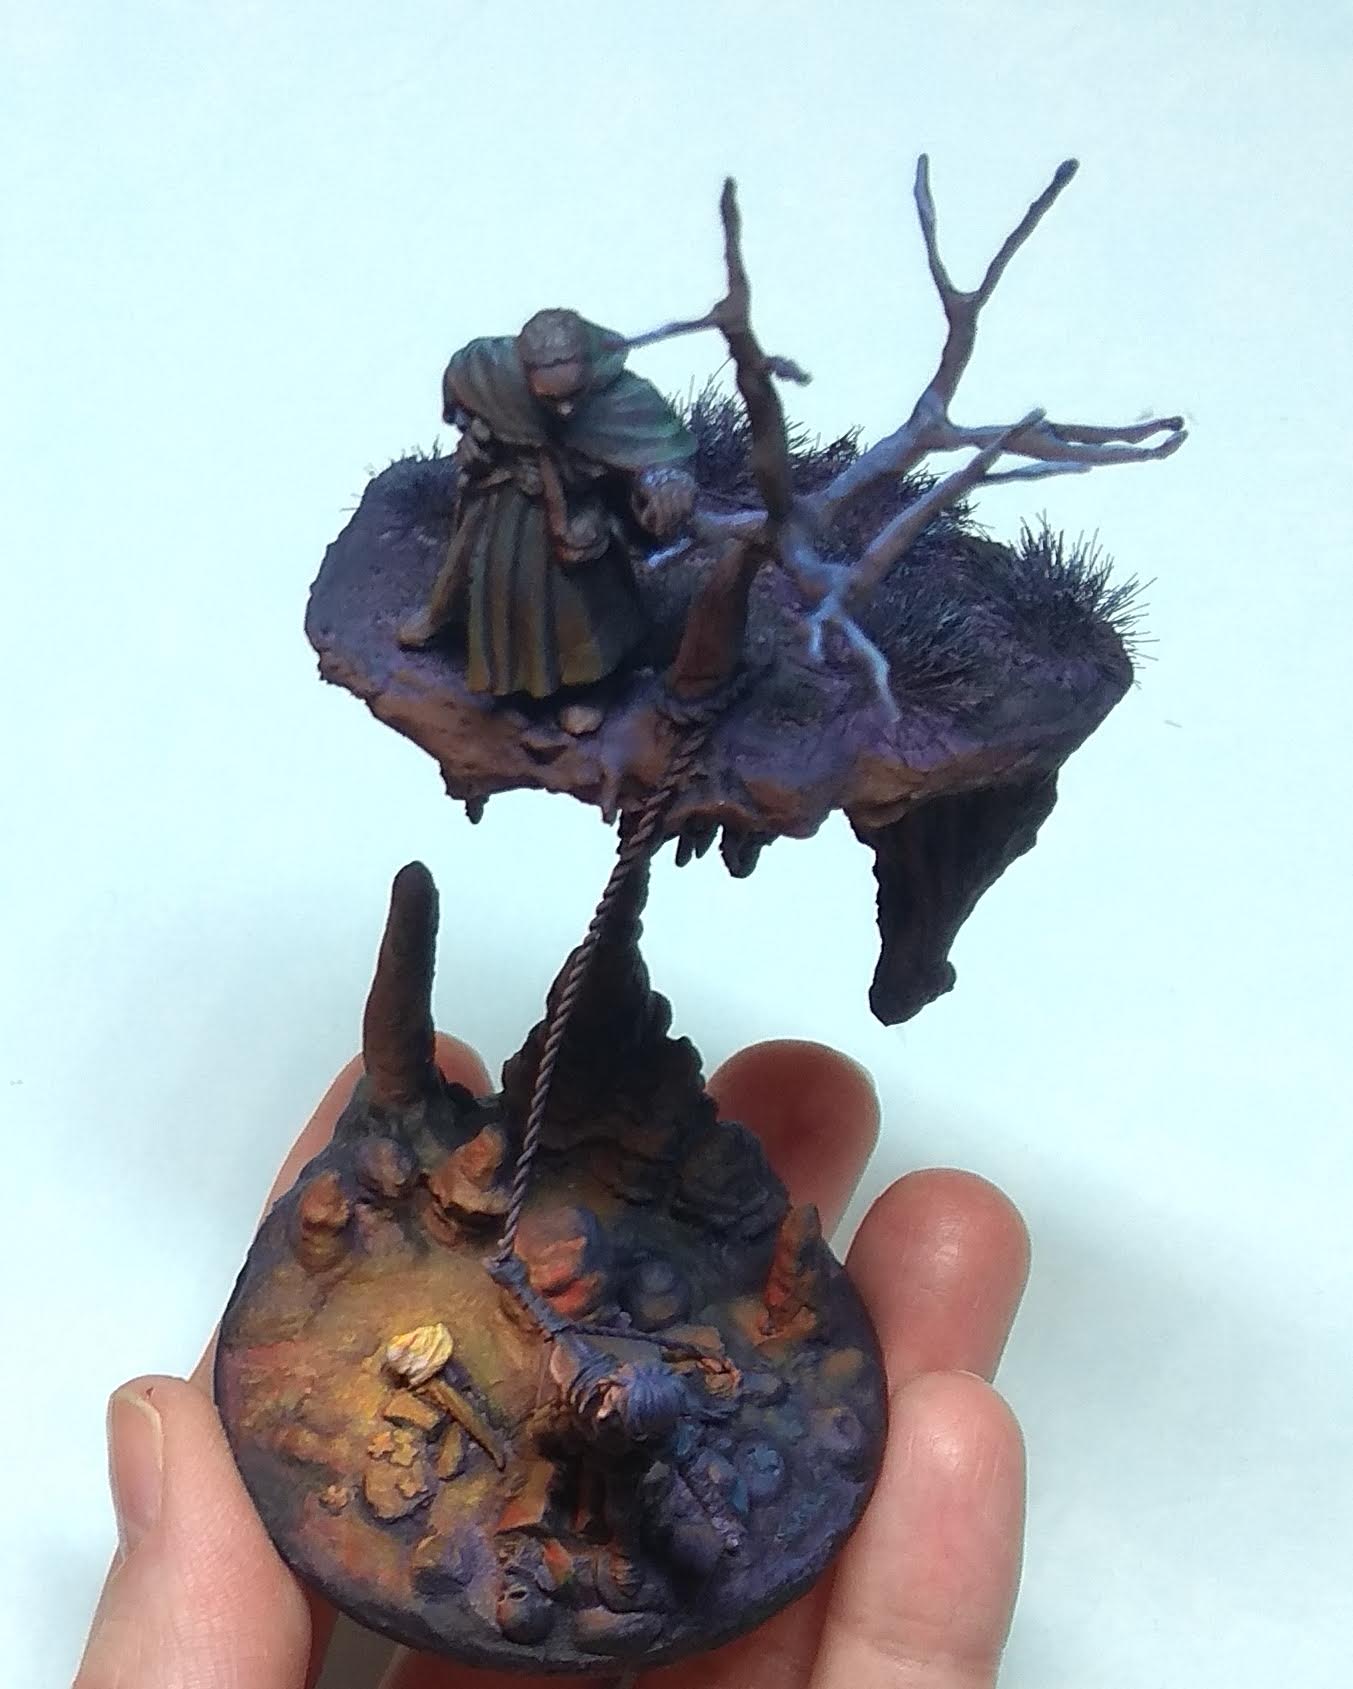
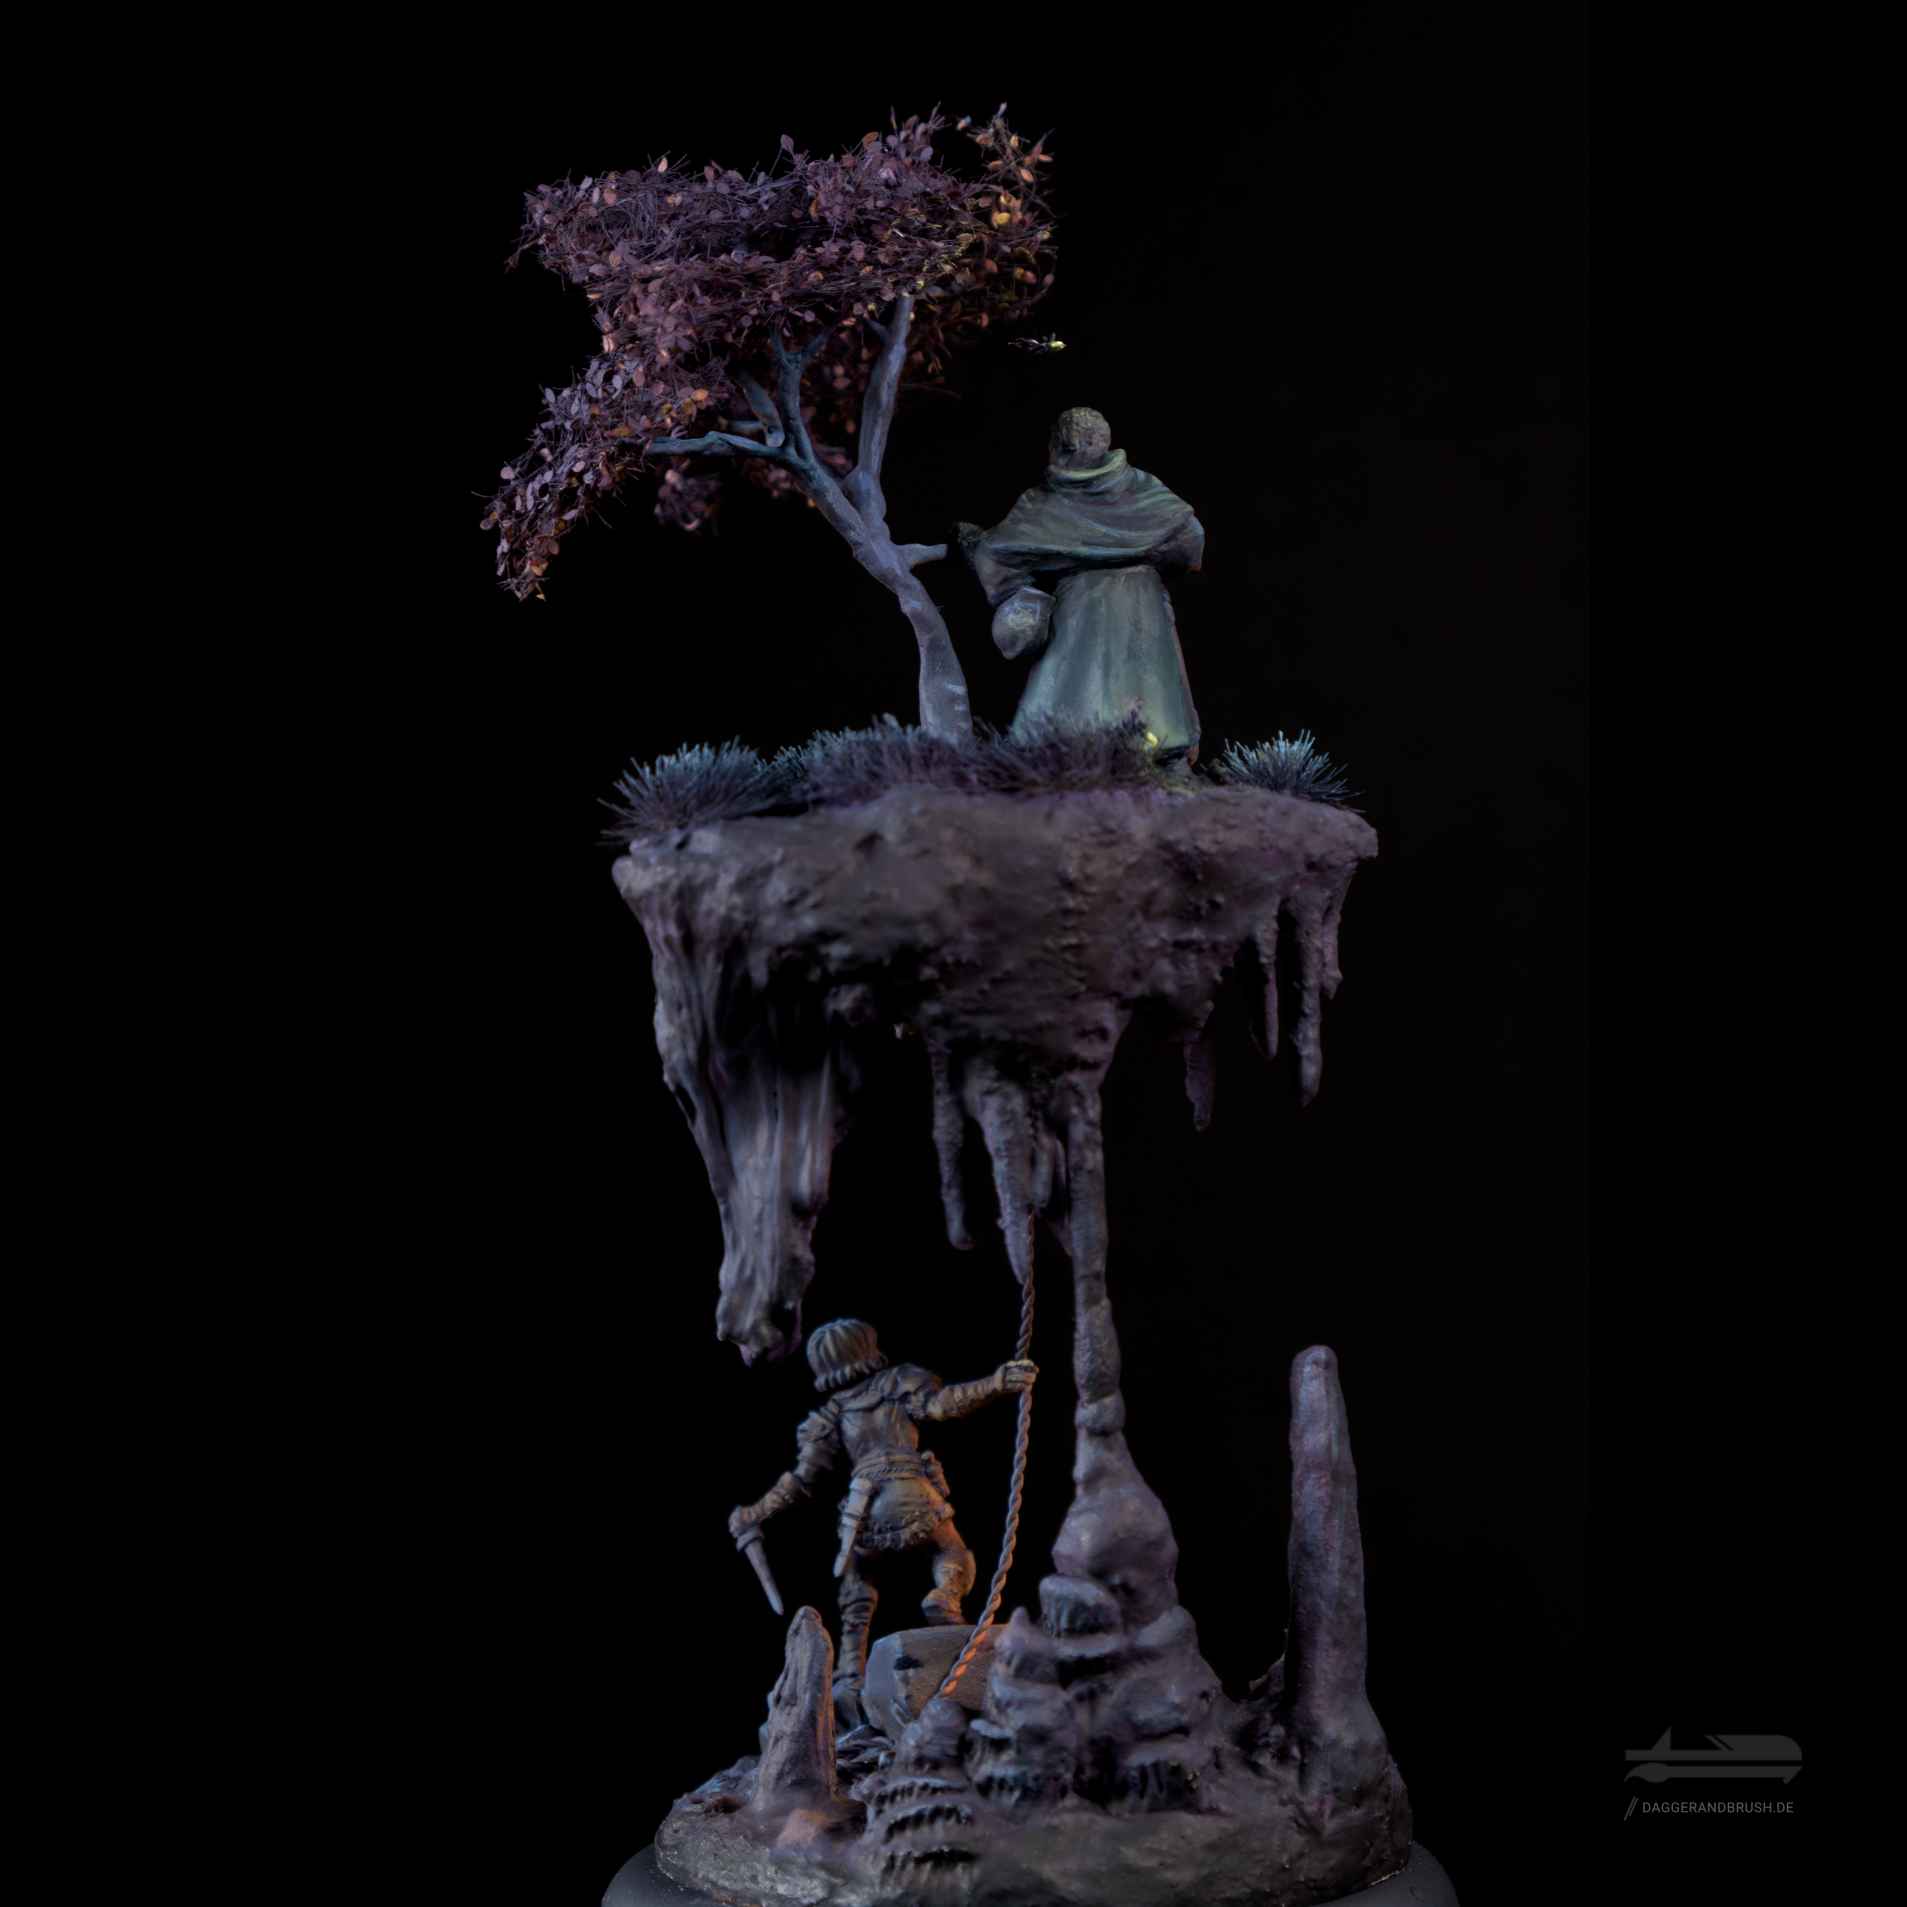
Fret not, for I will provide a few useful tips, should you desire to try your hand at OSL with multiple light sources. My example is a spelunking vignette on two levels: surface and a cave entrance. It features the moon and a torch as light source, as well as fireflies.
Creating atmosphere with light
As you may realise, even before you start, you need to have a good idea what kind of atmosphere or feeling you are after. What kind of light do you need to evoke the desired emotion in people looking at your work? Dreamy, scary, ominous? Cold and disagreeable or warm and cosy?
My goals were two-fold:
- Engage the beholder both on the surface and cave level, while still preserving the focal point of torch and spelunker.
- Evoke a feeling of looming danger or dread in the dark cave, contrasted by the warmth of the torch and the support the two adventurers give each other.
To achieve these goals the vignette makes use of a warm and cold contrast: The fire is a warm light source that falls off quickly in intensity, while the moonlight is a cold, more subtle and even source. Similar to the torch light, the comradship is but a small speck in the darkness of the cave and cold of the night. The fireflies, a cold greenish light, add interest on the less prominent surface level, to attract the eye of the beholder and let it wander along the vertical axis of the vignette. However, the firefly light is subtle enough to preserve the visual hierarchie between the two characters.
The protagonists – through foul and fair
While the overall atmosphere of a vignette is important, it would obviously not work at all if the characters you are using don’t match scale-wise or do not have the right poses to interact. Given the suspensful scence I decided to build, I couldn’t find matching miniatures out of the box.
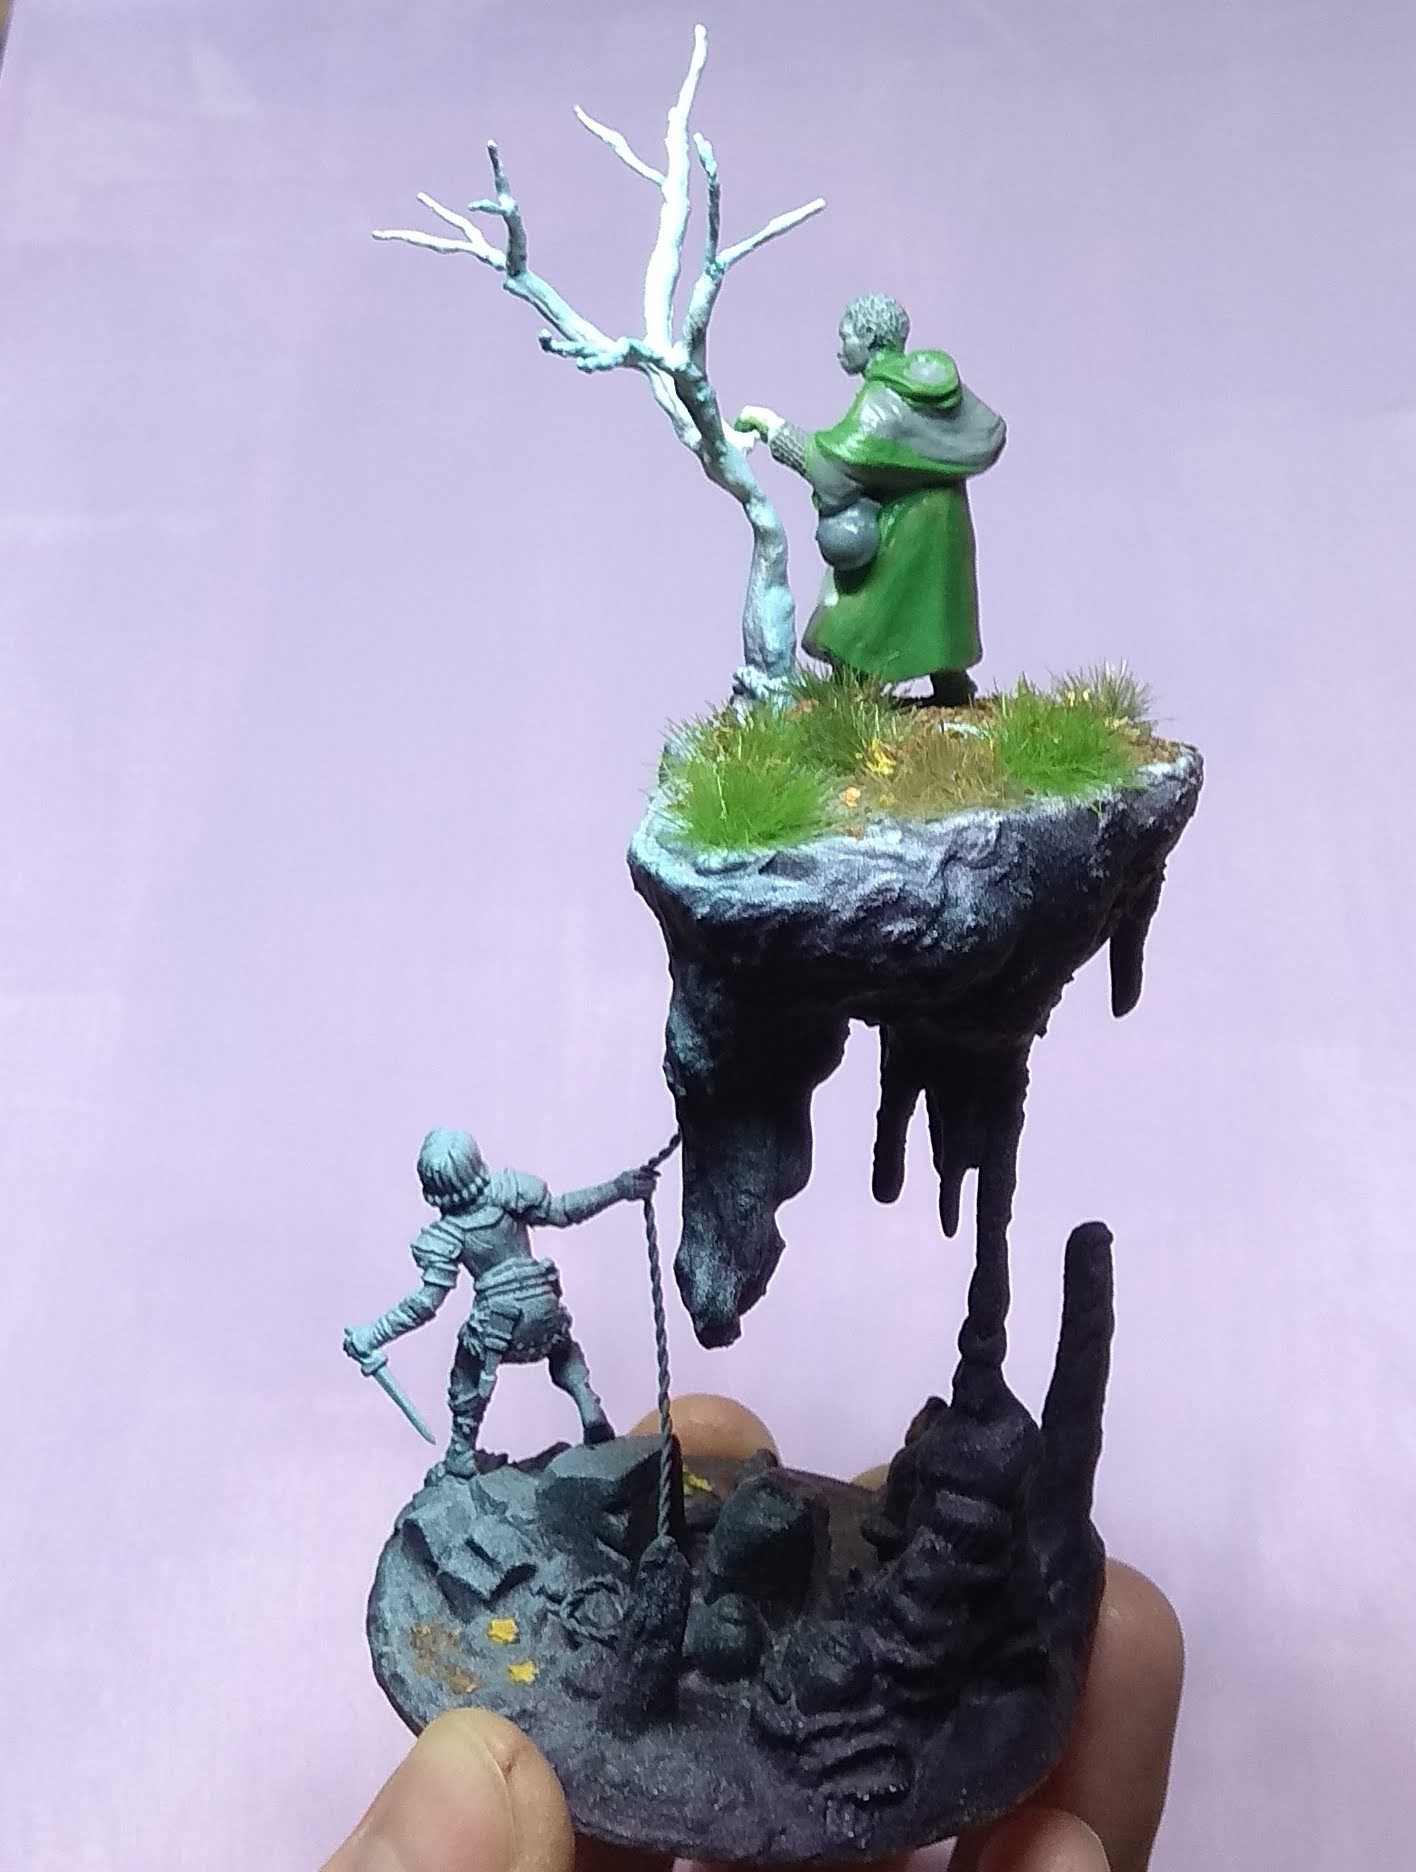
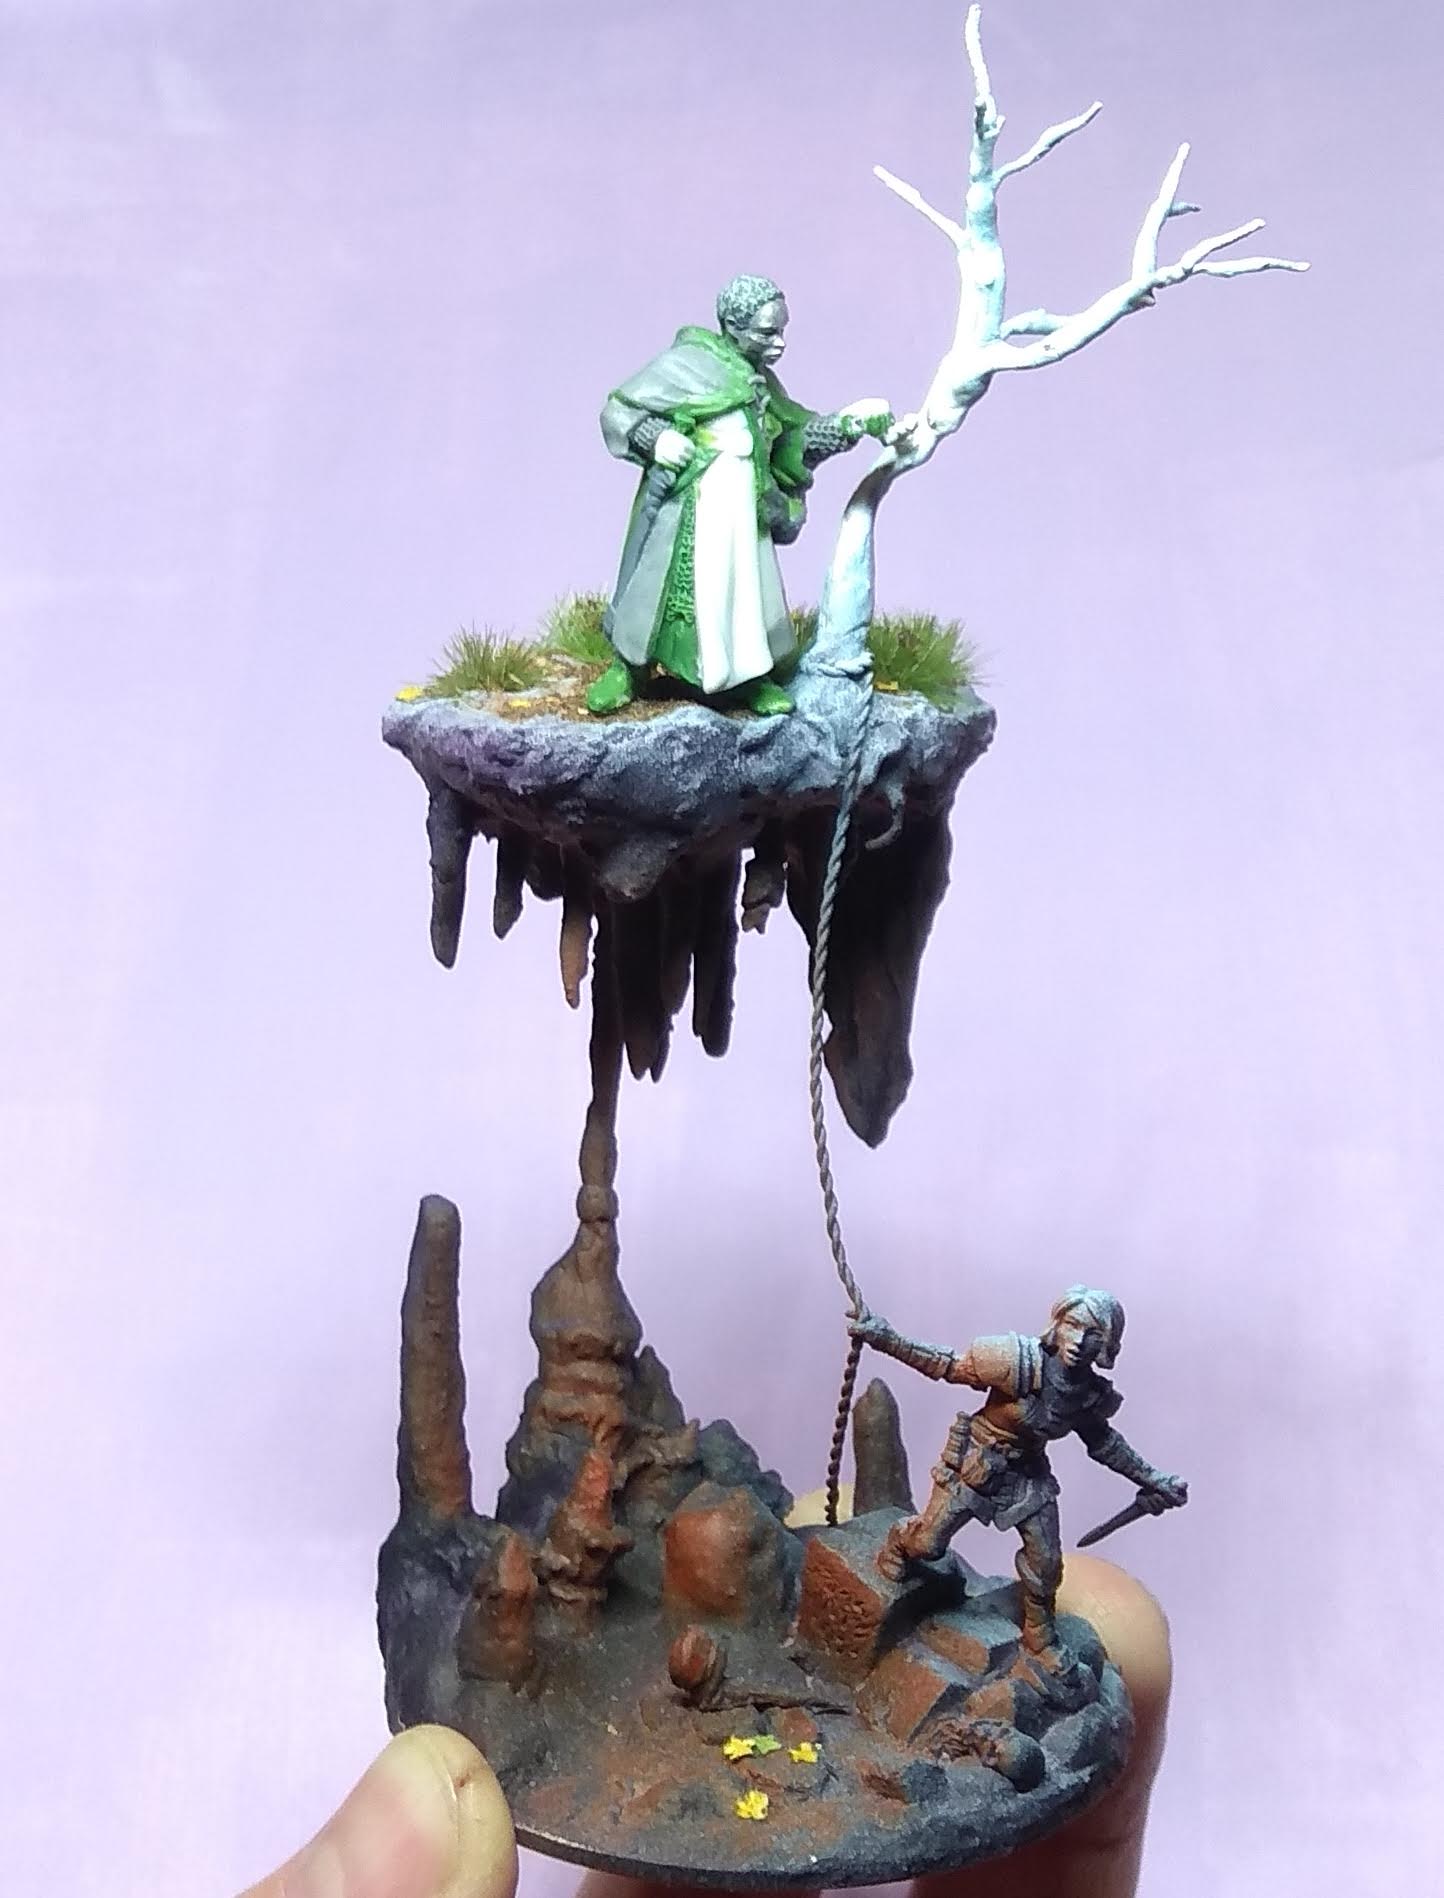
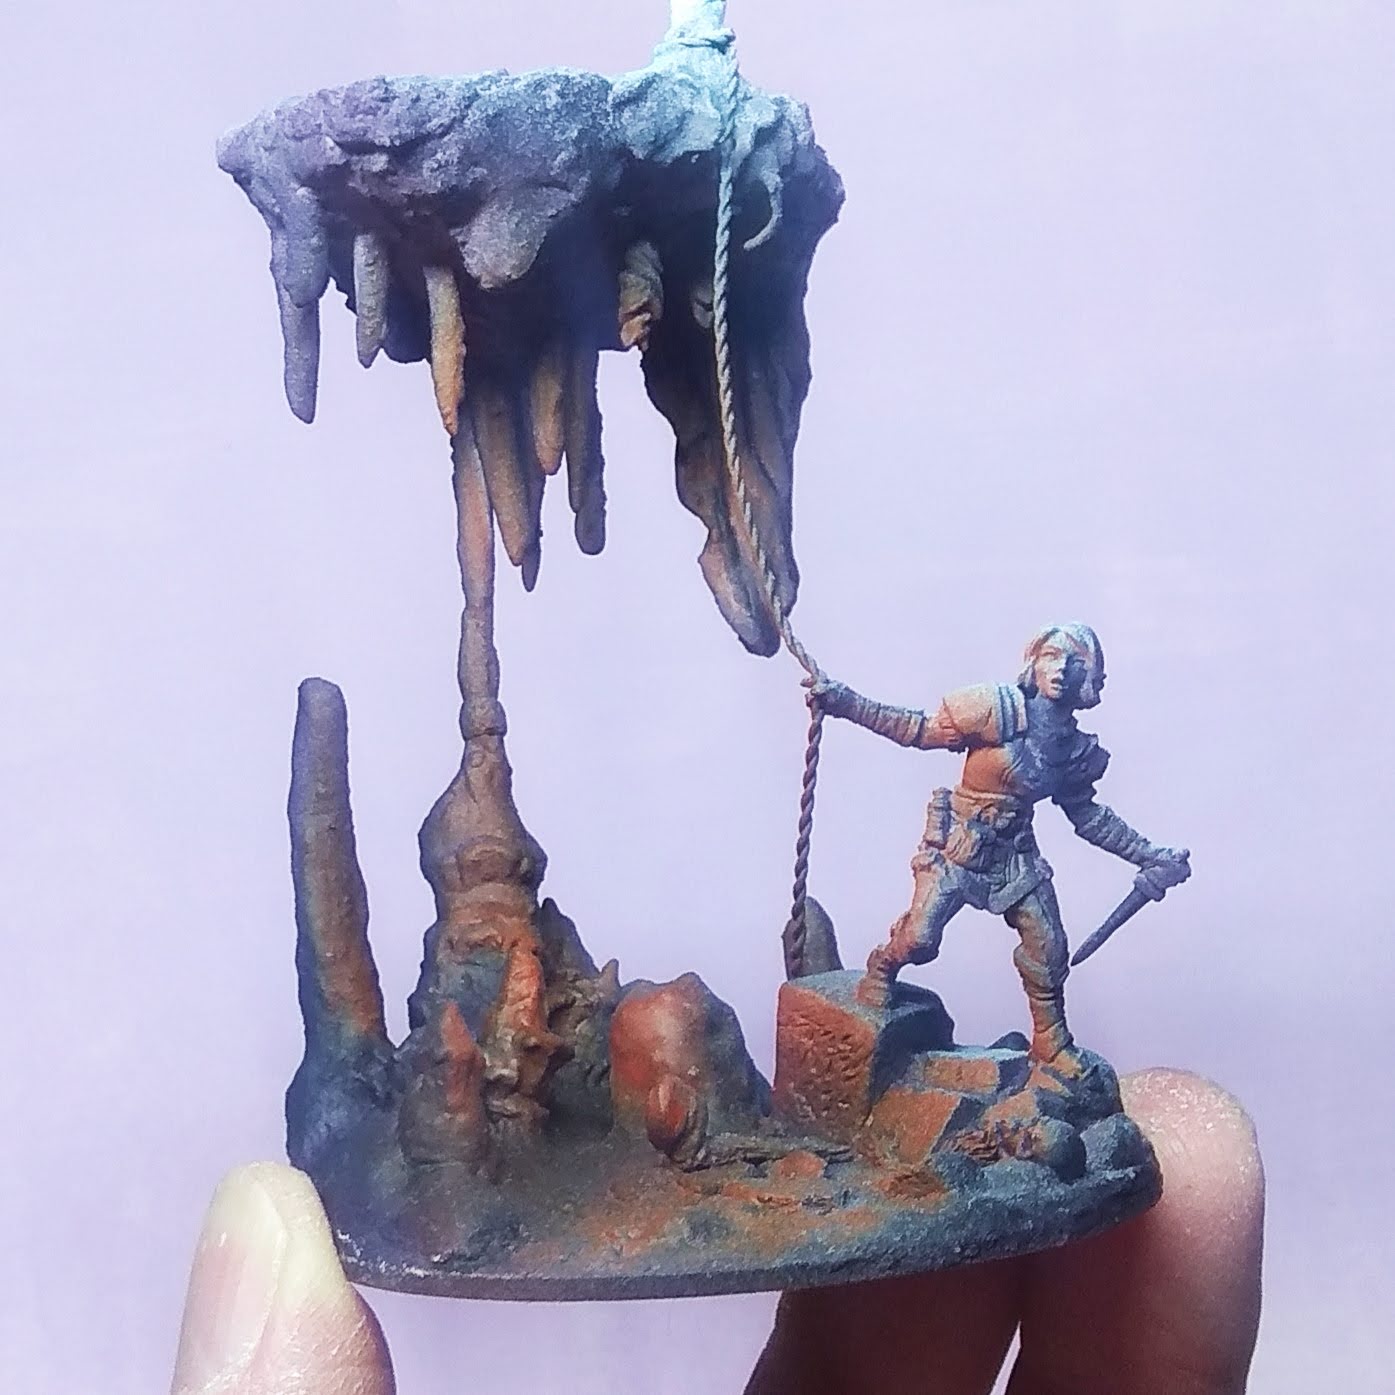
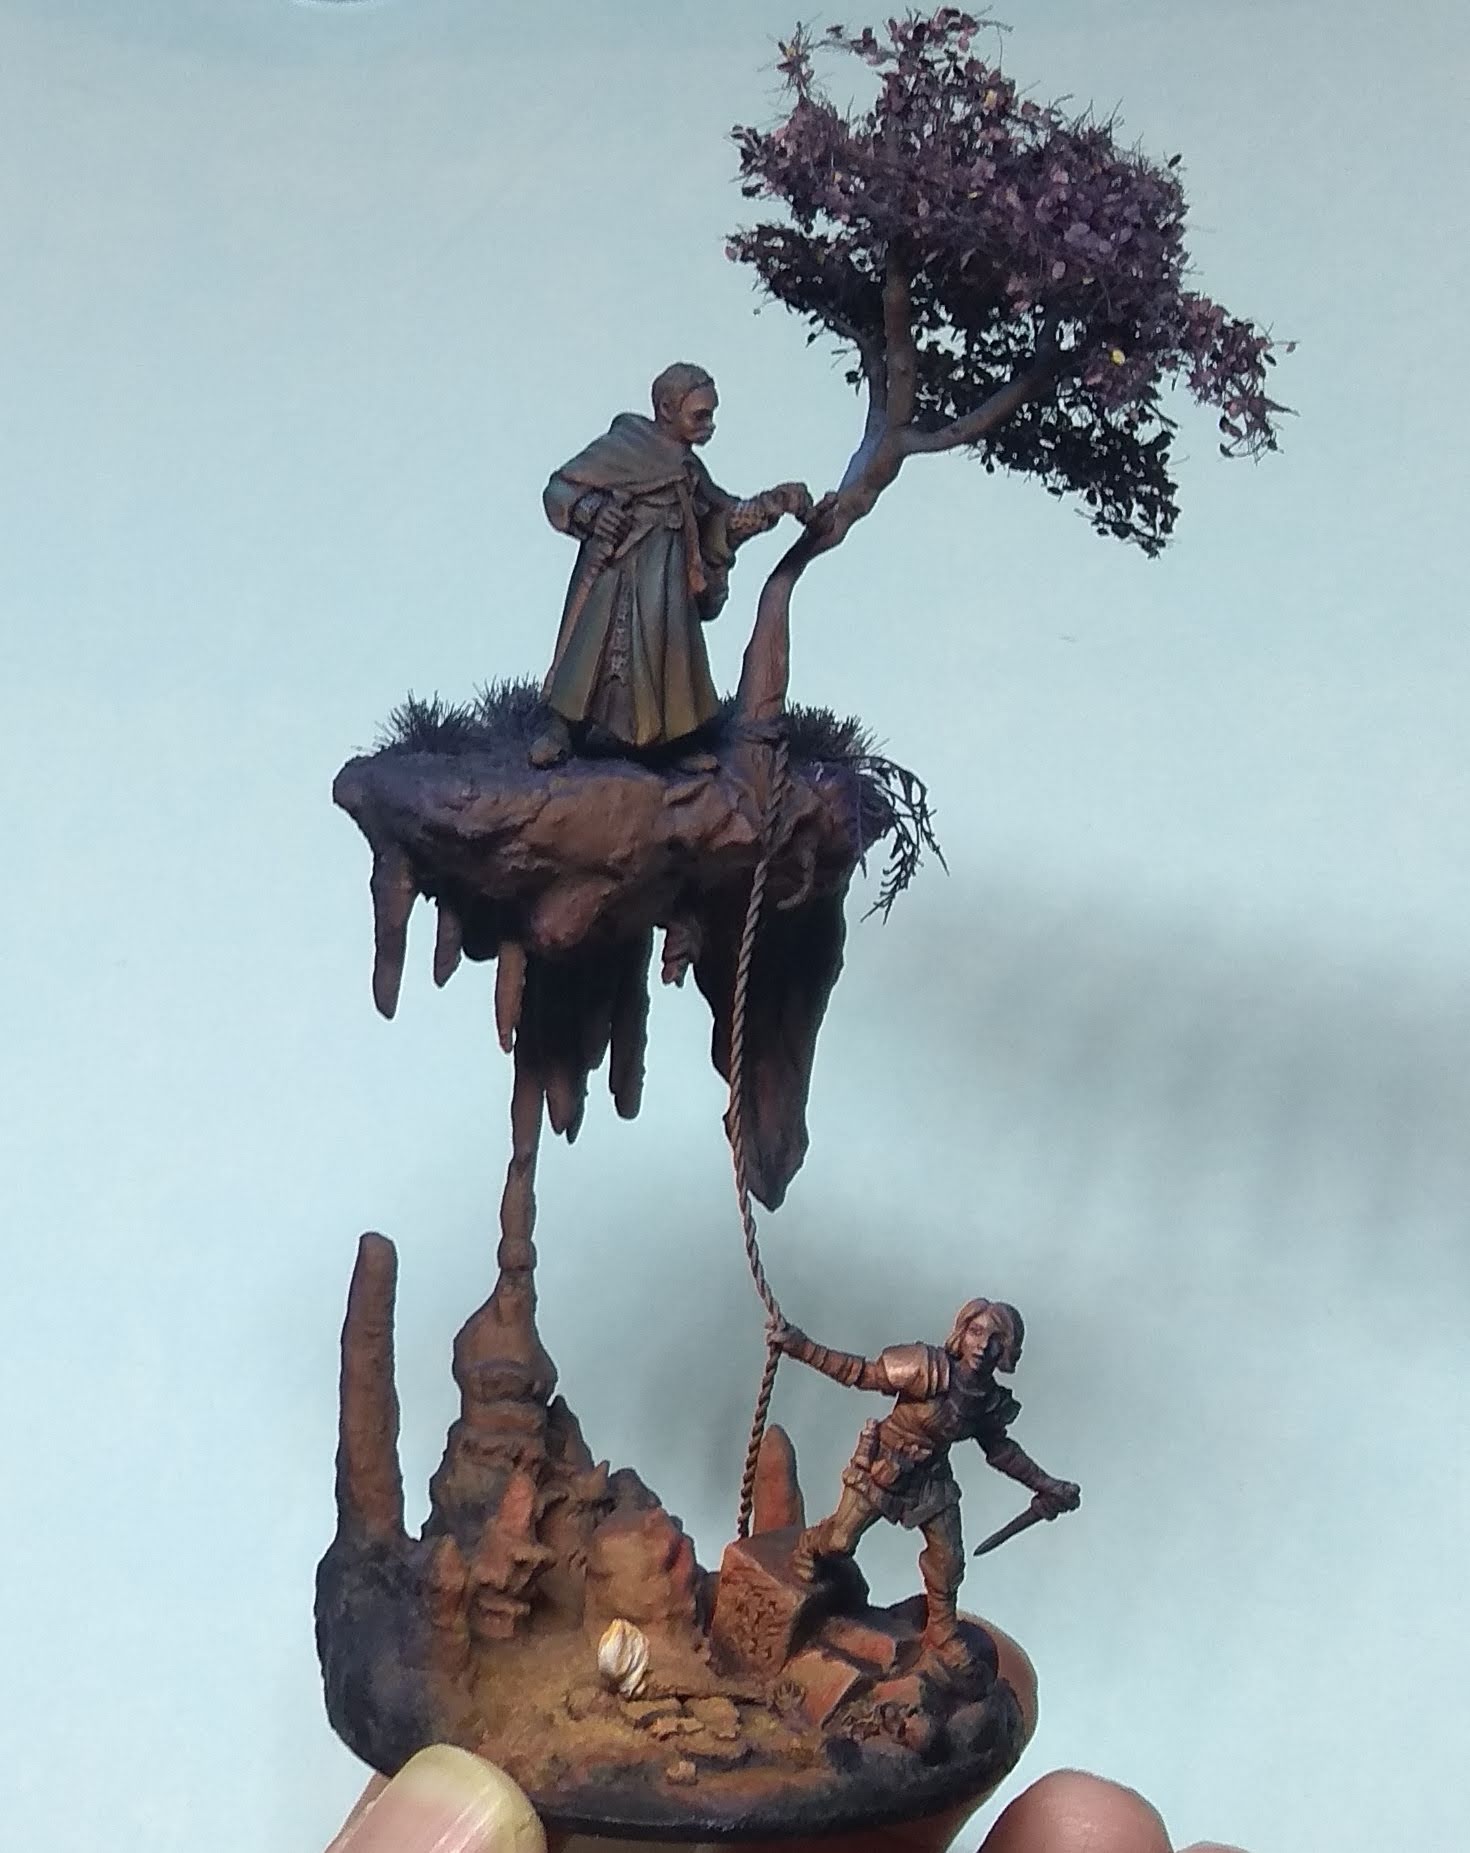
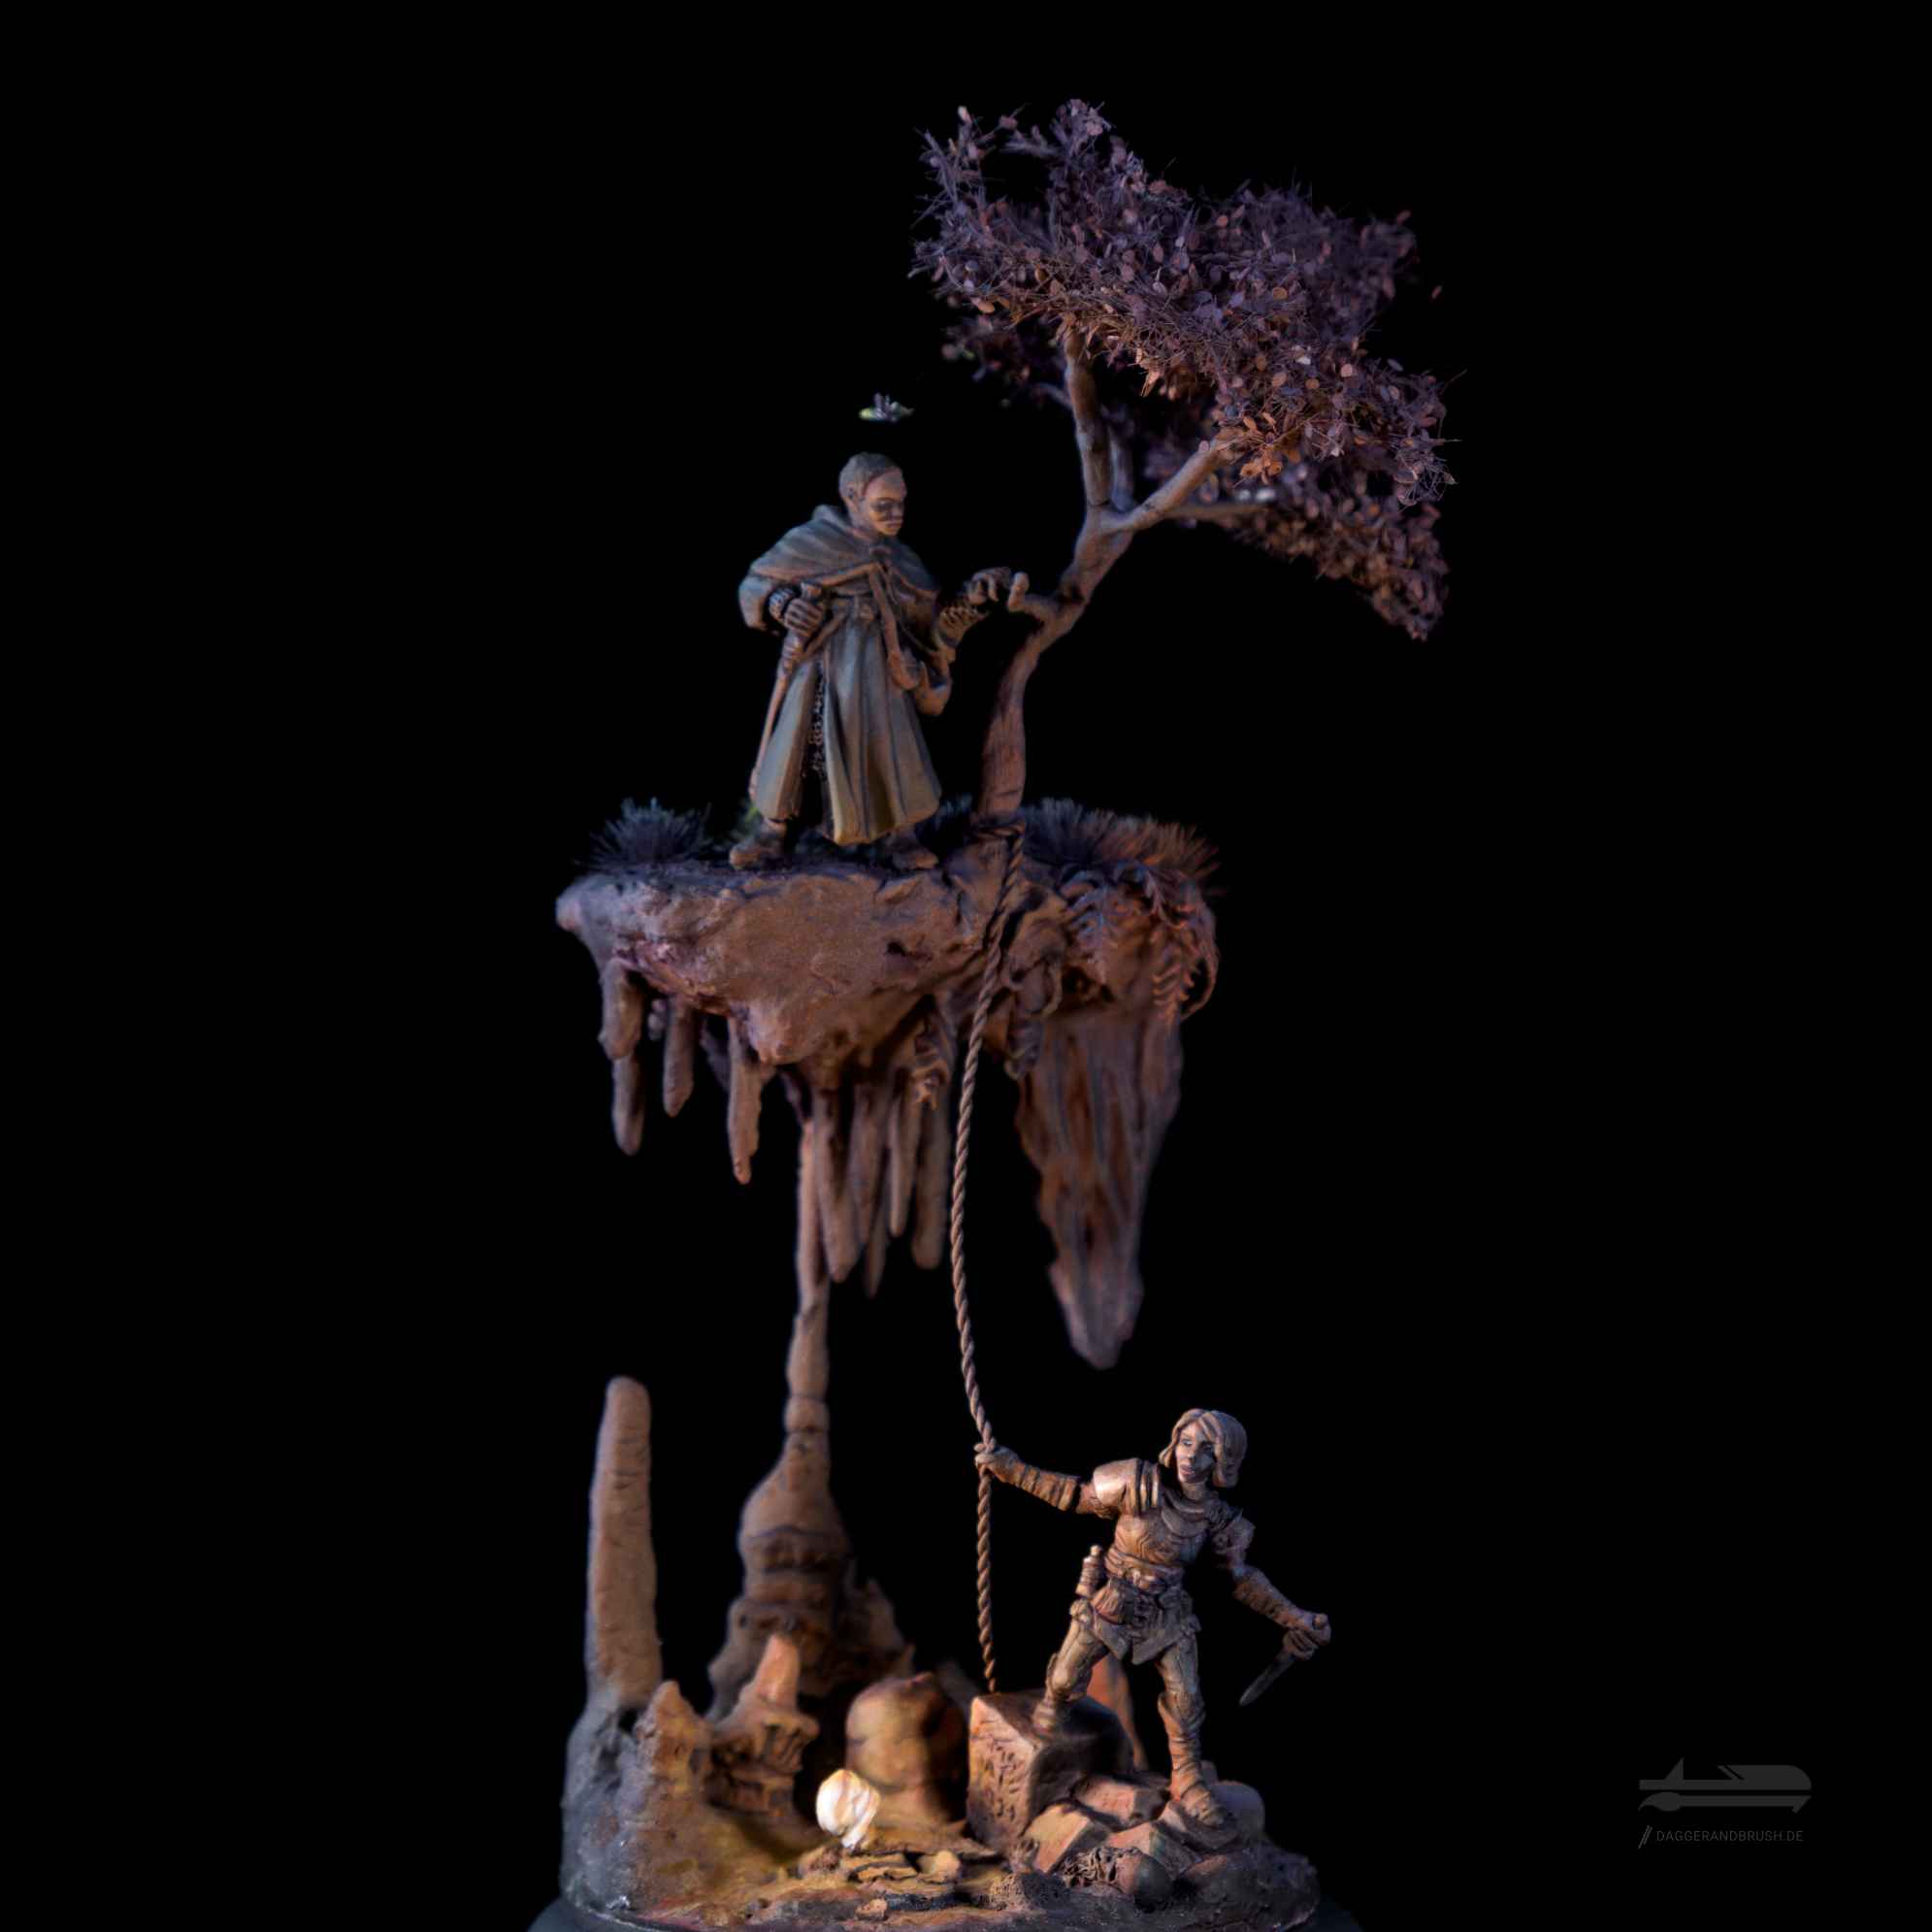
You may well find yourself in a similar situation. The only real solution is to kitbash or convert your characters to match your vision. The two spelunking friends are based on Reaper Miniatures Arthrand Nightblade, Elf Ranger and Lanell, Female Rogue. Lanell got a weapon swap, the rope (twisted brass wire) and a new Statuesque head. Arthrand got pretty much an entire make-over. I replaced the original head with another Statuesque one, sculpted new detail on the front (chainmail, cloak, clasps and straps) and back (robe) and adjusted the pose to depict the character looking down into the cave, resting with one hand on a branch.
I used Pro Create for some areas of the robe, as it is slightly firmer and less sticky than Greenstuff. Accordingly, it was easier to sculpt the fabric folds. The same is true for mail. Much easier to impress the pattern in Pro Create than sticky Greenstuff.
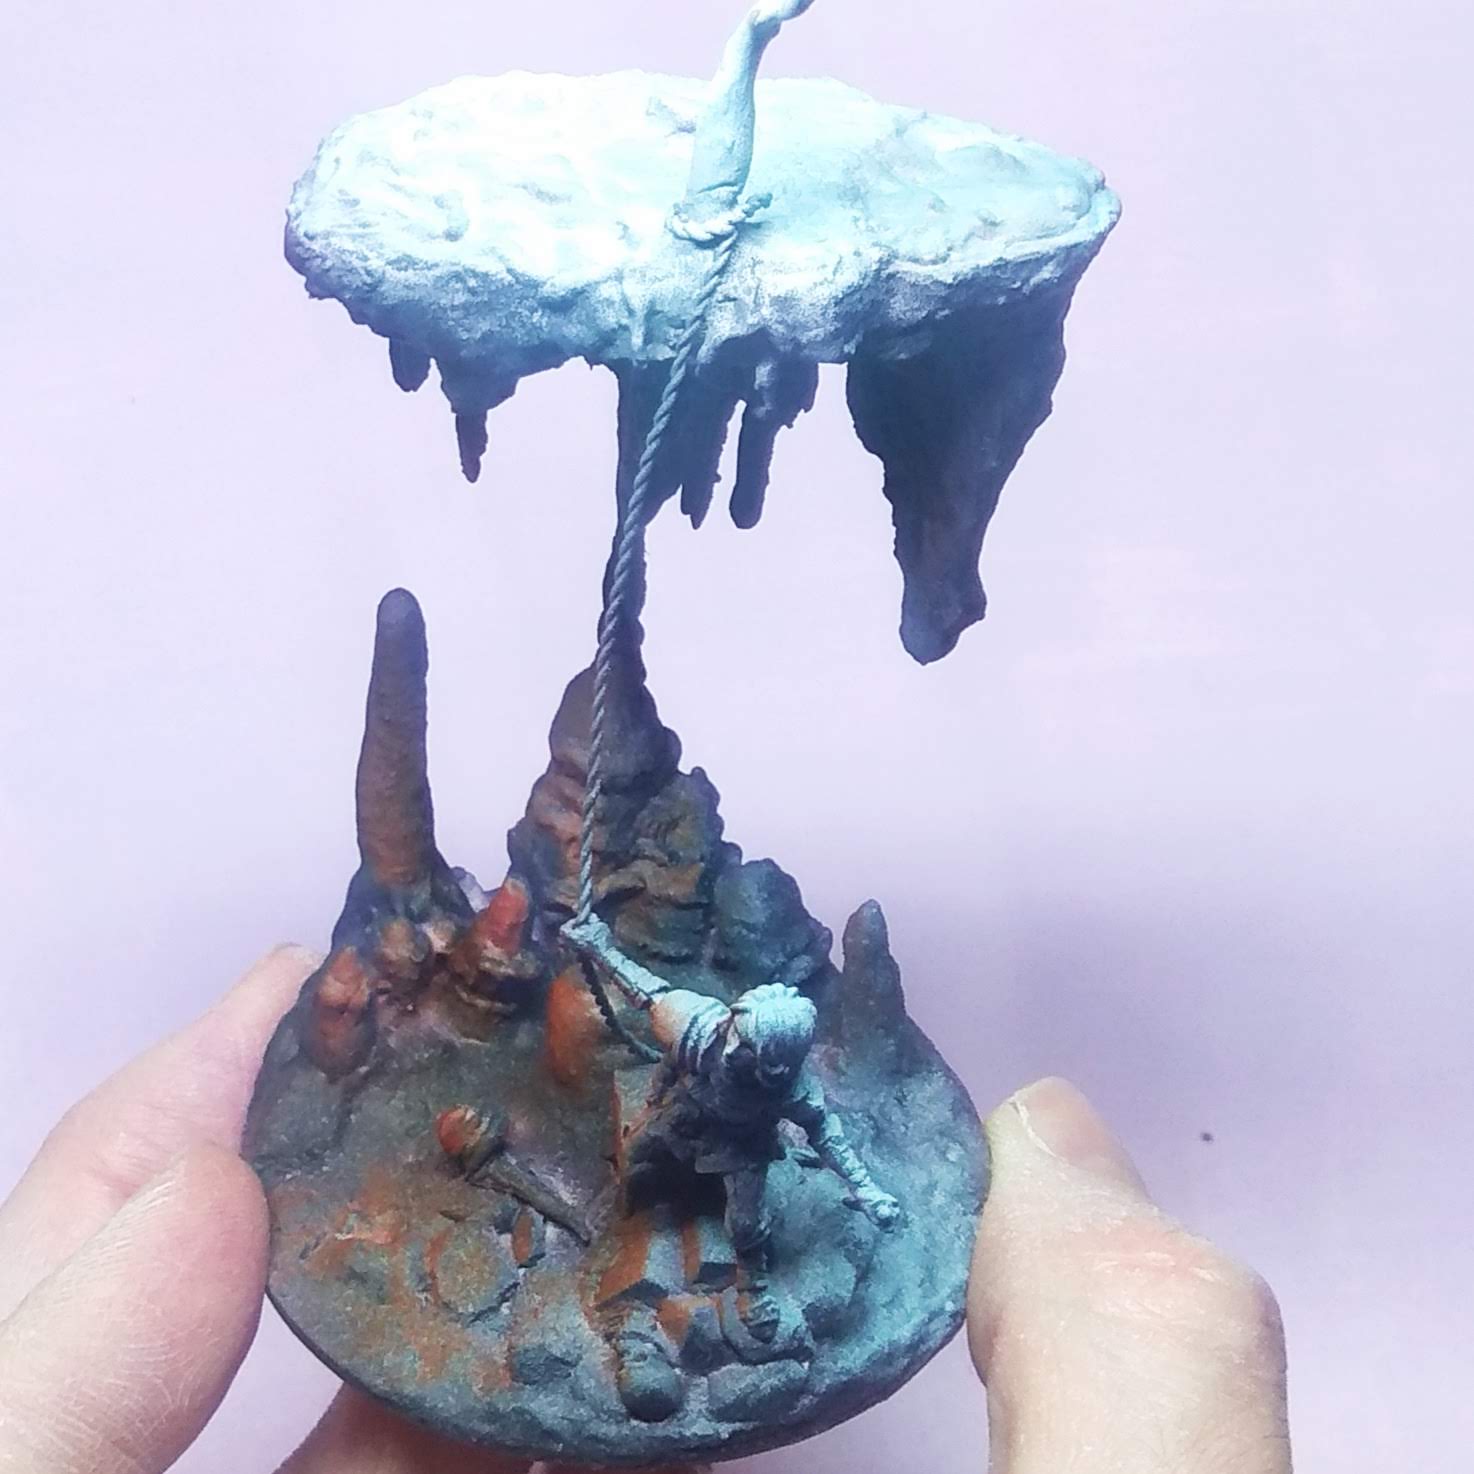
Painting Light – sketch it out
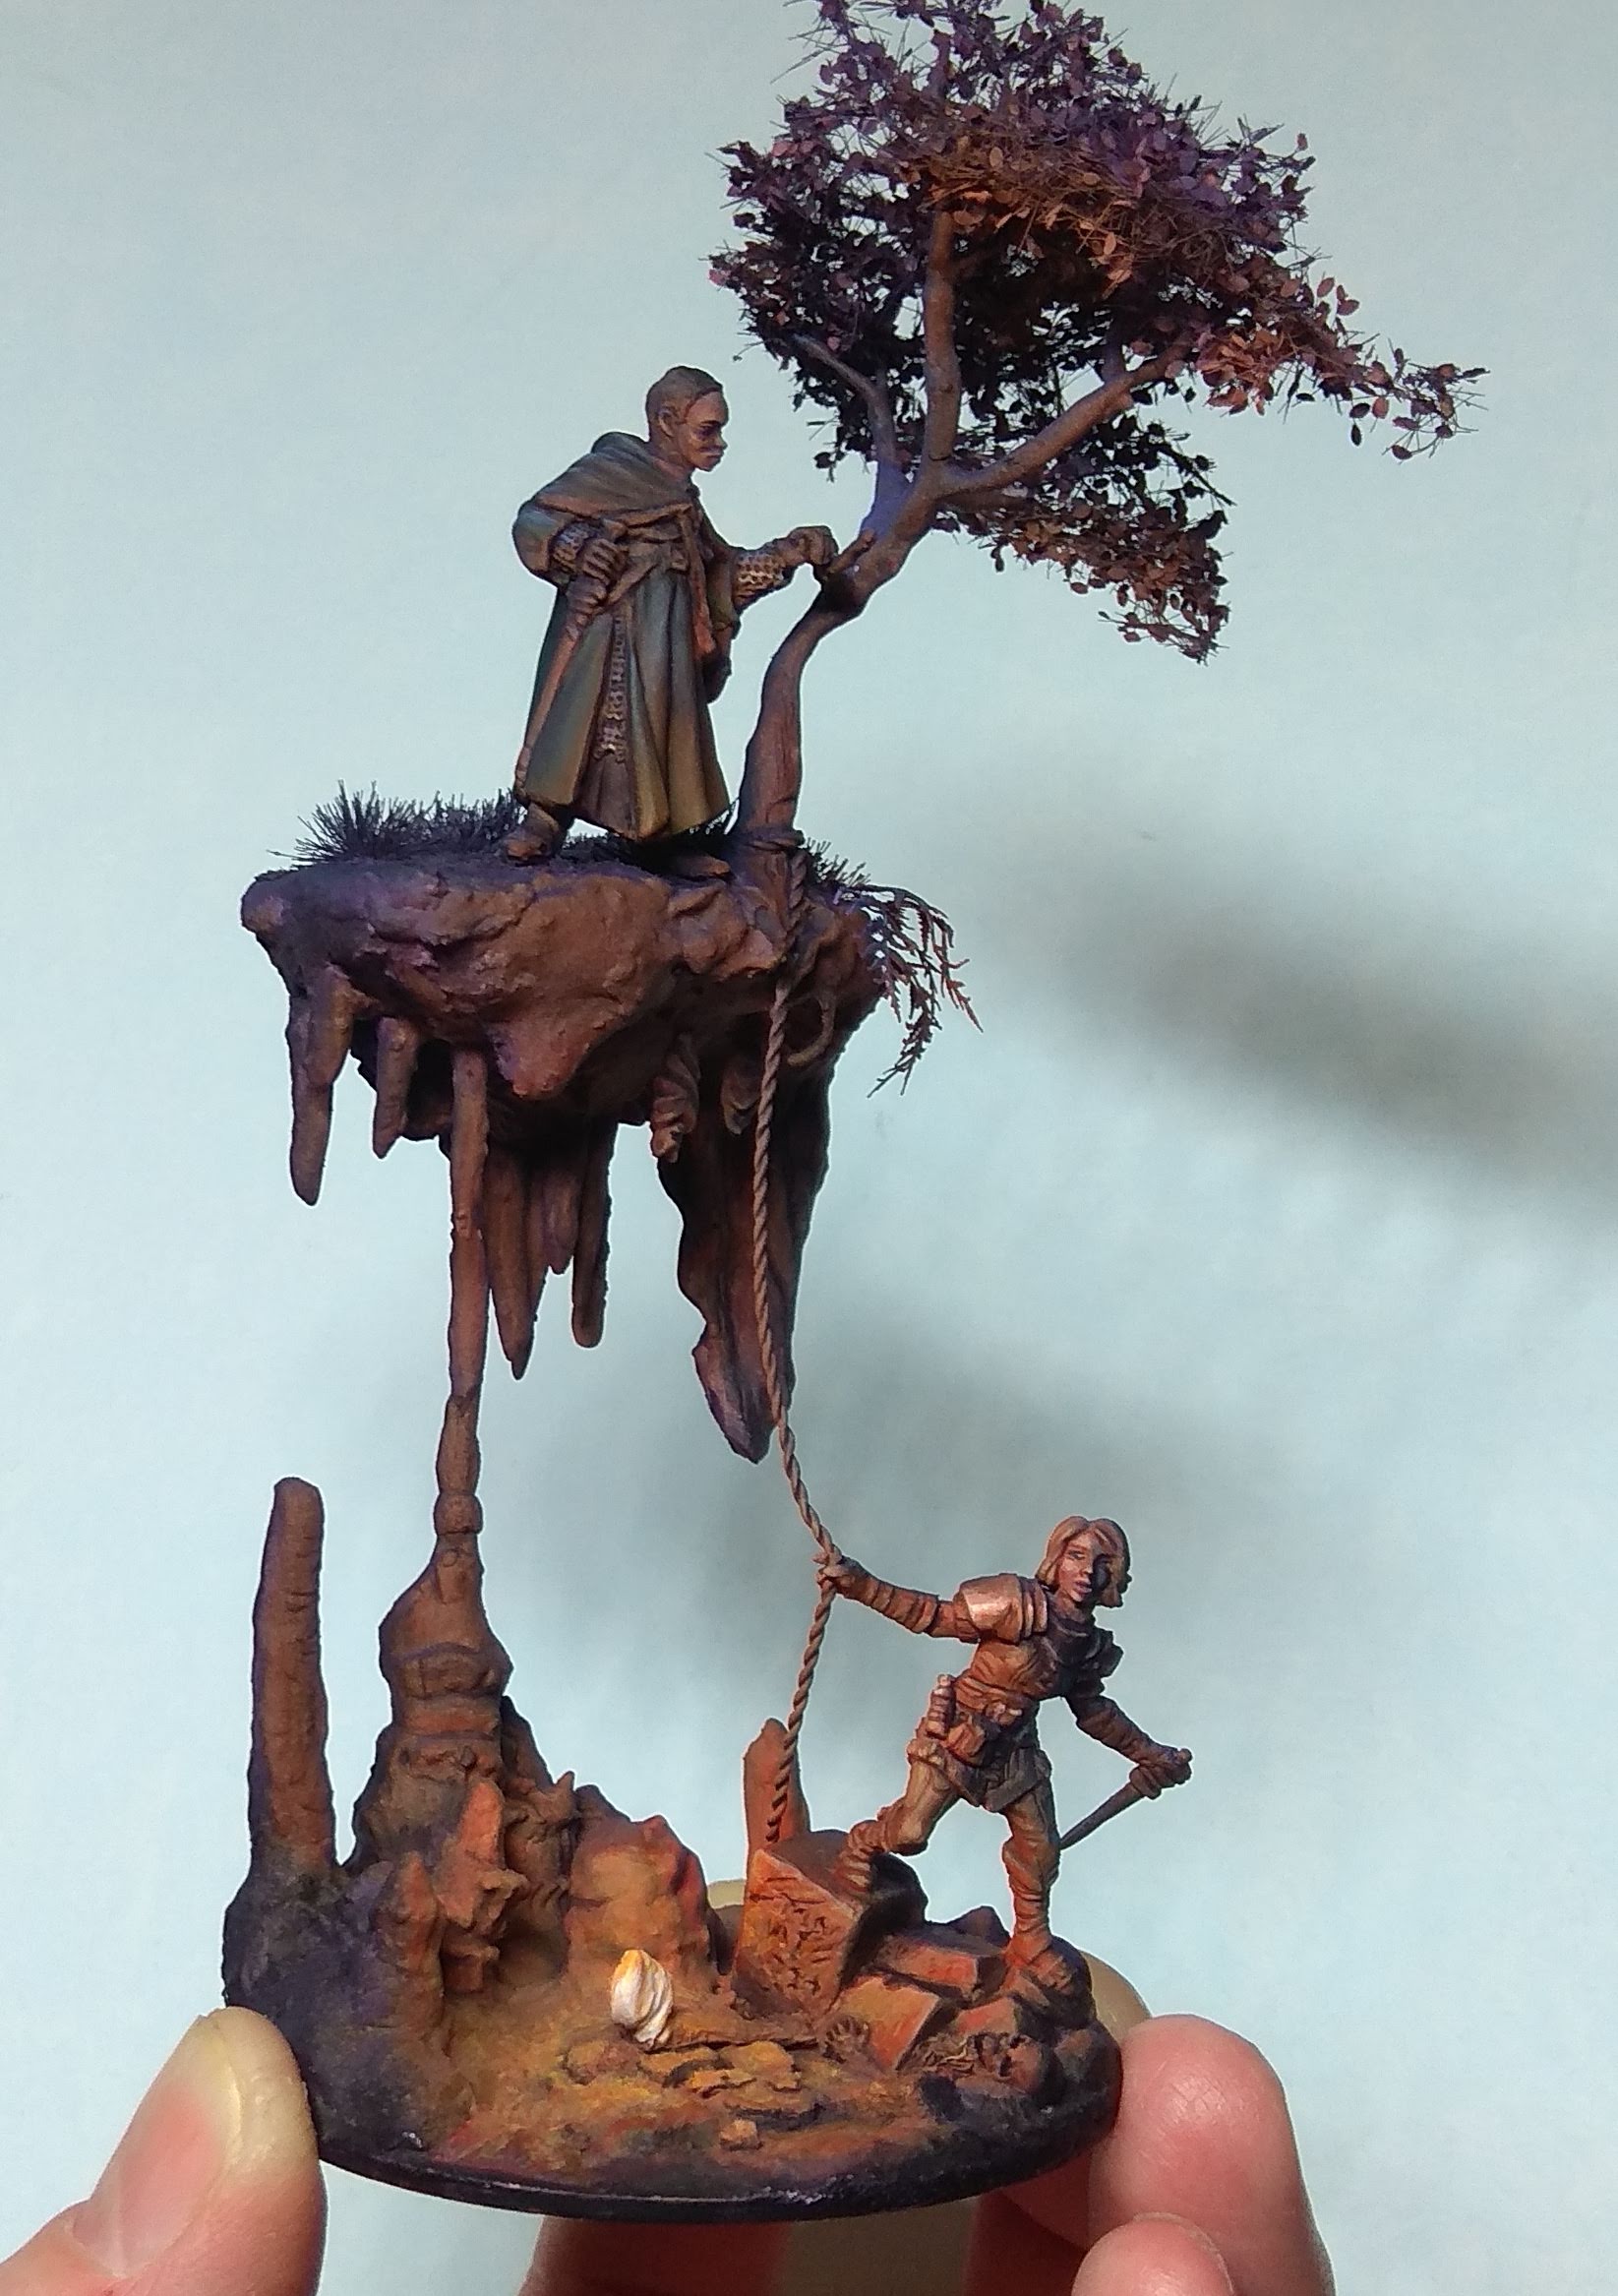
So, you are here for the Object Source Lighting tips, aren’t you? It all began with a coat of white primer and basecoat of cold purple, followed by a lighting sketch using orange, dark purple and turquoise applied via airbrush. Naturally, you don’t require an airbrush for this step and can do it by brush. However, it is significantly easier to get the sketch going with an airbrush. Simply align it with your imagined light source and spray several light coats until you are satisified with the intensity. The airbrush has a conical spray pattern, so the paint hits the surfaces just as the light would. Doesn’t need to be perfect, just enough guidance for your brush.
Contrast is king
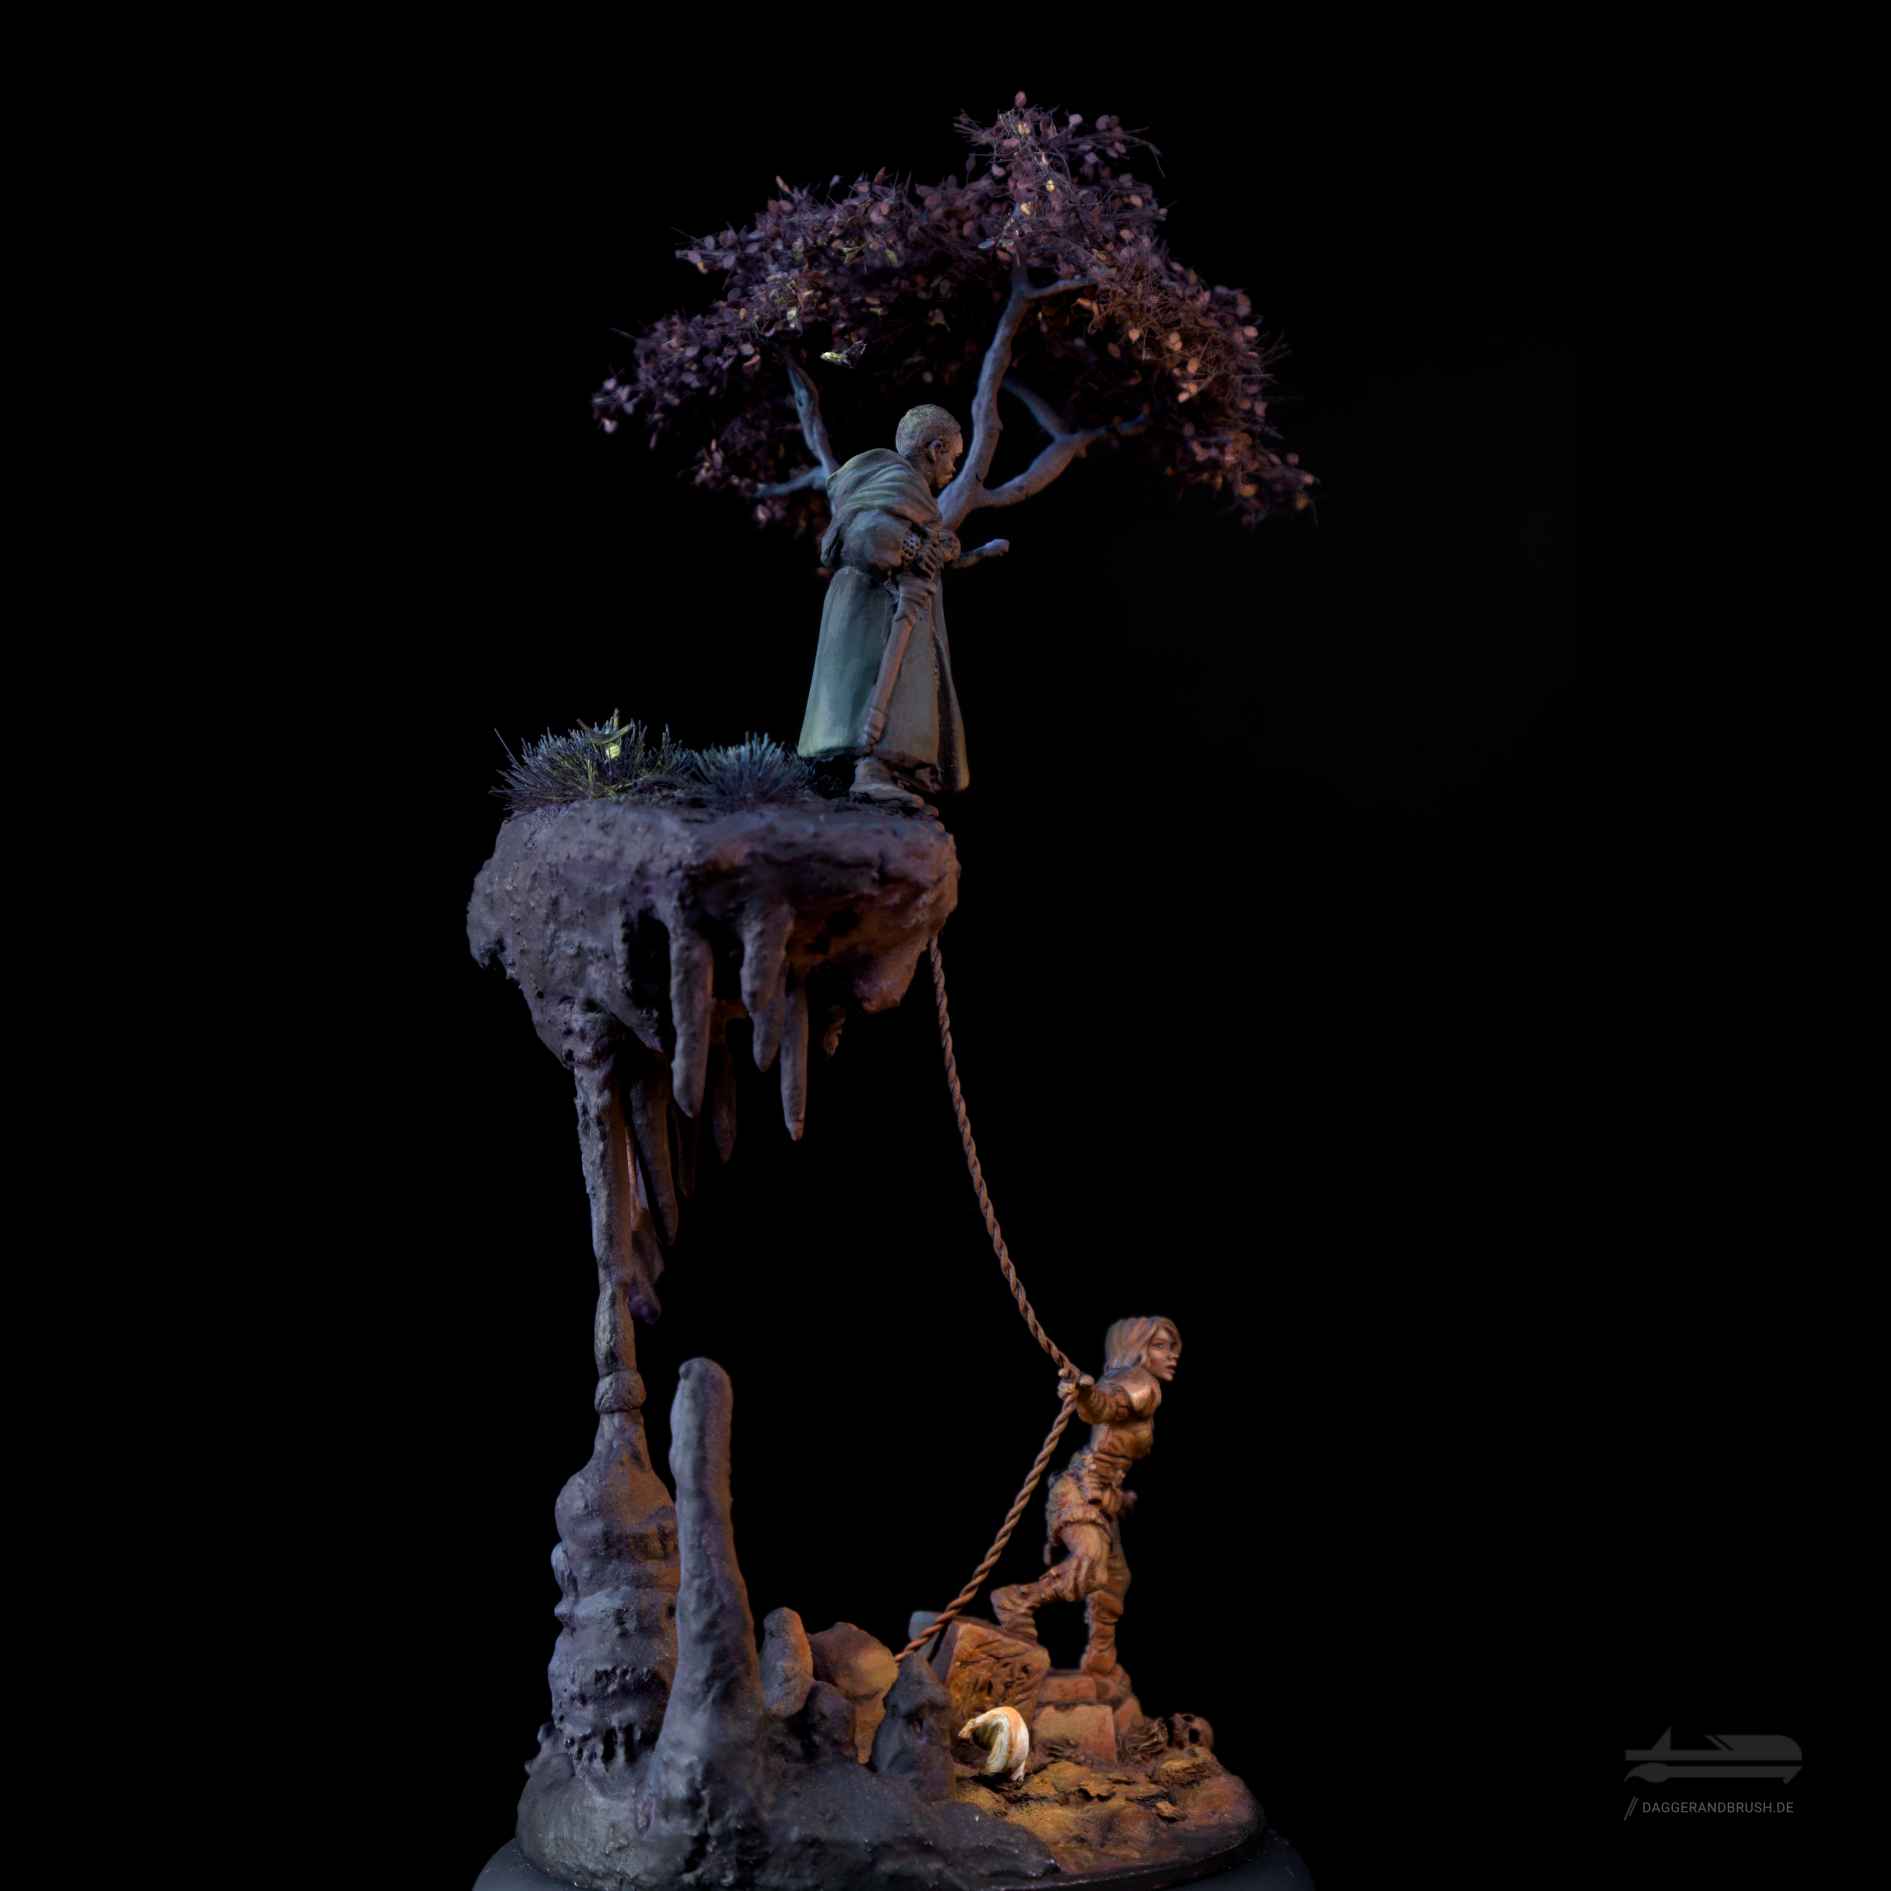
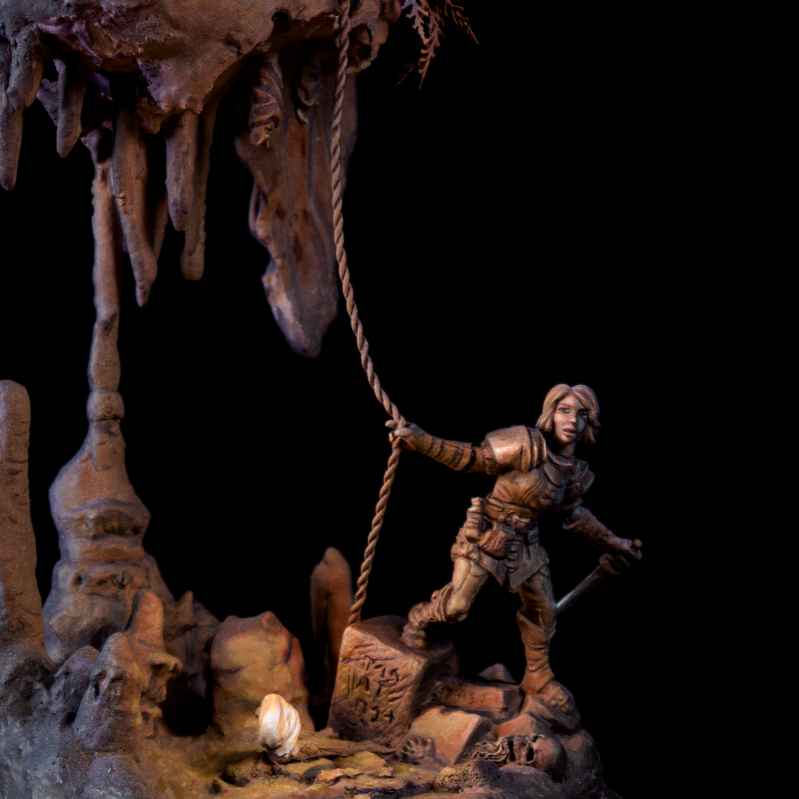
Based on this sketch you go in again with dark purple, light orange, yellow and pure white. On the surface level a lighter version of the turquois to almost light blue. The name of the game is contrast, contrast, contrast! Push it to eleven, go all in. The contrast between light and dark areas needs to be fairly strong to achieve the illusion of a torch illuminating the moonlit cave entrance. Have a look at the skull and rock slabs close to it. The shadows in the eye sockets, mouth cavity and the areas of the slabs not hit by the light are painted on. If you look from above, the light is blocked by stalagmites, rocks and Lanelle. Areas behind these elements need to be dark, but not just black. You still want some definition and colour in the areas in darkness.
Brighter makes it righter
As you may already now, the light source needs to be the brightes point. So both the fireflies and the torch are painted pure white first and then glazed down a bit to establish the colour of the light. In the WIP pictures you can see that I had to push the intensity of the torch flame several times, as it turned out to dark with the glazes applied.
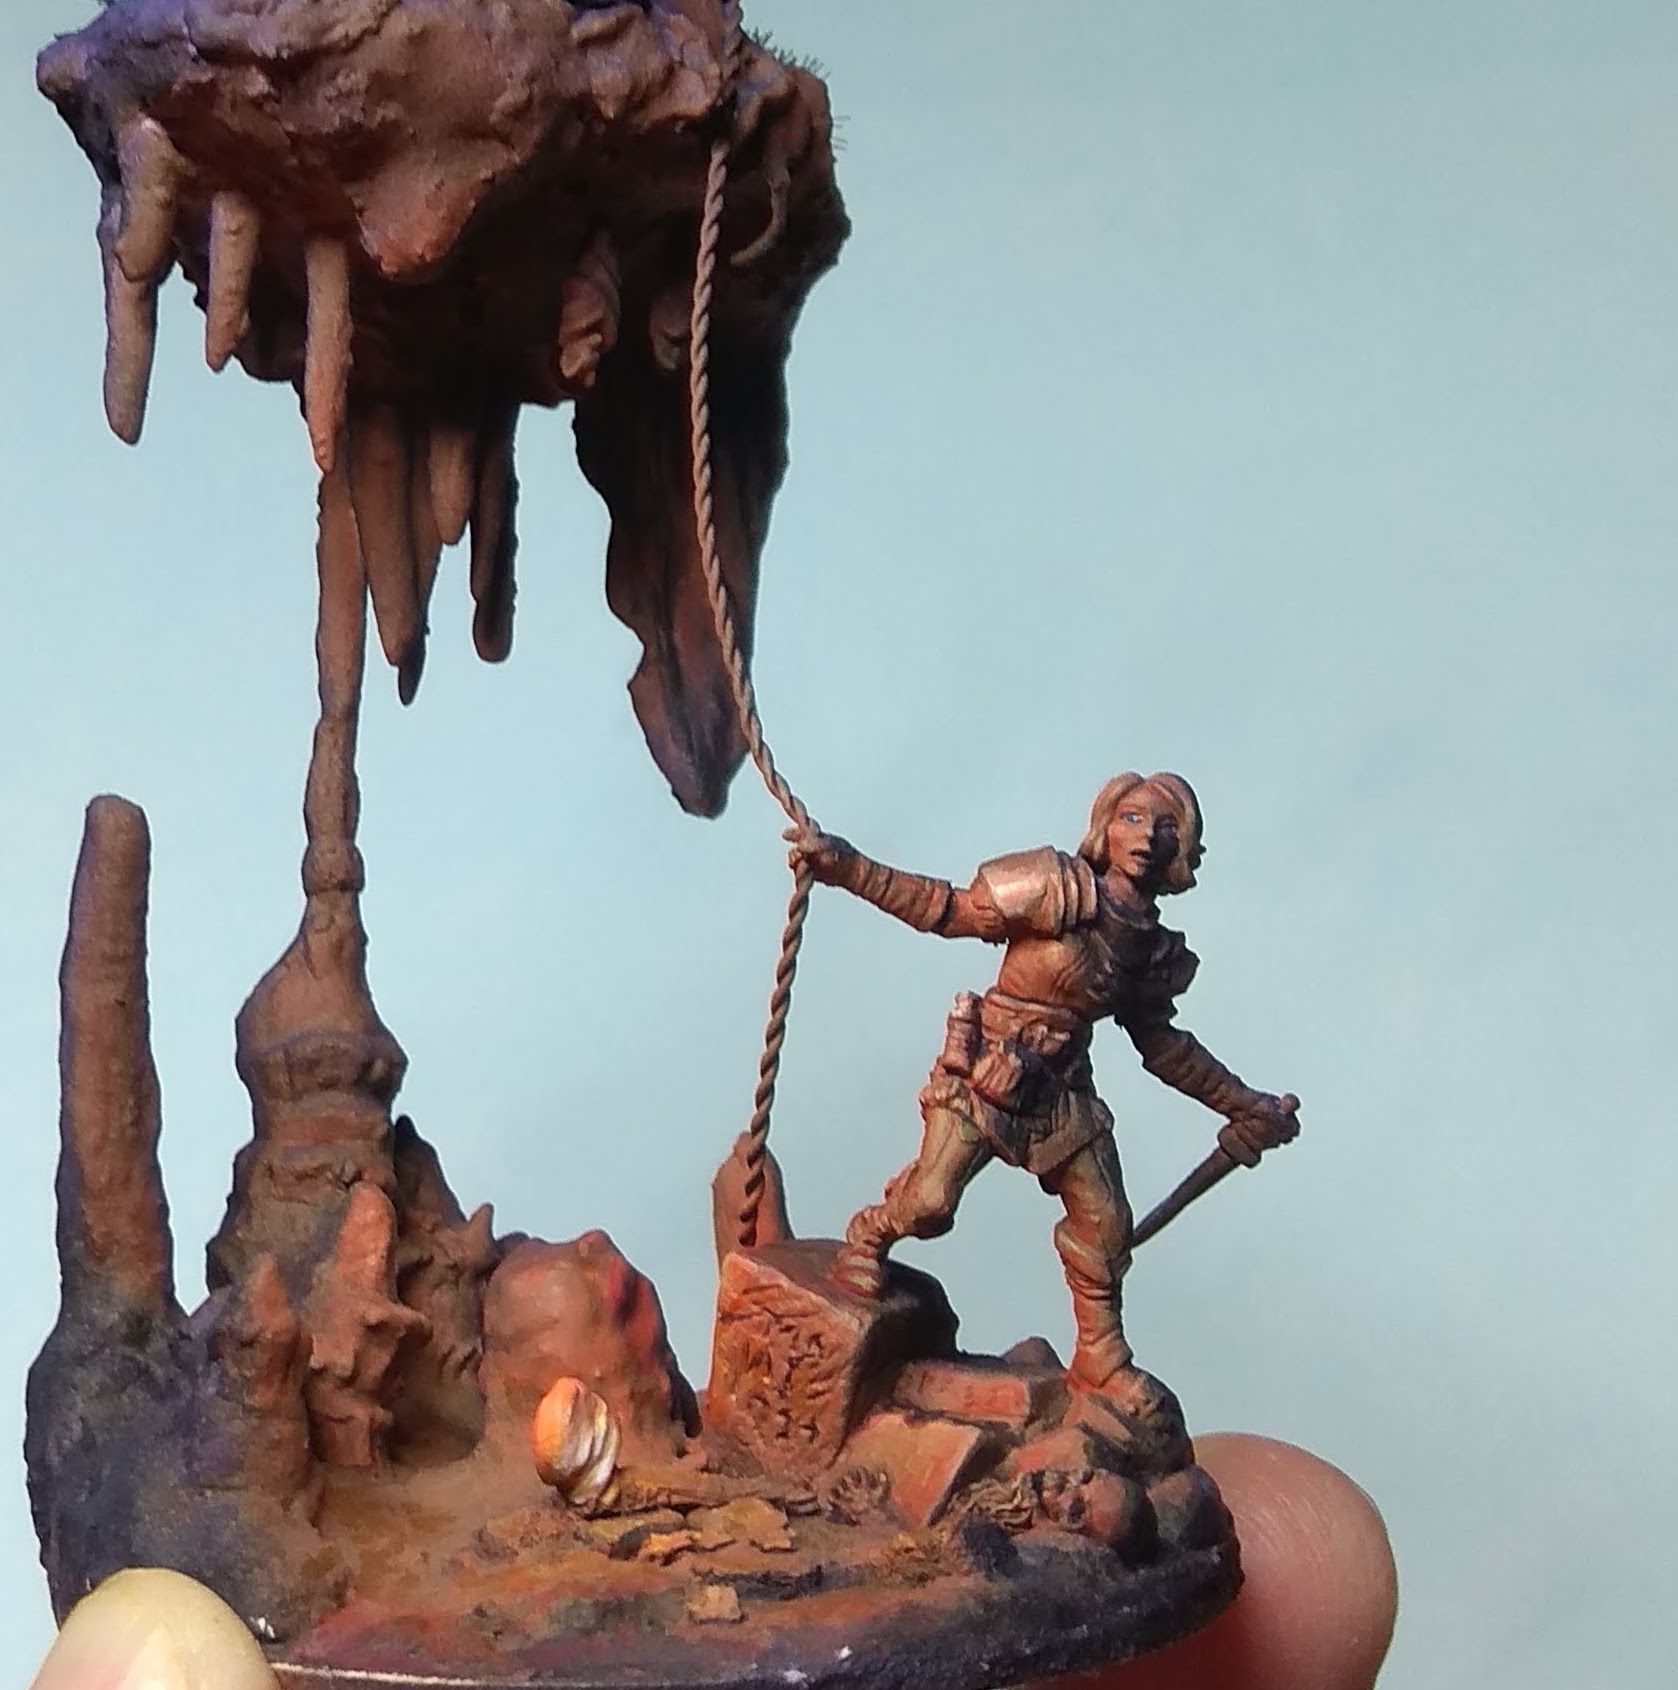
Glaze the face
To achieve a more natural appearance it also pays to apply some coloured glazes to the characters, mainly to differentiate facial features, clothing and metal. For instance I glazed some skin tone on Lanelles face, some red to her lips. Her pants got a green glaze, while the metal surfaces would reflect light stronger, so I pushed the highlights all up to white. Surprisingly it looks better to paint the eyes as you would normally, so no coloured eyeballs or entirely black sockets.
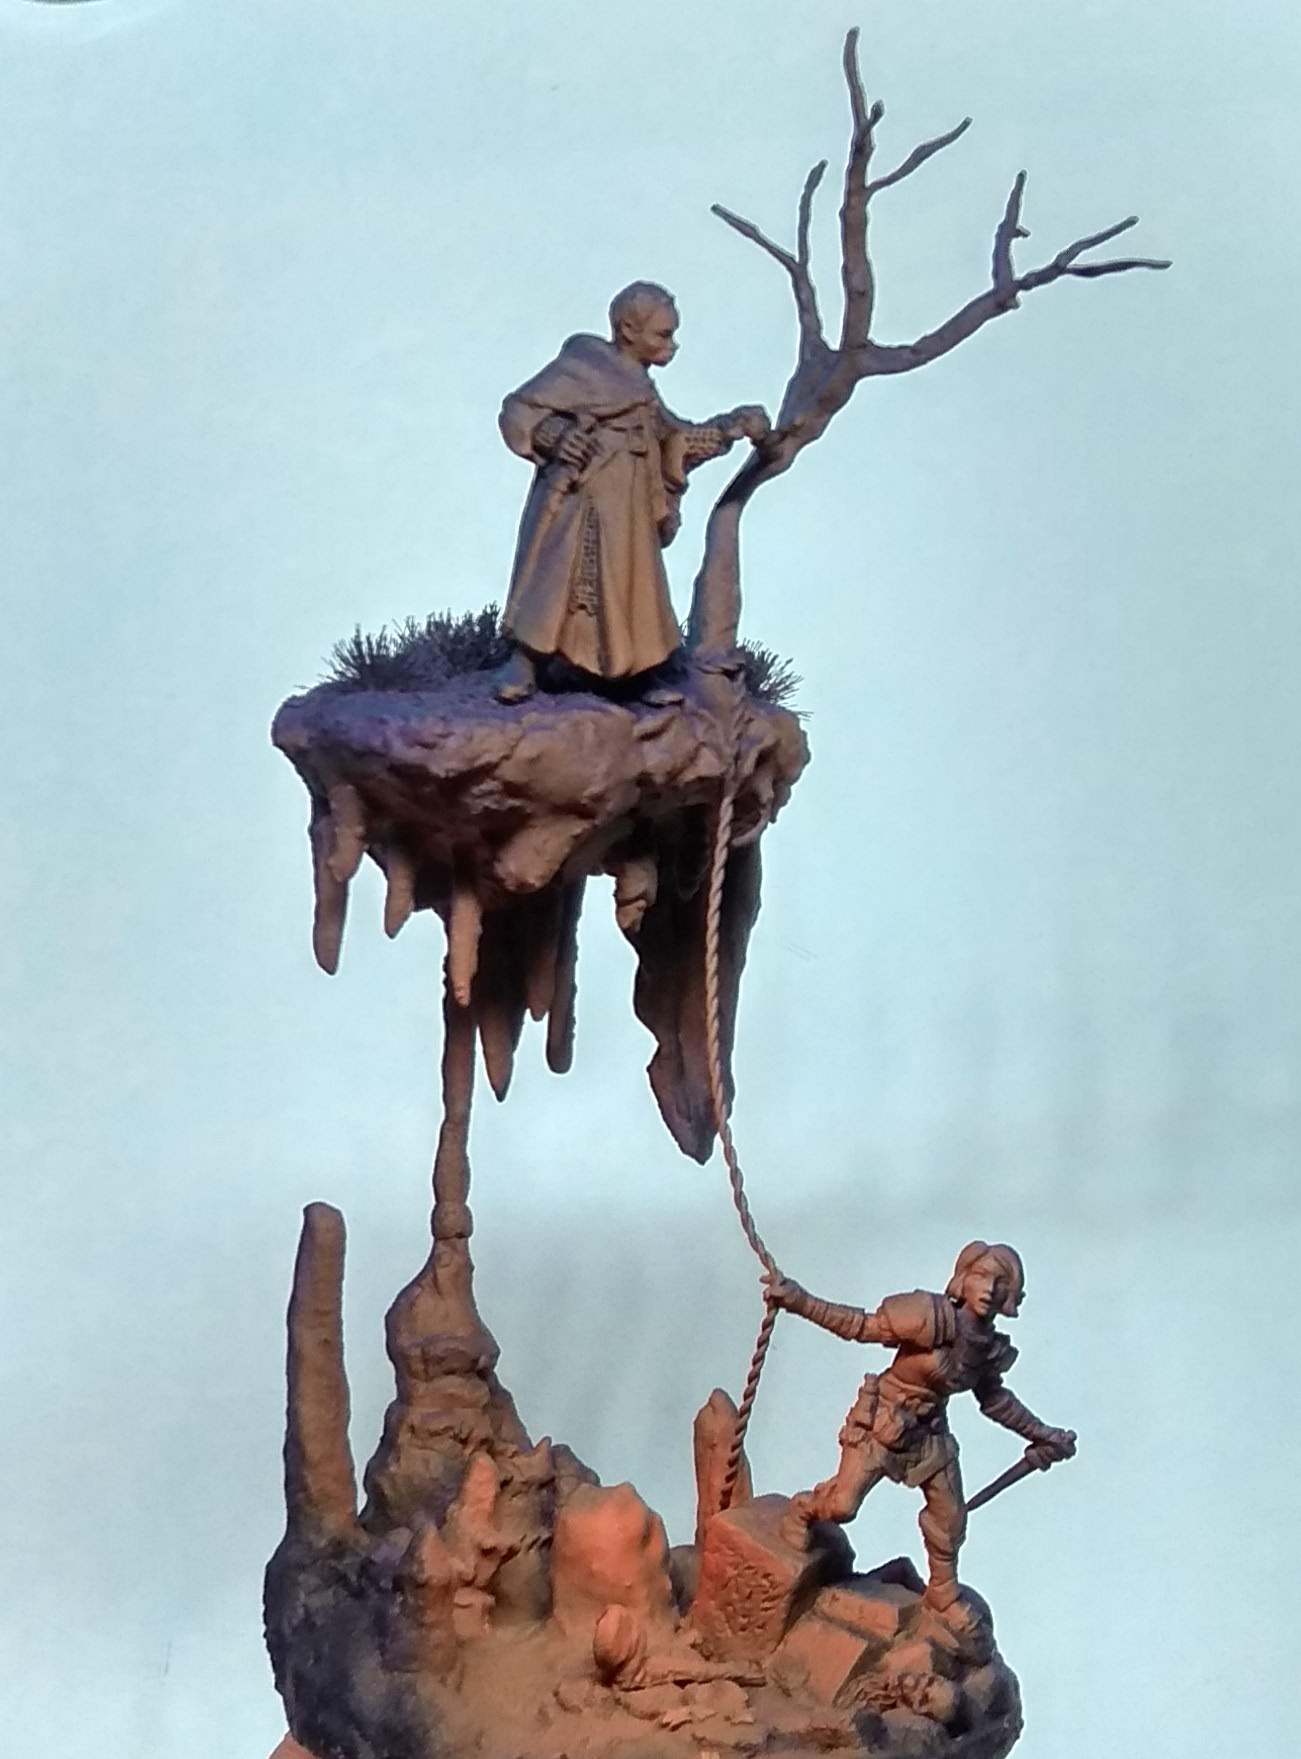
Back and forth lead to success
Finally, to really draw the scene togehter, the light of the torch needs to interact with the tree trunk, foliage and Arthrand. Both the tree and Arthrand were placed after I already painted the cave and Lanelle. So I had to mask the subterranean part with a palstic bag and went to town on the surface level. Again using my airbrush. I had to redo this step a few times to get it to a point were the Object Source Lighting was subtle enough but not too intense, given the distance to the torch.
I hope this journey into darkness was of interest to you and you learned a thing or two about Object Source Lighting with multiple light sources. Any questions, suggestions or some sweet work of your own? Leave a comment! Spelunking or not, always wield your brush with honour.
Great tutorial on how you achieved this awesome vignette
Thank you! Glad you like the vignette. Also had a look at your blog and will have a deeper read. Lots of good stuff. Really like the hellblade.
This is a great project and I enjoyed reading your thoughts and tips for OSL. There’s no doubt that it is a great technique that gets impressive results. It isn’t too hard to mess it up and a light hand and the more thought you put into it, the better it turns out in my experience. Personally, I think that’s exactly what happened here 🙂
Thank you Kuribo! I’d say my most ambitious paint job so far. I agree that subtle OSL is often better looking (to my tastes) than the all-in approach.