
Last time we fashioned a diorama base featuring weathered gravestones, a gnarly autumn tree and moss-covered flagstones. As promised in this second installment we will focus on an objective token or a small piece of scatter terrain featuring a ruined shrine and a removable birch tree. Naturally nothing stops you to use it as a scenic base instead or to incorporate this idea into a gaming board.
We will also cover how to make a generic flagstone base if the miniature you are working on does not demand a very elaborate base.
Given I already covered the basic techniques in the graveyard base tutorial, I will only provide instructions for new elements and some work in progress pictures with short annotations for the rest. The list of materials needed is similar to the graveyard base one, with some exceptions noted below.
Enthroned in darkness
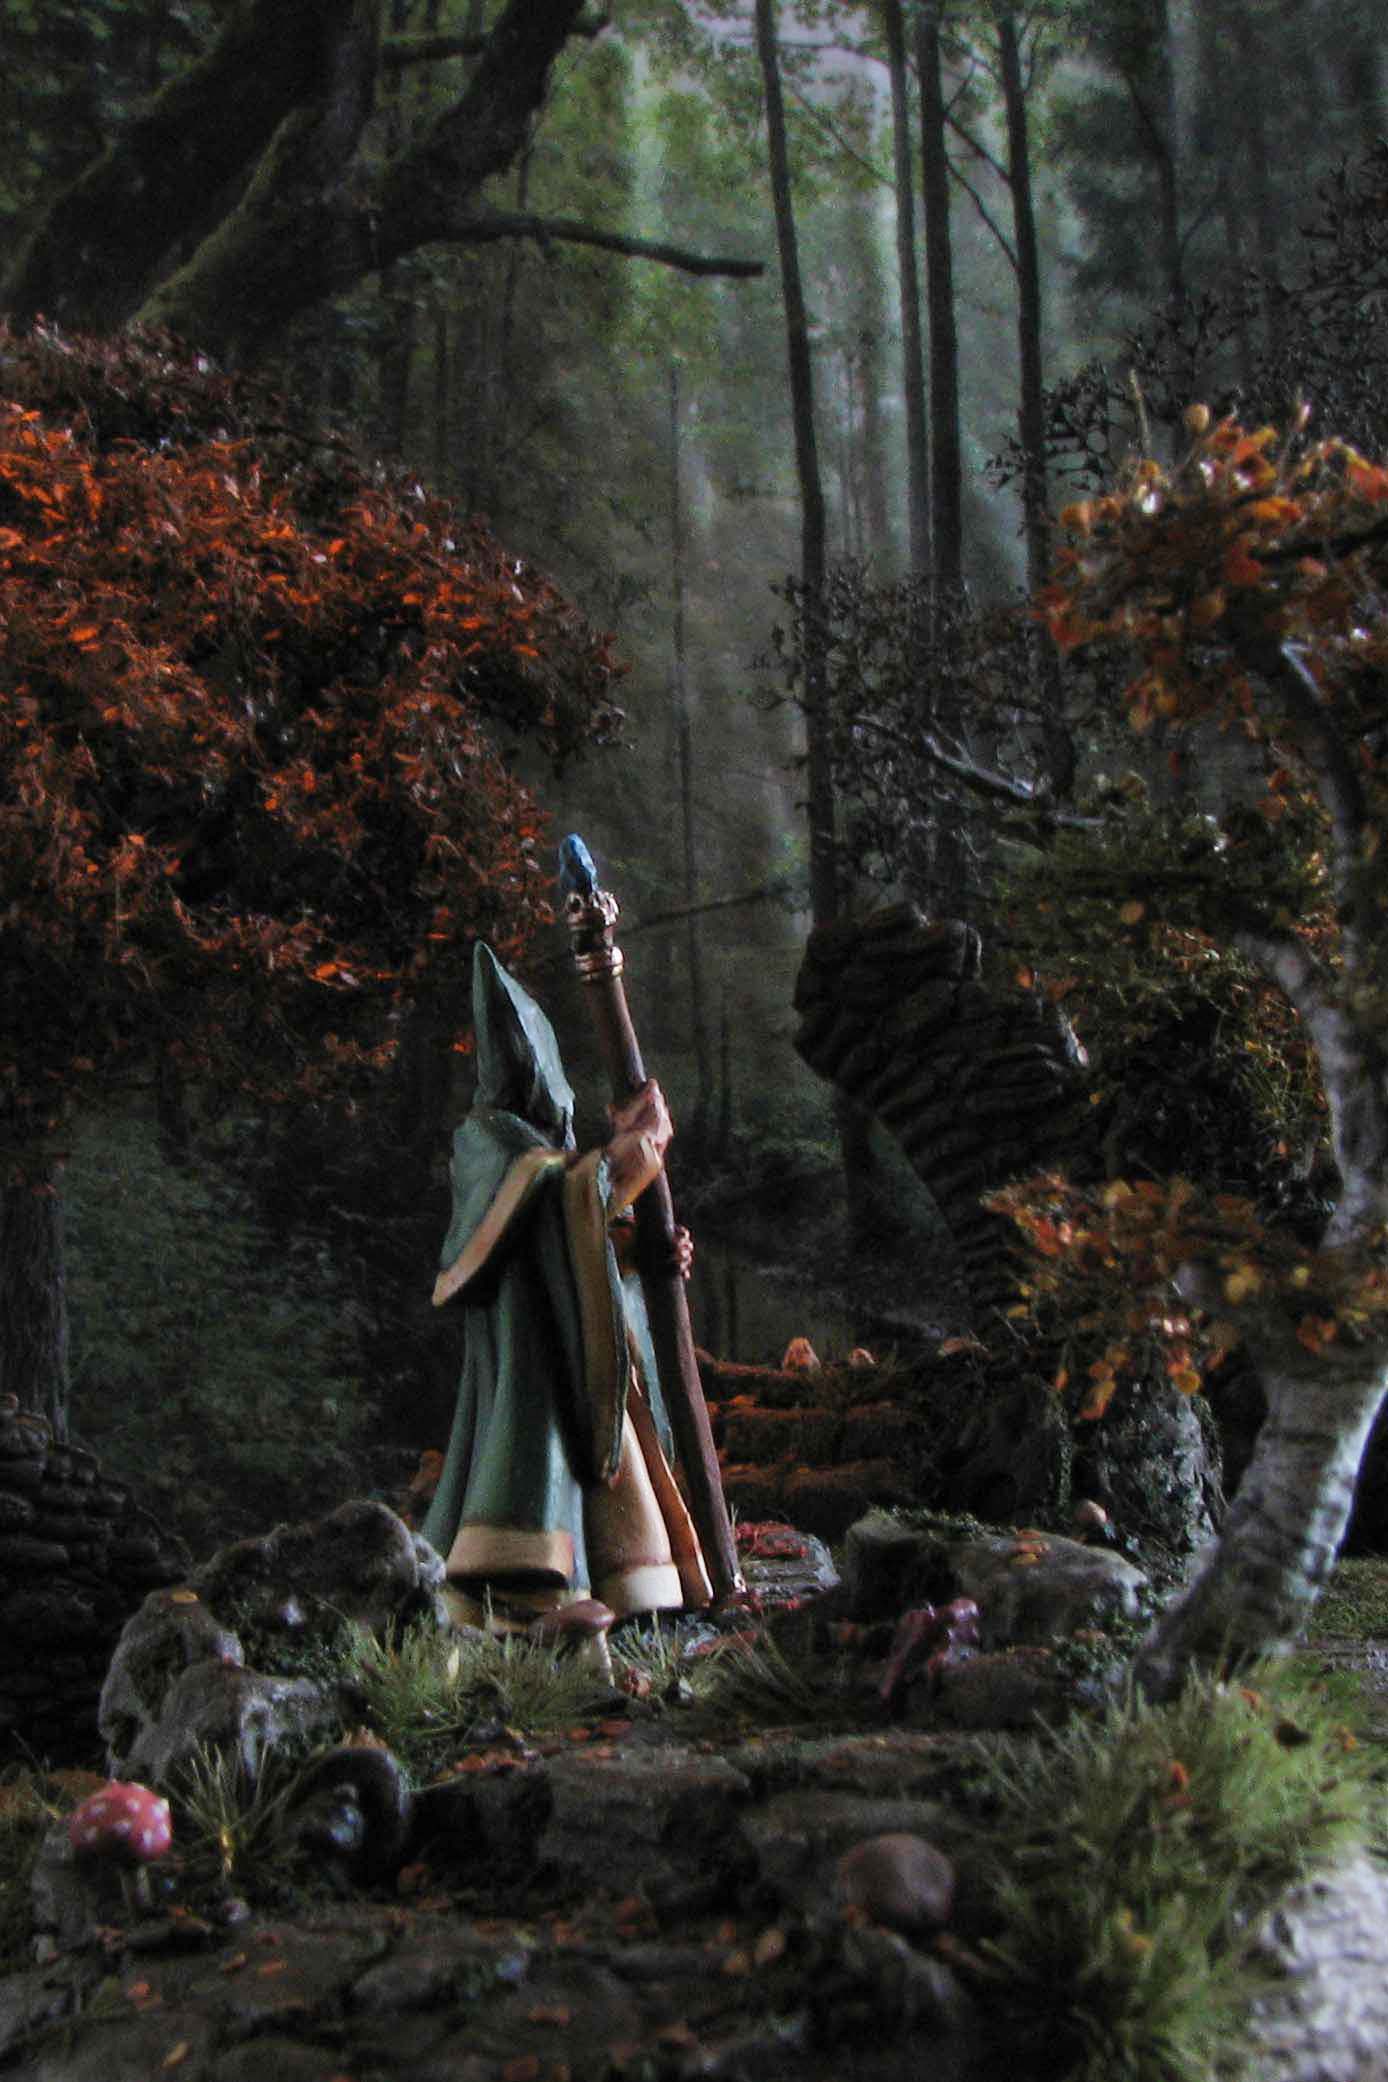
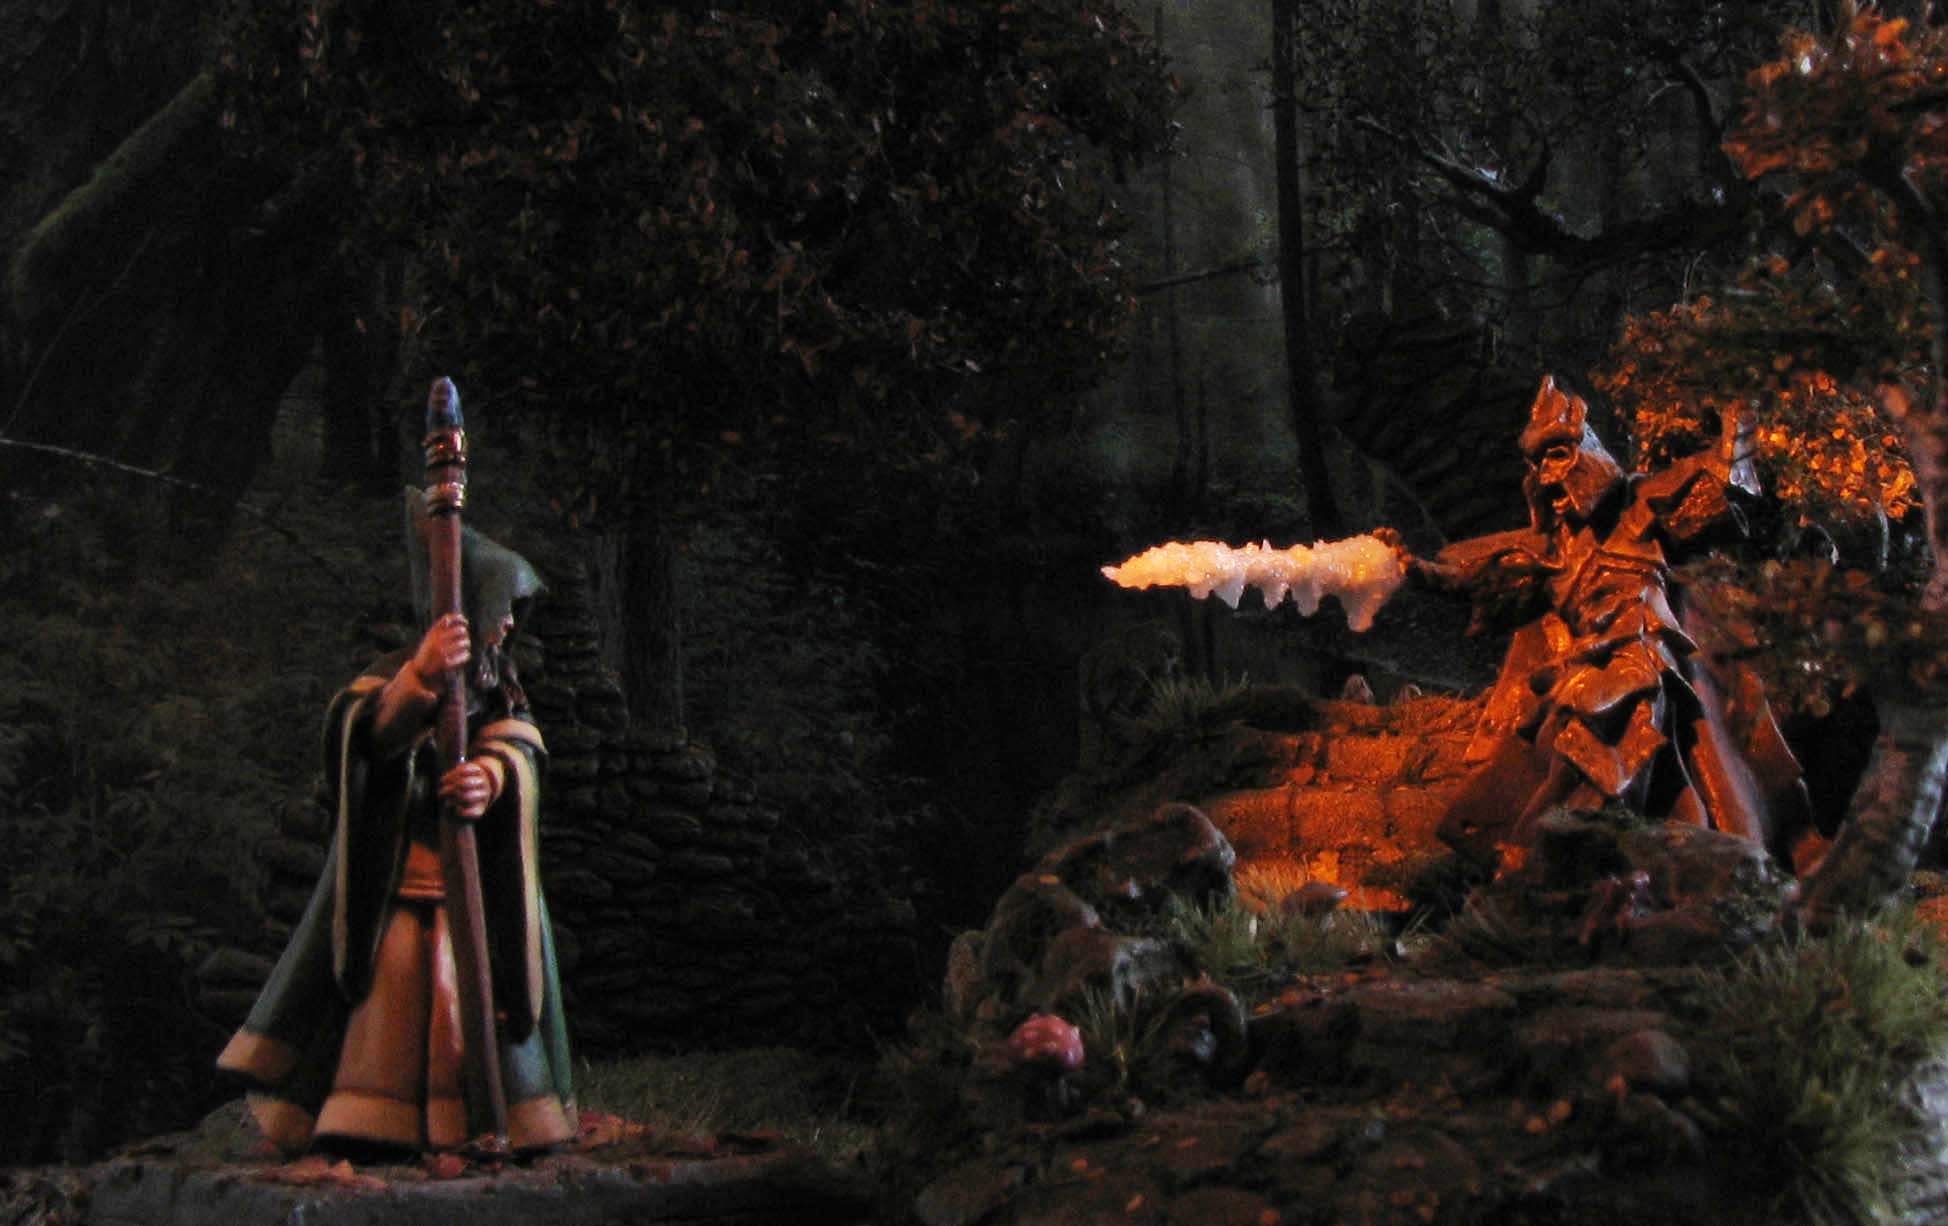
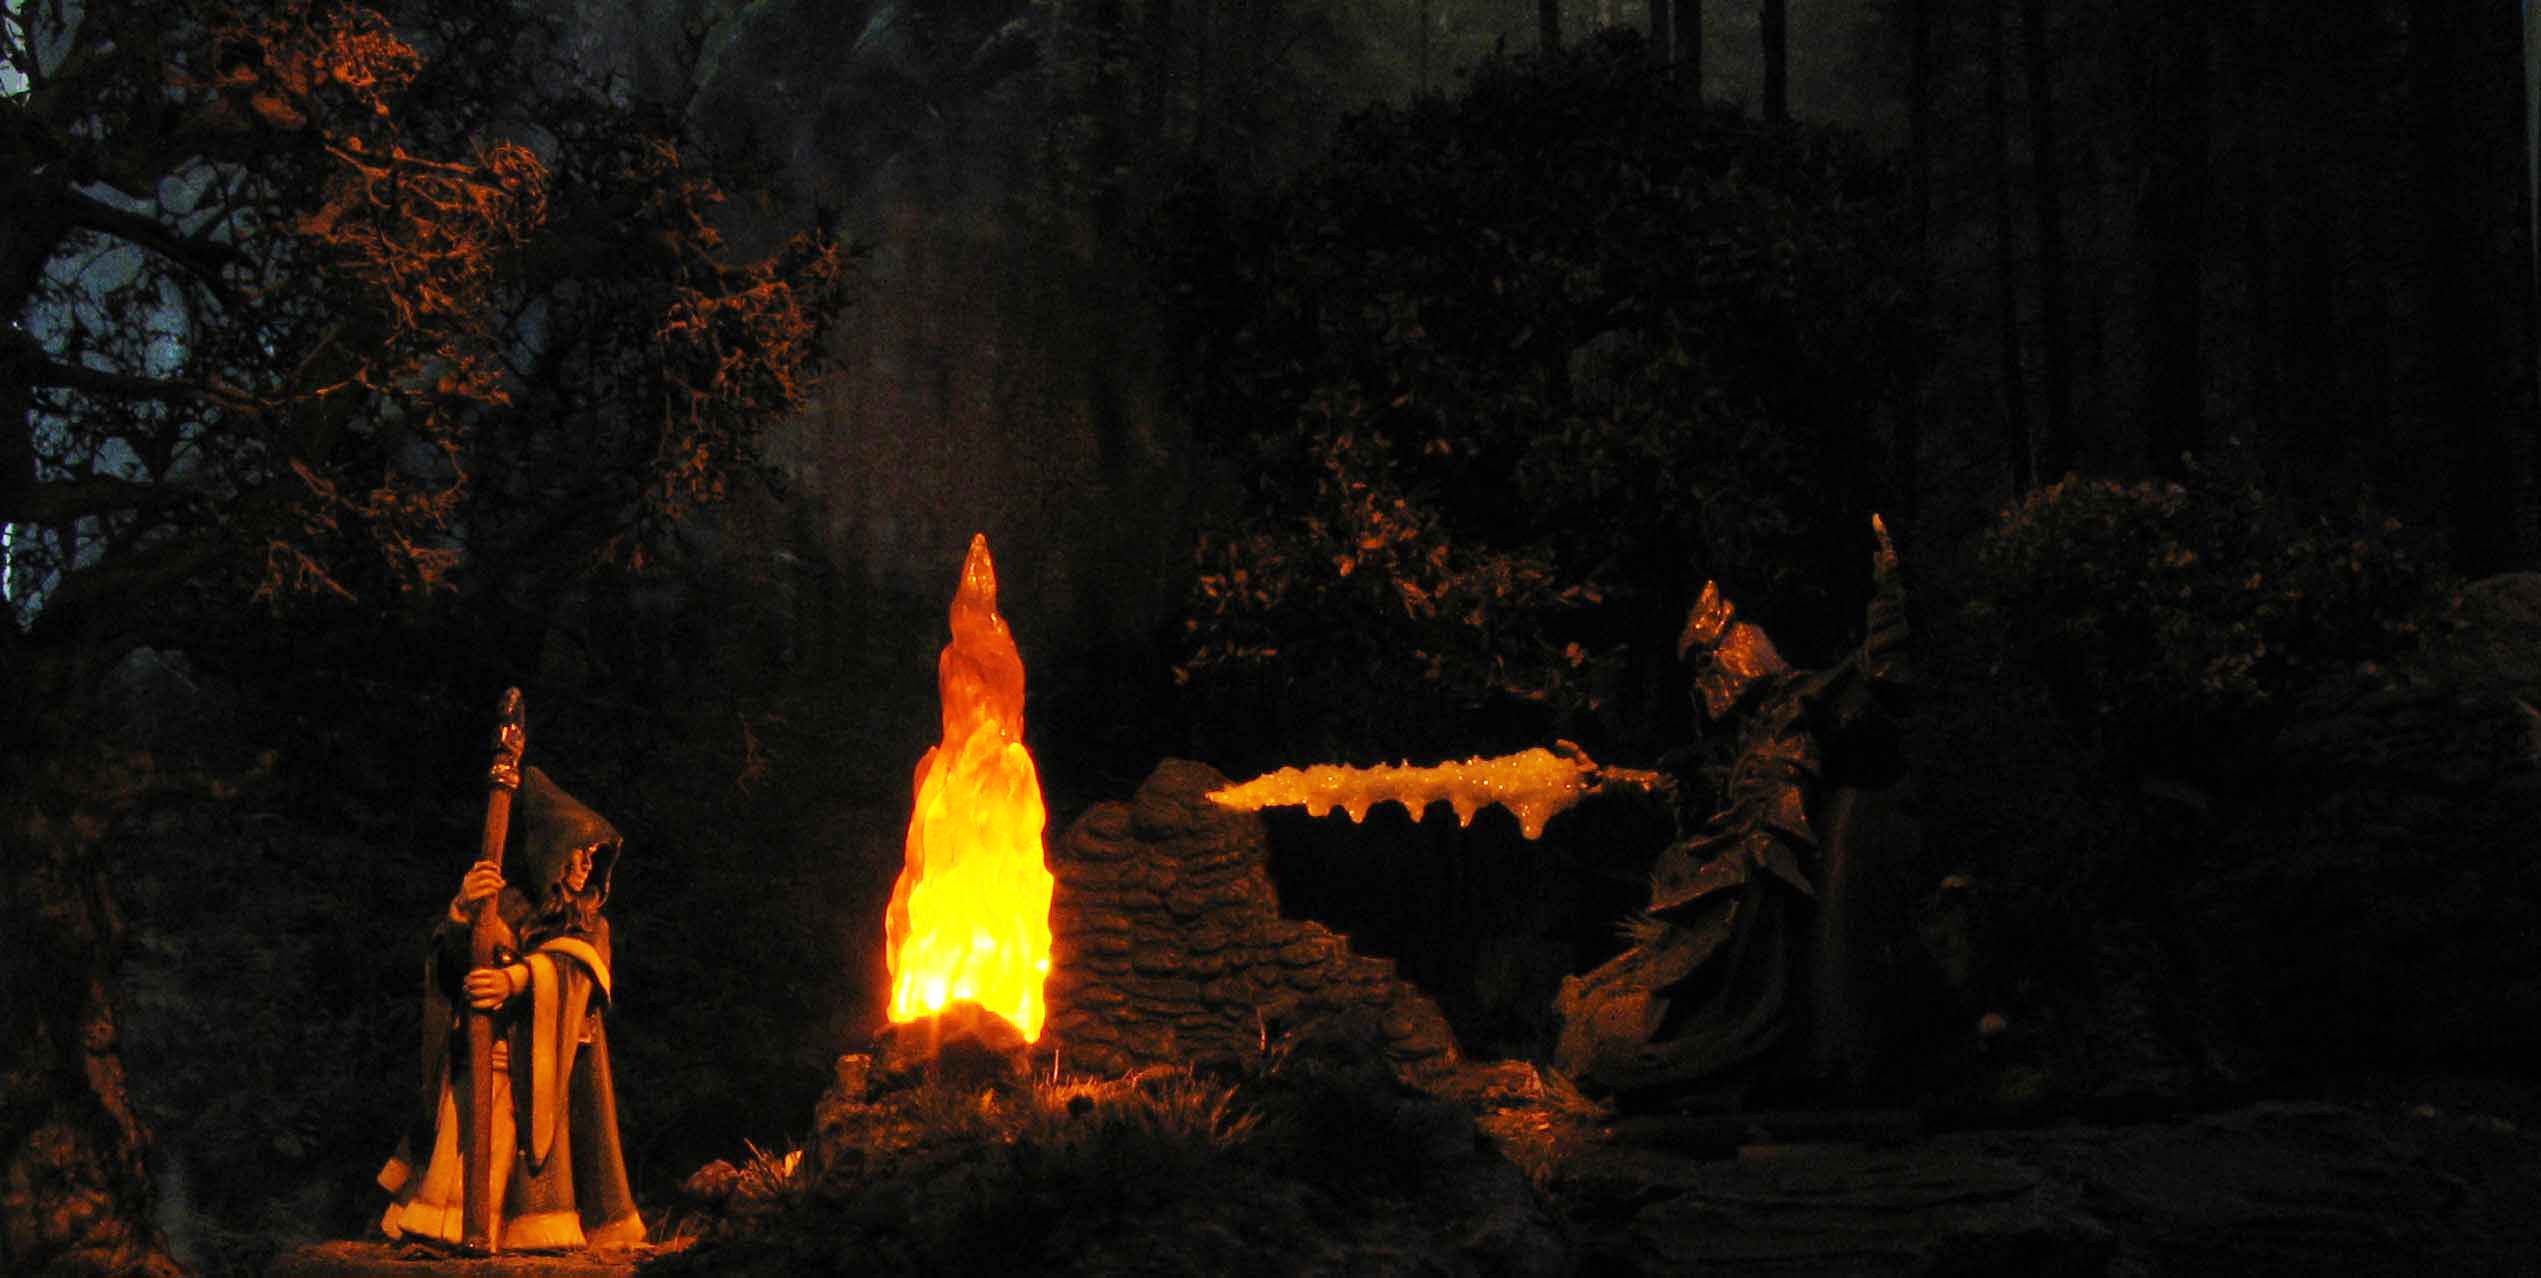
Once holding vigil over the dusky mountain range before Anirion a statue lay to the side of the small path of flagstones that lead to this outlook. The strong gusts and heavy rains had smoothed the once benevolent expression on this forgotten gods face. Looking at his broken limbs overgrown with moss he wondered if even the glory of a god could fade, his name a mere whisper in the wind, before long the voice falling silent forever.
The pedestal was still there, the broken god parted at his feet. A bronze vessel filled with rain water and a burnt down red candle made him wonder if some of the villagers or a shepherd found their way up here. The barren tree flanking the small shrine offered enough protection to give Anirion a brief respite before he had to brave the gusts again. He carefully lit a fire on the lee side of a rough rock face. The strong wind made the flames lick high in the sky, but soon they settled and he was able to warm his hands.
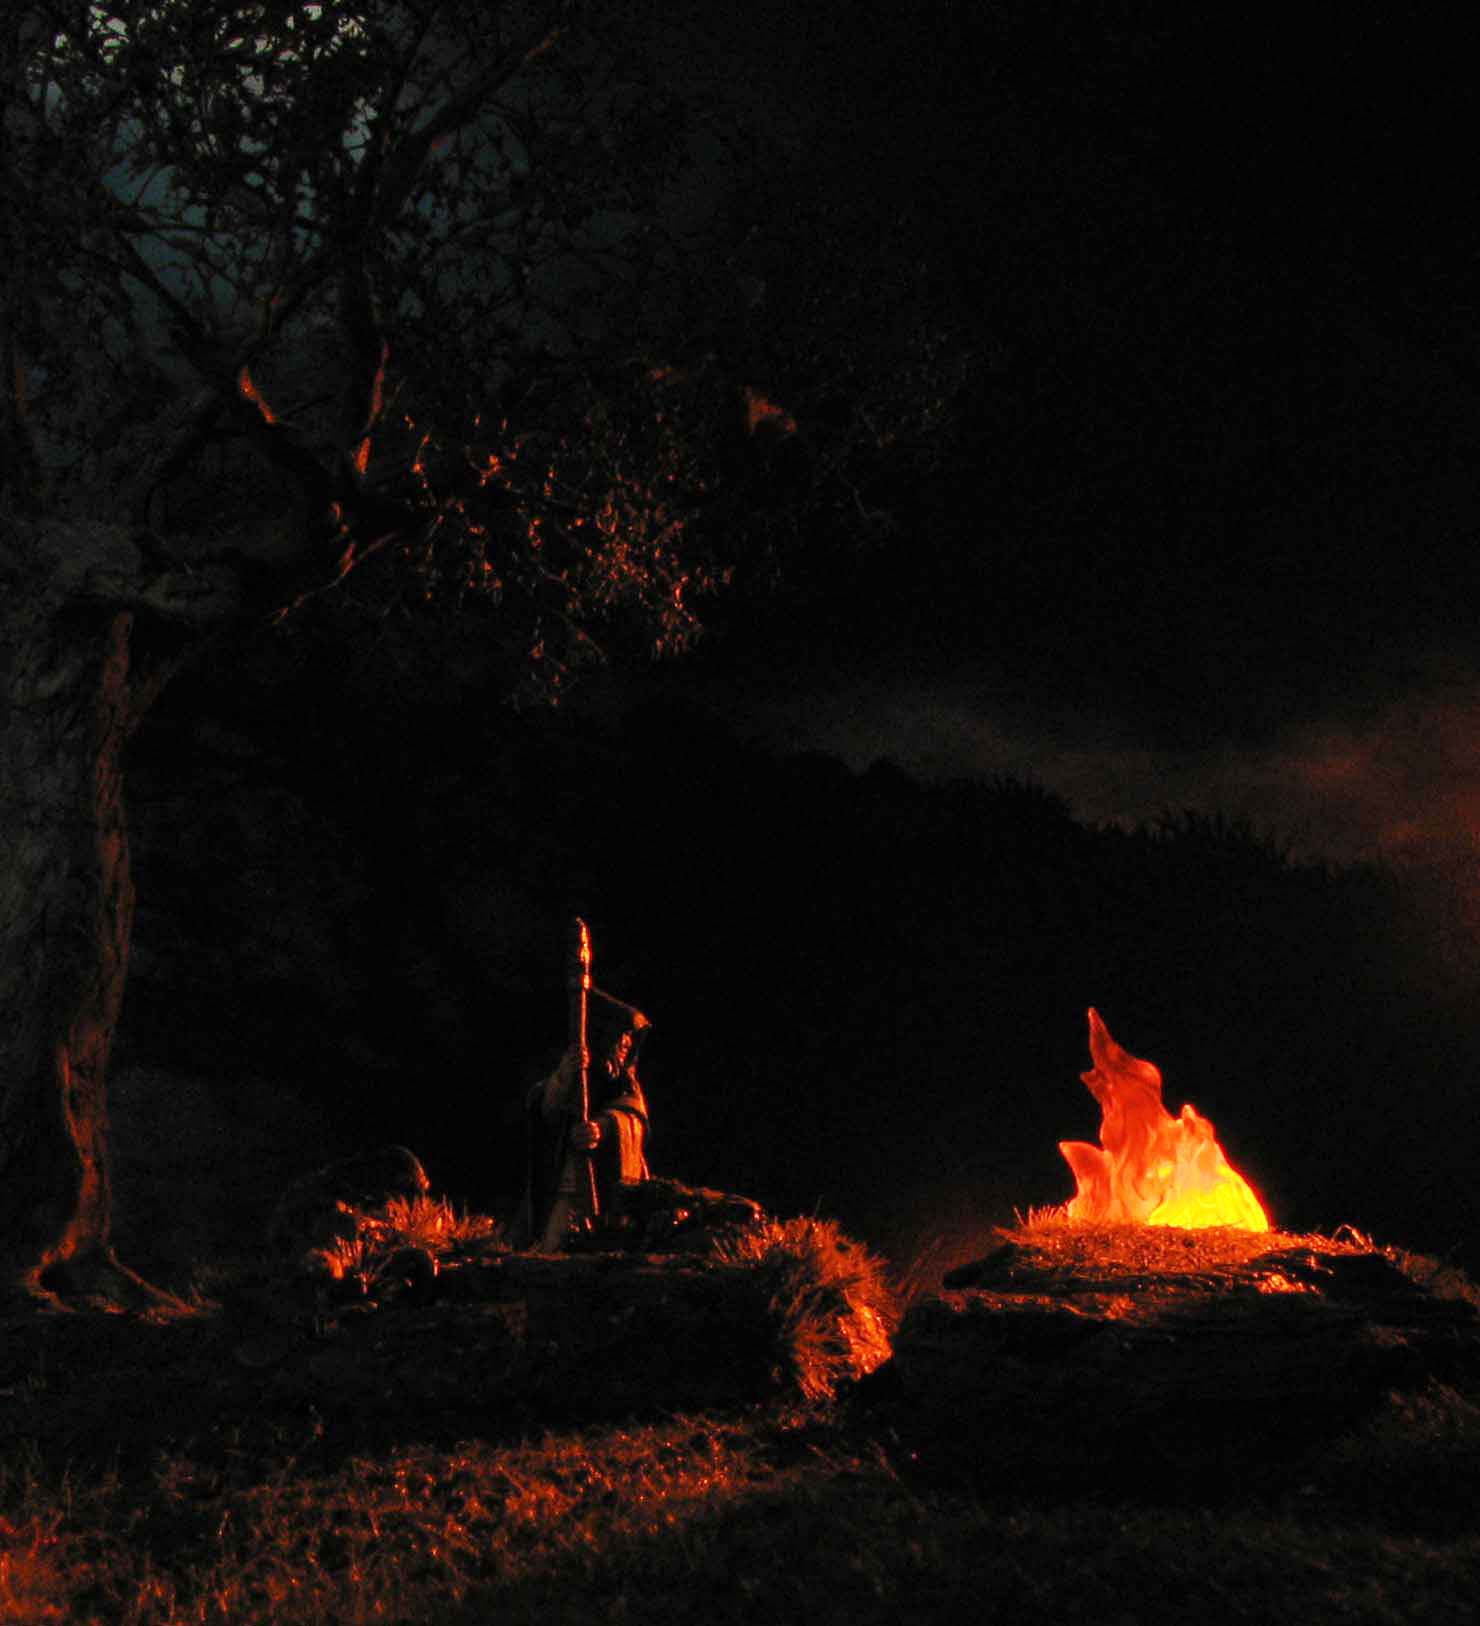
He left the village late, expecting to find the old graveyard when dusk settled, but rain and wind had slowed him down and even Lykaion seemed uneasy. With the moon in full bloom his companion often sought out his brethren and sistren, but it was not other wolves that unsettled him tonight. Anirion took a sip from his wine skin and followed the moon lit path with his eyes: sharp, jagged rocks and slick flagstone. He would wait till dawn and hope for the wind to settle. Scratching Lykaion between the ears, he covered under the outcrop, the rain dripping of his cloak. The broken god lay silent.
Scene arrangement
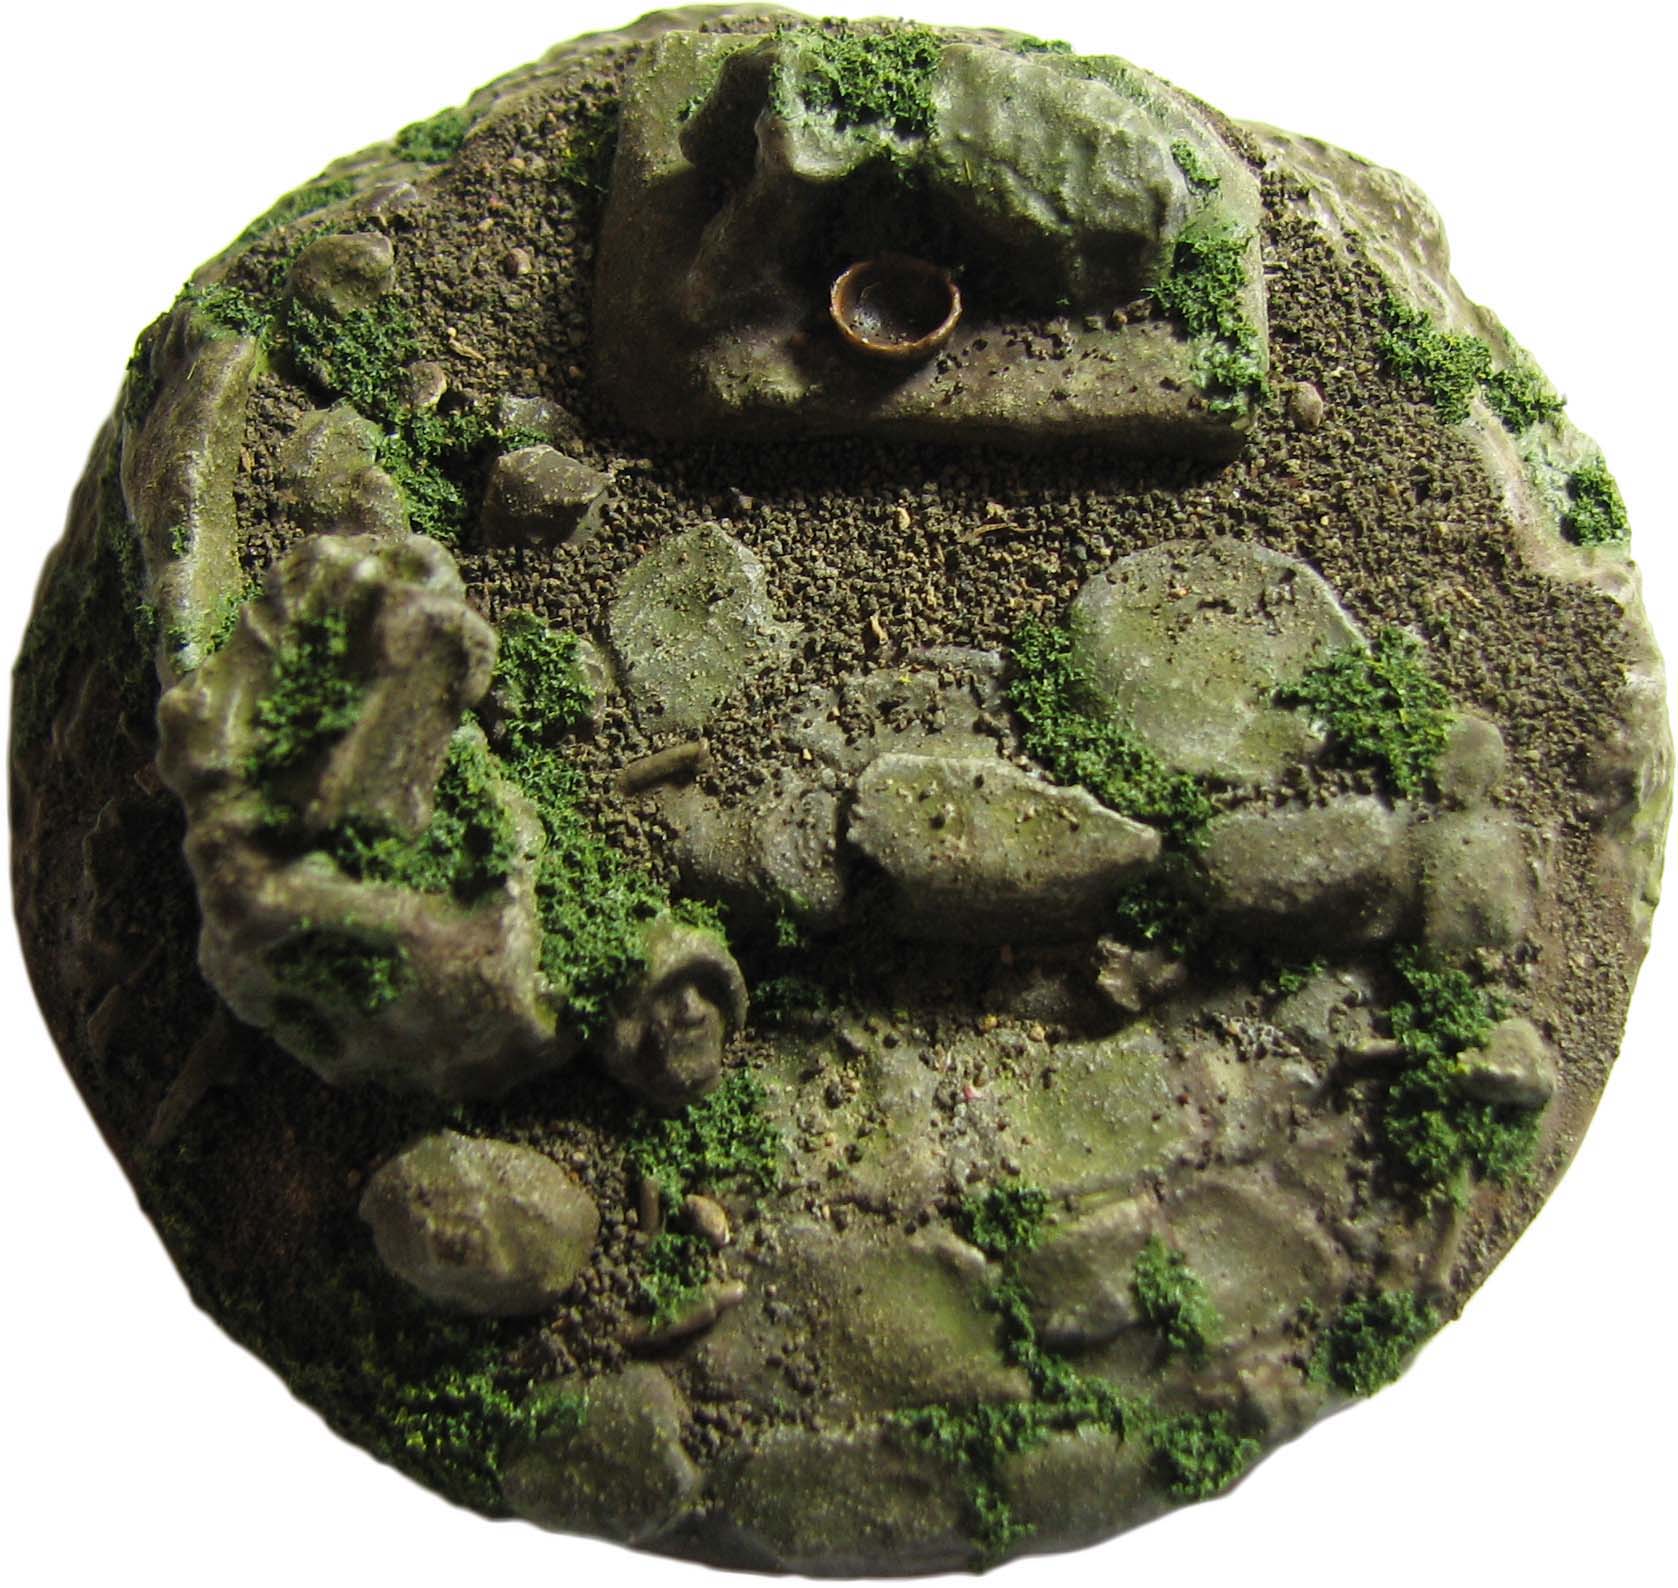
Similar to the graveyard base we need to think about the scene arrangement. While the piece is supposed to be an objective token it should still be possible to place a miniature on it, so I decided to leave some space in front of the pedestal the statue once stood on.
Following my mantra to have something to frame the scene to each side the fallen statue is placed to the left and the birch tree to the right of the path. This time there is no real background to the scene and the main focus is on both the statue and the birch tree.
Given the birch tree will be removable I decided to add some derelict offerings to the pedestal, namely a burnt down candle and a small bronze vessel, to offer the eye some interesting detail to dwell on, should the birch tree be absent.
Provisions for your crafting adventure
For the full list have a look at the graveyard base tutorial. For the new elements covered you will need:
Broken statue
- An unloved miniature.
- A sharp scalpel to cleave it in twain/ or trine (thrain :P?).
- Wood filler to add some texture.
Vegetation: Birch tree
- MiniNatur autumn birch foliage nets (optional) or your preferred foliage product. Autumnal colors preferred for contrast.
- Matte spray varnish to reduce the shine of the foliage. I use Testor’s Dull Coat.
- Thin wire to make an armature for the tree.
- White, grey and black craft paint to paint the tree.
- AK Interactive Grime/Slime effect paint to depict light moss on the bark (optional).
- Acrylic caulking as a first layer followed by wood filler to depict the bark.
Candle
- A cylindrical shape as a basis for the candle. I used some plastic sprue cuttings.
- Golden Acrylic Gel matt to sculpt the wax.
- One strand of copper wire cut in small pieces to depict the wick.
- Red, black and yellow acrylic paint. Brown wash to add depth.
- Fast setting glue to attach the candle to the pedestal.
Bronze vessel
- A halved coriander seed to depict the vessel.
- Golden Acrylic Gel matt to cover the seed for protection.
- Bronze and silver paint. Vallejo Smoke. For the verdigris effect a jade tone.
- Some gloss acrylic medium to depict rainwater collected in the vessel.
Critters (optional)
- Small lizard or salamander. The Busch Kleintierset is your friend.
How to make the statue – recycle your miniatures!
I would hazard a guess that almost every miniature enthusiast has a few miniatures lying around that were part of a set or deal, but really never caught his or her imagination. Instead of letting those decompose in the lead or plastic mountain I suggest to cut such miniatures up and make some suitable pieces for statues out of them.
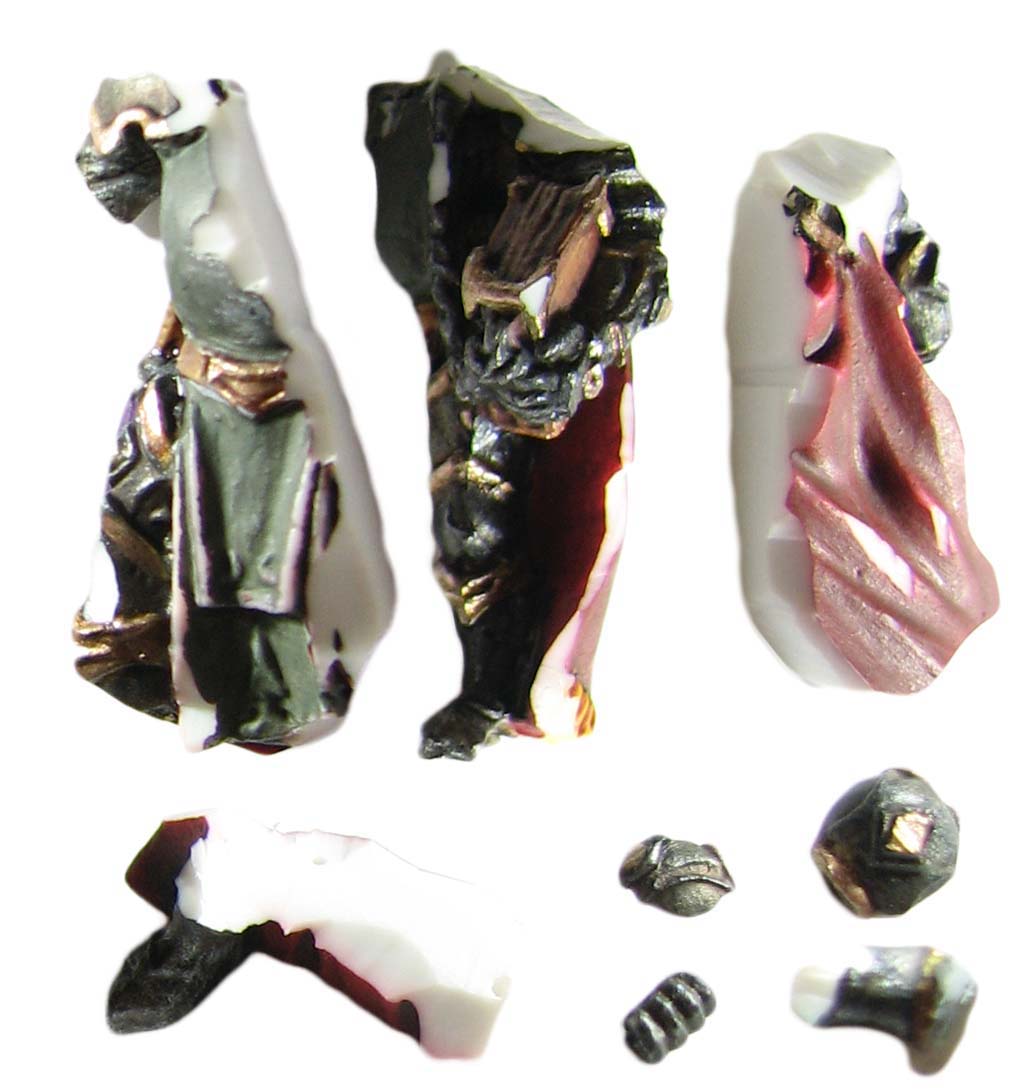
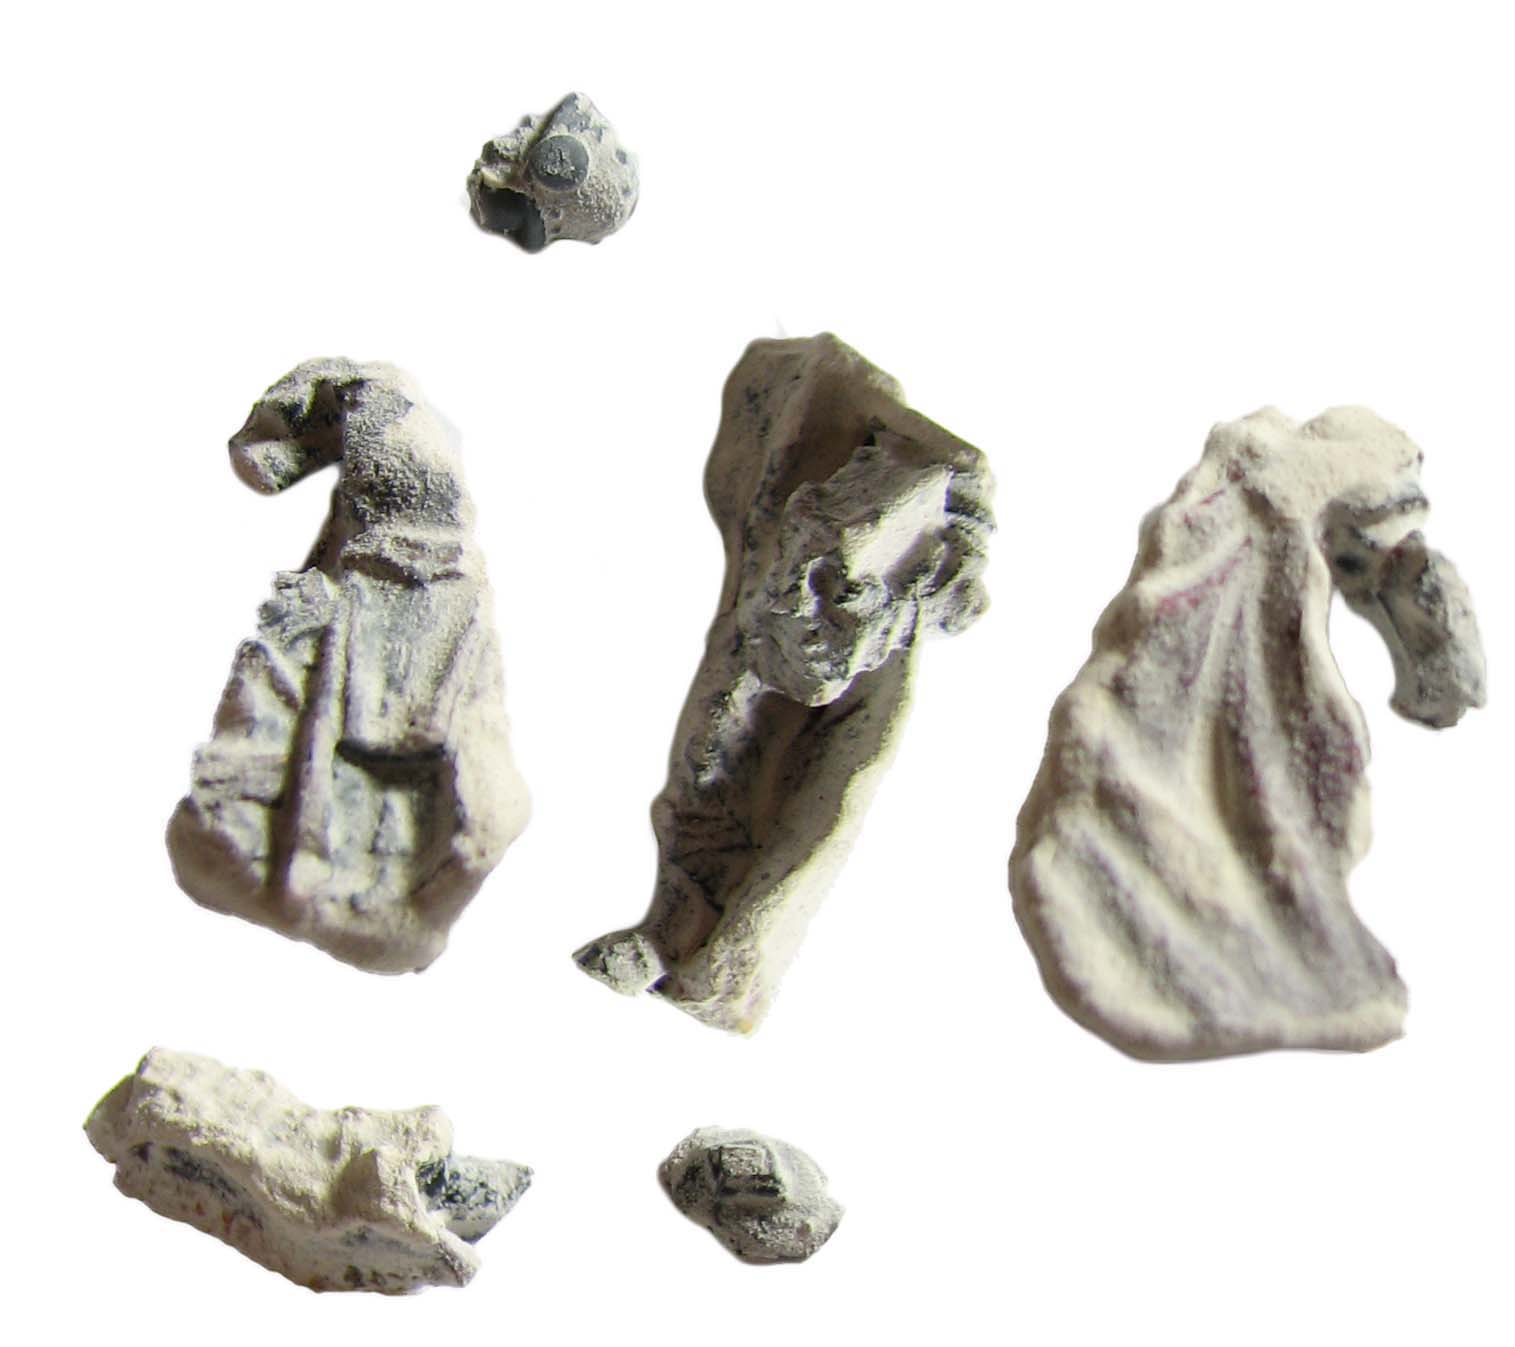
For my statue I chose the Reaper Bones version of Halbarand sculpted by Todd Harris. I never found the pose very convincing and the miniature is overall a bit too heroic in scale for my tastes. The static pose is perfect for a statue and with the book on a chain it fits quite well the idea of a god or hero that combined scholarly wisdom and martial prowess.
First, I cleft the remaining body into handy parts with my trusty two-handed scalpel of conversion +1. I also added a surplus head from the Perry Foot Knights set, as I did not want to use the more expensive Statuesque head (yes, I can be cheap).
We now have some unsightly cut surfaces that we will add some texture to. It is entirely up to you if you only texture the smooth surfaces or the entire piece. I wanted to depict an old, weathered statue, so I went for the latter. To add texture simply thin some wood filler with a drop of water and apply this paste with a brush.
To stabilize and protect the surface I recommend to apply some thinned down acrylic medium when the filler is fully dry.
And there we go. Simple, yet effective. The texture will work well with a gentle drybrush and it also obscures the rather chunky limbs a bit. Now the real fun begins: building the objective token.
Building the decrepit shrine
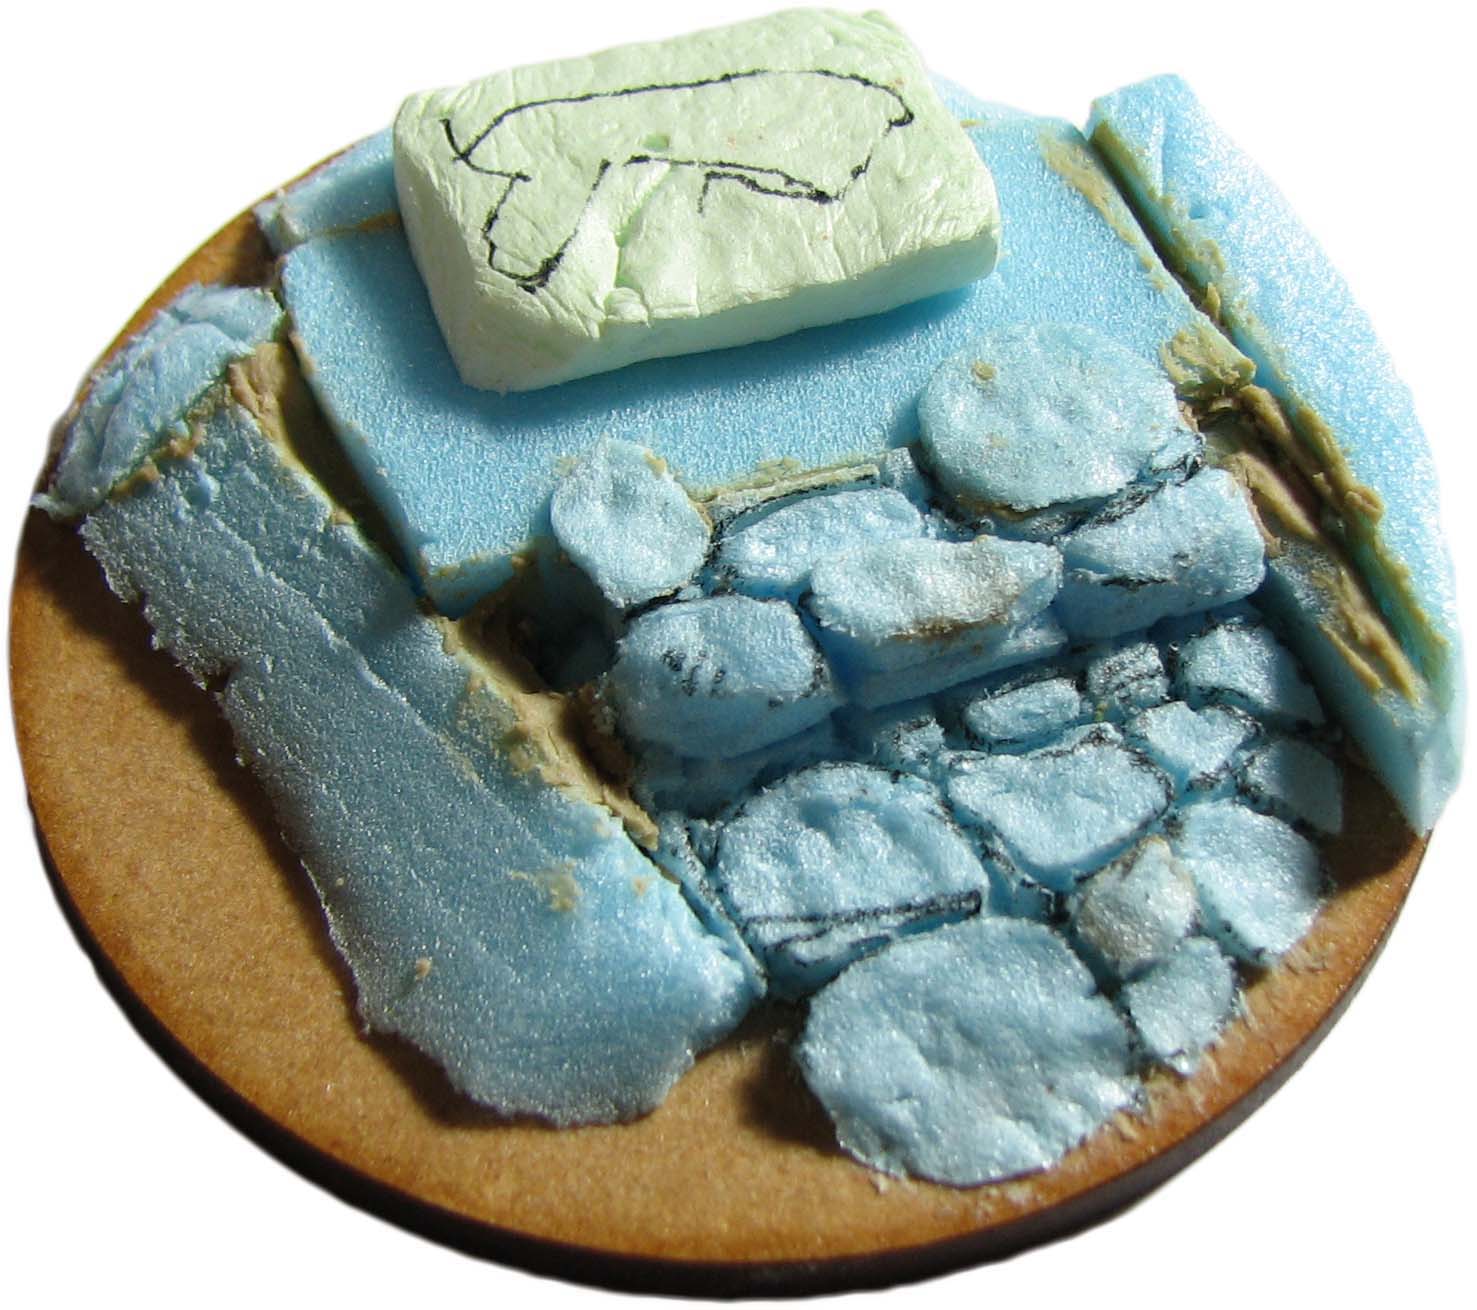
We start exactly the same way as with the graveyard base. We outline the basic shape with XPS and texture the foam where it will not be covered with soil.
Now we place the statue pieces, glue them down and cover any exposed foam with acrylic caulking. You can also place cork to depict larger rocks and use wood filler to depict outcroppings. This is also an opportune moment to place a steel nail head if you want a removable tree.
A halved coriander seed makes an excellent bowl. Coriander seeds have some faint lines on them that can be scraped away with a scalpel if you want a smooth surface. Strengthen it with some thinned acrylic medium and attach to the pedestal.
A little birch
You can proceed twisting some wire to fashion a small birch tree. Use some reference pictures for the shape. Cover it in acrylic caulking, followed by wood filler and carve horizontal lines in the dry filler to depict the characteristic markings of a birch tree with a needle.
Add some greenstuff to the bottom, press a small neodymium magnet in it and proceed shaping and adding texture to the greenstuff around the magnet. Put some plastic wrap between the tree and the base and attach it to the nail head. Let the greenstuff cure and remove the tree again. This guarantees a tight fit.


Trunk and foliage
Mix a very pale grey and paint the entire tree. With some more thinned down shades of dark grey going towards black you can now add the characteristic horizontal dark lines birch bark has. The inscribed texture should guide your brush. You can also use some very dark grey or even black to depict areas were more of the bark has come off. Finally you can add some of the AK effect paint to depict light moss. Now it is obviously time to add the MiniNatur foliage. I used some of the autumn variety, but also some left over summer foliage to depict an early autumn change from green to yellow, orange and red. Fixate the foliage with super glue.
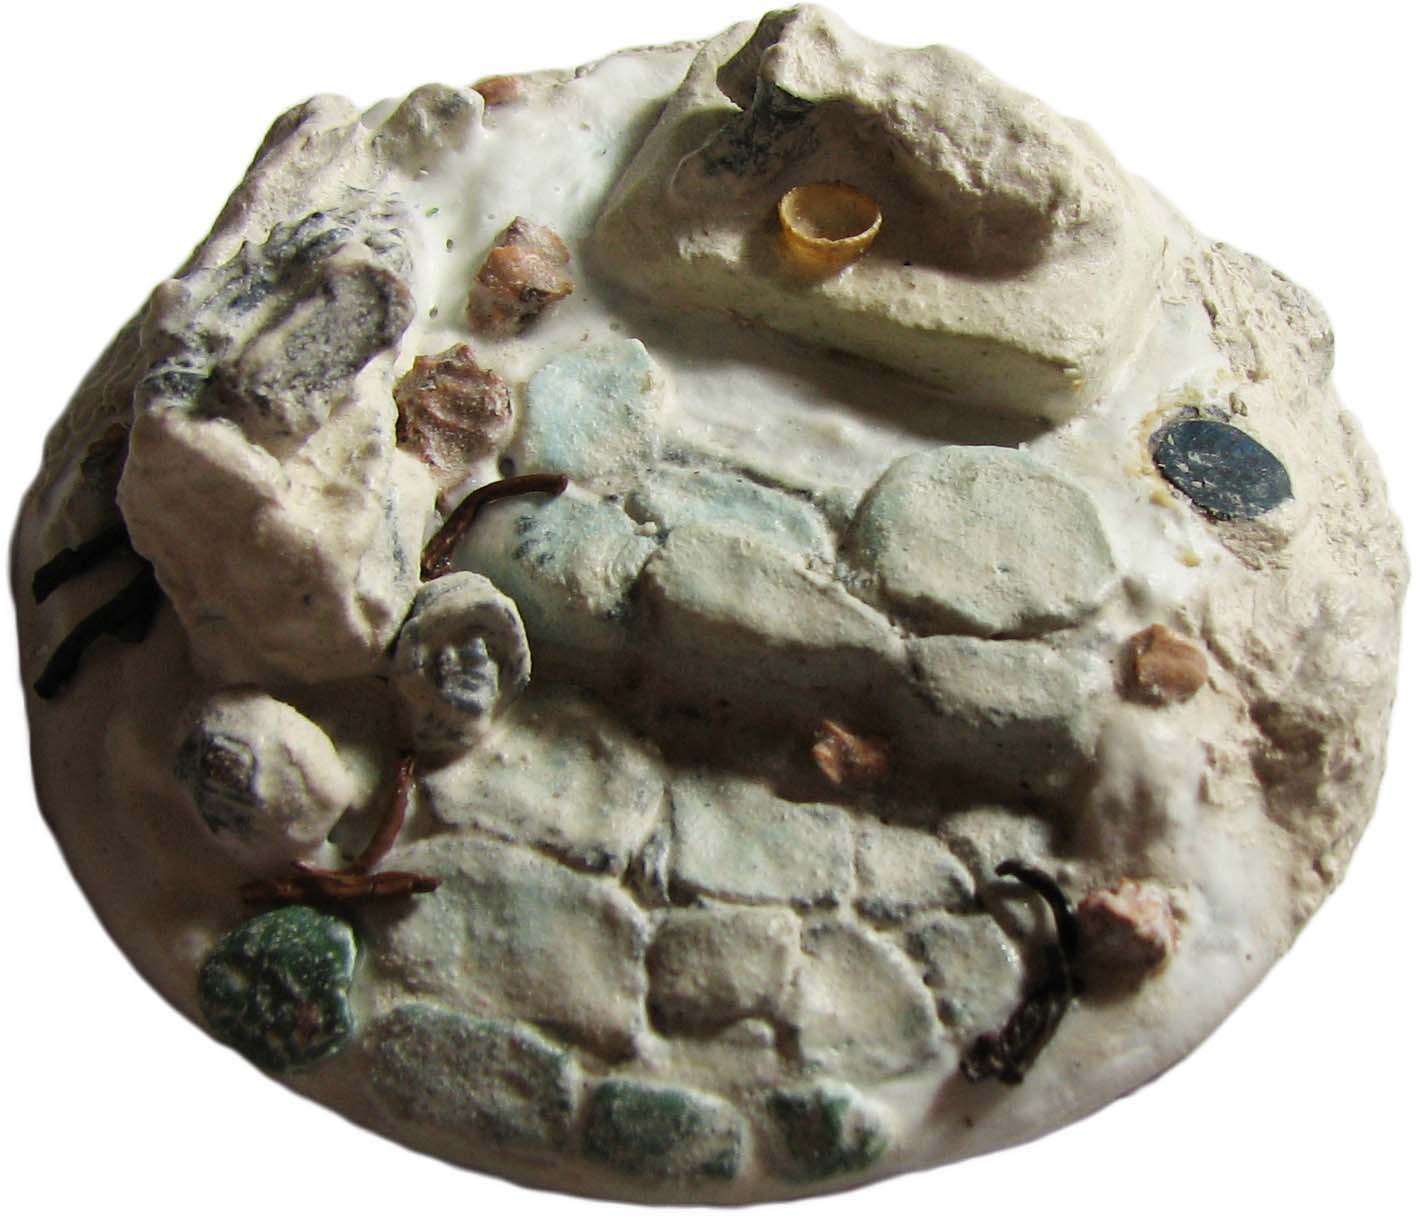
Finishing the base
Paint the base with grey and brown acrylic paint, followed by a drybrush. Basecoat the bowl with brown craft paint. Apply the home-made stone wash (brown pigment, matt varnish, water) and soil. You can also add a subtle moss effect using the AK enamel effect paint. I think the difference between this step and the next is remarkable and really adds realism. If you want a heavy layer of moss, mix some moss paste and apply to both the flagstones and the statue.

Candles and a bowl – so romantic!
Cover the cylindrical sprue piece with Golden Acrylics matt gel tinted red. It has a nice thick consistency and allows to sculpt an uneven surface. The idea is to make the candle look like it burned down a bit. Insert the copper wire in the top while the gel is still wet. After the first coat is dry, you might need to apply more coats to pronounce the effect and secure the copper wire further. You can also depict some wax that trickled down the pedestal.
Using thinned down red tones slowly alter the colour of the candle until you feel it looks convincing. You can also add subtle highlights with some more yellow mixed in the base color and shadows using a brown wash. Use some RMS Pure Black to paint the wick.
Paint the bowl with bronze paint, adding some silver paint for the highlights. Darken some areas with Vallejo Smoke. When all this is dry make a wash using a mixture of green, blue and white. We want a nice Jade tone. I suggest a mix of 10 to 1 water/ paint. Apply over the entire vessel and let dry. Repeat if you would like the verdigris effect to be stronger. To depict rain water collecting in the vessel add some thick acrylic gloss medium and let dry. Repeat if necessary.
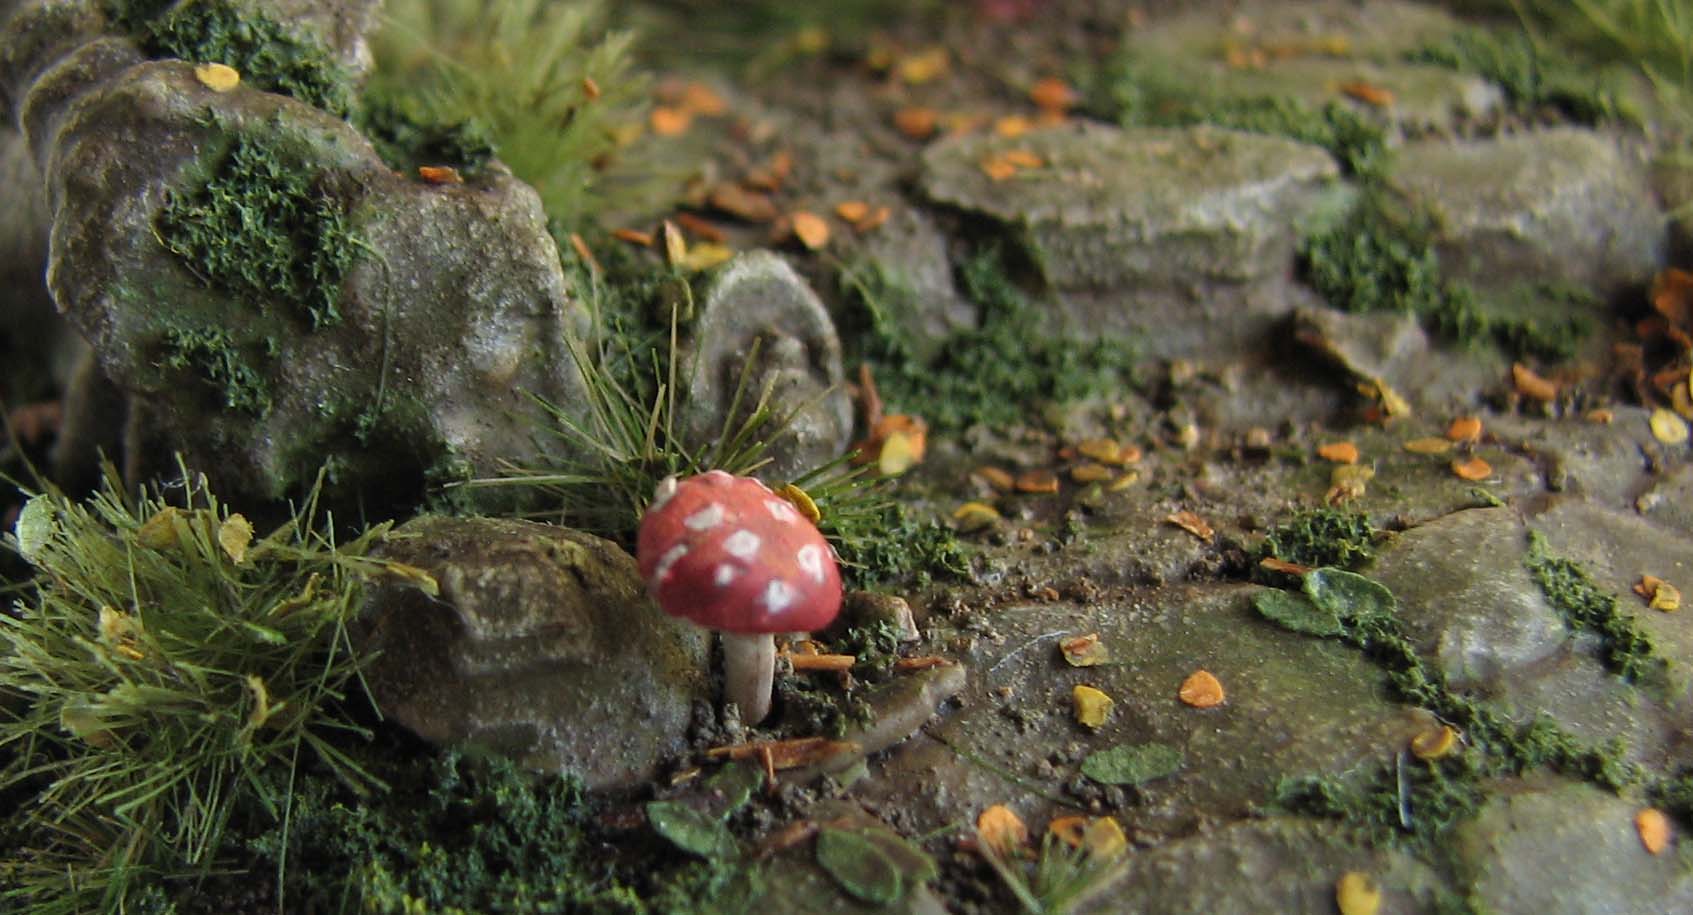
Fly agaric and a fire salamander
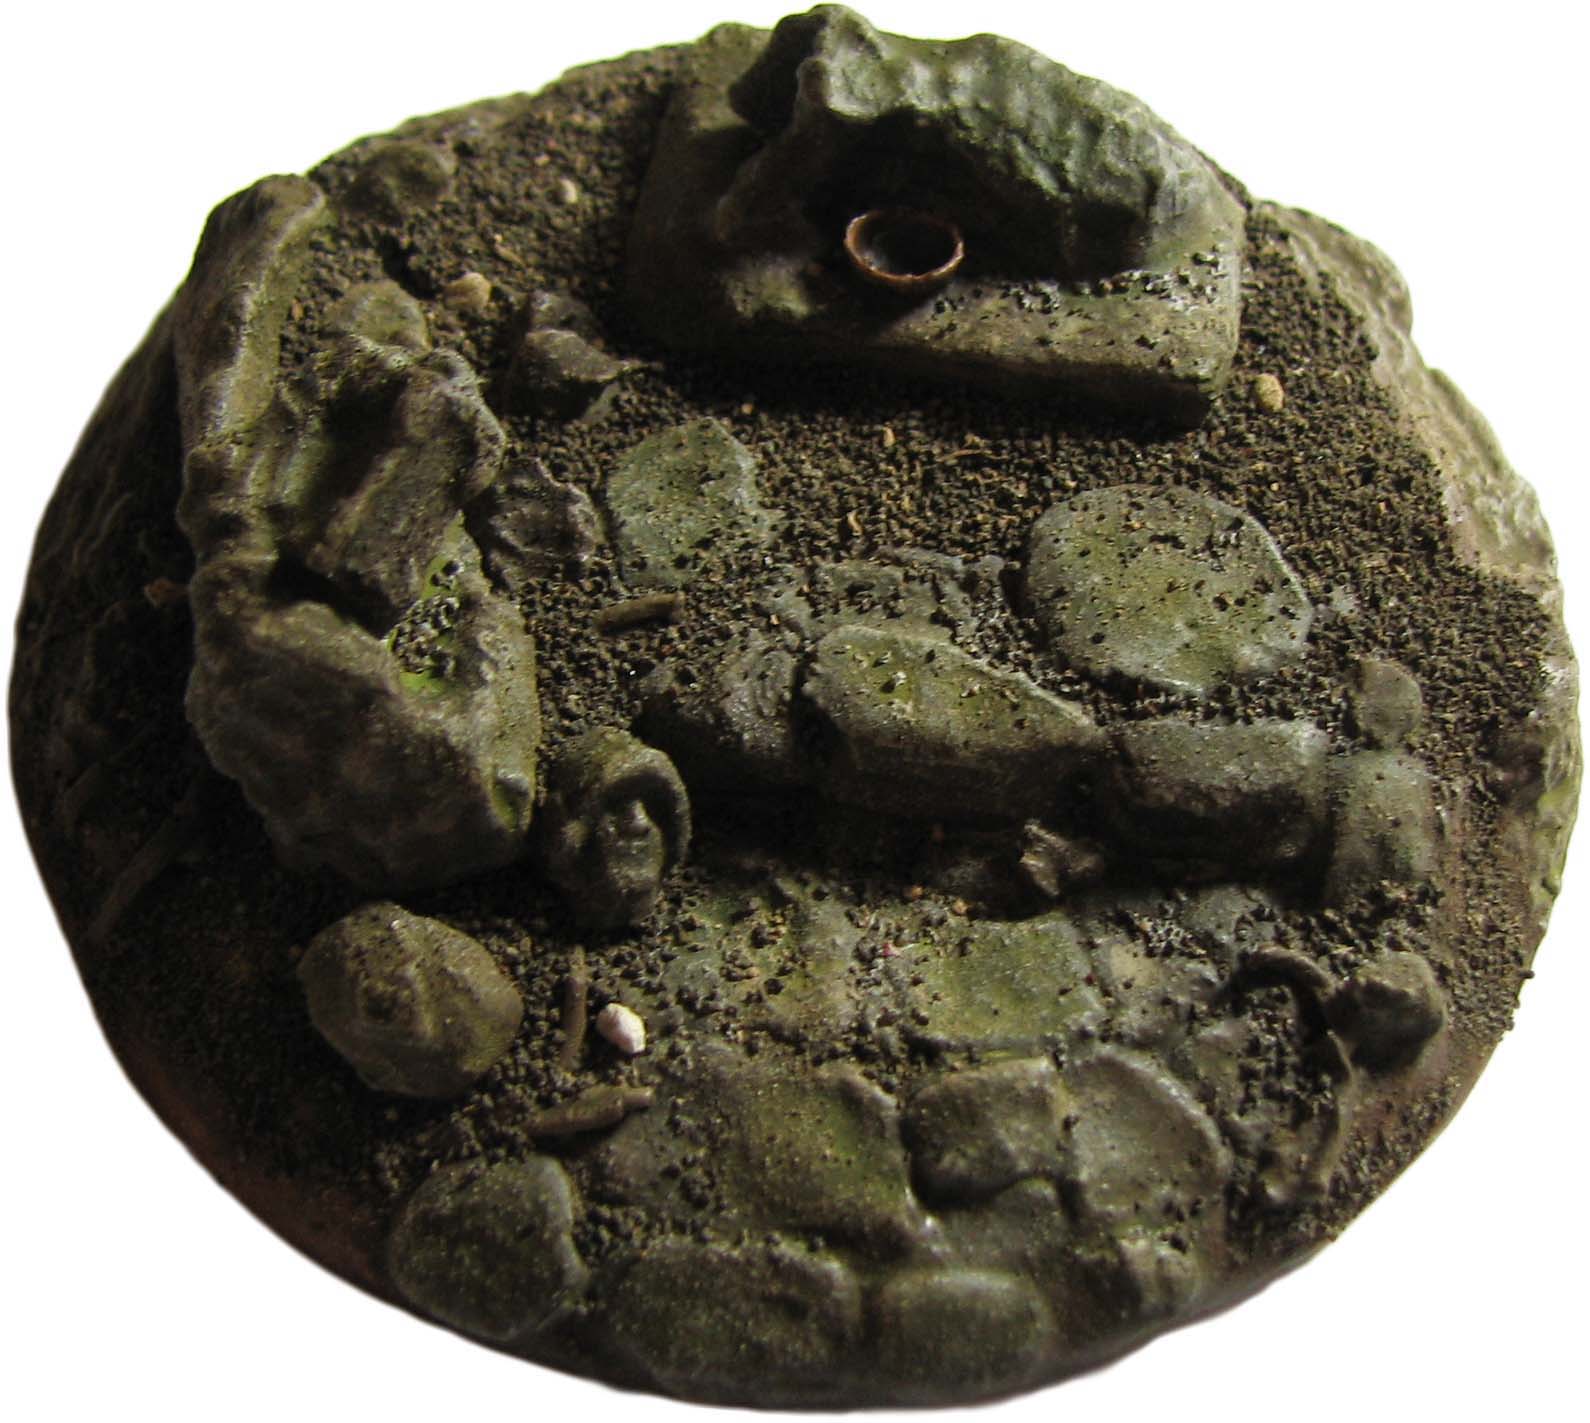
Add tufts, static grass, fallen leaves, mushrooms and the candle. Take away the lustre with some brown wash and lock it all down with some matte medium. I decided to add a fire salamander to the statue, mainly because I like the contrast rich markings on its body and its wide distribution in all of Europe, should I ever use the piece for historical gaming.
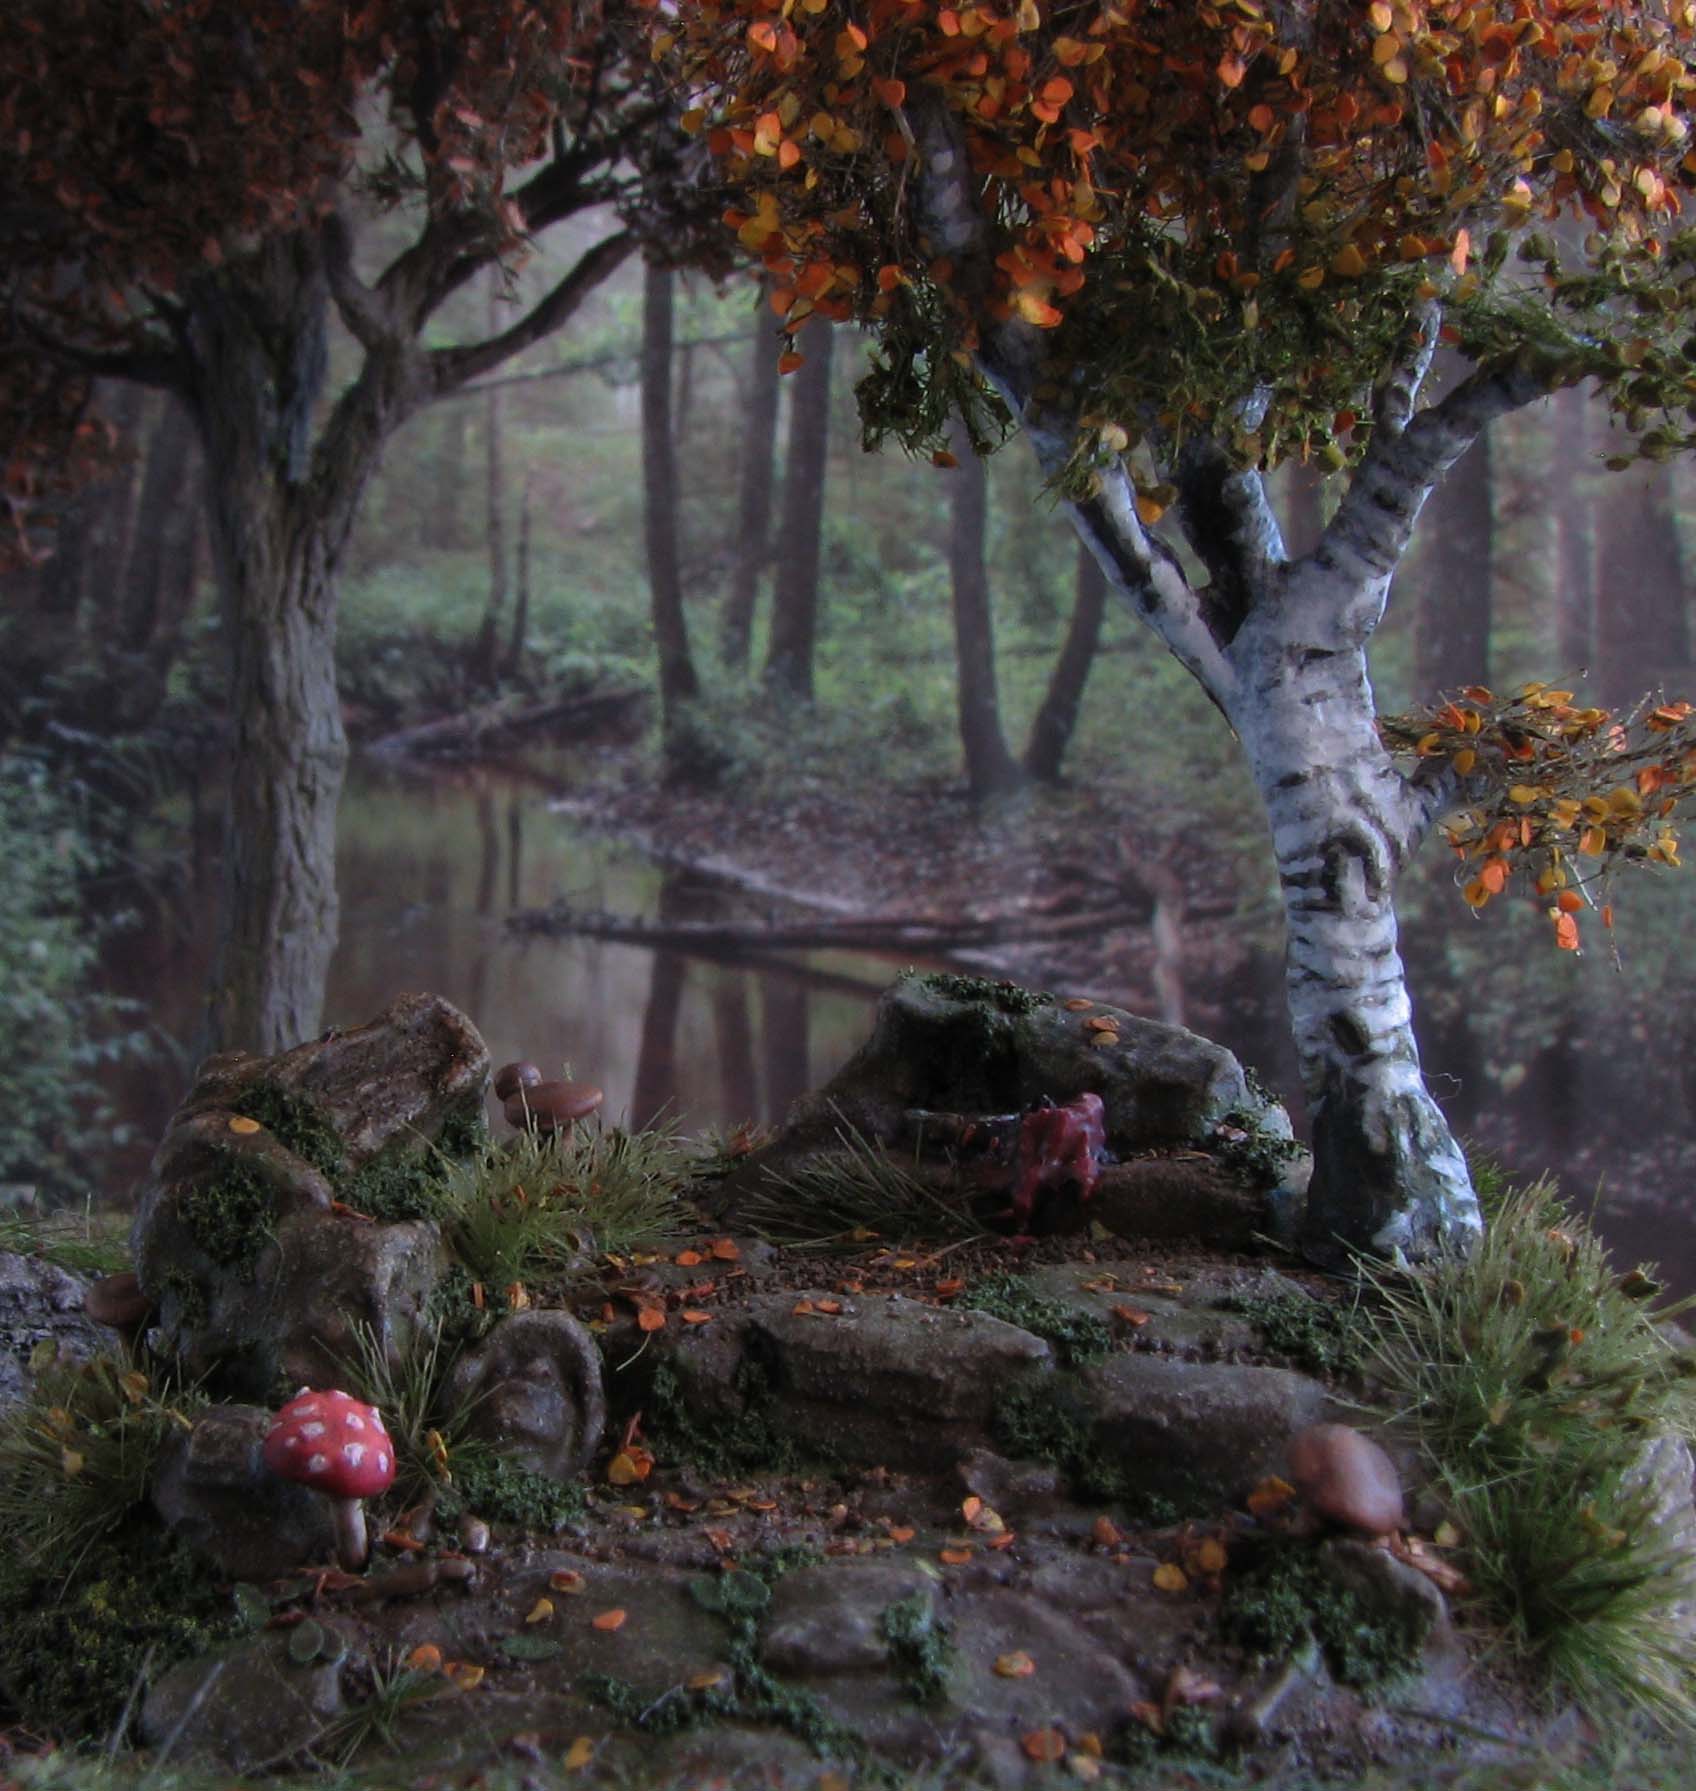

There we have it! A visually pleasing objective token, diorama base or small scatter terrain piece. As you can see the techniques used are very versatile and can be used for any project were you want to depict groundwork or an environment that nature slowly takes back.
Naturalistic terrain in two steps
There are two steps that no matter what you do will make your terrain pieces more naturalistic:
- The stone wash elevates any grey rock surface to the next level. It shifts the colour to a more naturalistic hue and takes away any gloss from washes or paints used.
- A final brown wash applied by hand or airbrush in combination with a misting of thinned matte medium really draws it all together and adds a subtle brown filter that adds realism to your pieces. The matte medium kills any lustre or gloss and fixates any remaining loose static grass, leaves and soil.
As always, I hope this tutorial is of use for your own projects and may come in handy if you need suitable bases for your miniatures. Based or not, always wield your brush with honor!
If your local place does not have any I might see how much it costs to post a few mls of it in one of these spare dropper bottles I have got to you, it should not be much. If it is not a lot, call it a thanks for all the hints and tips over the last few months.
Thank you for the kind offer. However, I can source it locally and might get it the next time I am at the shop.
No problem, I was thinking about this after and remembered that Royal Mail charge a fee, for things from outside the continent and it would cost more than a bottle of this. If it works like this where you are there would be no point but you have found some anyway so not an issue.
No worries. I also wonder if the post office would not make a fuss about shipping liquids, especially if they are enamel based.
I do love the back stories you give to stuff involving Anirion. Also another excellent little scene/diorama, it really shows off the moss effect of the AK stuff. Have you ever used the vallejo moss/lichen environment effect? I am thinking of using it somewhere in my graveyard thing, but no idea where or when in nature this appears, only ever seen it in the real world once. If memory serves it was on a fallen branch.
Thank you, its quite a bit of fun to write those. I did not yet use the lichen effect paint, but think it might be just the ticket to depict lichen. The light slime paint may have a similar effect, but is not as yellow in tint. I think it would be best applied using a sponge applicator. If my local modelshop has it I’ll give it a try.
I tried the lichen/moss effect on a bit of granite slate months ago just to see what it looked like, it actually has a kind of almost furry texture.
Yep, that’s really fantastic work. Very inspiring.
Thank you Kawe! Glad you like it. I should paint one of your goat knights up and let him face the undead. A tale of adventure (and mishap).
Fantastic work! I’m always impressed by the thought and little details that you put into your pieces.
Thank you Brian. Glad you like the tutorial. Details really bring a piece to life, so I feel mushrooms, lizards etc. may be the third step to remember for a naturalistic result.